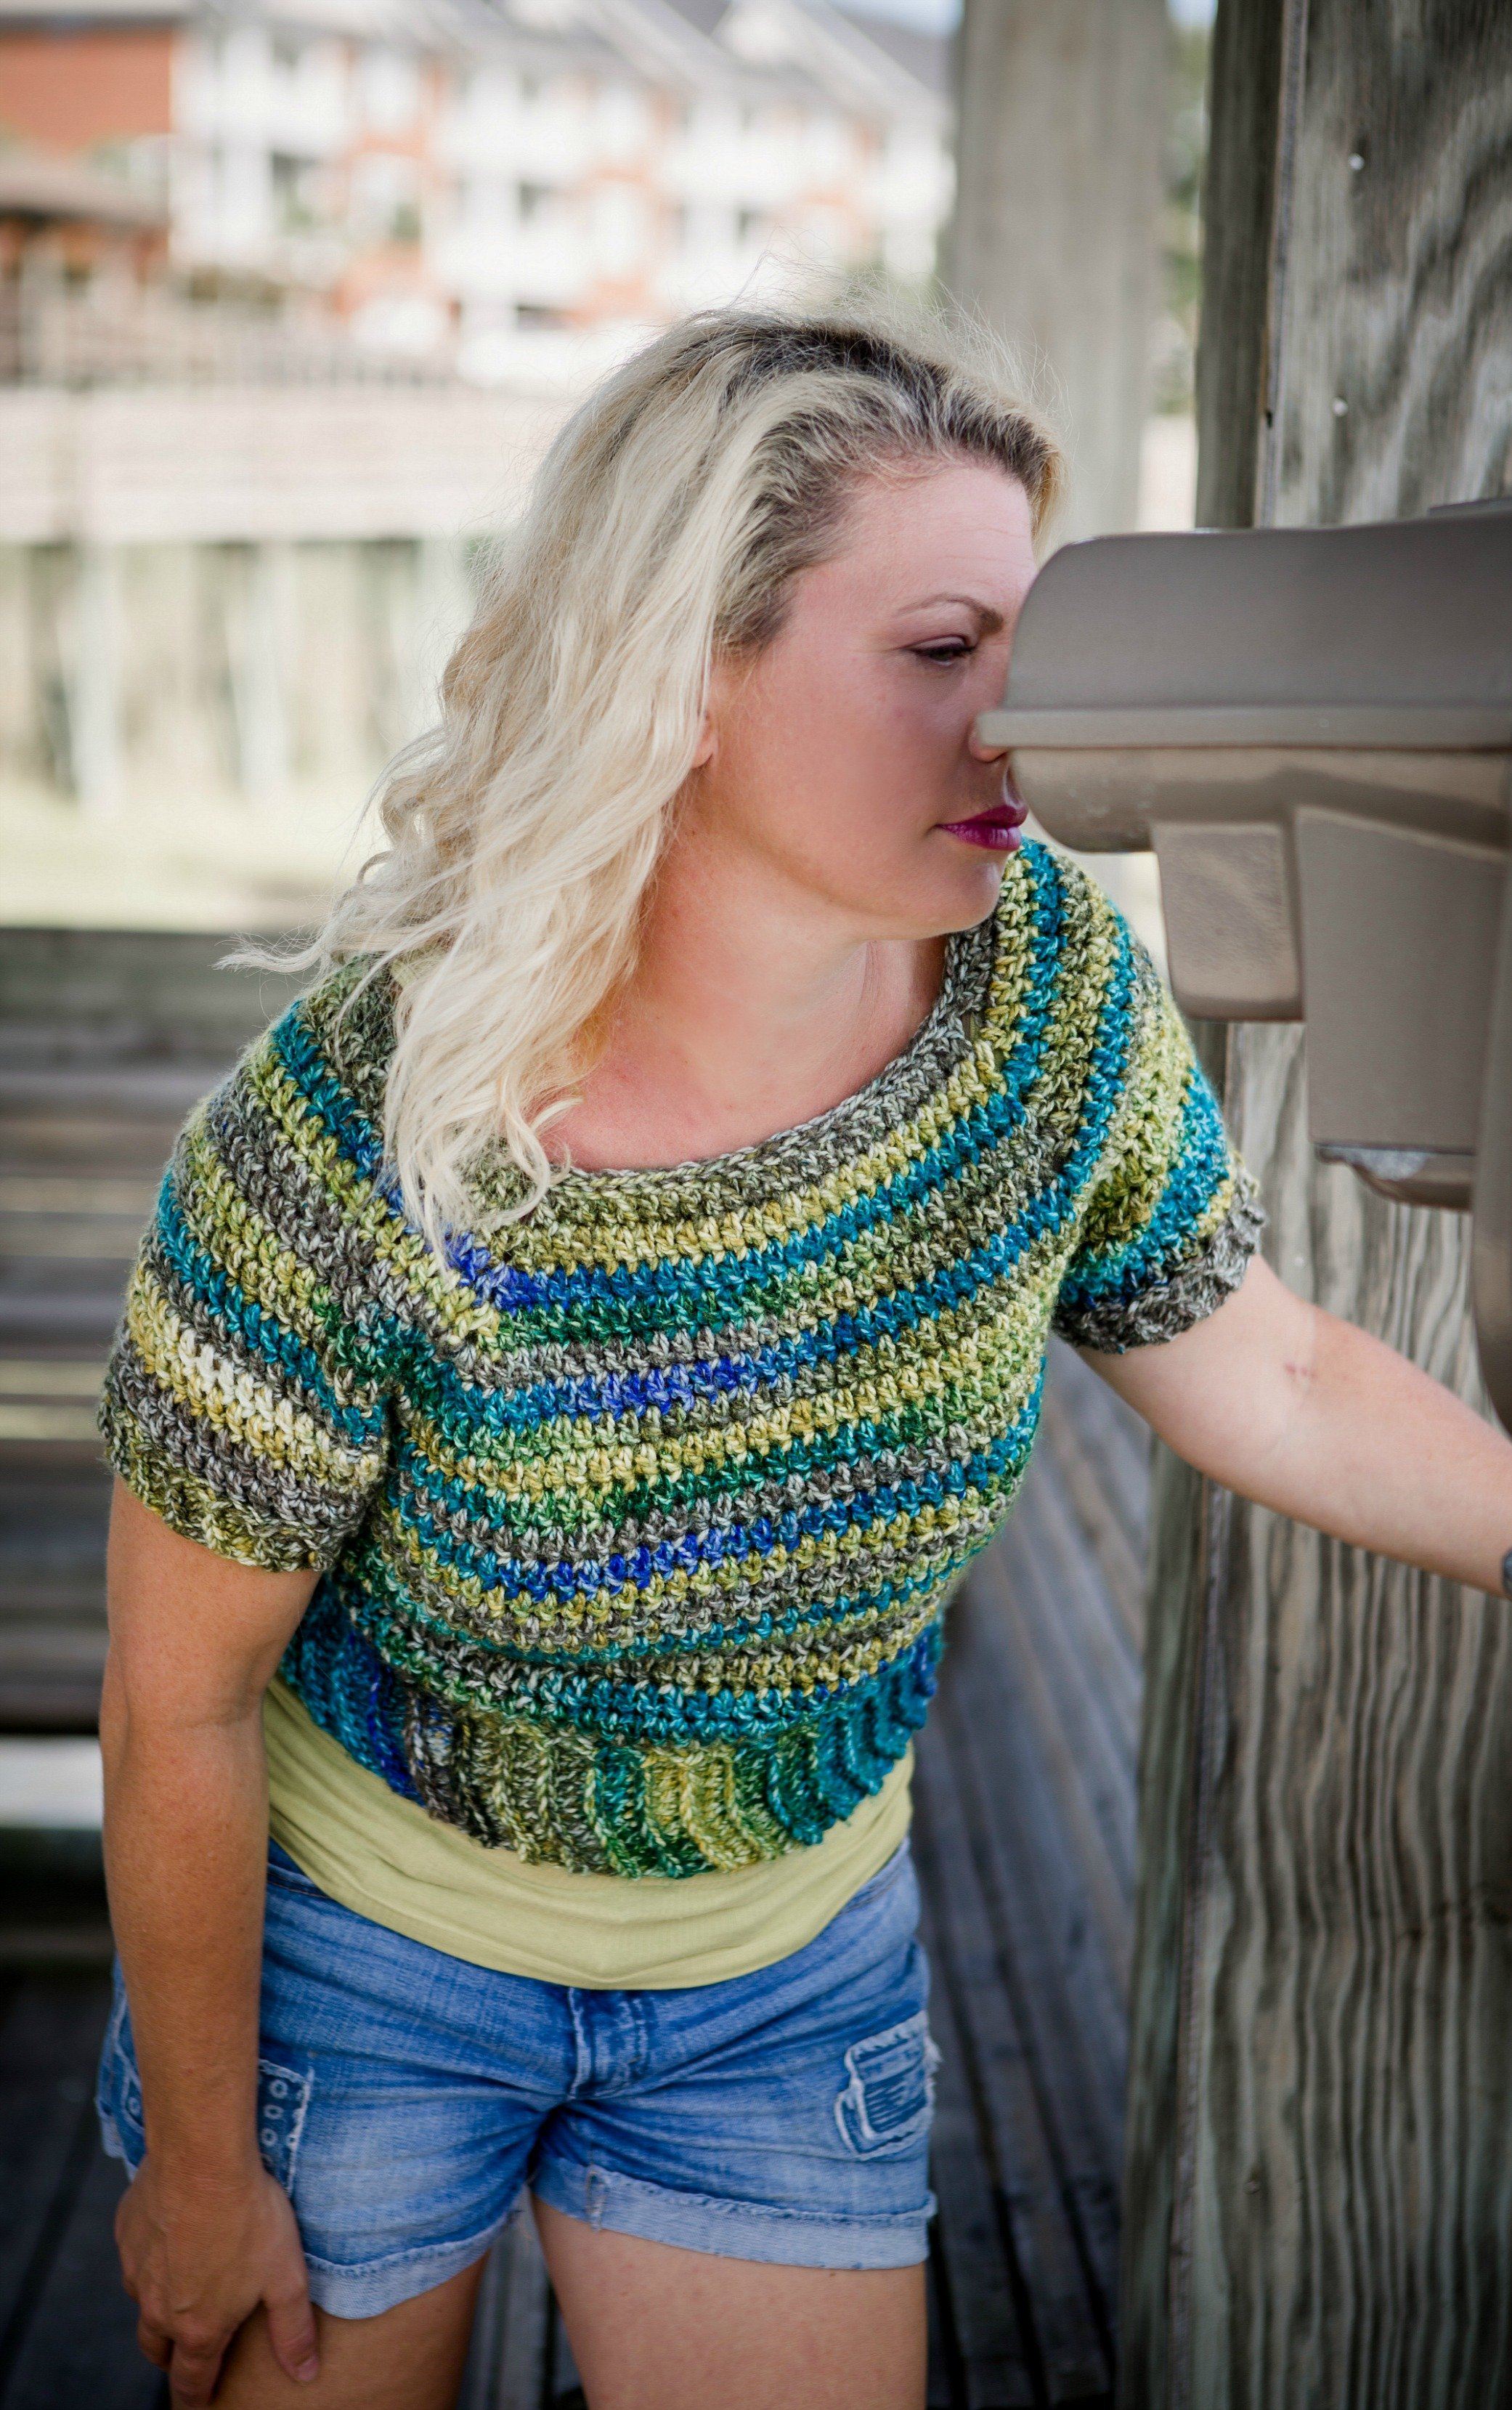
Timber V Back Pullover
September CAL with Lorene Eppolite
This free crochet pullover sweater features textured stitches, form-fitting style and a sexy V back. The Timber V Back Pullover can easily be modified with a full-back, shorter sleeves or more ease (looser fit). This sweater is constructed in two panels which are then seamed together at the shoulders. The two panels are then edged and seamless set-in sleeves are stitched directly into the panels. The entire sweater is then seamed up the sides. Directions will also include an optional strap along the back neckline.

SUPPLIES
YARN
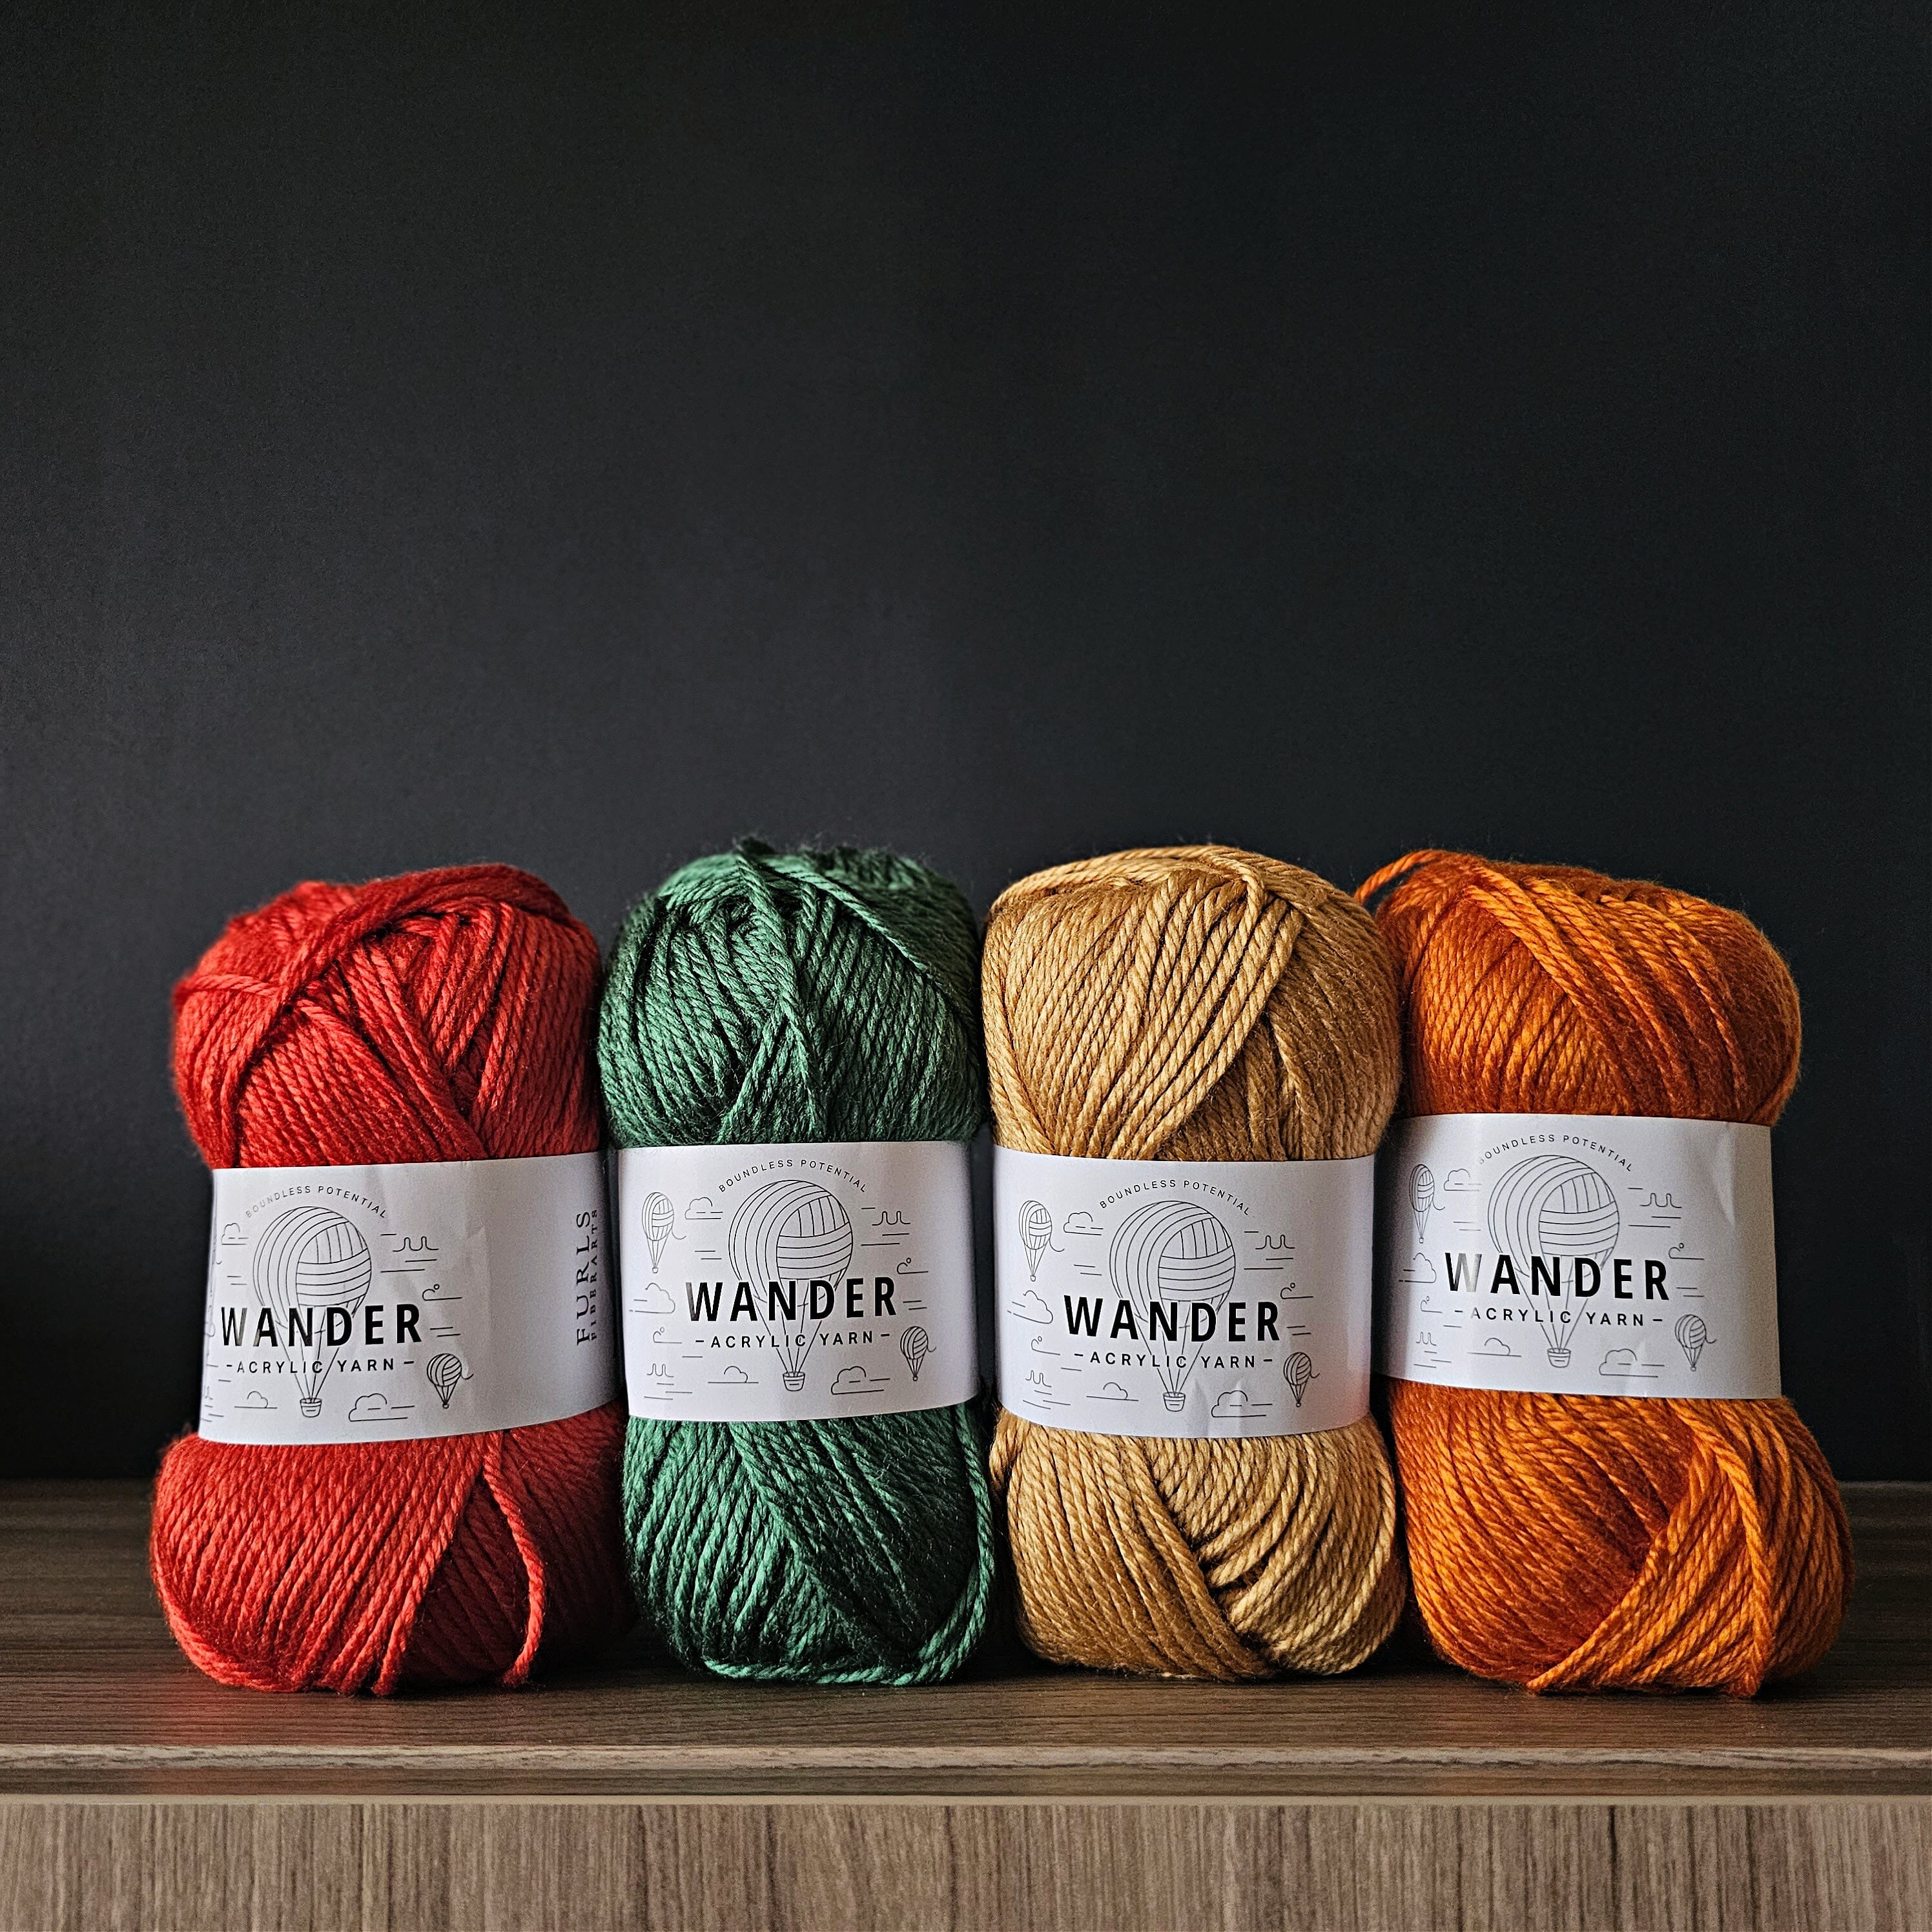
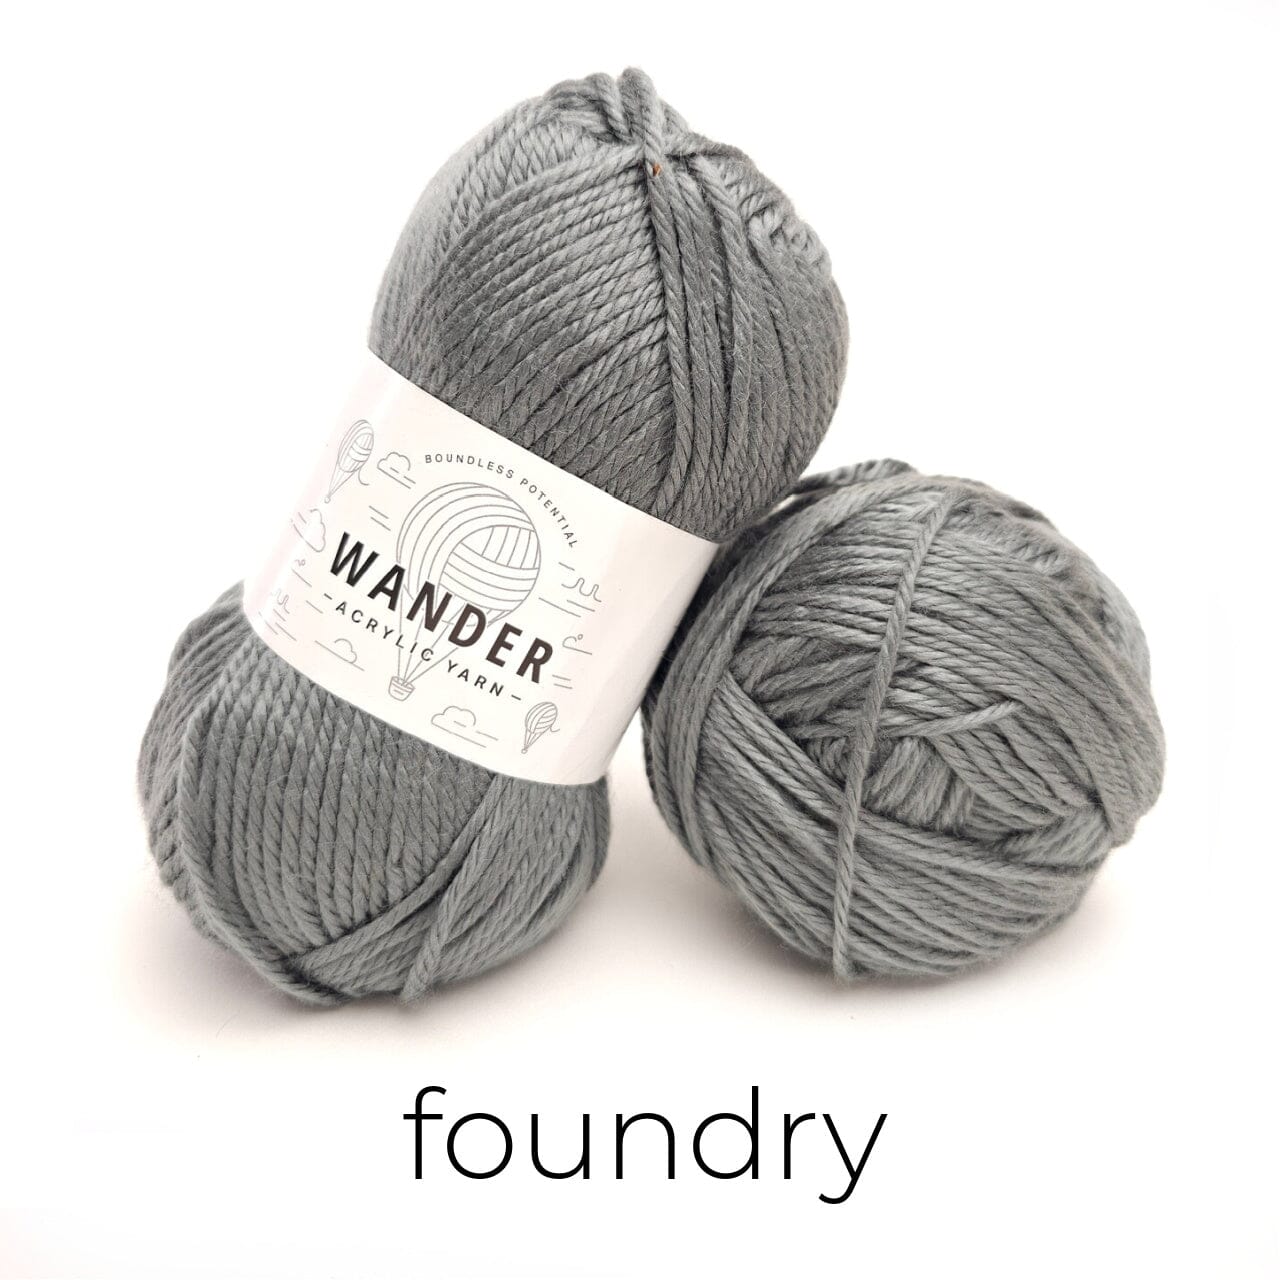
4 (4, 5, 5, 6, 6, 7, 7) skeins of Red Heart Soft solids OR 5 (5, 6, 6, 7, 8, 8, 9) skeins of prints, OR 5 (5, 6, 7, 7, 8, 8, 9) skeins of heathers– Sample uses Cocoa
OR 896 (1020, 1150, 1275, 1400, 1520, 1660, 1780) yards of comparable worsted weight (#4) yarn
MATERIALS
J/6.0mm hook- I used my NEW Blue Odyssey
PATTERN DETAILS
DIFFICULTY
Easy to intermediate
SIZES- follows CYC Standard Sizes- for more information click here
Small through 5x- with 1" ease per size
FINISHED MEASUREMENTS
See schematic for finished measurements

GAUGE
16 rows and 18 sts = 6”
in modified hdc (see special stitches) beginning with fdc row
STITCH GUIDE
ch(s) – chain(s), sc – single crochet, hdc – half double crochet, dc – double crochet, st(s) – stitch(es), BLO – back loop only, RS – right side,
SPECIAL STITCHES
Fhdc- Foundation Half Double Crochet
Chain 3 (counts as first fhdc). Yarn over (YO) and insert hook in 3rd chain from hook, *YO and pull up loop (3 loops on hook), YO and pull through 1 loop creating a chain, (this is an important step but easy to forget), YO and pull through all three loops on hook. This completes the second fhdc (remember your first ch3 counted as the first fhdc). To stitch the next fhdc, yarn over and insert the hook into the chain made in the 2nd fhdc and repeat from * to desired stitch count
Modified hdc
Worked the same way as a regular hdc, except the st is worked into the third bar and the front loop of the stitch only
NOTES
- The Timber V Back Pullover is constructed bottom up in two panels, the shoulders are seamed and then the sides are edged, the sleeves are stitched in directly (no seaming) then the entire sweater is edged and seamed.
- Ch 2 (and ch 1) are not considered the first stitch, the first hdc (or sc) will be placed in the same st as the Ch 2 (or ch 1)
- Sides are marked as would be worn

PART ONE
For Part One we will be working the front panel in full. The panel is constructed from the bottom up and is worked in rows. Be sure to read the special stitches section for how to do the modified hdc. If you prefer you can just do hdc in the front loop only, though the look will be different. The third bar described in the specials stitches is the bar directly below the front loop only- you will be working into both of those parts of the stitch.
If you want to make your sweater longer, you can add rows to the first section (Rows 2-28). Every two rows will add approx 3/4" to your work.
FRONT PANEL
Row 1 (RS): Fhdc 52 (58, 64, 70, 76, 82, 88, 94)
Rows 2-28: Ch 2, turn, Modified hdc to end <52 (58, 64, 70, 76, 82, 88, 94)>
Row 29: Ch 2, turn, modified hdc in first st, modified hdc2tog, modified hdc in each st until 3 sts remain, modified hdc2tog, modified hdc in the last st <50 (56, 62, 68, 74, 80, 86, 92)>
Mark this row- on both outer edges of the panel- you will need this marker for the sleeve placement.
Row 30: Ch 2, turn, modified hdc in first st, modified hdc2tog 2x, modified hdc in each st until 5 sts remain, modified hdc2tog 2x, modified hdc in the last st <46 (52, 28, 64, 70, 76, 82, 88)>
Row 31: Ch 2, turn, modified hdc in first st, modified hdc2tog, modified hdc in each st until 3 sts remain, modified hdc2tog, modified hdc in the last st <44 (50, 56, 62, 68, 74, 80, 86)>
Row 32: Ch 2, turn, modified hdc in first st, modified hdc2tog, modified hdc in each st until 3 sts remain, modified hdc2tog, modified hdc in the last st <42 (48, 54, 60, 66, 72, 78, 84)>
Next 9 (11, 9, 11, 9, 11, 9, 11) Rows: Ch 2, turn, Modified hdc to end <42 (48, 54, 60, 66, 72, 78, 84)>
Shoulder rows start a new count, final row count for all sizes will be 49 (51, 51, 53, 53, 55, 55, 57)
RIGHT SHOULDER
Row 1: Ch 2, turn, modified hdc in first st, modified hdc in the next 9 (12, 15, 18, 20, 23, 26, 29) sts, modified hdc2tog 3x, modified hdc in the next st, leaving the remaining sts unworked <14 (17, 20, 23, 25, 28, 31, 34>
Row 2: Ch 2, turn, modified hdc in first st, modified hdc2tog 2x, Modified hdc to end <12 (15, 18, 21, 23, 26, 29, 32)>
Row 3: Ch 2, turn, modified hdc in first st, modified hdc in each st until 3 sts remain, modified hdc2tog, modified hdc in the last st <11 (14, 17, 20, 22, 25, 28, 31)>
Row 4: Ch 2, turn, modified hdc in first st, modified hdc2tog, modified hdc in each st to end <10 (13, 16, 19, 21, 24, 27, 30)>
Rows 5-8 (8, 10, 10, 12, 12, 14, 14): Ch 2, turn, modified hdc to end <10 (13, 16, 19, 21, 24, 27, 30)>
Fasten off
LEFT SHOULDER
Mark your Left Strap for easy identification of the left side during the seaming and assembly process. Lay tank so that finished strap is to the right (beginning tail will be at the bottom left). Join yarn by slip st in the 17th (20th, 23rd, 26th, 28th, 31st, 34t, 37th) sts from the left corner.
Row 1: Ch 2, modified hdc in first (same) st, modified hdc2tog 3x, Modified hdc to end <14 (17, 20, 23, 25, 28, 31, 34>
Row 2: Ch 2, turn, modified hdc in first st, modified hdc in each st until 5 sts remain, modified hdc2tog 2x, modified hdc in the last st <12 (15, 18, 21, 23, 26, 29, 32)>
Row 3: Ch 2, turn, modified hdc in first st, modified hdc2tog, modified hdc in each st to end <11 (14, 17, 20, 22, 25, 28, 31)>
Row 4: Ch 2, turn, modified hdc in first st, modified hdc in each st until 3 sts remain, modified hdc2tog, modified hdc in the last st <10 (13, 16, 19, 21, 24, 27, 30)>
Rows 5-8 (8, 10, 10, 12, 12, 14, 14): Ch 2, turn, modified hdc to end <10 (13, 16, 19, 21, 24, 27, 30)>
Fasten off

PART TWO
Last week we completed the Front Panel. This week we are working on the complete Back Panel. The Back Panel is completed in the same way as the front. If you added any rows on the Front Panel you will need to add the same amount of rows on the Back Panel (Rows 2-25). If you don't want the V-Back in your back panel, all you'll need to do is repeat the Front Panel. Next week we will work on some assembly and adding our sleeves.
BACK PANEL
Row 1 (RS): Fhdc 52 (58, 64, 70, 76, 82, 88, 94)
Rows 2-25: Ch 2, turn, Modified hdc to end <52 (58, 64, 70, 76, 82, 88, 94)>
Shoulder/V Back rows start a new count, final row count for all sizes will be 49 (51, 51, 53, 53, 55, 55, 57)
RIGHT SIDE of V BACK
Row 1: Ch 2, turn, modified hdc in first st, modified hdc in the next 25 (28, 31, 34, 36, 39, 42, 45) sts, leaving the remaining sts unworked <26 (29, 32, 35, 37, 40, 43, 46)>
Row 2: Ch 2, turn, modified hdc in first st, modified hdc2tog, modified hdc in each st to end <25 (28, 31, 34, 36, 39, 42, 45)>
Row 3: Ch 2, turn, Modified hdc to end <25 (28, 31, 34, 36, 39, 42, 45)>
Row 4: Ch 2, turn, modified hdc in first st, modified hdc2tog, modified hdc in each st to end <24 (27, 30, 33, 35, 38, 41, 44)>
Mark this row- on the outer edge- you will need this marker for the sleeve placement.
Row 5: Ch 2, turn, modified hdc in first st, modified hdc2tog, modified hdc in each st to end <23 (26, 29, 32, 34, 37, 40, 43)>
Row 6: Ch 2, turn, modified hdc in first st, modified hdc2tog, modified hdc in each st until 5 sts remain, modified hdc2tog 2x, modified hdc in the last st <20 (23, 26, 29, 31, 34, 37, 40)>
Row 7: Ch 2, turn, modified hdc in first st, modified hdc2tog, modified hdc in each st to end <19 (22, 25, 28, 30, 33, 36, 39)>
Row 8: Ch 2, turn, modified hdc in first st, modified hdc2tog, modified hdc in each st until 3 sts remain, modified hdc2tog, modified hdc in the last st <17 (20, 23, 26, 28, 31, 34, 37>
Row 9: Ch 2, turn, Modified hdc to end <17 (20, 23, 26, 28, 31, 34, 37>
Row 10: Ch 2, turn, modified hdc in first st, modified hdc2tog, modified hdc in each st to end <16 (19, 22, 25, 27, 30, 33, 36>
Row 11: Ch 2, turn, Modified hdc to end <16 (19, 22, 25, 27, 30, 33, 36>
Row 12: Ch 2, turn, modified hdc in first st, modified hdc2tog, modified hdc in each st to end <15 (18, 21, 24, 26, 29, 32, 35)>
Row 13: Ch 2, turn, Modified hdc to end <15 (18, 21, 24, 26, 29, 32, 35)>
Row 14: Ch 2, turn, modified hdc in first st, modified hdc2tog, modified hdc in each st to end <14 (17, 20, 23, 25, 28, 31, 34)>
Row 15: Ch 2, turn, Modified hdc to end <14 (17, 20, 23, 25, 28, 31, 34)>
Row 16: Ch 2, turn, modified hdc in first st, modified hdc2tog, modified hdc in each st to end <13 (16, 19, 22, 24, 27, 30, 33)>
Row 17: Ch 2, turn, Modified hdc to end <13 (16, 19, 22, 24, 27, 30, 33)>
Row 18: Ch 2, turn, modified hdc in first st, modified hdc2tog, modified hdc in each st to end <12 (15, 18, 21, 23, 26, 29, 31)>
Row 19: Ch 2, turn, Modified hdc to end <12 (15, 18, 21, 23, 26, 29, 31)>
Row 20: Ch 2, turn, modified hdc in first st, modified hdc2tog, modified hdc in each st to end <11 (14, 17, 20, 22, 25, 28, 30)>
Row 21: Ch 2, turn, Modified hdc to end <11 (14, 17, 20, 22, 25, 28, 30)>
Row 22: Ch 2, turn, modified hdc in first st, modified hdc2tog, modified hdc in each st to end <10 (13, 16, 19, 21, 24, 27, 29)>
Rows 23-24 (26, 26, 28, 28, 30, 30, 32): Ch 2, turn, Modified hdc to end <10 (13, 16, 19, 21, 24, 27, 29)>
Fasten off leaving long tail for seaming
LEFT SIDE of V BACK
Mark your Left Strap for easy identification of the left side during the seaming and assembly process. Lay tank so that finished strap is to the right (beginning tail will be at the bottom left). Join yarn by slip st in the first unworked st to the left of the Left Side of V Back, this will be the 26th st from the left corner.
Row 1: Ch 2, modified hdc in first (same) st, modified hdc in the next 25 (28, 31, 34, 36, 39, 42, 45) sts, leaving the remaining sts unworked <26 (29, 32, 35, 37, 40, 43, 46)>
Row 2: Ch 2, turn, modified hdc in first st, modified hdc in each st till 3 sts remain, modified hdc2tog, hdc in the last st <25 (28, 31, 34, 36, 39, 42, 45)>
Row 3: Ch 2, turn, Modified hdc to end <25 (28, 31, 34, 36, 39, 42, 45)>
Row 4: Ch 2, turn, modified hdc in first st, modified hdc in each st till 3 sts remain, modified hdc2tog, hdc in the last st <24 (27, 30, 33, 35, 38, 41, 44)> Mark Row 4- on the outer edge
Row 5: Ch 2, turn, modified hdc in first st, modified hdc in each st till 3 sts remain, modified hdc2tog, hdc in the last st <23 (26, 29, 32, 34, 37, 40, 43)>
Row 6: Ch 2, turn, modified hdc in first st, modified hdc2tog 2x, modified hdc in each st until 3 sts remain, modified hdc2tog, modified hdc in the last st <20 (23, 26, 29, 31, 34, 37, 40)>
Row 7: Ch 2, turn, modified hdc in first st, modified hdc in each st till 3 sts remain, modified hdc2tog, hdc in the last st <19 (22, 25, 28, 30, 33, 36, 39)>
Row 8: Ch 2, turn, modified hdc in first st, modified hdc2tog, modified hdc in each st until 3 sts remain, modified hdc2tog, modified hdc in the last st <17 (20, 23, 26, 28, 31, 34, 37>
Row 9: Ch 2, turn, Modified hdc to end <17 (20, 23, 26, 28, 31, 34, 37>
Row 10: Ch 2, turn, modified hdc in first st, modified hdc in each st till 3 sts remain, modified hdc2tog, hdc in the last st <16 (19, 22, 25, 27, 30, 33, 36>
Row 11: Ch 2, turn, Modified hdc to end <16 (19, 22, 25, 27, 30, 33, 36>
Row 12: Ch 2, turn, modified hdc in first st, modified hdc in each st till 3 sts remain, modified hdc2tog, hdc in the last st <15 (18, 21, 24, 26, 29, 32, 35)>
Row 13: Ch 2, turn, Modified hdc to end <15 (18, 21, 24, 26, 29, 32, 35)>
Row 14: Ch 2, turn, modified hdc in first st, modified hdc in each st till 3 sts remain, modified hdc2tog, hdc in the last st <14 (17, 20, 23, 25, 28, 31, 34)>
Row 15: Ch 2, turn, Modified hdc to end <14 (17, 20, 23, 25, 28, 31, 34)>
Row 16: Ch 2, turn, modified hdc in first st, modified hdc in each st till 3 sts remain, modified hdc2tog, hdc in the last st <13 (16, 19, 22, 24, 27, 30, 33)>
Row 17: Ch 2, turn, Modified hdc to end <13 (16, 19, 22, 24, 27, 30, 33)>
Row 18: Ch 2, turn, modified hdc in first st, modified hdc in each st till 3 sts remain, modified hdc2tog, hdc in the last st <12 (15, 18, 21, 23, 26, 29, 31)>
Row 19: Ch 2, turn, Modified hdc to end <12 (15, 18, 21, 23, 26, 29, 31)>
Row 20: Ch 2, turn, modified hdc in first st, modified hdc in each st till 3 sts remain, modified hdc2tog, hdc in the last st <11 (14, 17, 20, 22, 25, 28, 30)>
Row 21: Ch 2, turn, Modified hdc to end <11 (14, 17, 20, 22, 25, 28, 30)>
Row 22: Ch 2, turn, modified hdc in first st, modified hdc in each st till 3 sts remain, modified hdc2tog, hdc in the last st <10 (13, 16, 19, 21, 24, 27, 29)>
Rows 23-24 (26, 26, 28, 28, 30, 30, 32): Ch 2, turn, Modified hdc to end <10 (13, 16, 19, 21, 24, 27, 29)>
Fasten off leaving long tail for seaming
PART THREE
Welcome to Part Three of the Timber V Back Pullover. As you might now I was in the grips of Hurricane Florence, and her aftermath, for the last two weeks... but things are getting back to normal and our internet service has been restored. I am now completely back to work and available to answer any questions you may have.
There was a small row repeat error with the last section of Part Two. The repeats were listed as 23-24 (24, 26, 26, 28, 28, 30, 30) but it should have been Rows 23-24 (26, 26, 28, 28, 30, 30, 32). It has been corrected on the pattern. However, if you are making one of the affected sizes (medium, 1x, 3x or 5x) you will need to two rows to each shoulder on the back panel before moving on.
I apologize for the inconvenience; luckily it is a quick and easy fix that won't affect the final design. Now to move on to Part Three.
This week we will be seaming our shoulders and adding our sleeves. Next week we work on final edging and assembly. I hope you have been enjoying the pattern thus far. Please tag me, Lorene Haythorn Eppolite, in the Fun with Furls group on Facebook if you have any questions. I can also be reached at lorene.e@furlscrochet.com.
ASSEMBLING SHOULDERS and EDGING
Place the RS of both the front and back panel together and mattress seam the shoulders (be sure you are working into the wrong sides).
With RS facing, sc evenly along the long side edges of the seamed front and back panels. Exact st count is not mandatory, you just want to make sure that the fabric is neither stretched or pulled. What works well for me is doing 3sc along every two rows (or 1sc at the end of one row and 2sc at the end of the next row). Place a st marker on both sides of the seamed panels, to correspond with the edging sc that lines up with the marked rows on the front and back panels.
SLEEVES
Sleeves are done in regular hdc sts or, if you prefer, you can continue with the modified hdc.
Row 1: With wrong side facing, join yarn in the first marked st, ch 2 and hdc in the marked st, hdc2tog, hdc in each st until you reach the shoulder seam, hdc2tog (exact placement is not mandatory, as long as you are at the center of the two seamed panels), hdc in each st until 3 sts before the marked st, hdc2tog, hdc in the marked st, turn <st counts will vary> Mark the st at the shoulder seam.
Row 2: Ch 2 and hdc in the first st, hdc2tog, hdc in each st until to the marked st, hdc2tog over the marked st and the next st, hdc in each st until 3 sts remain, hdc2tog, hdc in the last st, turn <row will decrease by 3 sts>
Rows 3-8: Repeat the previous row
Rows 9-12: Ch 2 and hdc in the first st and each st to the end
Row 13: Ch 2 and hdc in the first st, hdc2tog, hdc in each st until 3 sts remain, hdc2tog, hdc in the last st
Rows 14-43: Repeat rows 9-13 six times more
Next 3 (3, 5, 5, 7, 7, 9, 9) Rows: Ch 2 and hdc in the first st and each st to the end
Fasten off
Repeat for Second Sleeve
PART FOUR
FINAL EDGING and RIBBING
With RS facing, join yarn by slip st in any st along the bottom corner on either long side of the assembled front and back panel.
Ch 1 and sc in the same st, *sc evenly along the long panel and along the unfinished edge of the sleeve, when you reach the end of the first sleeve complete the section below for ribbing.
Row 1: Ch 6, turn, sc in the 2nd st from hook, sc in the next 3 chs, sc2tog in the 5th ch and the first unworked st of the sleeve/or bottom edge, sl st in the next unworked st of the sleeve
Row 2: Ch 1, turn, sc in the blo of the next 4 sts, sc in both loops of the last sc
Row 3: Ch 1, turn, sc in the blo of the first sc and each of the next 3 sc, sc2tog in the blo of the last st and the the first unworked st of the sleeve, sl st in the next unworked st of the sleeve
Repeat rows 2 and 3 until all unworked sts of the sleeve edges are worked
Continue to sc evenly along the unfinished edge of the sleeve, sc along the long edge of the sweater, when you reach the bottom hem of the sweater complete the section below for ribbing.
Row 1: Ch 9, turn, sc in the 2nd st from hook, sc in the next 3 chs, sc2tog in the 8th ch and the first unworked st of the hem, sl st in the next unworked st of the hem
Row 2: Ch 1, turn, sc in the blo of the next 7 sts, sc in both loops of the last sc
Row 3: Ch 1, turn, sc in the blo of the first sc and each of the next 6 sc, sc2tog in the blo of the last st and the the first unworked st of the hem, sl st in the next unworked st of the hem
Repeat rows 2 and 3 until all unworked sts of the sleeve edges are worked
Repeat from * one time more until the entire sweater is edged and ribbing is added to each sleeve and the bottom of the front and back panels. Sl st into the first sc (skipping over the ch-1) to join.
Fasten off and weave in all ends.
FINAL ASSEMBLY
Place both panels and sleeves together with the right sides facing in, mattress seam along both sides and the bottom edge of the sleeves
Fasten off
NECK EDGING- without optional neckband
Rnd 1: Join yarn by sl st at the right shoulder seam; ch 1 and sc in the first st, sc evenly around the neck and V back <stitch count will vary>
Fasten off.
OPTIONAL NECK BAND
Rnd 1: Join yarn by sl st at the right shoulder seam; ch 1 and sc in the first st, sc evenly around the neck and V back <stitch count will vary>
Rnd 2: Ch 1 and sc in the first st, sc in each of the next 6 sts along the back of the V, working off the base of the last sc, fhdc 19 (xx) times, begin an additional fhdc as follows; working into the ch of the previous fhdc, YO and pull up loop (3 loops on hook), insert hook into the corresponding st on the opposite side of the V neck, yarn over and pull through the st (four loops on hook), YO and pull through all four loops on the hook, continue to sc around the entire neckline, sl st into the first sc (skipping over the ch-1)
Rnd 3: Ch 1 and sc in the first st, sc around the neck and the top of the band
Fasten off
Rnd 4: Join yarn by sl st anywhere on the V section, ch 1 and sc in the first st, sc around the entire V and the bottom of the band
Fasten off
Weave in all ends
ABOUT OUR DESIGNER
Subscribe to the Cre8tion Crochet Weekly Newsletter for weekly free patterns, discounts on paid patterns, reviews and giveaways and business tips. You’ll be sent a promo code for one free pattern from my Ravelry shop when you sign up.