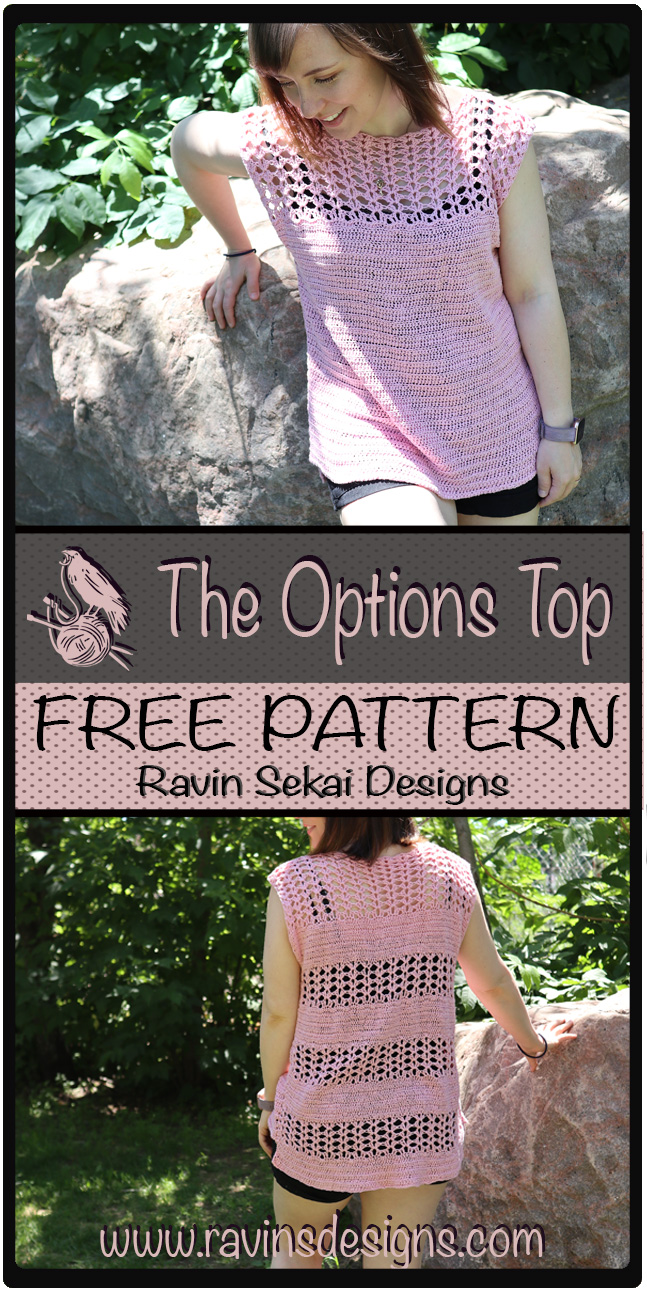
The Options Top

Edit 4/11/2020: added a notes section for clarification.
For the free pattern of this garment please continue on this page. Please consider supporting me by purchasing the 100% ad free PDF download with full chart for this pattern on my Ravelry or ETSY pages. Or consider joining my Patreon for member perks.
Look at the fall styling for this top at the end of this post!!! This Top has even more OPTIONS!!
About This Top:
Hey hey hey!! It’s really summer now! I know I’ve been going on and on about it still being cold for ages, but now that hot hot heat has finally made it’s way up to Canada! I’m a little conflicted. It’s HOT. I kinda forgot what being hot was like. haha. I’m being reminded now this week. Especially since we don’t own an air conditioner. It’s Canada!! The average high in July is only supposed to be 26°C (79°F)!!. We’re weighing the pros and cons of getting a window unit to combat the heat, but really, Vin sits in air-con bliss all day at work, and, mostly, I’m the only one that deals with the hot house. I can live with a fan blowing on me and cold drinks (for now!)
Anyway, This week I’ve got an awesome new pattern for you all. I started creating this quite awhile ago, but I always have several things going at once, so it took me a bit. It’s a good time to unveil it though! This top is wonderfully simple and easy to make. And, there are so many different ways for you to make it! You can customize it however you like. My favorite part about this top is that the sizing options that give you all the power! I wanted a very oversized drapey top when I designed this item, and I wear a size small generally. So the small size reflects that feel and gives me exactly what I was after. But, if you want a more form fitting top, you can easily size down and have exactly what you want, too.
Each size fits a wide range of busts, so you can see where you fall on the chart, and make decisions on sizing from there. I love having options!
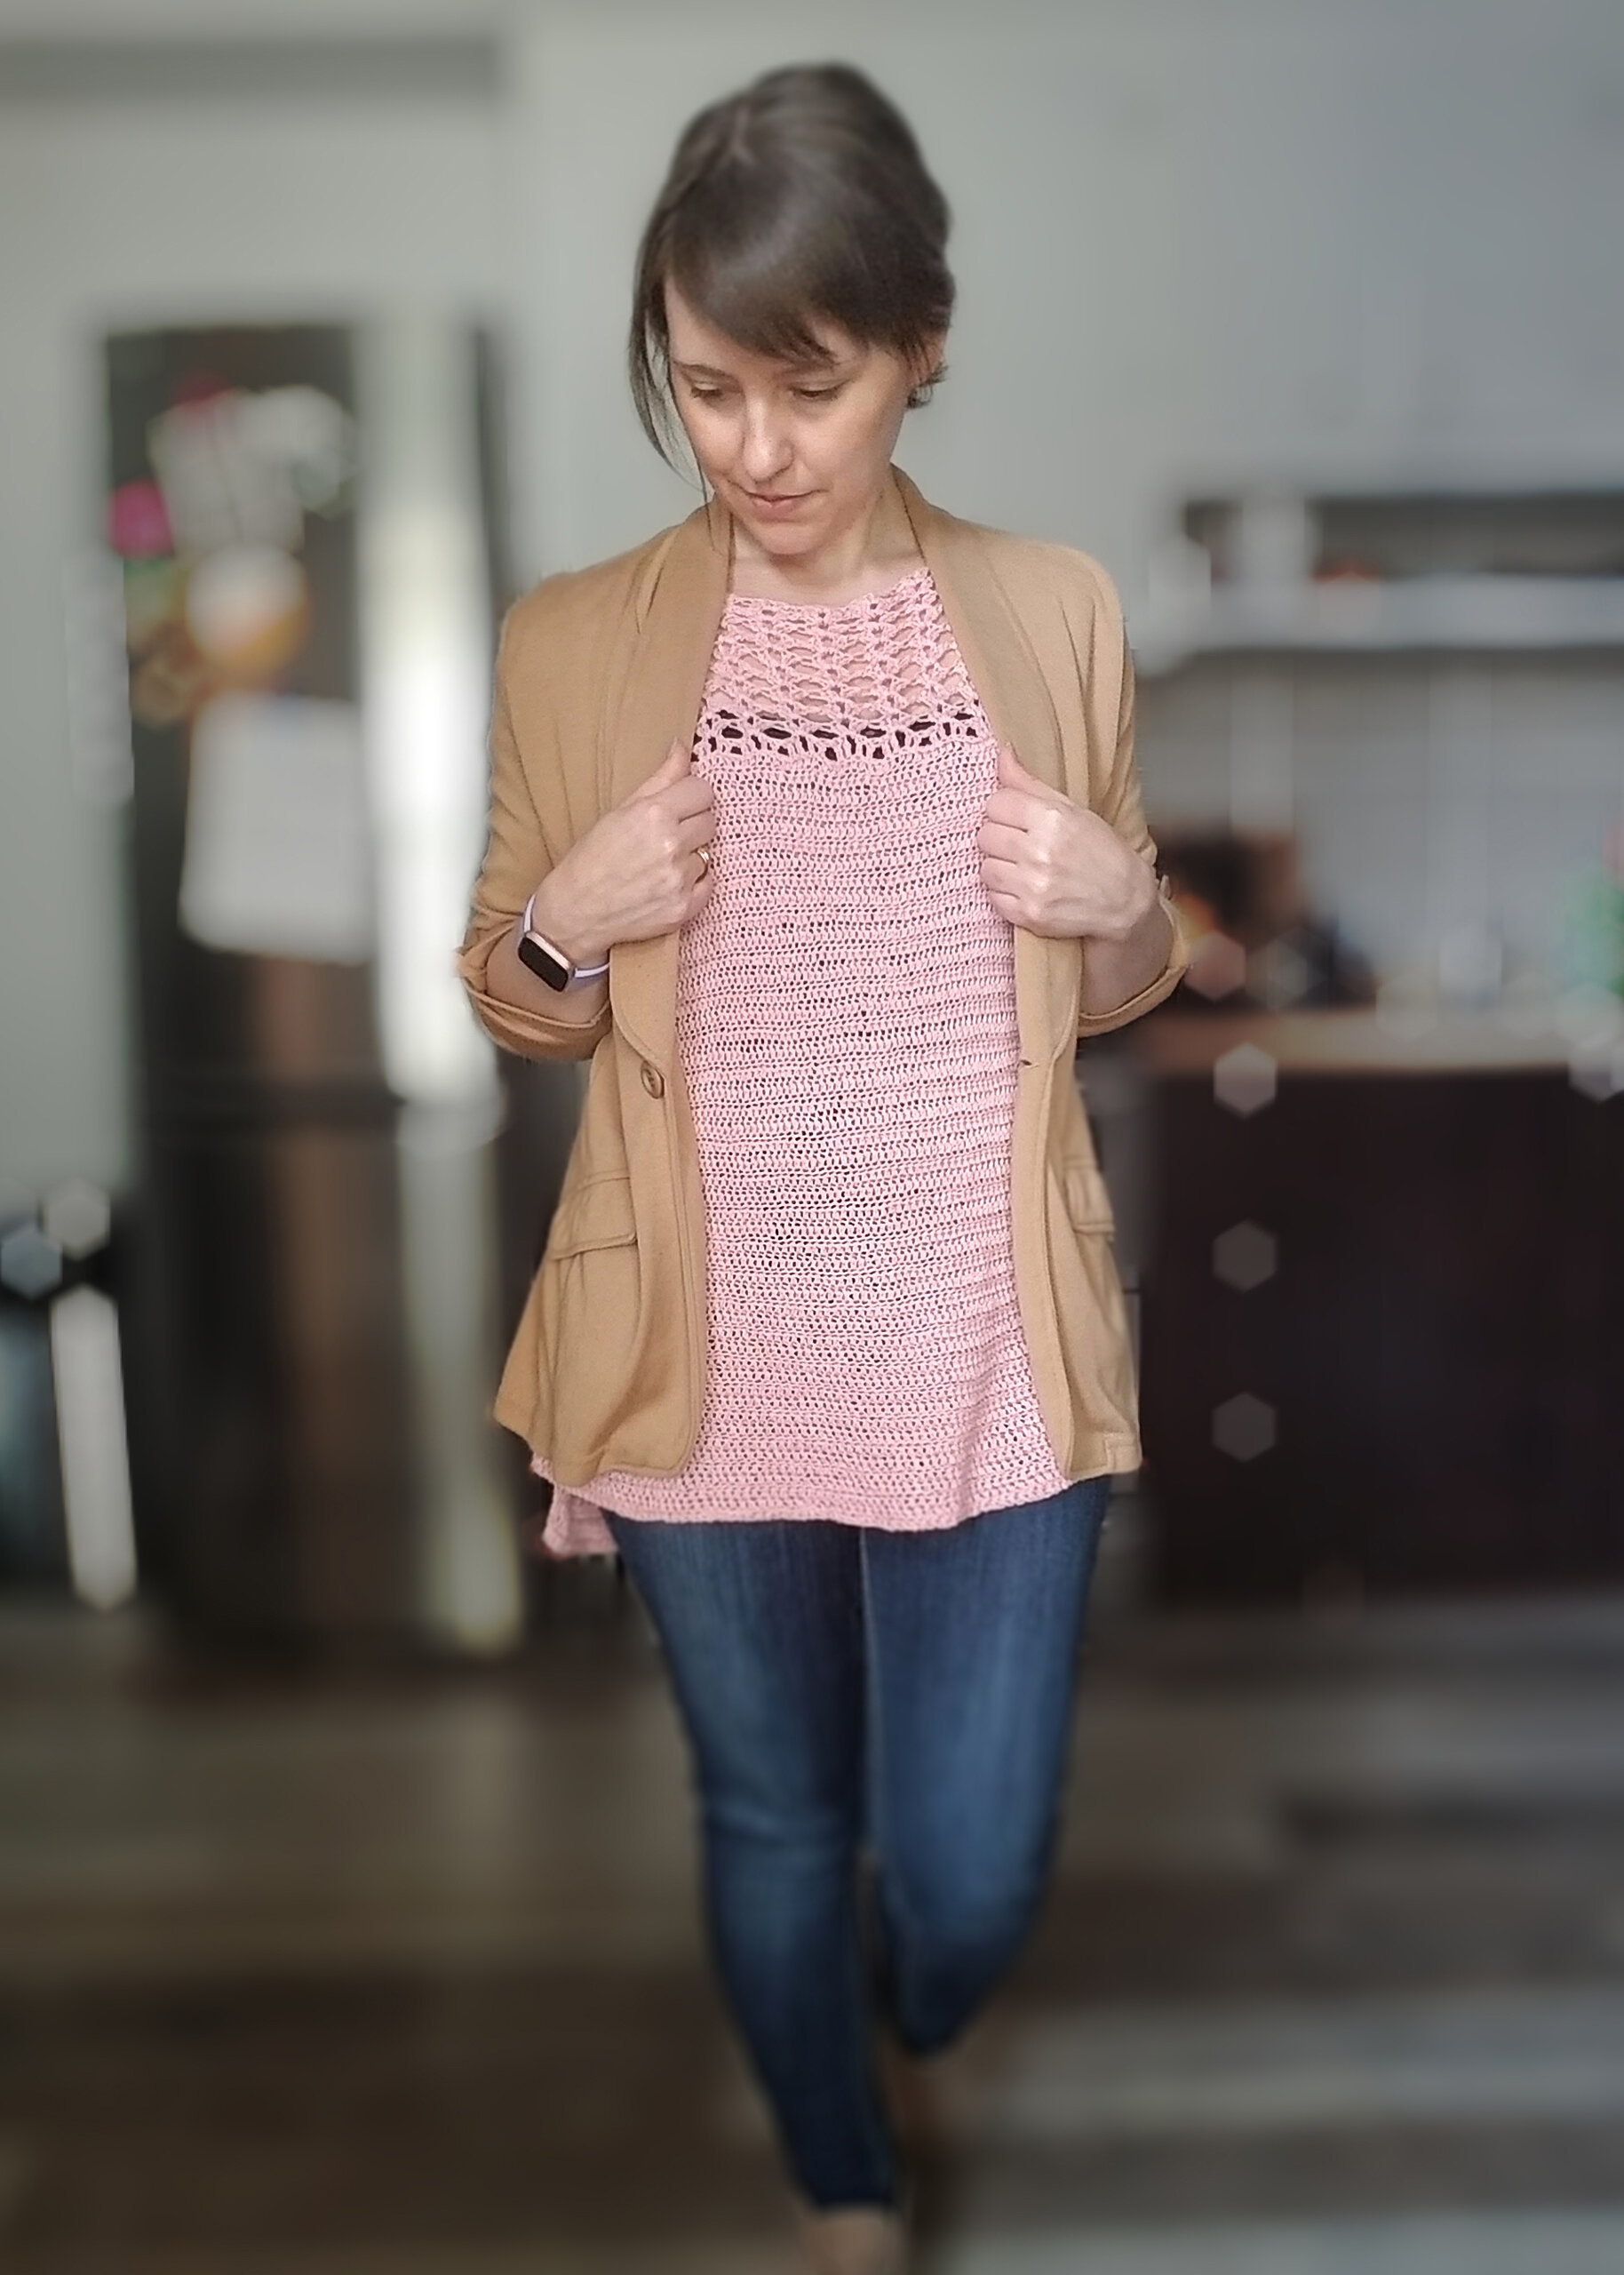
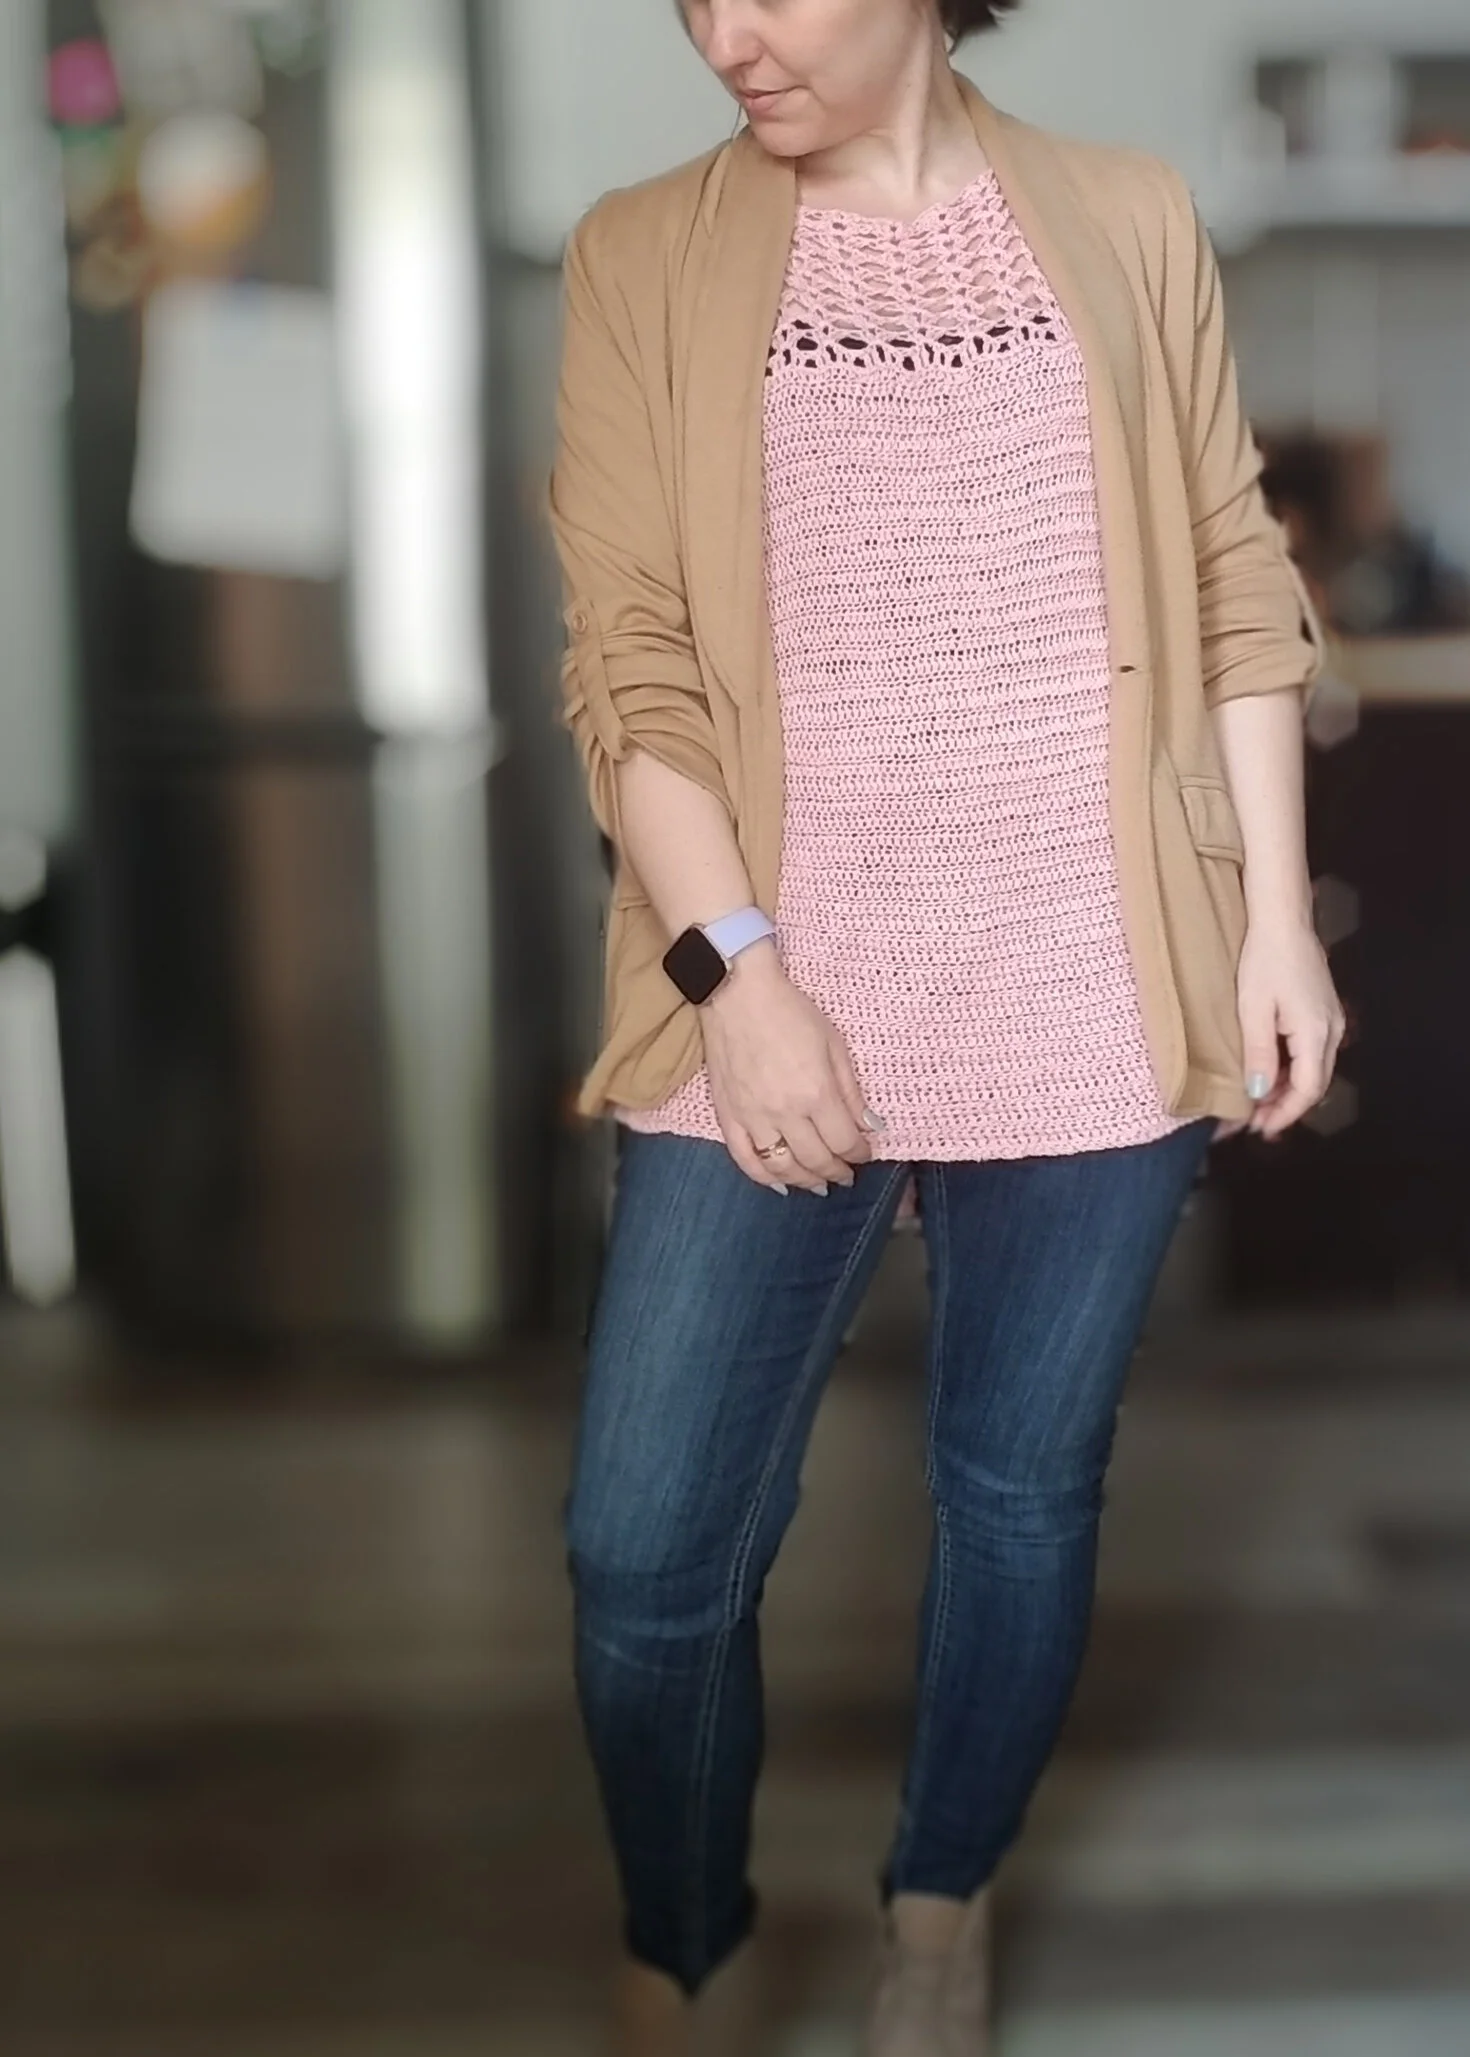
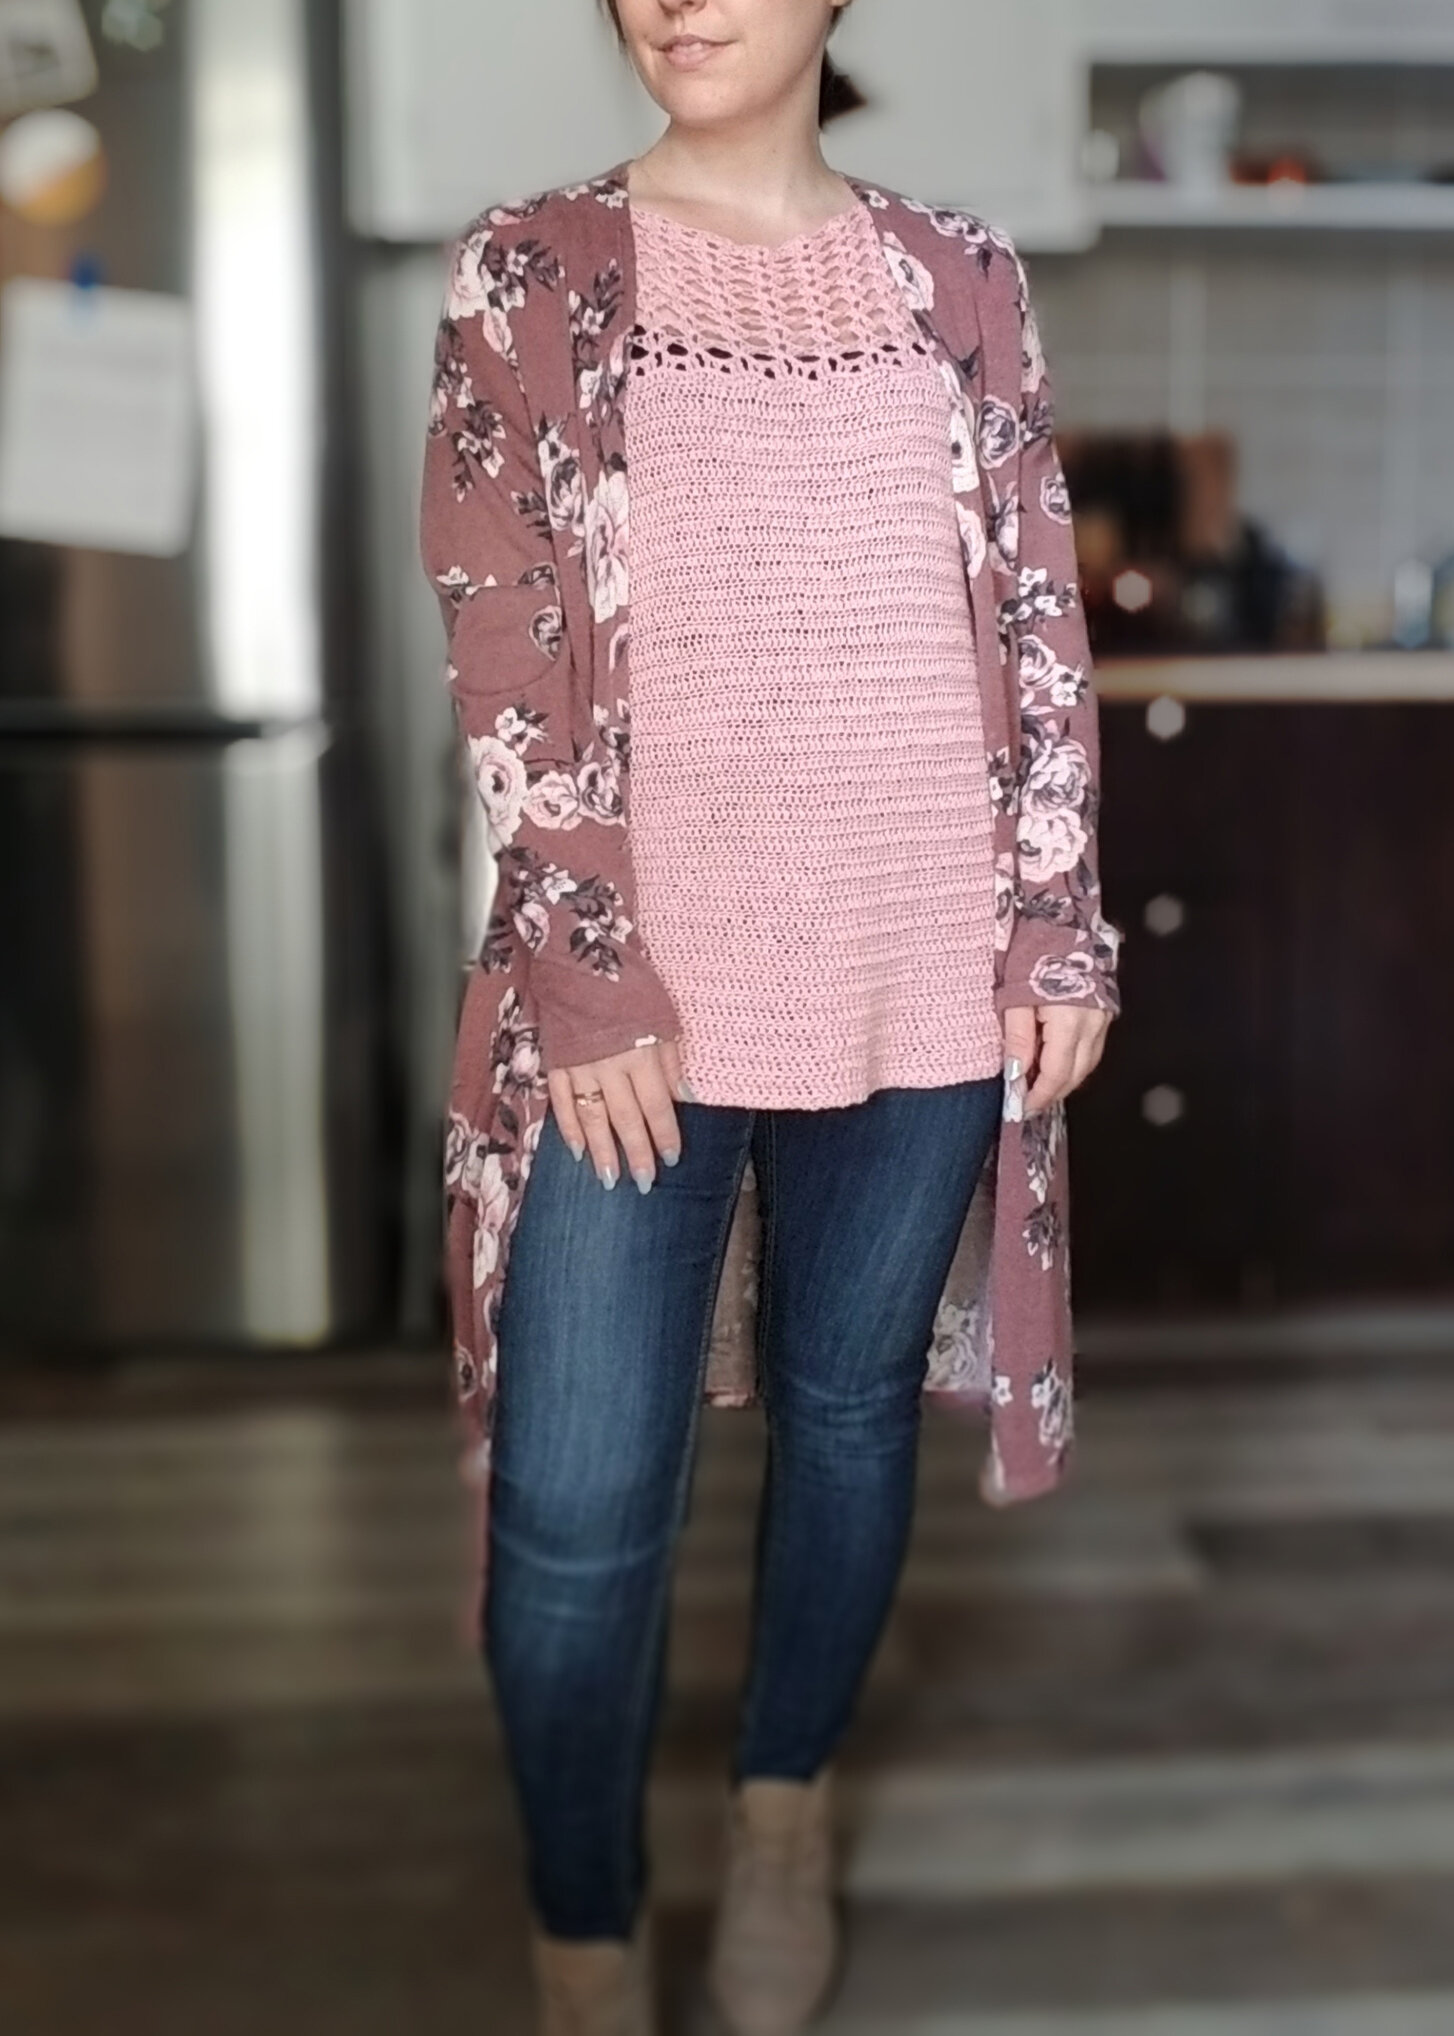
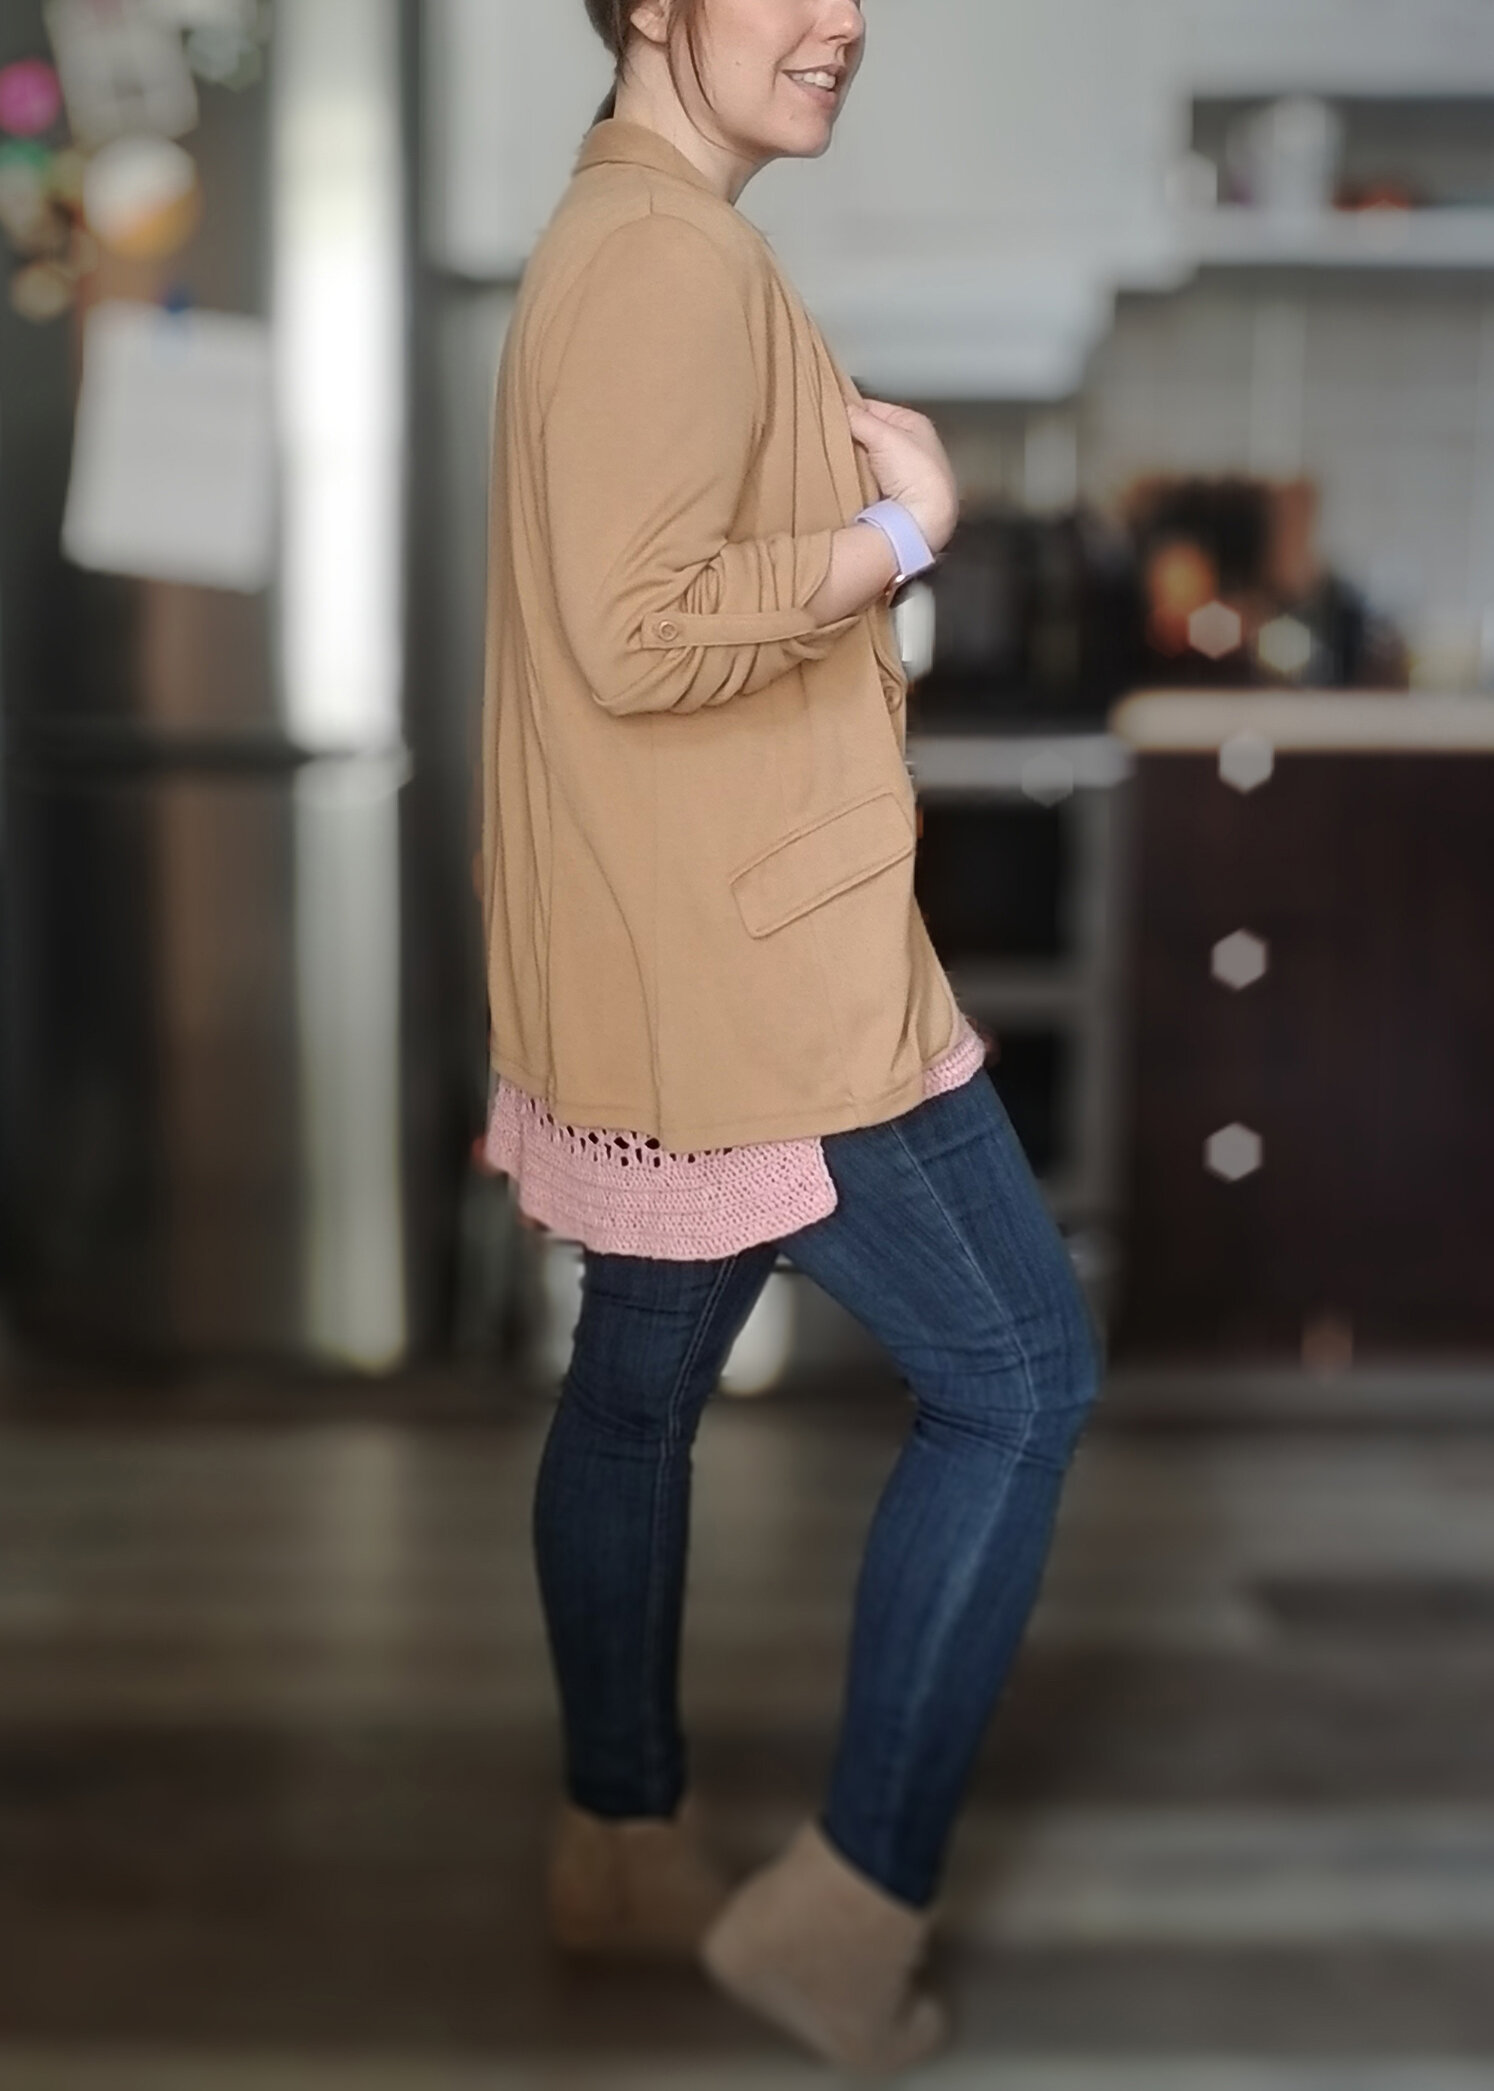
The design of this item is made using easy half double crochet stitches and simple lace. The difference in gauge between the hdc and lace gives the shaping for this beautiful top! Plus, the asymmetrical hem keeps it from being boring.
But, cause this is the OPTIONS top, if you prefer the backside to the front, you can always make 2 backs and seam them together, hate the back love the front, make 2 fronts! Don’t like asymmetrical hemlines? There are instructions to keep the hem even.
Like I said OPTIONS!
The yarn I used is a 70% linen, 30% pima cotton blend from Knit Picks called Lindy Chain. (I am not affiliated with Knit Picks in any way, I just like their yarn :)) This yarn is great to use for summer projects because the fiber content is very breathable during hot days. If you’re not in to Knit Picks yarn, or don’t like Lindy Chain in particular, a good sub would be Lion Brand Faye which has a very close gauge to Lindy chain, though it is a piled yarn instead of a chained one, so the look of the finished top would be a little different. Any fingering weight - light DK weight cotton would also create a great top. Just make sure you crochet a gauge swatch to determine which size to create!
Enjoy making this top the way YOU like it!
I love to see what you create!
Please share your creations with the community on social media by tagging @ravinsekaidesigns and hashtag #theoptionstop
I can’t wait to see the beautiful things you come up with!
Facebook: Ravin Sekai Designs
Ravelry: RavinSekai
Instagram: @ravinsekaidesigns
Pinterest: Ravin Sekai Designs
Patreon: Ravin Sekai Designs
What You Need:
Hook: 3.5mm hook
Yarn: Knit Picks Lindy Chain, 70% Linen 30% Pima Cotton, 180yds per skein. Weight 1, Fingering/lace yarn. XS(S, M, L, XL) 5 (5,6,6,7) skeins, 900(900,1080,1080, 1260) yds total
Gauge: 20st x 12rows = 4” in hdc, 4 lace repeats x 6.7 rows lace = 4”
Sizing Chart:
XS: 30 - 34in bust
S: 34 - 38in bust,
M: 38 - 42in bust,
L: 42 - 46in bust,
XL: 46 - 50in.
Finished Garment (before seaming): approximately 18.5”(21”, 22”, 24.5”, 25.5”) wide at hdcblo x 22”(22”, 22”, 23”, 23”) front 24”(24”, 24”, 25”, 25”)in back length
Sizing Reference: model has 35” bust, wearing size S with about 6” positive ease. This top is meant to be very loose fitting and breezy. If you’re looking for a tighter top, try making a size down. If you’re looking to make a larger or in between size, you need to always either add or subtract in multiples of 6 stitches in order to maintain the lace portion. model is wearing a top made with FRONT and BACK STYLE 1.
Skills/Abbreviations:
Pattern is written in US abbreviations
St: stitch
Ch: chain
Hdcblo: half double crochet in the back loop only
Rep: repeat
Sk: skip
Dc: double crochet
FO: fasten off

Notes
“Hdc in 3rd chain from hook” from Row 1 on both front and back creates a ch2 and counts as 1 hdc.
ch2 and ch3 at beginning of rows count as 1 hdc or dc respectively. So, make sure you don’t add a stitch to each row by placing a stitch in the first one below.
ch3 counting as 1 dc is especially important when you start the lace section. Your first dc should go into the 3rd hdc below So, ch3 (counts as 1 dc), sk1 (means you're skipping the 2nd st below), dc in next (this is the 3rd st below).
The Pattern:
For the free pattern of this garment please continue on this page. Please consider supporting me by purchasing the 100% ad free PDF download with full chart for this pattern on my Ravelry or ETSY pages. Or consider joining my Patreon for member perks.
FRONT:
sizes are written with smallest size first then others in parentheses XS(S, M, L, XL)
Base:
Ch 93(105, 111, 123, 129)
Row 1: hdc in 3rd ch from hook, hdc across. Turn. 92st (104,110,122,128 st)
Row 2: ch2 (counts as 1 hdc), hdcblo in each hdc below, hdc in ch2 at end. Make sure you don’t miss the last st. Turn. 92st (104,110,122,128 st)
Row 3 - Row 48 (48, 48, 51, 51): rep Row 2 until piece reaches 16in (16,16,17,17in). 92st (104,110,122,128 st)
Lace Panel:
Row 49(49, 49, 52, 52): ch3 (counts as 1 dc), sk1, dc in next 2st, ch2, dc in next 2 st, [sk2, dc in next 2st, ch2, dc in next 2st] 14x (16x, 17x, 19x, 20x) total until last 2st, sk1, dc in last st (ch2 below), Turn.
Row 50(50, 50, 53, 53) - Row 58(58, 58, 59, 59): ch3, [2dc, ch2, 2dc] all in each ch2 below 15x(17x, 18x, 20x, 21x), dc in last st (ch3 below). Turn.
FO
BACK STYLE 1:
FOR XS, S, AND M ONLY
For STYLE 1 the back is 2 inches longer than front making an asymmetrical hem.
Ch 93(105, 111)
Row 1: hdc in 3rd ch from hook, hdc across. Turn. 92st (104, 110st)
Row 2 - Row 8: ch2 (counts as 1 hdc), hdcblo in each hdc below, hdc in ch2 at end. Make sure you don’t miss the last st. Turn. [8 rows hdc total] 92st (104, 110st)
Row 9: ch3 (counts as 1 dc), sk1, dc in next 2st, ch2, dc in next 2 st, [sk2, dc in next 2st, ch2, dc in next 2st] rep 14x (16x, 17x) until last 2st, sk1, dc in last st (ch2 below), Turn.
Row 10 - Row 13: ch3, [2dc, ch2, 2dc] all in each ch2 below 15x(17x, 18x), dc in last st (ch3 below). Turn. (5 rows of lace total)
Row 14: ch2, hdc in each dc below and 2hdc in each ch2 space. Turn. 92st (104, 110st)
Row 15 - Row 21: ch2 (counts as 1 hdc), hdcblo in each hdc below, hdc in ch2 at end. Make sure you don’t miss the last st. Turn. [8 rows hdc total] 92st (104, 110st)
Row 22: rep Row 9.
Row 23 - Row 26: rep Row 10 four times (5 rows lace total)
Row 27: rep Row 14
Row 28 - Row 34: rep Row 15 - Row 21 [8 rows hdc total] 92st (104, 110st)
Row 35: rep Row 9.
Row 36 - Row 39: rep Row 10 four times (5 rows lace total)
Row 40 - Row 47: rep Row 15 - Row 21 [8 rows hdc total] 92st (104, 110st)
Row 48: rep Row 9
Row 49 - Row 57: rep Row 10 nine times (10 rows lace total)
FO
BACK STYLE 1:

FOR L AND XL ONLY
Ch 123 (129)
Row 1: hdc in 3rd ch from hook, hdc across. Turn. 122 (128 st)
Row 2 - Row 9: ch2 (counts as 1 hdc), hdcblo in each hdc below, hdc in ch2 at end. Make sure you don’t miss the last st. Turn. [9 rows hdc total] 122 (128 st)
Row 10: ch3 (counts as 1 dc), sk1, dc in next 2st, ch2, dc in next 2 st, [sk2, dc in next 2st, ch2, dc in next 2st] rep 19x (20x) until last 2st, sk1, dc in last st (ch2 below), Turn.
Row 11 - Row 14: ch3, [2dc, ch2, 2dc] all in each ch2 below 20x(21x), dc in last st (ch3 below). Turn. (5 rows of lace total)
Row 15: ch2, hdc in each dc below and 2hdc in each ch2 space. Turn. 122 (128 st)
Row 16 - Row 23: ch2 (counts as 1 hdc), hdcblo in each hdc below, hdc in ch2 at end. Make sure you don’t miss the last st. Turn. [9 rows hdc total] 122 (128 st)
Row 24: rep Row 10.
Row 25 - Row 28: rep Row 11 four times (5 rows lace total)
Row 29: rep Row 15
Row 30 - Row 37: rep Row 16 - Row 23 [9 rows hdc total] 122 (128 st)
Row 38: rep Row 10.
Row 39 - Row 42: rep Row 11 four times (5 rows lace total)
Row 43 - Row 49: rep Row 16 - Row 22 [8 rows hdc total] 122 (128 st)
Row 50: rep Row 10
Row 51 - Row 60: rep Row 11 nine times (10 rows lace total)
FO
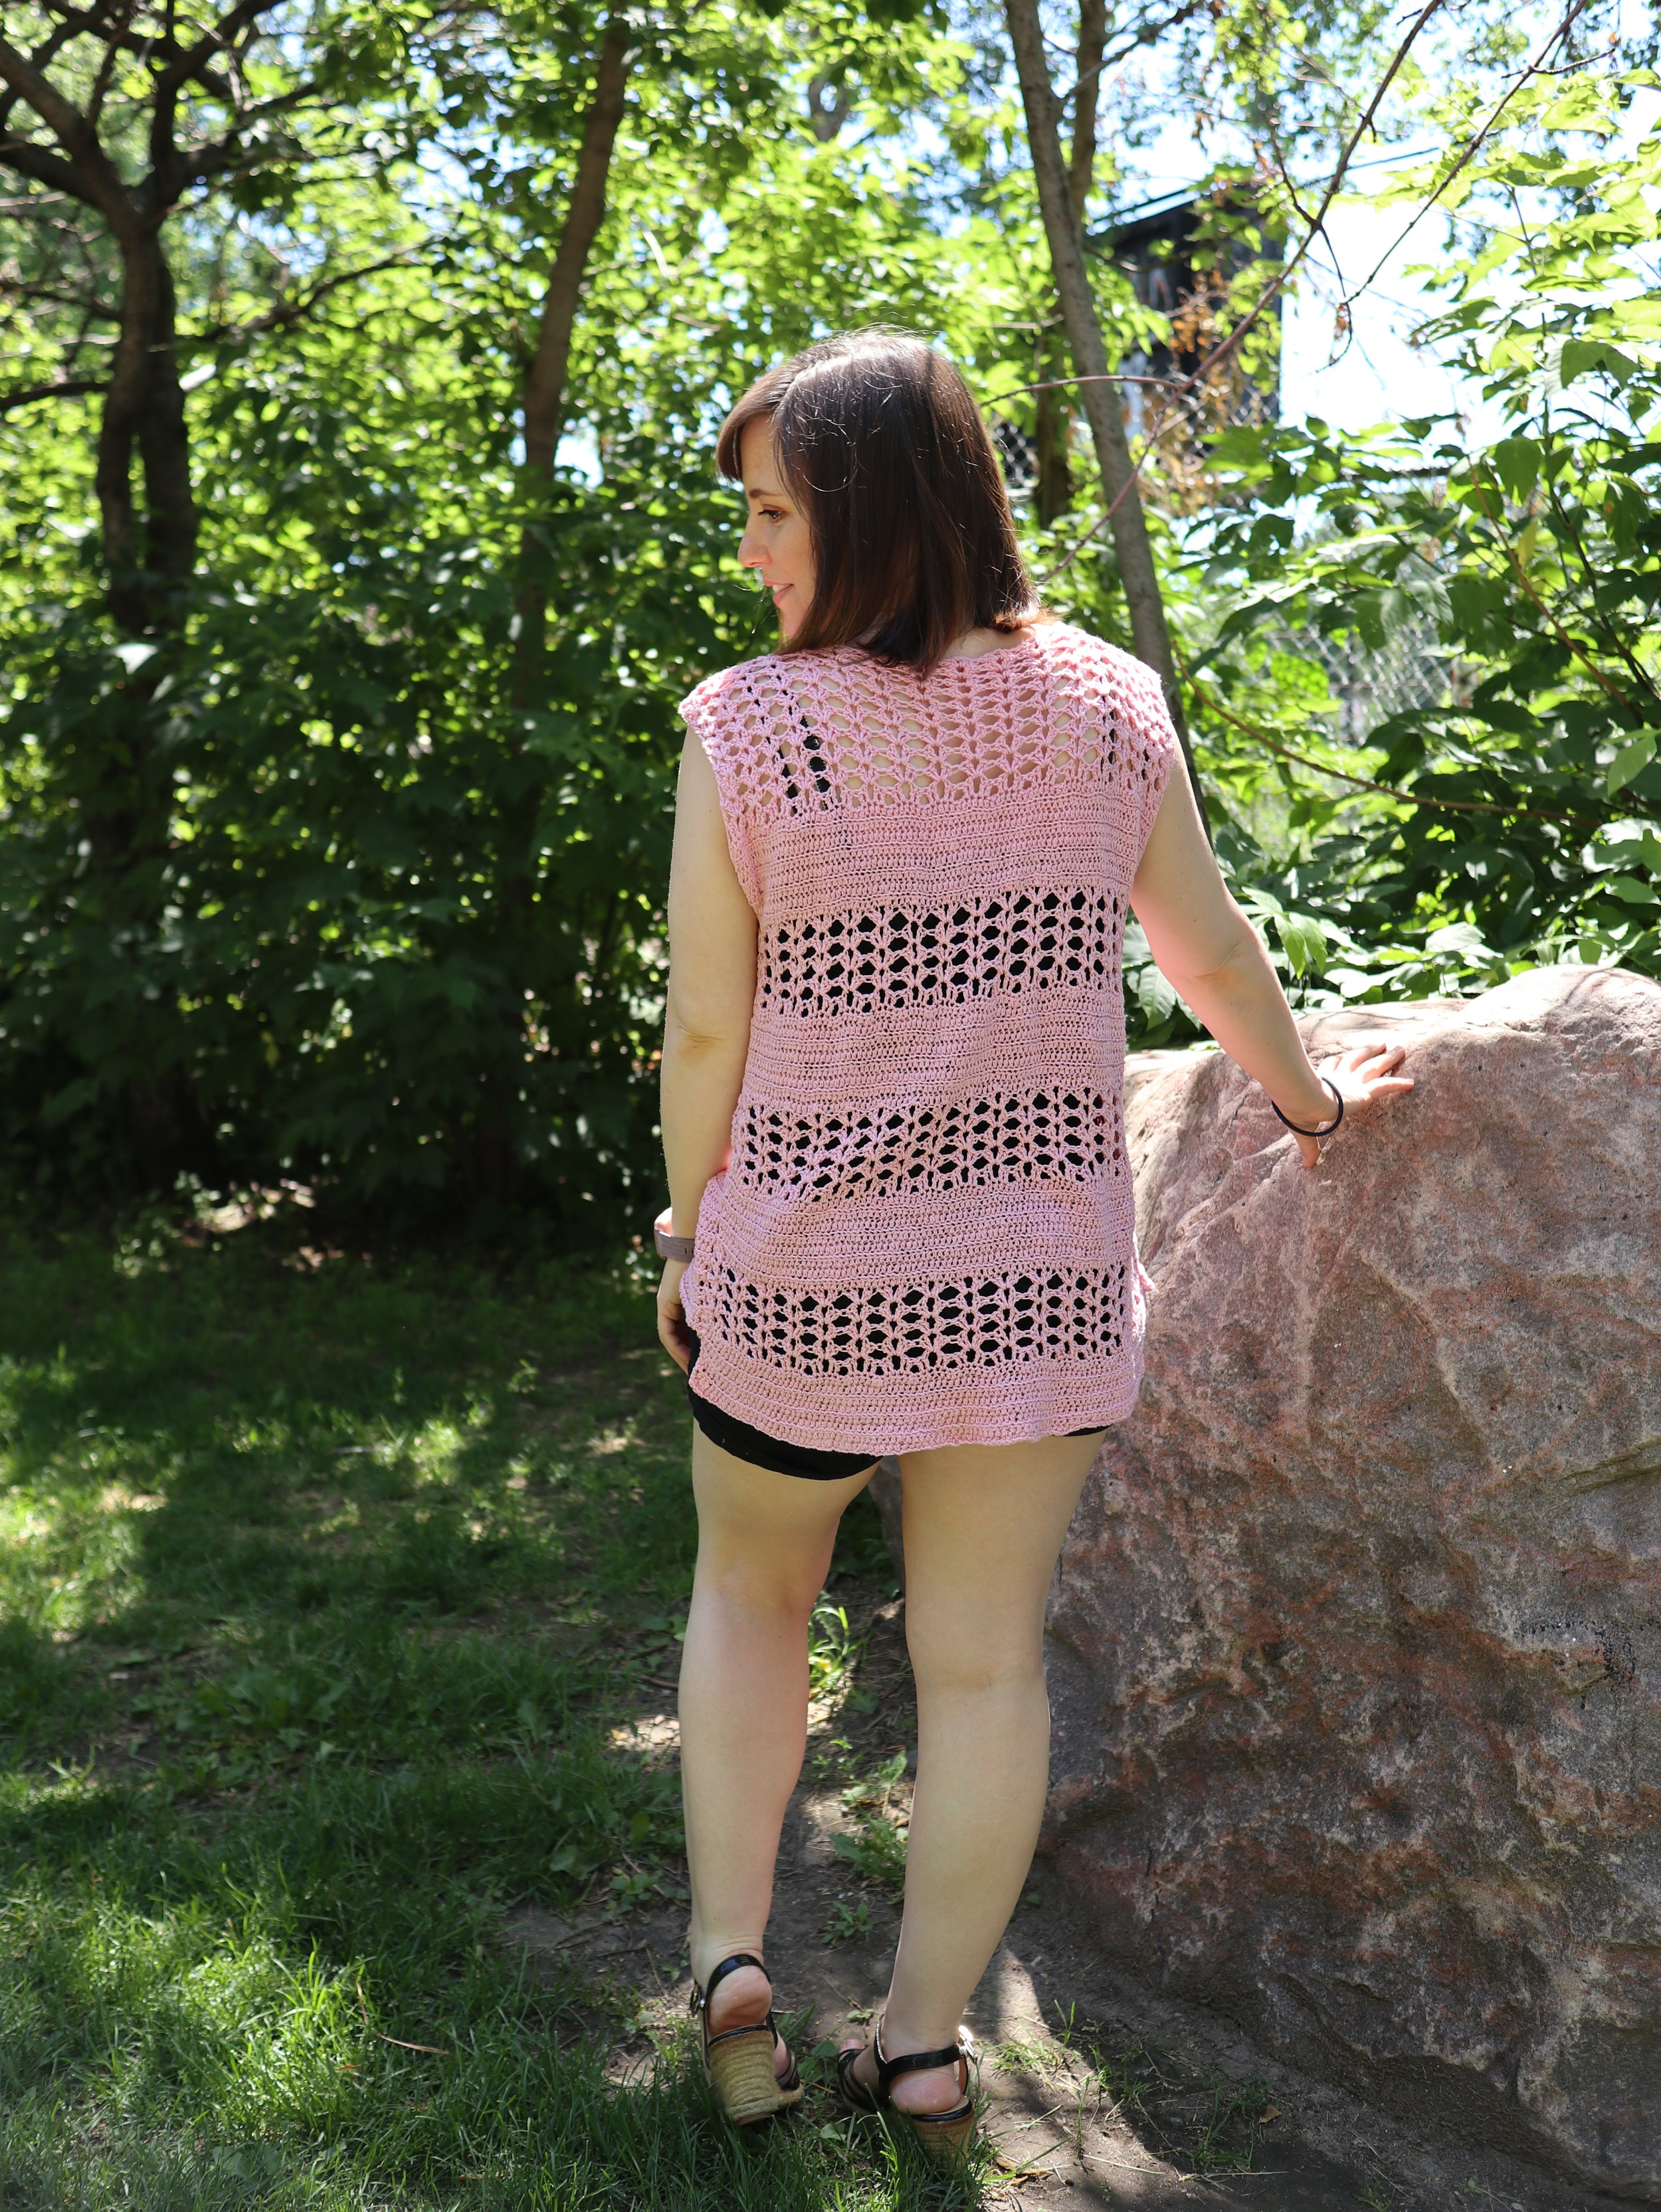
BACK STYLE 2:
The back is same length as front in STYLE 2.
If you want a back that is the same length as the front, simply stop crocheting the lace panel at 7 rows of lace instead of 10 rows of lace. This should make a hemline that is even.
BACK STYLE 3:
Some people may not like the open weave of the back of the STYLE 1 and STYLE 2, so if you want your back to be the same as the front, simply make 2 of FRONT. If you still want the back 2 inch longer than front, simply add 5 extra rows of hdcblo to backside.
BACK STYLE 4:
If you like the back of the garment the best, simply make 2 of the backside. For the asymmetrical back for STYLE 4, either begin the backside of garment by crocheting 5 extra rows of hdcblo OR for the front crochet only 7 rows of lace for the final lace section and 10 rows of lace for the back. Either of these options would create a top like the picture, but with the back pattern.

Blocking:
I know a lot of crochet items do not need blocking, but this top definitely benefits from blocking. The hdcblo lay much flatter and the entire top has a much better drape.
I prefer wet blocking my garments to make sure my yarn is settling properly. However, you can block however you prefer. Just stretch the garment to the sizes indicated in ‘Finished Garment (before seaming)’ above and pin down.
After the top dries, you will notice that the lace panel at the top will pull in a bit from the blocked size, that is exactly what it should do to create the shape of the top.
Seaming:
Neck Opening:
Because the lace portion has a smaller gauge than the hdcblo, it gives the top a natural pull in at the top lace panel to create the shape of the top. After blocking, attach garment together at shoulders, seam 4(4.5, 4.5, 6, 6) lace repeats together, neck opening should be approx. 10 - 12 inches wide depending on your preference.
Sides:
Attach sides together 9(9, 9, 10, 10) inches from shoulder seam and, if using the asymmetrical design, attach bottom of front 2” from bottom of back. If your front and back are even, simply attach the bottom corners together. Seam down both sides. This will give you a 9(9, 9, 10, 10) inch arm opening for your garment.
IF YOU LIKED THIS PATTERN, PLEASE SUPPORT ME ON PATREON OR BUY ME A COFFEE!

BUY ME A COFFEE
Support me on Patreon
I love to see what you create!
Please share your creations with the community on social media by tagging @ravinsekaidesigns and hashtag #theoptionstop
I can’t wait to see the beautiful things you come up with!
Facebook: Ravin Sekai Designs
Ravelry: RavinSekai
Instagram: @ravinsekaidesigns
Pinterest: Ravin Sekai Designs
Patreon: Ravin Sekai Designs
Here’s to some Fall Styling!!