
Beginner Crochet Tank Top ~ The Lennon Tank ~ Free Pattern

A Beginner Crochet Tank Top ~ The Lennon Tank ~ is quick and easy crochet top that can be easily modified to fit your specific body measurements.
Read through my inspiration and design process, scroll down for the Free Pattern or purchase the Full Color coded Printable PDF Here!

Inspiration + Design
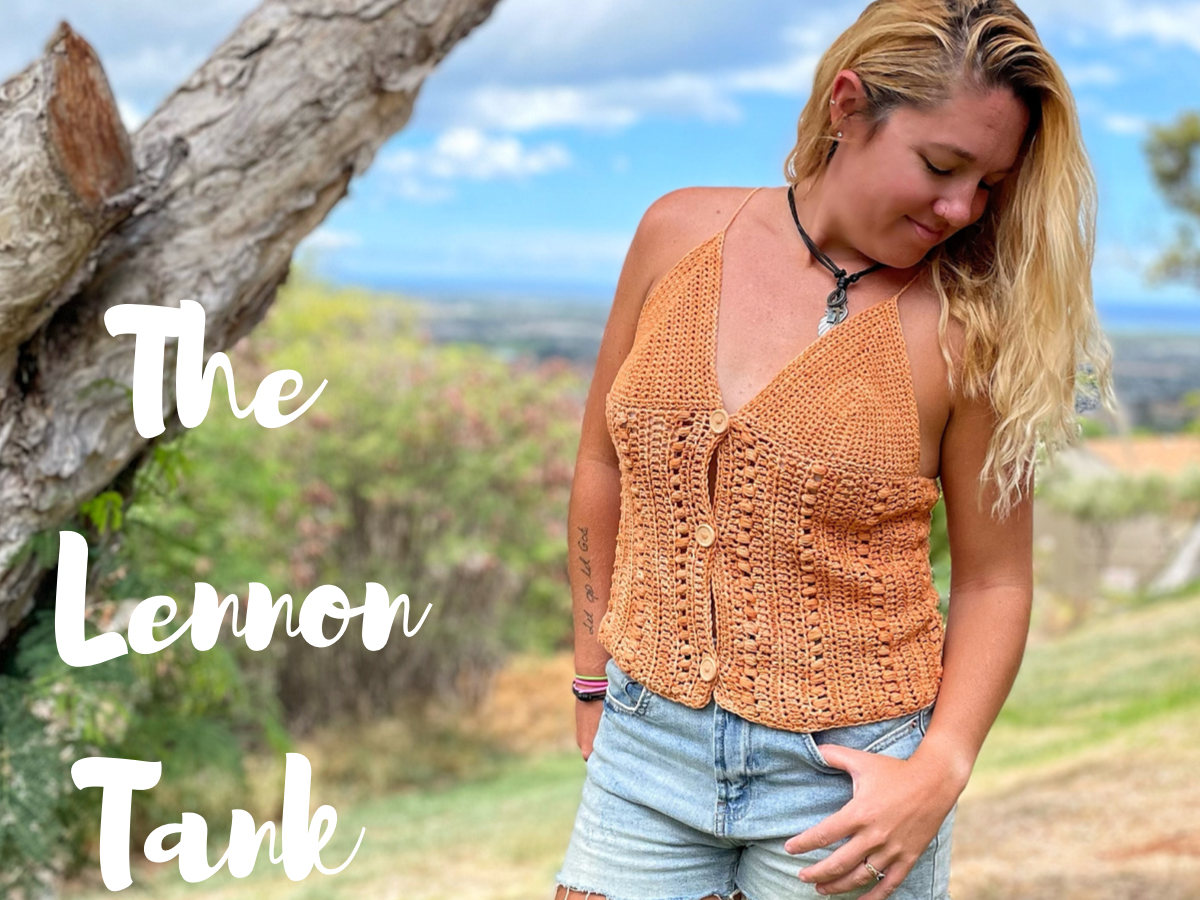
It’s hard to believe, but it’s already time for my last summer design of the year. And I know I say this all the time, but The Lennon Beginner Crochet Tank Top is one of my favorites and I’m sure you are going to love it too!
I knew for this top, I wanted to try something a little bit different than how I normally make my tank tops. I wanted it to button up in the front and have vertical lines rather than the standard horizontal ones, which are so much more flattering in my opinion. I also knew exactly which stitch combination I wanted to use, the extended half double crochet and the puff stitch! Together, these stitches make the perfect fun and flirty boho top!

The Beginner Crochet Tank Top that can be customized to YOU!
Another great thing about how this tank is designed is that can easily be modified and adjusted to your specific needs. The main body is made in one piece following a five row repeat, so if you need it to be a little wider, just add a few more rows.
The same thing can be applied to the length of the tank top. If you want more of a cropped version, reduce the amount of stitches in your foundation row. If you want it to be longer, simply add stitches to your foundation row. As long as you end up with an even number of stitches, you can make your tank top any length.
And, the cups for this beginner crochet tank top are made to your individual measurements. That way, it will ensure the perfect fit and coverage that you want.

The Yarn
For this Beginner Crochet Tank Top, I chose to use “LongHorn”, another one of our custom color-ways from our Hobo Chic #1 Yarn Collection. It is dyed on our Category 3 Cotton/Bamboo Blend, which is my absolute favorite fiber to work with.
The Bamboo creates the best drape of any fiber I have ever worked with and makes a super soft and breathable fabric.
If you want to try out any of our 8 custom color-ways, including “LongHorn”, they are available “dyed to order” in my shop now!
Other Suitable Yarn Substitutes are:
~Lion Brand Coboo
~Lion Brand Truboo
~ Crochet.com CotLin

Pattern
~Purchase the Color Coded Printable PDF Here.
~Save it to your Ravelry Here.

To Sum it up:
The Lennon Tank is a beginner crochet tank top that is made in two pieces; one long rectangle and two cups. Each of these pieces can be easily modified to fit your specific measurements.
Yarn
Below is the approximate yardage for all sizes:
***Yardage will vary due to the customization of individual cups.***
| Size | XS | S | M | L | XL | 2X | 3X | 4X | 5X |
| Approx Yds | 450 | 525 | 600 | 700 | 750 | 850 | 900 | 1000 | 1075 |
Notions
-Size H (5.0 mm) Hook & Size G (4.25 mm) Hook
-Yarn Needle
-Stitch Markers
-Buttons
Gauge
14 Ehdc and 8 pattern rows (2 Ehdc Rows + 1 Ps Row + 4 Ehdc Rows + 1 Ps Row) = 4”
Sizing
This Beginner Crochet Tank Top is made to be fitted. The measurements are Finished garment sizes. When choosing your size, find the bust measurement that equals your approximate bust measurement and make that size.
| Size | XS | S | M | L | XL | 2X | 3X | 4X | 5X |
| Bust | 30” | 34” | 38” | 42” | 46” | 50” | 54” | 58” | 62” |
Abbreviations Used
Ch- Chain
Yo- Yarn Over
St- Stitch
Sl St- Slip Stitch
Sc- Single Crochet
Ehdc- Extended Half Double Crochet
Ps- Puff Stitch
Pattern Notes
-Tank is made from one rectangle and 2 separate cups.
-The cup portion of the tank is made using your specific measurements to ensure a proper fit.
-Ch 2 Does NOT count as a Stitch throughout.
-To adjust the length of the tank, simply add or subtract stitches from your beginning chain, making sure to use an even number.
-Total Stitches are indicated between [ ]
Special Stitches
Extended Half Double Crochet-Yo, insert hook into the next St. Draw up a loop (3 loops on hook). Yo, pull through one loop. Yo, pull through remaining 3 loops.

The Lennon Tank
With Size H (5.0 mm) hook
Starting with the Cups (make 2)
The cup portion of this top is based off of your specific measurements.
To begin, Ch the amount that approximately measures the length from the bottom of your breast to the center of your breast.
Row 1: Sc in the 2nd Ch from the hook and in each Ch until you get to the last Ch. Work 3 Sc in the last Ch, and place a stitch marker in the center stitch of these 3 Sc. This is your middle stitch. You will now be working on the opposite side of your chain. Sc in each Ch across. You should now have the same amount of stitches on each side of the Stitch marker.


Row 2: Ch 1, Turn. Sc in each stitch across until you reach the Stitch Marker. Work 3 Sc in this St and move the stitch marker up to the center of these 3 stitches. Continue to Sc in each of the remaining stitches.
Continue to repeat row 2 until it starts to resemble the cups of a bra and is your desired size.
Once your cups have reached desired size, do not finish off. Turn your work and Sc along the bottom edge of the cups.
Finish Off leaving a long tail for seaming.
Main Body – With Size H (5.0 mm) Hook
A Full Stitch Tutorial to walk you through the tricky parts of the pattern is available in the Printable PDF.
Sizes XS & 2XL Only
Row 1: Ch 38(44), Ehdc in the 3rd Ch and each Ch across. [36(42) Ehdc]
Row 2: Ch 2, Turn. Ehdc in the first St and each St across. [36(42) Ehdc]
Row 3: Ch 2, Turn. Ehdc in the first St and each St across. [36(42) Ehdc]
Row 4: Ch 1, Turn. Skip the first St. (where the Ch 1 is) *Ps next, don’t forget your Ch 1 to secure the Ps after each one, skip the next St*. Repeat from * to * across ending with a (Ps, Ch 1) in the last St. [18(21) Ps]
Row 5: Ch 2, Turn. (You will now technically have 3 Ch stitches, the Ch 1 closing Ch and the 2 turning chains.) Ehdc in the first St, which is the Ps closing Ch from the previous row. Ehdc in each St across. [36(42) Ehdc]
Row 6-8: Ch 2, Turn. Ehdc in the first St and each St across. [36(42) Ehdc]
Repeat rows 4-8 until you have a total of 62(102) Rows.
Do not finish off, Turn your work and Sc around the entire rectangle.
***Tip- It is helpful to place 3 Sc stitches in each corner stitch to prevent curling.***
Finish off & Continue to Construction
Sizes S & 3XL Only
Row 1: Ch 40(44), Ehdc in the 3rd Ch and each Ch across. [36(38, 38, 40, 40, 42, 42, 44, 44) Ehdc]
Row 2: Ch 2, Turn. Ehdc in the first St and each St across. [38(42) Ehdc]
Row 3: Ch 1, Turn. Skip the first St. (where the Ch 1 is) *Ps next, don’t forget your Ch 1 to secure the Ps after each one, skip the next St*. Repeat from * to * across ending with a (Ps, Ch 1) in the last St. [19(21) Ps]
Row 4: Ch 2, Turn. (You will now technically have 3 Ch stitches, the Ch 1 closing Ch and the 2 turning chains.) Ehdc in the first St, which is the Ps closing Ch from the previous row. Ehdc in each St across. [38(42) Ehdc]
Row 5-7: Ch 2, Turn. Ehdc in the first St and each St across. [38(42) Ehdc]
Repeat rows 3-7 until you have a total of 70(110) Rows.
Do not finish off, Turn your work and Sc around the entire rectangle.
***Tip- It is helpful to place 3 Sc stitches in each corner stitch to prevent curling.***
Finish off & Continue to Construction
Sizes M, L, 4XL & 5XL Only
Row 1: Ch 40(42, 46, 46), Ehdc in the 3rd Ch and each Ch across. [38(40, 44, 44) Ehdc]
Row 2: Ch 1, Turn. Skip the first St. (where the Ch 1 is) *Ps next, don’t forget your Ch 1 to secure the Ps after each one, skip the next St*. Repeat from * to * across ending with a (Ps, Ch 1) in the last St. [19(20, 22, 22) Ps]
Row 3: Ch 2, Turn. (You will now technically have 3 Ch stitches, the Ch 1 closing Ch and the 2 turning chains.) Ehdc in the first St, which is the Ps closing Ch from the previous row. Ehdc in each St across. [38(40, 44, 44) Ehdc]
Row 4-6: Ch 2, Turn. Ehdc in the first St and each St across. [38(40, 44, 44) Ehdc]
Repeat rows 2-6 until you have a total of 78(88, 118, 128) Rows.
Do not finish off, Turn your work and Sc around the entire rectangle.
***Tip- It is helpful to place 3 Sc stitches in each corner stitch to prevent curling.***
Finish off & Continue to Construction
Size XL Only
Row 1: Ch 42, Ehdc in the 3rd Ch and each Ch across. [40 Ehdc]
Row 2: Ch 2, Turn. Ehdc in the first St and each St across. [40 Ehdc]
Row 3: Ch 2, Turn. Ehdc in the first St and each St across. [40 Ehdc]
Row 4: Ch 2, Turn. Ehdc in the first St and each St across. [40 Ehdc]
Row 5: Ch 1, Turn. Skip the first St. (where the Ch 1 is) *Ps next, don’t forget your Ch 1 to secure the Ps after each one, skip the next St*. Repeat from * to * across ending with a (Ps, Ch 1) in the last St. [20 Ps]
Row 6: Ch 2, Turn. (You will now technically have 3 Ch stitches, the Ch 1 closing Ch and the 2 turning chains.) Ehdc in the first St, which is the Ps closing Ch from the previous row. Ehdc in each St across. [40 Ehdc]
Row 7-9: Ch 2, Turn. Ehdc in the first St and each St across. [40 Ehdc]
Repeat rows 5-9 until you have a total of 94 Rows.
Do not finish off, Turn your work and Sc around the entire rectangle.
***Tip- It is helpful to place 3 Sc stitches in each corner stitch to prevent curling.***
Finish off & Continue to Construction
Construction
With your rectangle laying in front of you, fold the left and the right sides to meet in the middle. Then line your cups up with the front middle of the tank and sew them on using the mattress stitch.


Straps
With your tank laying in front of you, decide where you want to position the straps on the back of your top. It is helpful to count the same amount of stitches from each cup to where you place the straps. Place stitch markers in these 2 stitches to mark where your straps will go.
Using the Size G hook, join yarn to the center stitch on the top of the left cup. Chain the amount needed to obtain the length of strap desired. Then join to the back of the tank with a slip stitch in the marked stitch. Sc in the same St as join and in each St until you reach the second stitch marker. Then chain the same amount of chains as the first strap, and join to the center stitch of the other cup.
For a thicker strap- Join yarn to the back of the top. Chain the amount needed to obtain the length of strap desired. Then join to the center stitch of the cup with a slip stitch. Ch 1, turn, and Sc in each Ch across. Join to the back. Sc in the same St as join and in each St until you reach the second stitch marker. Then chain the same amount of chains as the first strap, and join to the center stitch of the other cup. Ch 1, turn and Sc in each Ch across. Then join to the back.
To Finish off, attach desired amount of buttons on to the front of tank.


Tie off, tuck in those ends and enjoy your new Lennon Tank
Make sure to pin this pattern for later, and if you do make one tag me @Cactus.and.lace on Instagram and use the hashtag #CactusandlaceDesigns . I can’t wait to see your Lennon Tanks, and I would love to share your pics! 🌵
Other Free Crochet Patterns You Might Love


The Sprinter Tank// The Haven Tank// The Aurelia Top// The Ivy Top