The Electric Sun Tee Crochet Pattern
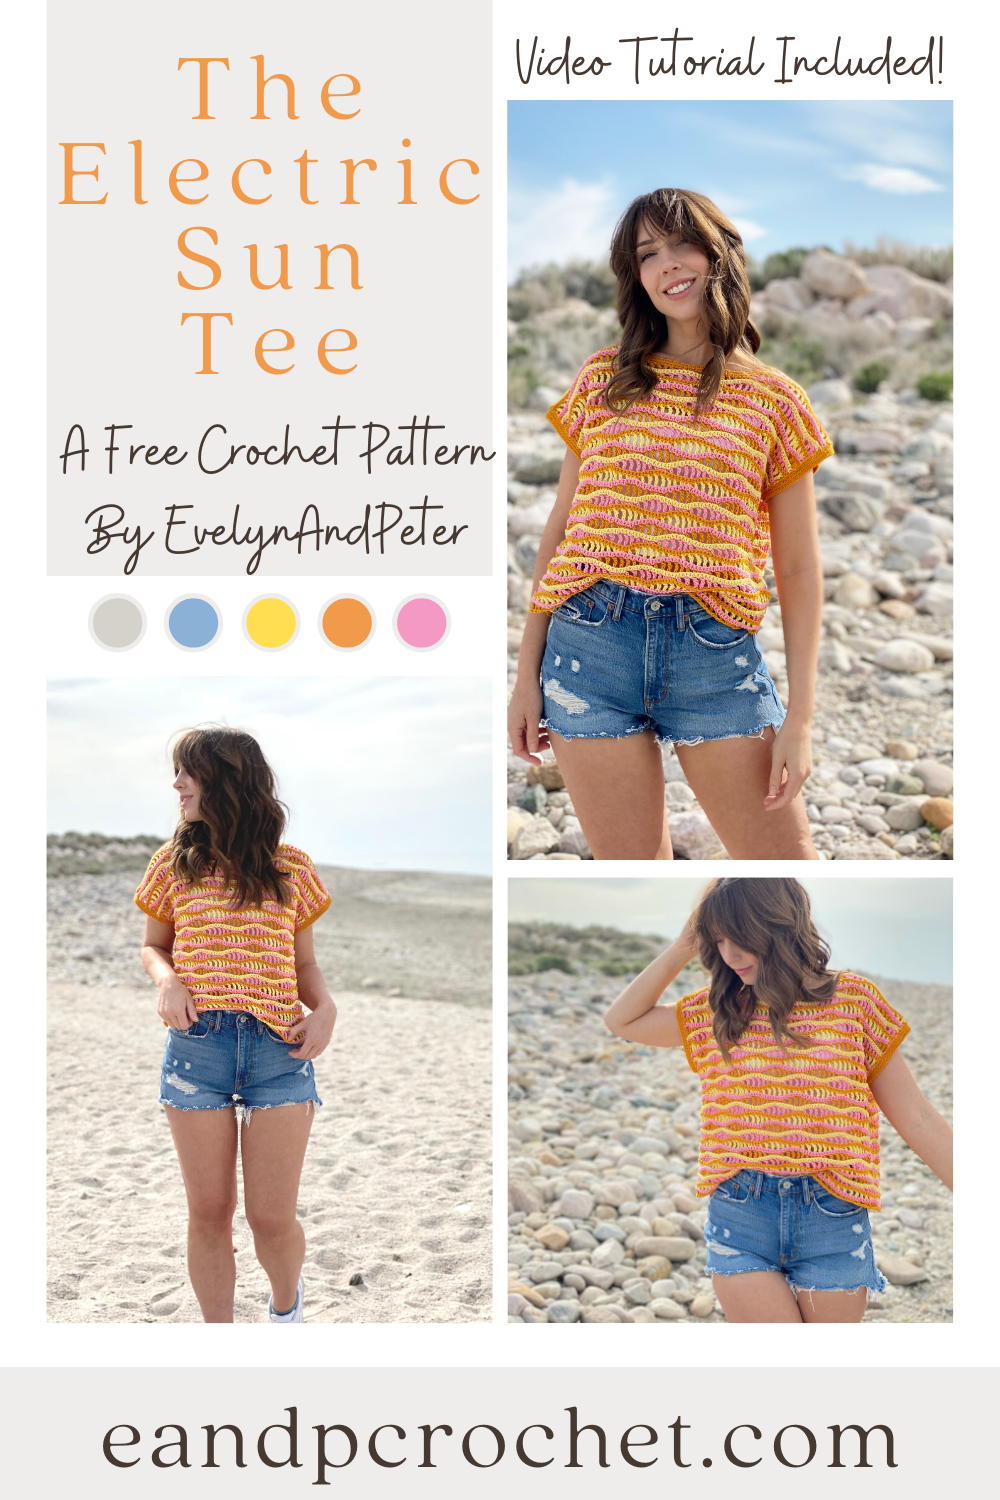
Stepping out of my color comfort zone with The Electric Sun Tee Crochet Pattern! This oversized top was so fun to make! I used 3 different colors for mine and switched them out with each row. The stitches create a really cool wave effect!
This top is written with plenty of positive ease for a very oversized look! Because of the oversized fit, each of the 3 sized can fit a wide range of body shapes and sizes! You can also make your top longer if you want by adding as many row repeats as you want before you start the shaping of the neckline. Be sure to add the same amount on both panels!
Make sure you do not cut your yarn when you change colors. If you do, you will have a ton of ends to weave in! I kept my yarn attached with each color change. Then, when I come back to that color I simply picked it back up and switched colors. This leaves small floats along the outer edge of your panel. When we sew the front and back panel together, we will sew over the floats and they will be hidden within the seam on the inside of the shirt! And TaDa! You just save yourself a ton of work!
The first few rows might be a little tricky to remember the stitch repeat. If you need some extra help, be sure to check out my video tutorial! If you have a question, it is most likely covered in the video!
If you like this top, then be sure to check out some of my other ones!
Links:
-
The Electric Sun Tee Crochet Pattern is available as a Lion Brand kit! The kit comes with all the yarn you need + the PDF digital download of the pattern. You can even customize your yarn color!
-
I have a full video tutorial available for The Electric Sun Tee Crochet Pattern! Be sure to check it out if you are more of a beginner!
-
Grab The Electric Sun Tee low cost ad-free printable PDF from ETSY or RAVELRY!
Description:
Toss on this colorful and oversized retro style tee this summer! The open stitches make this breezy tee perfect to use as a poolside cover up or to just pair with your favorite shorts. The bright colors and stripes make the texture pop!
Materials:
-
Worsted (4) Weight Yarn, Lion Brand 24/7 Cotton in Goldenrod (2, 3, 4 skeins or 300, 430, 560 yards), Pink(2, 3, 3 skeins or 260, 390, 520 yards) and Lemon (2, 3, 3 skeins or 260, 390, 520 yards)
-
G/4.00mm Crochet Hook
-
Yarn Needle
-
Scissors
-
Measuring Tape
-
Stitch Markers (2)
Gauge:
Ch 18 and work rows 1-12 of pattern= 4X4” Square
Sizes:
XS/S/M(L/XL/2X/3X, 4X/5X)
Finished Measurements:


Notes:
-
This top is worked from the bottom up in 2 panels.
-
This top is written very oversized with plenty of positive ease. Due to the amount of stitches in the pattern repeat, it is written in 3 combined sizes- XS/S/M, L/XL/2X/3X and 4X/5X.
-
The sleeves and neckline trim are added last.
-
You can adjust the length of your top by adding or removing rows before the neckline shaping. Take note that this will change the yardage requirement listed above.
-
Do not cut your yarn after each row. You will pick your yarn back up after each color change and carry it up the side of your panel as you go. The floats will be hidden when you sew your top together and add the trim.
-
You will change your color at the end of each row. To do this, drop the working yarn and do the last pull through of the last stitch with your new yarn color. You will repeat changing Color A, Color B and then Color C throughout.
Video Link:
Check out the full video tutorial here!
Stitches and Abbreviations (US Terms):
Ch(s)- Chain(s)
RS- Right Side
St(s)- Stitch(es)
Sc- Single Crochet
Sk- Skip
Hdc- Half Double Crochet
Dc- Double Crochet
Tr- Treble Crochet
Sp- Space
BLO- Back Loop Only
Color Guide-
Color A- Goldenrod
Color B- Pink
Color C- Lemon
The Electric Sun Tee Crochet Pattern:
Front Panel-
Note- You will change color at the end of every row in this order- Color A, Color B, Color C. Repeat throughout both panels. Do not cut yarn.
With Color A- Ch 98(130, 162)
Row 1(RS): 1 Sc in the second Ch from the hook, 1 Sc in next Ch, *Ch1, Sk next Ch, 1 Hdc in next Ch, Ch 1, Sk next Ch, 1 Dc in next Ch, Ch 1, Sk next Ch, 1 Tr in next Ch, Ch 1, Sk next Ch, 1 Tr in next Ch, Ch 1, Sk next Ch, 1 Dc in next Ch, Ch 1, Sk next Ch, 1 Hdc in next Ch, Ch 1, Sk next Ch**, 1 Sc in next 3 Chs, repeat from * across row, ending last repeat at **, 1 Sc in last 2 Chs, turn. (97(129, 161)Sts)
Row 2: Ch 1, 1 Sc in each St and Ch Sp across the row, turn. (97(129, 161) Sc)
Row 3: Ch 4 (counts as 1 Tr here and throughout), *1 Tr (BLO) in next, Ch 1, Sk 1, 1 Dc (BLO) in next, Ch 1, Sk 1, 1 Hdc (BLO) in next, Ch 1, Sk 1, 1 Sc (BLO) in next 3 Sts, Ch 1, Sk 1, 1 Hdc (BLO) in next, Ch 1, Sk 1, 1 Dc (BLO) in next, Ch 1, Sk 1**, 1 Tr (BLO) in next, Ch 1, Sk 1, repeat from * across row, ending last repeat at **, 1 Tr (BLO) in final 2 Sts, turn. (97(129, 161) Sts)
Row 4: Repeat Row 2.
Row 5: Ch 1, 1 Sc (BLO) in first 2 Sts, *Ch 1, Sk 1, 1 Hdc (BLO) in next, Ch 1, Sk 1, 1 Dc (BLO) in next, Ch 1, Sk 1, (1 Tr (BLO) in next, Ch 1, Sk 1) twice, 1 Dc (BLO) in next, Ch 1, Sk 1, 1 Hdc (BLO) in next, Ch 1, Sk 1**, 1 Sc (BLO) in next 3 Sts, repeat from * across row, ending last repeat at **, 1 Sc (BLO) in final 2 Sts, turn. (97(129, 161) Sts)
Rows 6-49(53, 61): Repeat Rows 2-5.
You will now be splitting the neckline-
Row 50(54, 62): Ch 1, 32(48, 64) Sc (working in Sts and Ch Sps), turn. (32(48, 64) Sc)
Row 51(55, 63): Ch 4 (counts as 1 Tr), Sk 1 (do not Ch 1), 1 Dc (BLO) in next, Ch 1, Sk 1, 1 Hdc (BLO) in next, Continue with regular St repeat across row ending with 2 Tr (BLO) in final 2 Sts, turn. (31(47,63) Sts)
Row 52(56, 64): Ch 1, 1 Sc in each St and Ch Sp across until 2 Sts remain, Sc2tog, turn. (30(46, 62) Sc)
Row 53(57, 65): Ch 1, 1 Hdc (BLO) in first, Ch 1, Sk 1, 1 Dc (BLO) in next St, Continue with regular St repeat across row ending with 1 Sc (BLO) in last 2 Sts, turn. (30(46, 62) Sts) Note- no decrease in this row
Row 54(58, 66): Ch 1, 1 Sc in each St and Ch Sp across until 1 Ch Sp and 1 St remains, Sk over last Ch Sp, 1 Sc in final St, turn. (29(45, 61) Sc)
Row 55(59, 67): Ch 1, Hdc2tog (BLO), Ch 1, Sk 1, 1 Sc (BLO) in next 3 Sts, Ch 1, Sk 1, 1 Hdc (BLO) in next, continue with St repeat across row, ending with 2 Tr (BLO) in final 2 Sts, turn. (28(44, 60) Sts)
Row 56(60, 68): Repeat Row 54(58,66). (27(43, 59) Sc)
Tie off.
Opposite Shoulder-
Lay your front panel RS down. We will now be working the second shoulder/neckline area. Count 32(48, 64) Sts from the left (unworked side) in towards the center of the shirt and join with a Sl St.
Row 50(54, 62): Ch 1, 1 Sc in each St and Ch Sp across row, turn. (32(48, 64) Sc)
Row 51(55, 63): Ch 4 (counts as 1 Tr), 1 Tr (BLO) in next, Ch 1, Sk 1, 1 Dc (BLO) in next, continue with stitch repeat across row until 2 Sts remain, Sk next St (do not Ch 1), 1 Tr in last (BLO), turn. (31(47,63) Sts)
Row 52(56, 64): Ch 1, Sc2tog, 1 Sc in each remaining St and Ch Sp across row, turn. (30(46, 62) Sc)
Row 53(57, 65): Ch 1, 1 Sc (BLO) in first 2 Sts, Ch 1, Sk 1, 1 Hdc (BLO) in next, Ch 1, Sk 1, 1 Dc (BLO) in next, continue with stitch repeat across row, ending with 1 Hdc (BLO) in final St, turn. (30(46, 62) Sts) Note- no decreases in this row
Row 54(58, 66): Ch 1, 1 Sc in first St, Sk over next Ch Sp (do not Ch 1), 1 Sc in each remaining St and Ch Sp across row, turn. (29(45, 61) Sc)
Row 55(59, 67): Ch 4 (counts as Tr), 1 Tr (BLO) in next, Ch 1, Sk 1, 1 Dc (BLO) in next, Ch 1, Sk 1, 1 Hdc (BLO) in next, continue with St repeat across row until 2 Sts remain, Hdc2tog, turn. (28(44, 60) Sts)
Row 56(60, 68): Repeat Row 54(58, 66). (27(43, 59) Sc)
Tie off.
Back Panel:
With Color A- Ch 98(130, 162) and repeat Rows 1-49(53, 61) of front panel.
Rows 50(54, 62)-55(59, 67): Continue repeating Rows 2-5 of front panel ending on a Row 3 repeat.
Shoulder Shaping-
Row 56(60, 68): Ch 1, 27(43, 59) Sc across working in Sts and Ch Sps. (27(43, 59) Sc)
Tie off, leave a long tail for sewing last row of back panel to last row of front panel.
Opposite Side-
Lay your back panel RS down. We will now be working the second shoulder shaping area. Count 27(43, 59) Sts from the left (unworked side) in towards the center of the shirt and join with a Sl St.
Row 56(60, 68): Ch 1, 1 Sc in same St and each St and Ch Sp across row. (27(43, 59) Sc)
Tie off, leave a long tail for sewing last row of back panel to last row of front panel.
Join Panels:
Place your front and back panel together, RS facing. Sew the last row of the back panel to the last row of the front panel at the shoulder. You can use a needle and sew across to join or use your hook and Sl St across. Repeat on other shoulder using the same method.
Now, we need to measure out the arm hole opening. Use your measuring tape and measure from the shoulder seam down the side of your top a total of 8(9,10)” and place a SM. Make sure both panels are lined up evenly and that your SM is placed through both panels. We will be leaving this space unworked.
Next, we need to sew the sides of the top together. Using yarn color A, sew from the bottom hem up the side until you reach the SM. I used my hook and Sl St up. Make sure that when you are seaming up the side that you work your Sts over the “floats” from the color changes so that they are hidden on the inside of your work when we are finished. Tie off and repeat the same process on the opposite side.
Sleeves:
With your top RS out, join Color A with a Sl St at the underarm just to the left of the side seam.
Round 1: Ch 1, Sc evenly around the arm hole opening, Sl St to the first Sc made to join. Note- St count is not crucial here, just try to make your Sts even around. Don’t forget to work over the “floats” to hide them.
Round 2: Ch 1, 1 Sc (BLO) in each St around, Sl St to join.
Round 3: Repeat Round 2.
Tie off and repeat on the other side. Be sure to make the same amount of Sts as the first sleeve.
Neckline:
With your top RS out, join Color A with a Sl St to any spot at the neckline.
Round 1: Ch 1, Sc evenly around the opening, Sl St to the first Sc made to join. Note- St count is not crucial here, just try to make your Sts even around. Don’t forget to work over the “floats” to hide them.
Round 2: Ch 1, 1 Sc (BLO) in each St around, Sl St to join.
Tie off, weave in any ends.


