
The Dead of Winter Capelet – Free Crochet Pattern is copyrighted by I Need It Crochet. You may not copy, share, change, or sell the pattern itself. Also, you may not claim this pattern as your own. All pictures contained in this pattern fall under the copyright and may not be used.
Finished items made from the Dead of Winter Capelet – Free Crochet Pattern belong to you and you may do what you wish with them. If you choose to sell them on Etsy I would very much appreciate it if you credited me as the pattern designer.


Or… Just scroll down to see it for free!
When I began crocheting, I was amazed at the amount of patterns out there for winter items such as hats, scarves, mitts, etc. But I was also struck with a problem. While beautiful and unique in their own ways, most of those winter items were not suitable for our cold weather climate.
There are a few very legitimate reasons for this. For one, many designers don’t live in a region where it gets as cold as it does here. I happen to live in one of the coldest climates in North America. An average winter day will bring us temperatures of -25 to -30 Celcius. And on the colder days, the thermometer will dip to -45!
Another reason for the lack of cold weather patterns is that solid stitches can be well… boring. A basic hdc stitch is pretty warm, especially when done in a thick yarn, but it doesn’t have a lot of character.
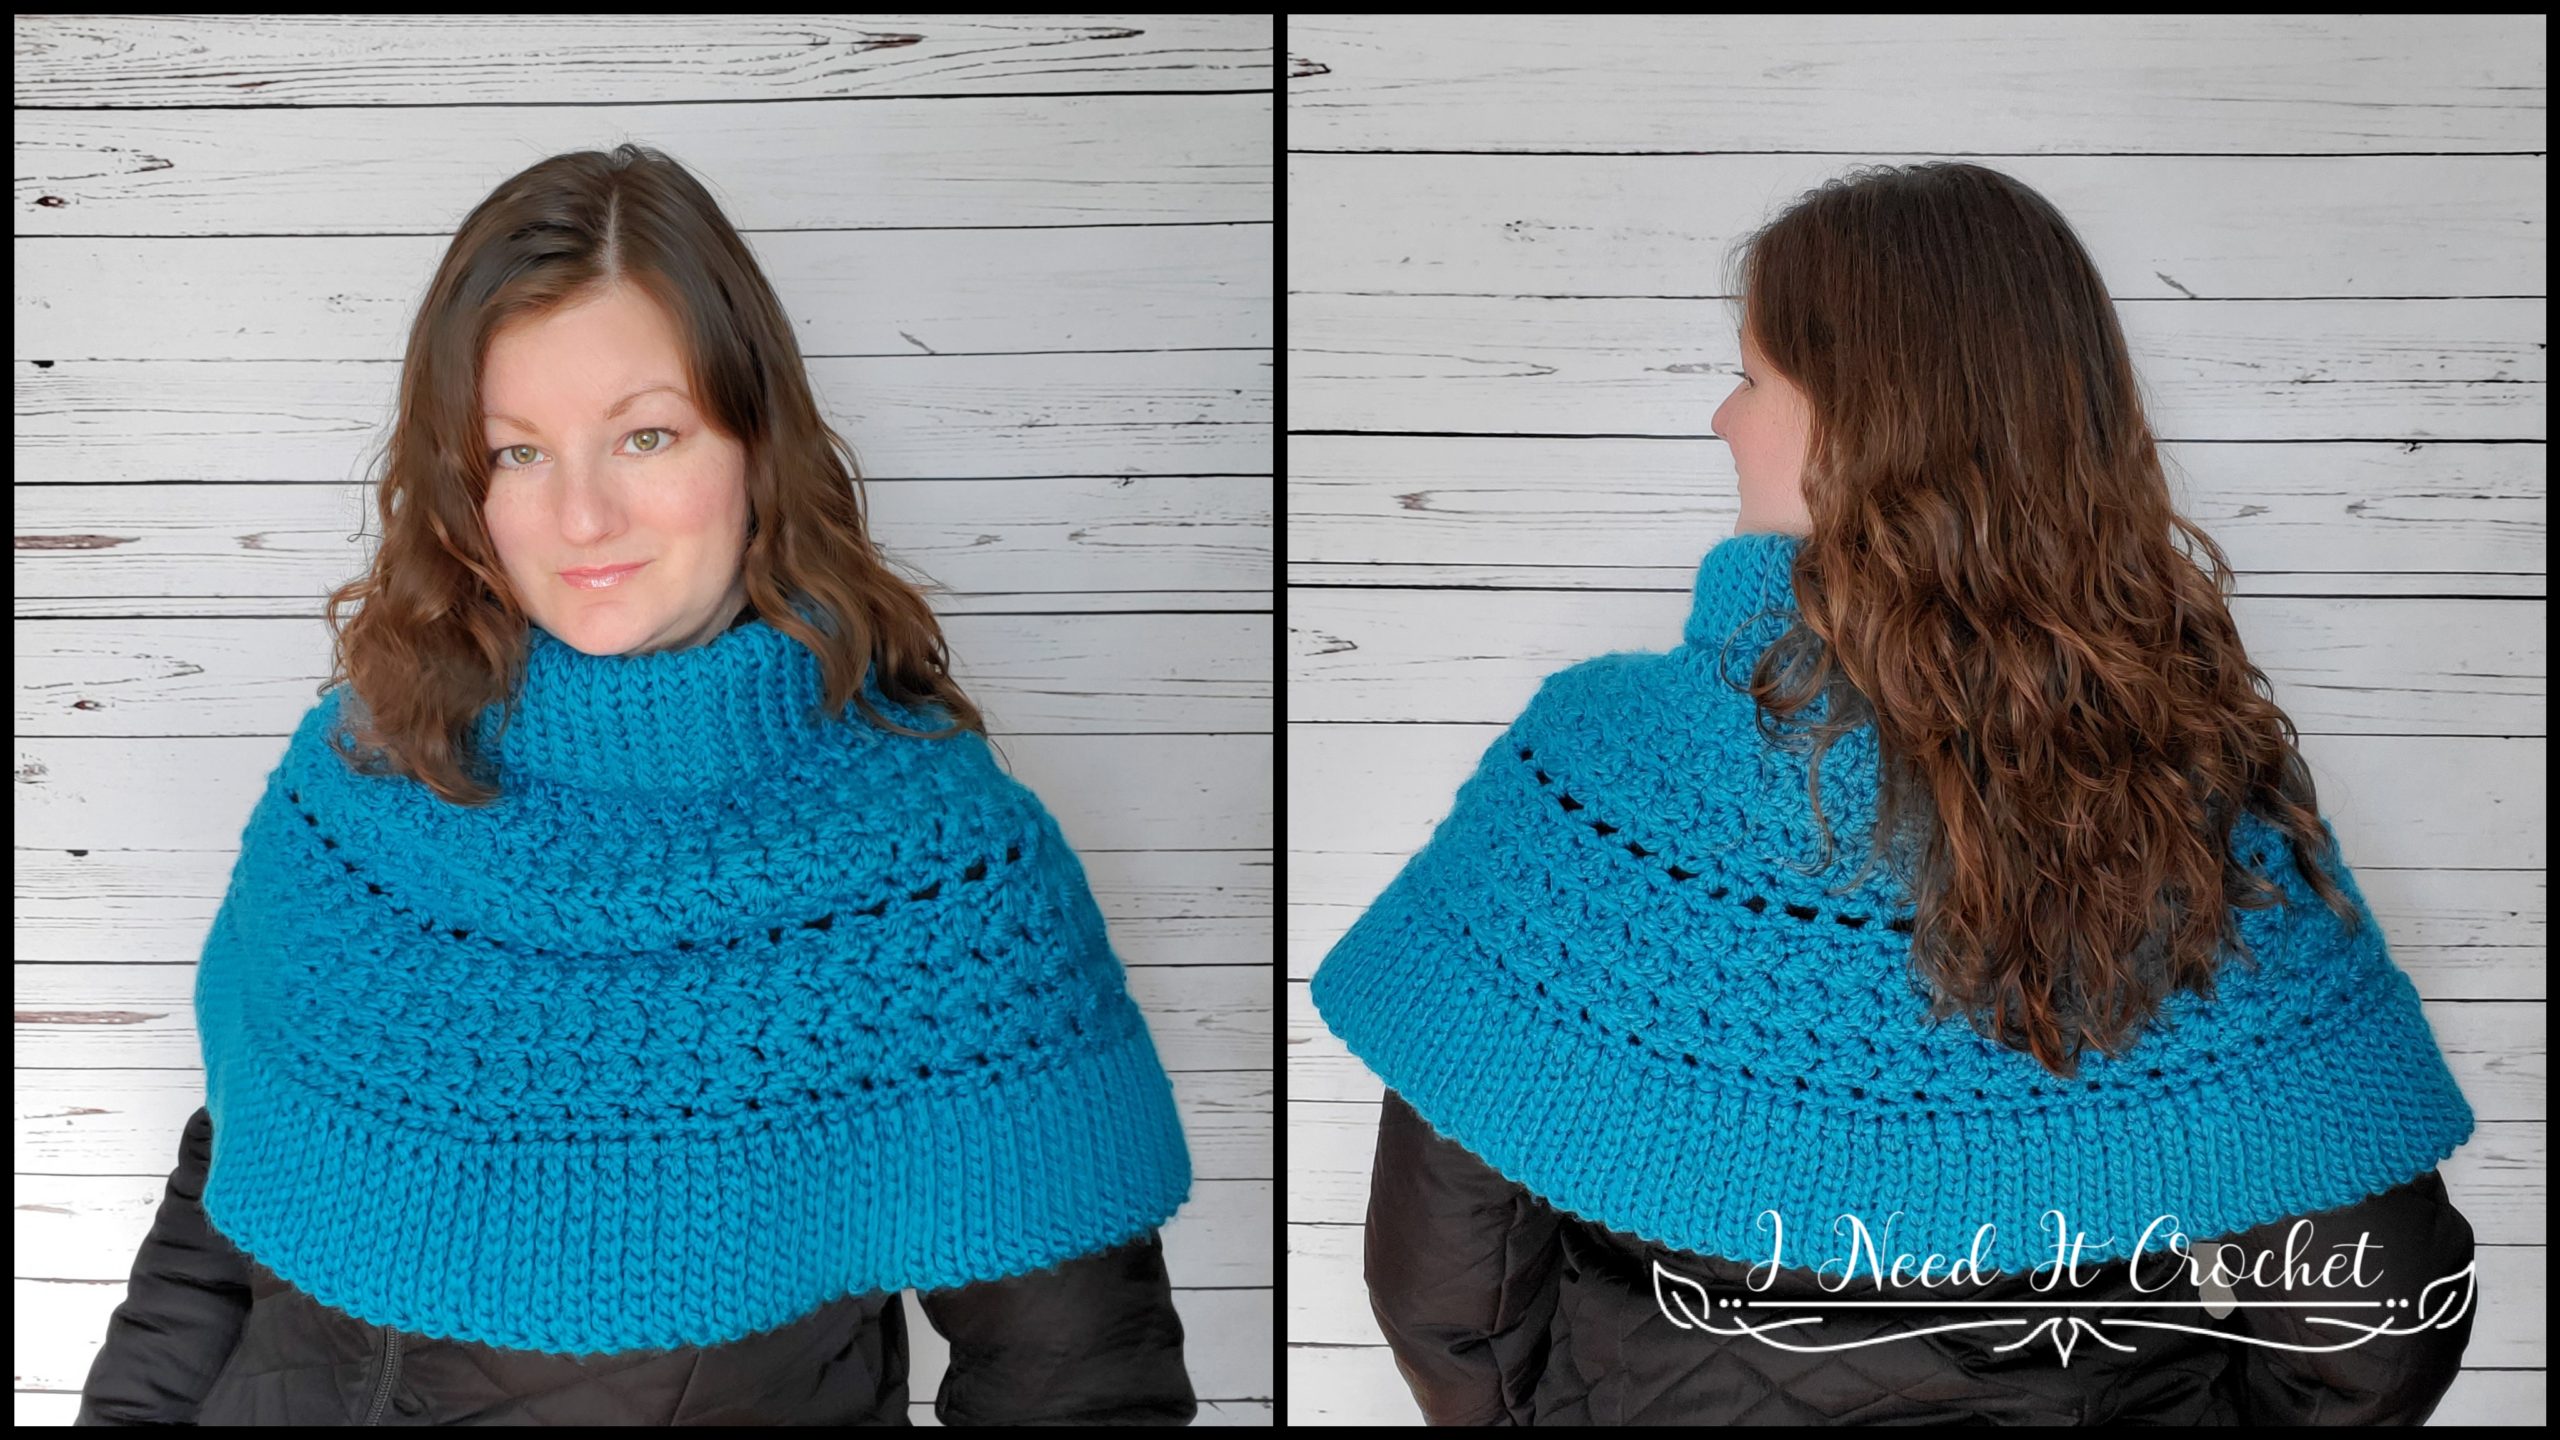
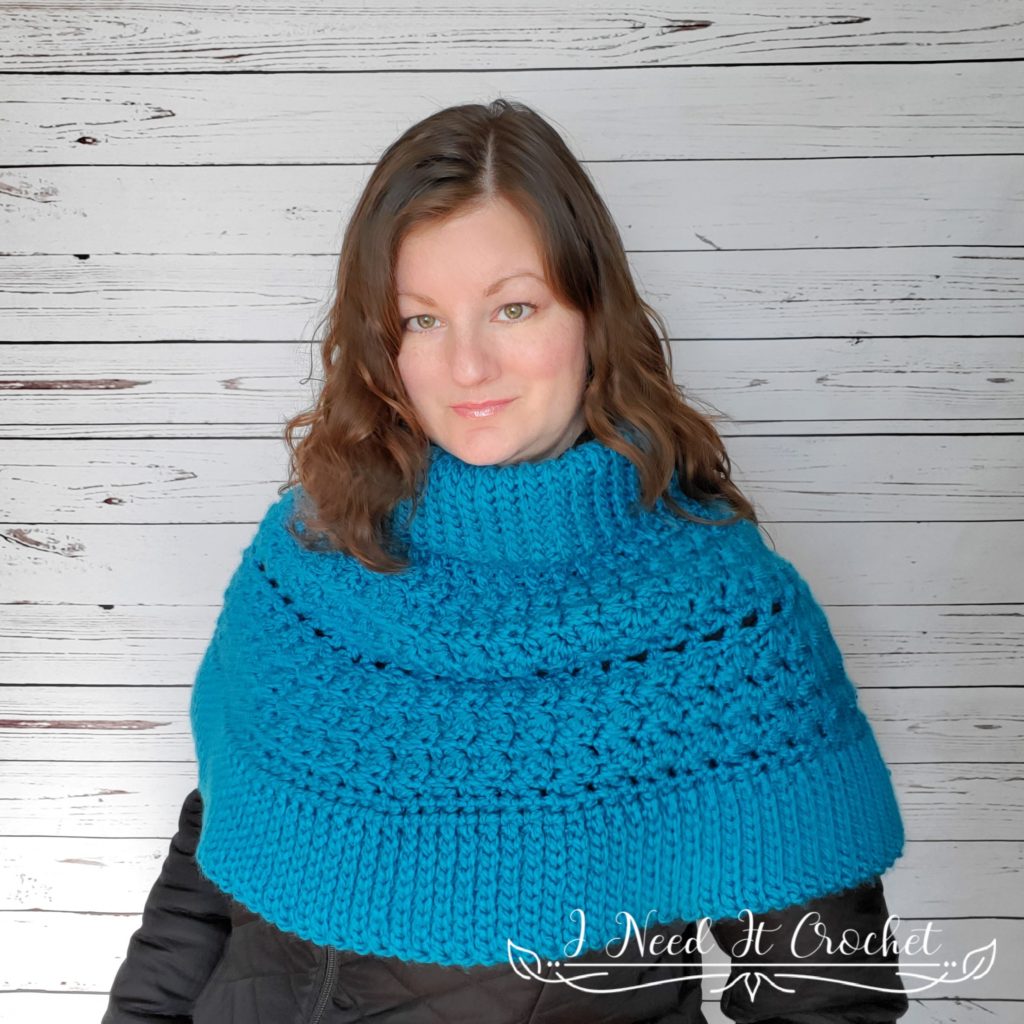
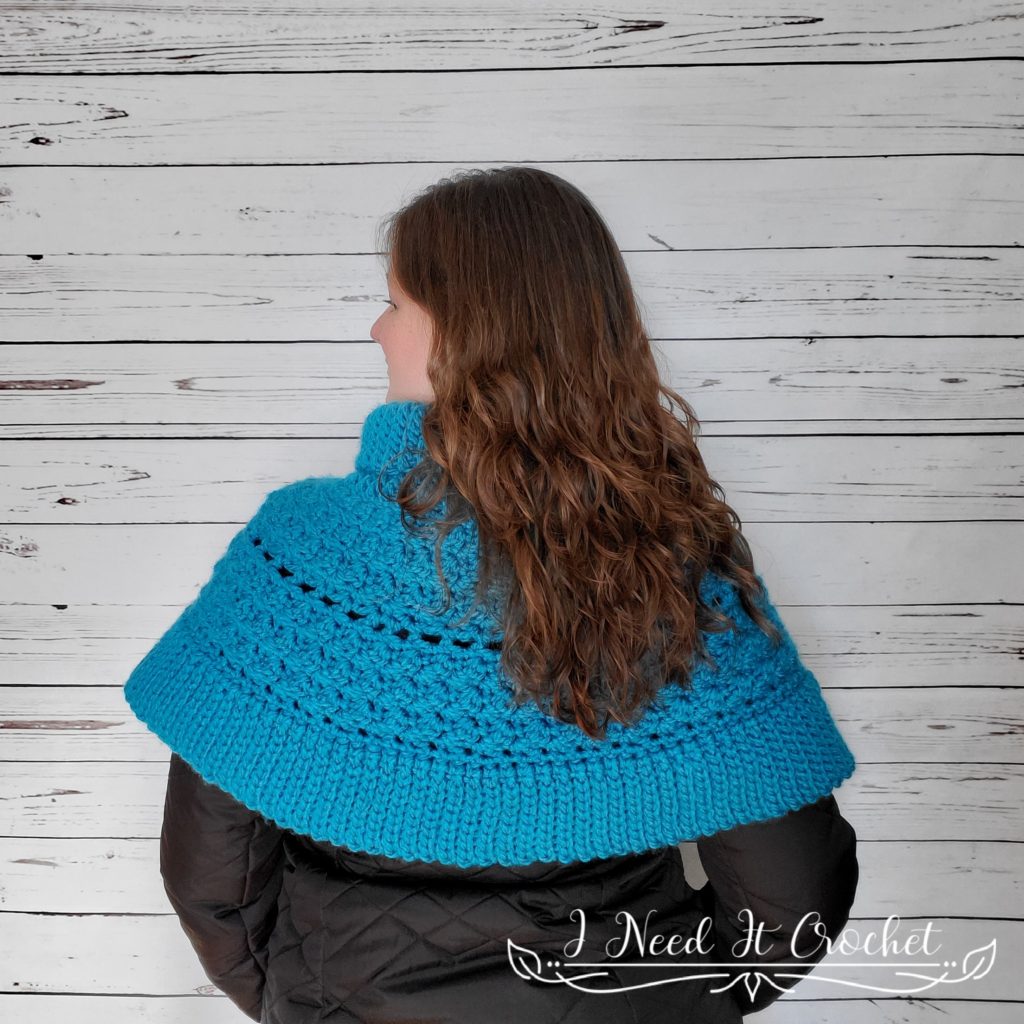
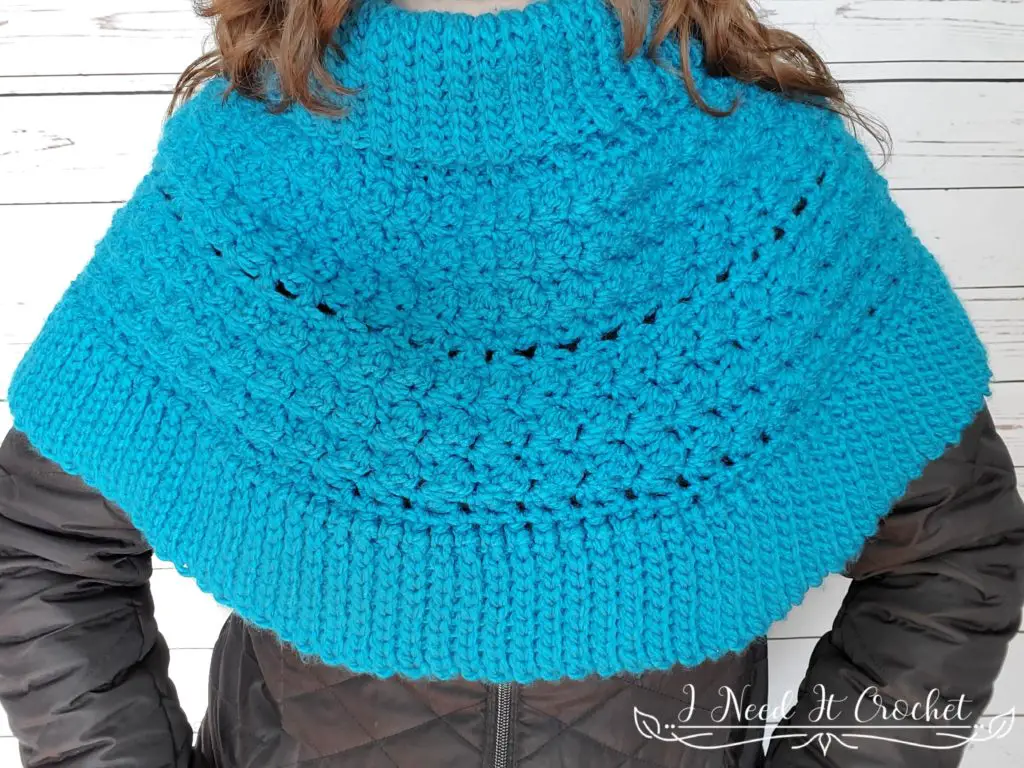
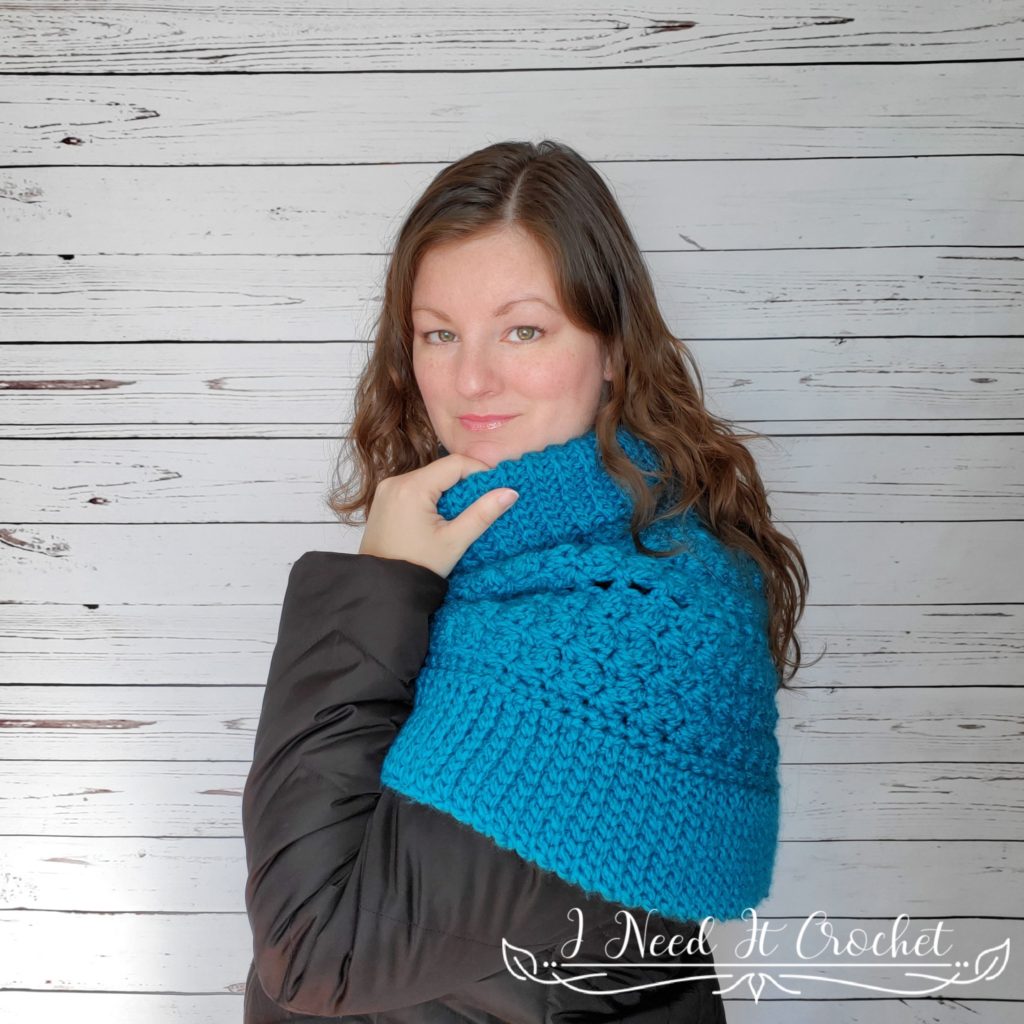
So, that was my goal with this capelet. I wanted to create something that would stand up to our winter, be interesting to look at, and fun to make. I’m proud to say that I achieved my goal with this pattern! Made with super bulky yarn and closely set stitches, this accessory is sure to keep you toasty even in a harsh Manitoba winter.
Finished Sizes:
Instructions given to fit size XSmall/Small; changes for Medium/Large, XLarge/2XLarge, 3XLarge/4XLarge, & 5XLarge/6XLarge are in ()
XS/S (M/L, XL/2X, 3X/4X, 5X/6X)
Cowl Circumference: 21” (22”, 23”, 24”, 25”)
Bottom Circumference: 52” (60”, 67”, 76”, 83”)
Gauge Swatch:
With 9mm hook, ch 10.
1. Sc in 2nd ch from hook and each ch across. Turn. – 9 st
2. Ch1, (sc, dc) in 1st st, sk1 st. *(Sc, dc) in next st, sk1 st.** Repeat from * to ** 2 more times. Sc in last st. Turn. – 9 st
Repeat row 2 until you have 8 rows total. Swatch should measure 4 ½” x 4 ½”. If your swatch measurements are off, try again with a different sized hook.
Materials:
I used Loops and Threads Charisma, which is 100% Acrylic, #5 Bulky weight yarn. Though it is listed as a #5, it is more like a #6.
Any yarn of similar weight would work.
Approximately 375 (415, 450, 485, 515) yds.
8mm Hook
9mm Hook
Stitch Markers
Yarn Needle
Scissors
Measuring Tape
Abbreviations:
Sk = Skip
Sp = Space
St = Stitch
Ss = Slip Stitch
Ch = Chain
Sc = Single Crochet
Hdc = Half Double Crochet
Dc = Double Crochet
BLO = Back Loop Only
Notes:
Ch1 at the beginning of a row is never considered a stitch.
Ch1 between hdc sts is considered a stitch.
I have added many pictures to help you along the way.
Model above (that’s me) is wearing a size M/L.
Instructions
We will begin by making the cowl neck portion of the capelet. This piece is worked as one large, flat rectangle, then we will slip stitch the ends together, forming a tube. From there, the rest of the capelet is worked in the round. The whole piece is done seamlessly, with no sewing.
Cowl Neck
The cowl neck is made completely out of slip stitches. This might sound tedious, but it does go quickly with such a thick yarn. And the result is so squishy and warm!
With 8mm hook (or a hook 1mm smaller than the hook used to obtain gauge)
Ch 21.
1. Ss in BLO of 2nd ch from hook and each ch across. Turn. – 20 st
2. Working this row in BLO: Ch1. Ss in each st across. Turn. – 20 st
Repeat row 2 until you have 40 (42, 44, 46, 48) ribs (see notes below).
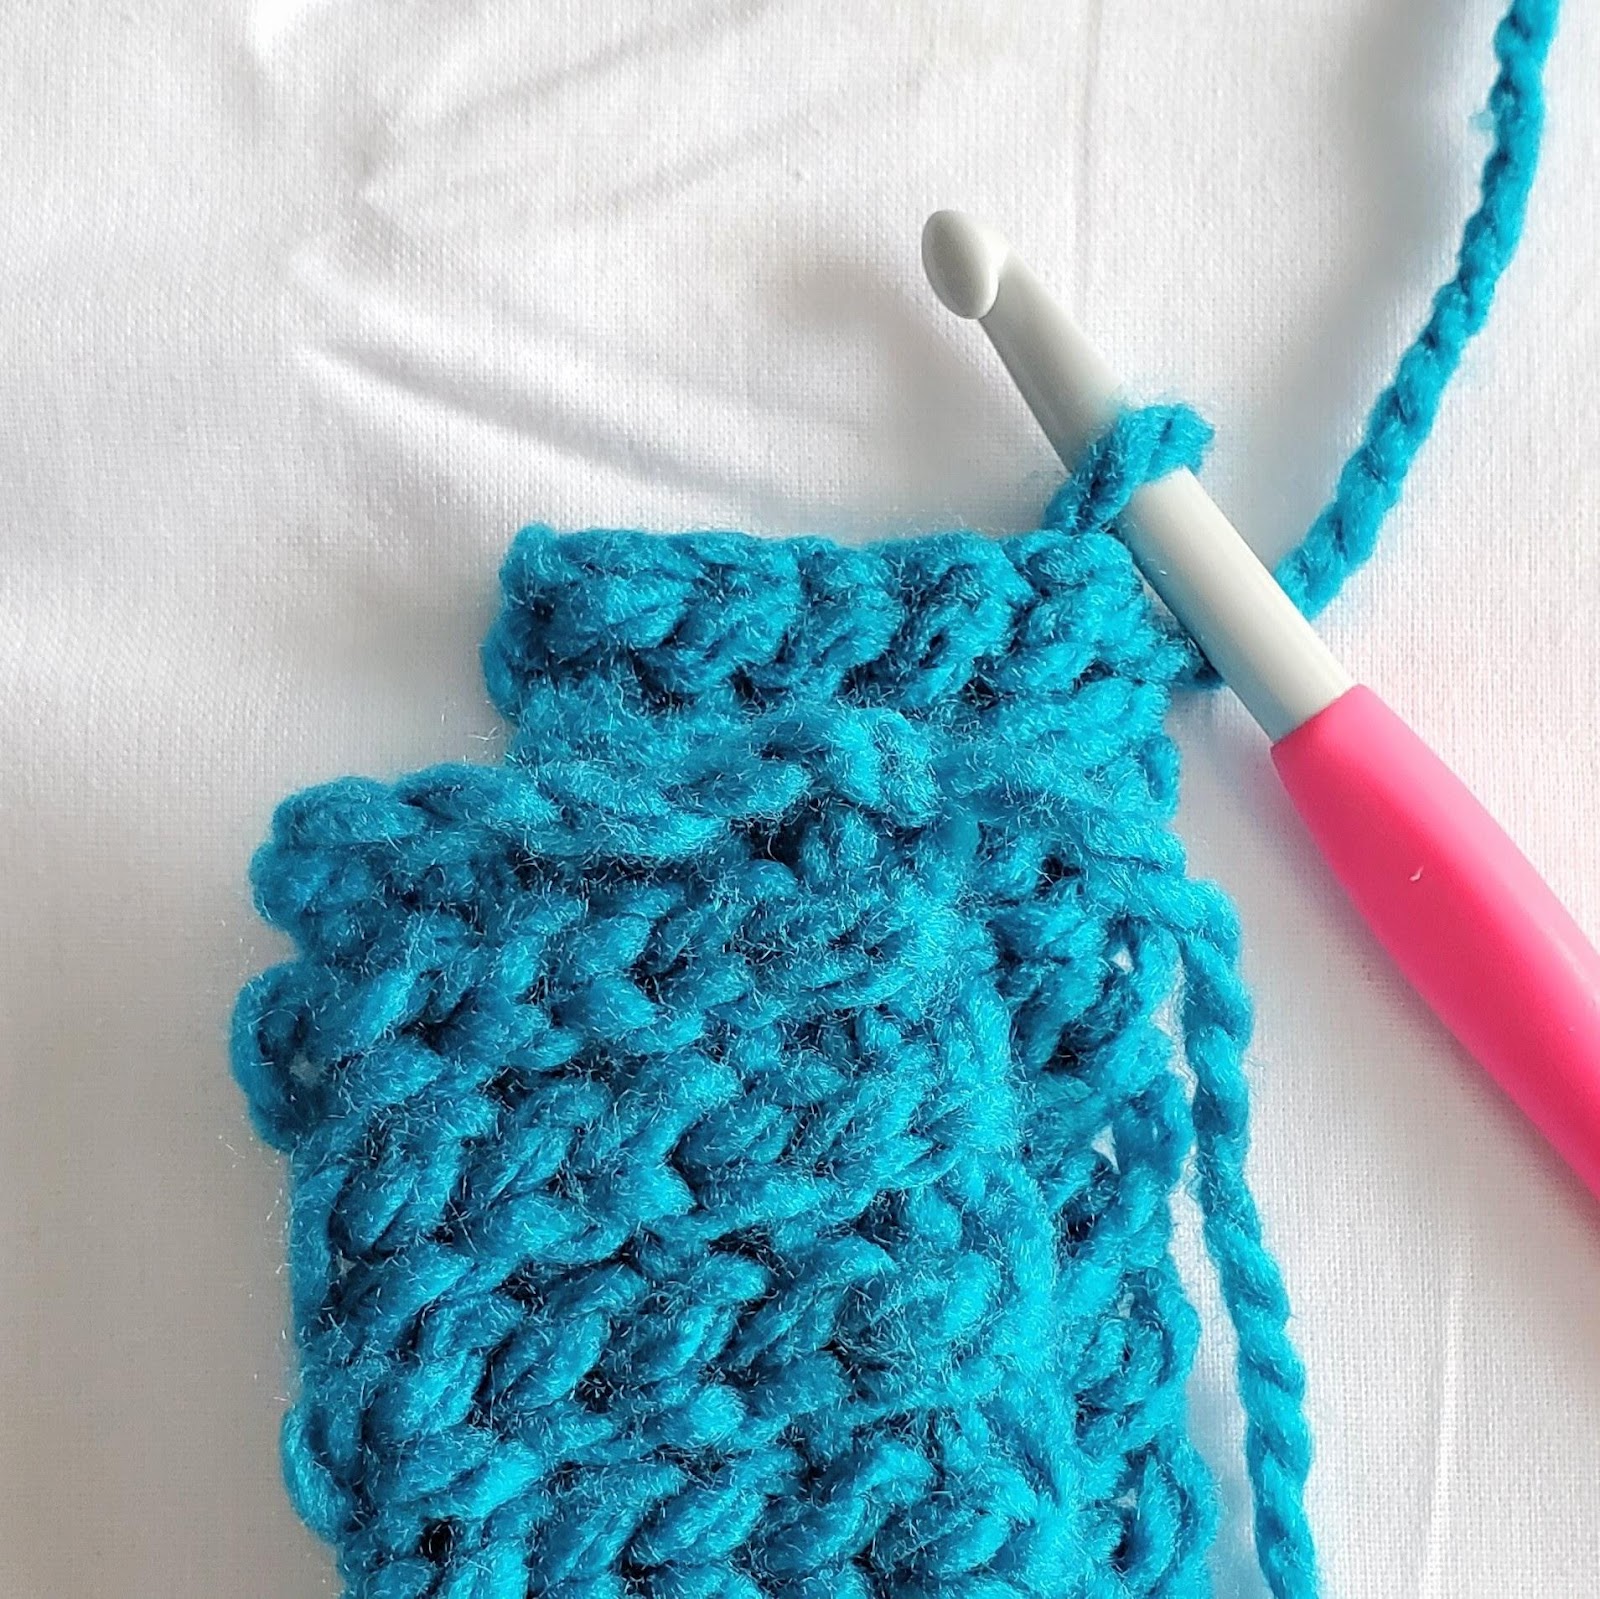
When designing this pattern, I noted that keeping track of your row count is nearly impossible with this stitch, unless you want to mark off each row as you complete it. Nobody wants to do that (including me!), so I have provided instructions to count your ribs instead. This is how you will count your ribs:
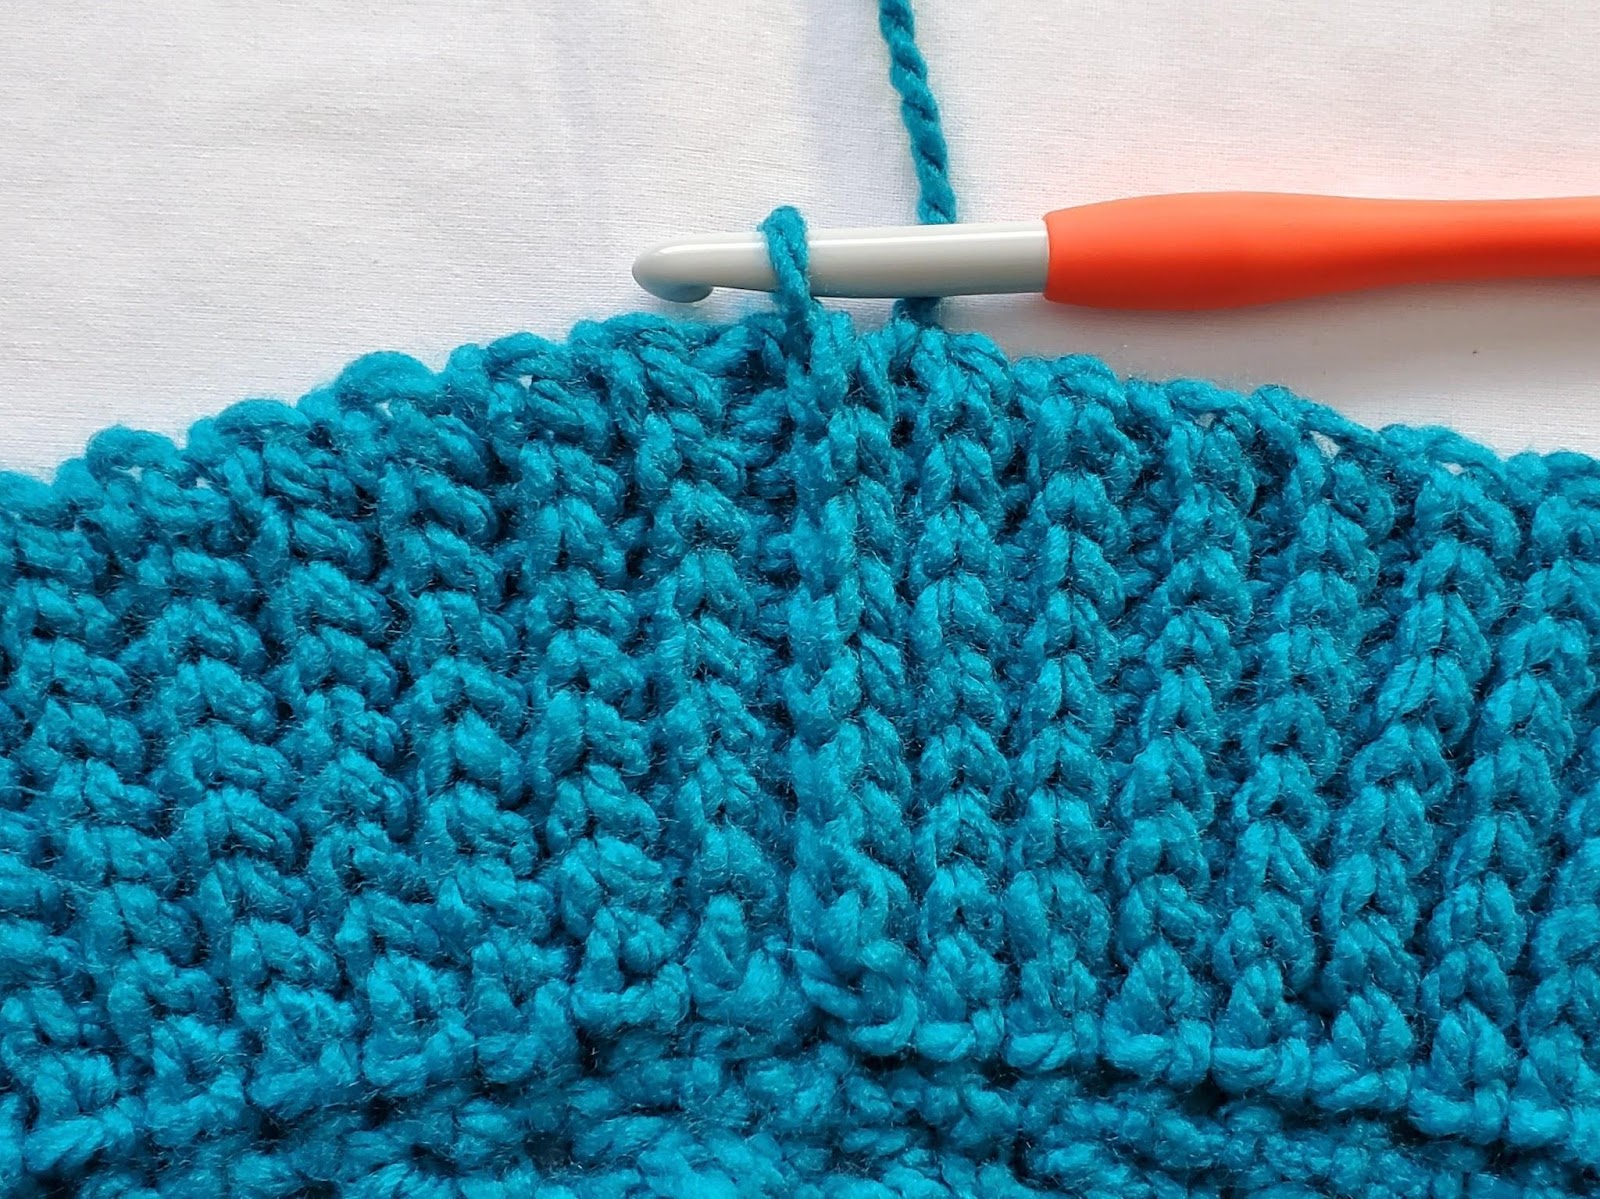
– Lay out your piece so that the starting tail is on the top right and your hook is on the top left. (If your hook is on the bottom left, that means you need to complete one more row before continuing.) See figure 1 for an example of what this looks like. This is the right side of your work. Note: The band in these pics is much narrower, but pay no attention to that. It is only for demonstration purposes.
– Count each rib across. In figure 2 my hook is laying on a rib.
– Once you have the right number of ribs, Pick up your work with the right side facing you.
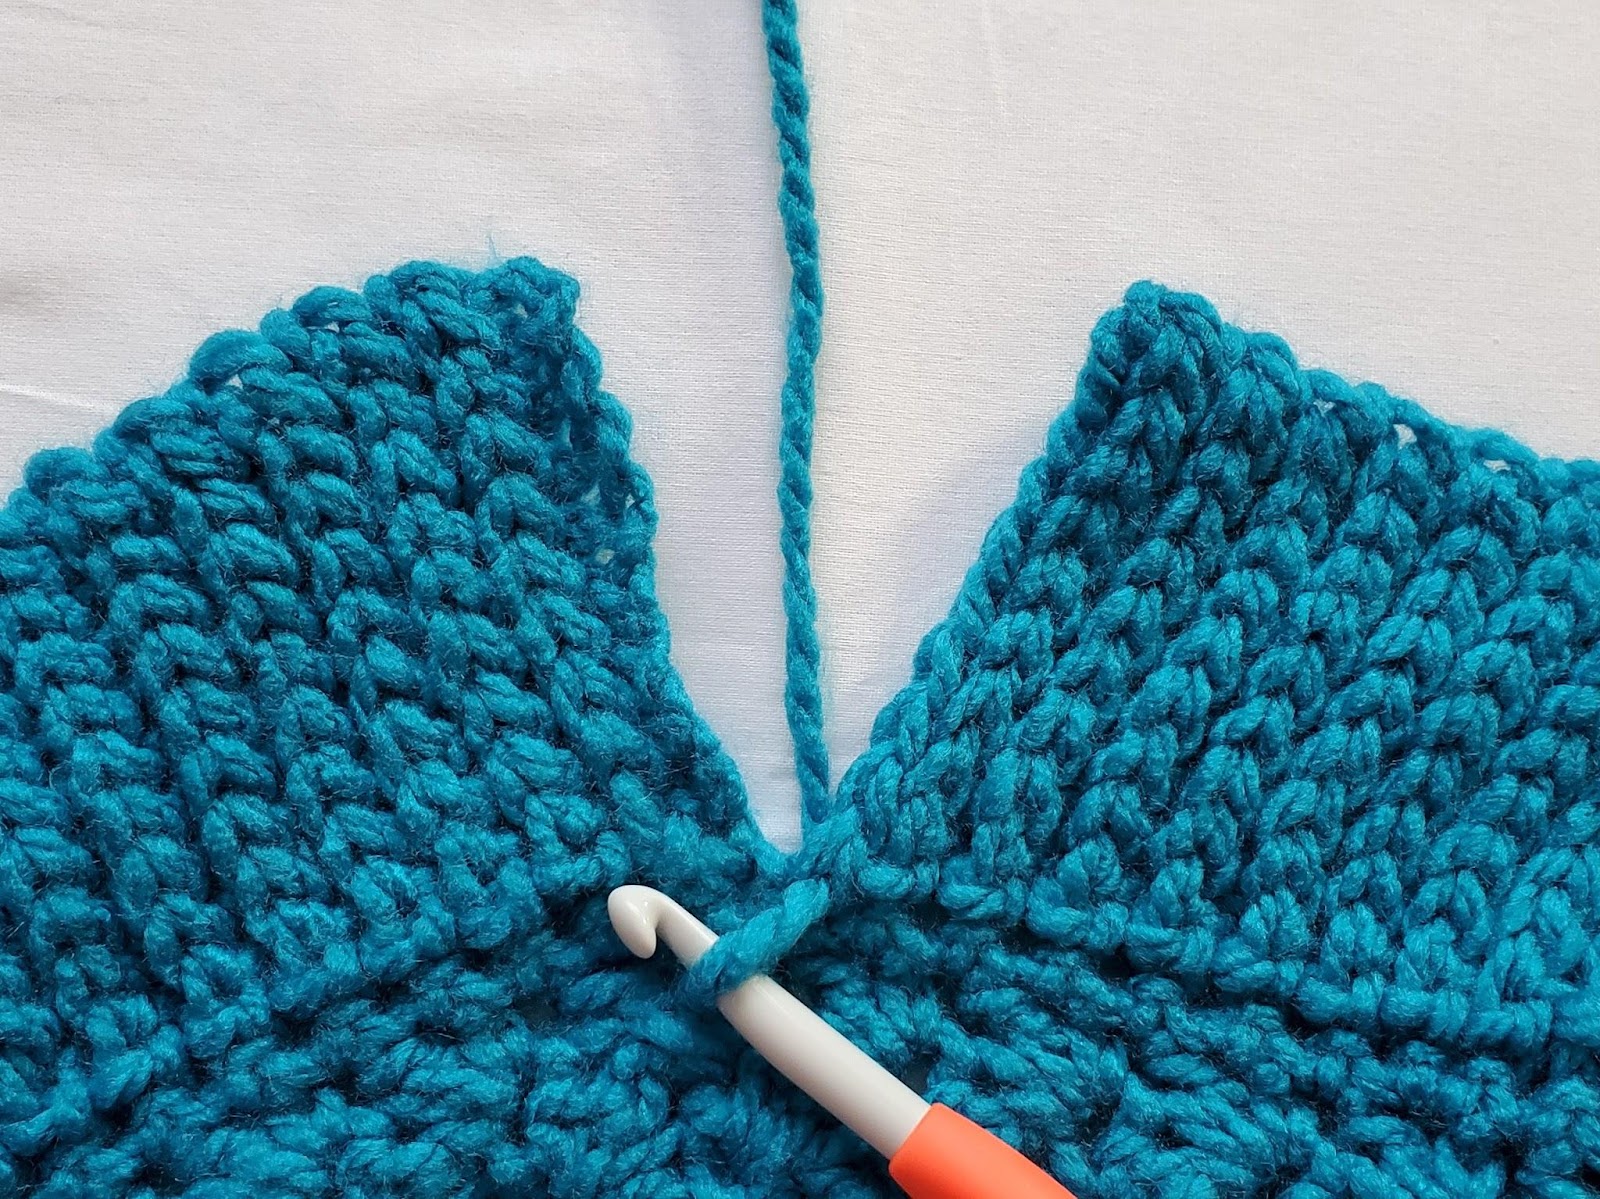
– Fold your band in half, bringing the bottom row up in front of the top row (see figure3).
– Ss the ends together, working through the bottom loop of the starting chain (shown in yellow in figure 4), and the /BLO of the last row (shown in red in figure 4).
– Turn your band right side out. Do not bind off. The first row of the capelet body will be worked into the bottom edge of the cowl.


Capelet Body
With 9mm hook (or the hook used to obtain gauge)
We will now be working in the round, but still turning after each round is completed.
1. Ch1. Work 60 (84, 90, 100, 104) sc around the bottom edge of the cowl. Ss to 1st sc. Turn. – 60 (84, 90, 100, 104) st
2. Ch1. (Sc, dc) in 1st st, sk1 st. *(Sc, dc) in next st, sk1 st. ** Repeat from * to ** around. Ss to 1st sc. Turn. – 60 (84, 90, 100, 104) st
3. – 7. Repeat round 2.
8. Ch1. Sc in 1st st and next 4 (5, 7, 3, 2) sts, 2sc in next st. *Sc in next 5 (6, 8, 4, 3) sts, 2sc in next st. ** Repeat from * to ** around. Ss to 1st sc. Turn. – 70 (96, 100, 120, 130)
9. Ch1. Hdc in 1st st, ch1, sk1 st. *Hdc in next st, ch1, sk1 st. ** Repeat from * to ** around. Ss to 1st hdc. Turn. – 70 (96, 100, 120, 130)
10. Ch1. (Sc, dc) in 1st st, sk1 st. *(Sc, dc) in next st, sk1 st. ** Repeat from * to ** around. Ss to 1st sc. Turn. – 70 (96, 100, 120, 130)
11. – 15. Repeat round 10.
16. Ch1. Sc in 1st st and next 3 (6, 3, 4, 3) sts, 2sc in next st. *Sc in next 4 (7, 4, 5, 4) sts, 2sc in next st. ** Repeat from * to ** around. Ss to 1st sc. Turn. Do not bind off. – 94 (108, 120, 140, 156)
Bottom Trim
The bottom trim is worked in short rows, first working away from the main body, then back again.
Begin by chaining 10 (see figure 5).
1. Ss in BLO of 2nd ch from hook and each ch across. Now working into both loops: Ss into the st on the main body where you chained from. Ss into the next unworked st on the main body (see figures 6 & 7). Turn. – 11 st
2. Sk 1st 2 ss. Ss in BLO of each st across (see figure 8). Turn. – 9 st
3. Ch1. Ss in BLO of 1st st and each st across. Now working into both loops: Ss into the st on the main body that has already been worked. Ss into the next unworked st on the main body (see figure 9). Turn. – 11 st


Repeat rows 2 & 3 around, until all of the sts on the main body have been worked and you have just finished a row 3 repeat, holding back the last ss (so you have ss’ed into the st on the main body that has already been worked, but not into the next st.
Holding the ends of the trim together with the right side facing out, ss the ends together through the bottom bar of row 1 and the BLO of the last row (the same way you did for the cowl above). Your work should blend in with the rest of the trim, as in figure 11. Bind off.
Weave in your ends, and you’re done!
I hope you love your new capelet, and I look forward to seeing all of your beautiful pictures on Ravelry!
If you’d like to know when I post new patterns and tutorials, head on over to my Facebook and Instagram and give me a like and a follow!
If you enjoyed The Dead of Winter Capelet – Free Crochet Pattern, you may want to check out my other designs!
And until next time… Happy Hooking! 😉
