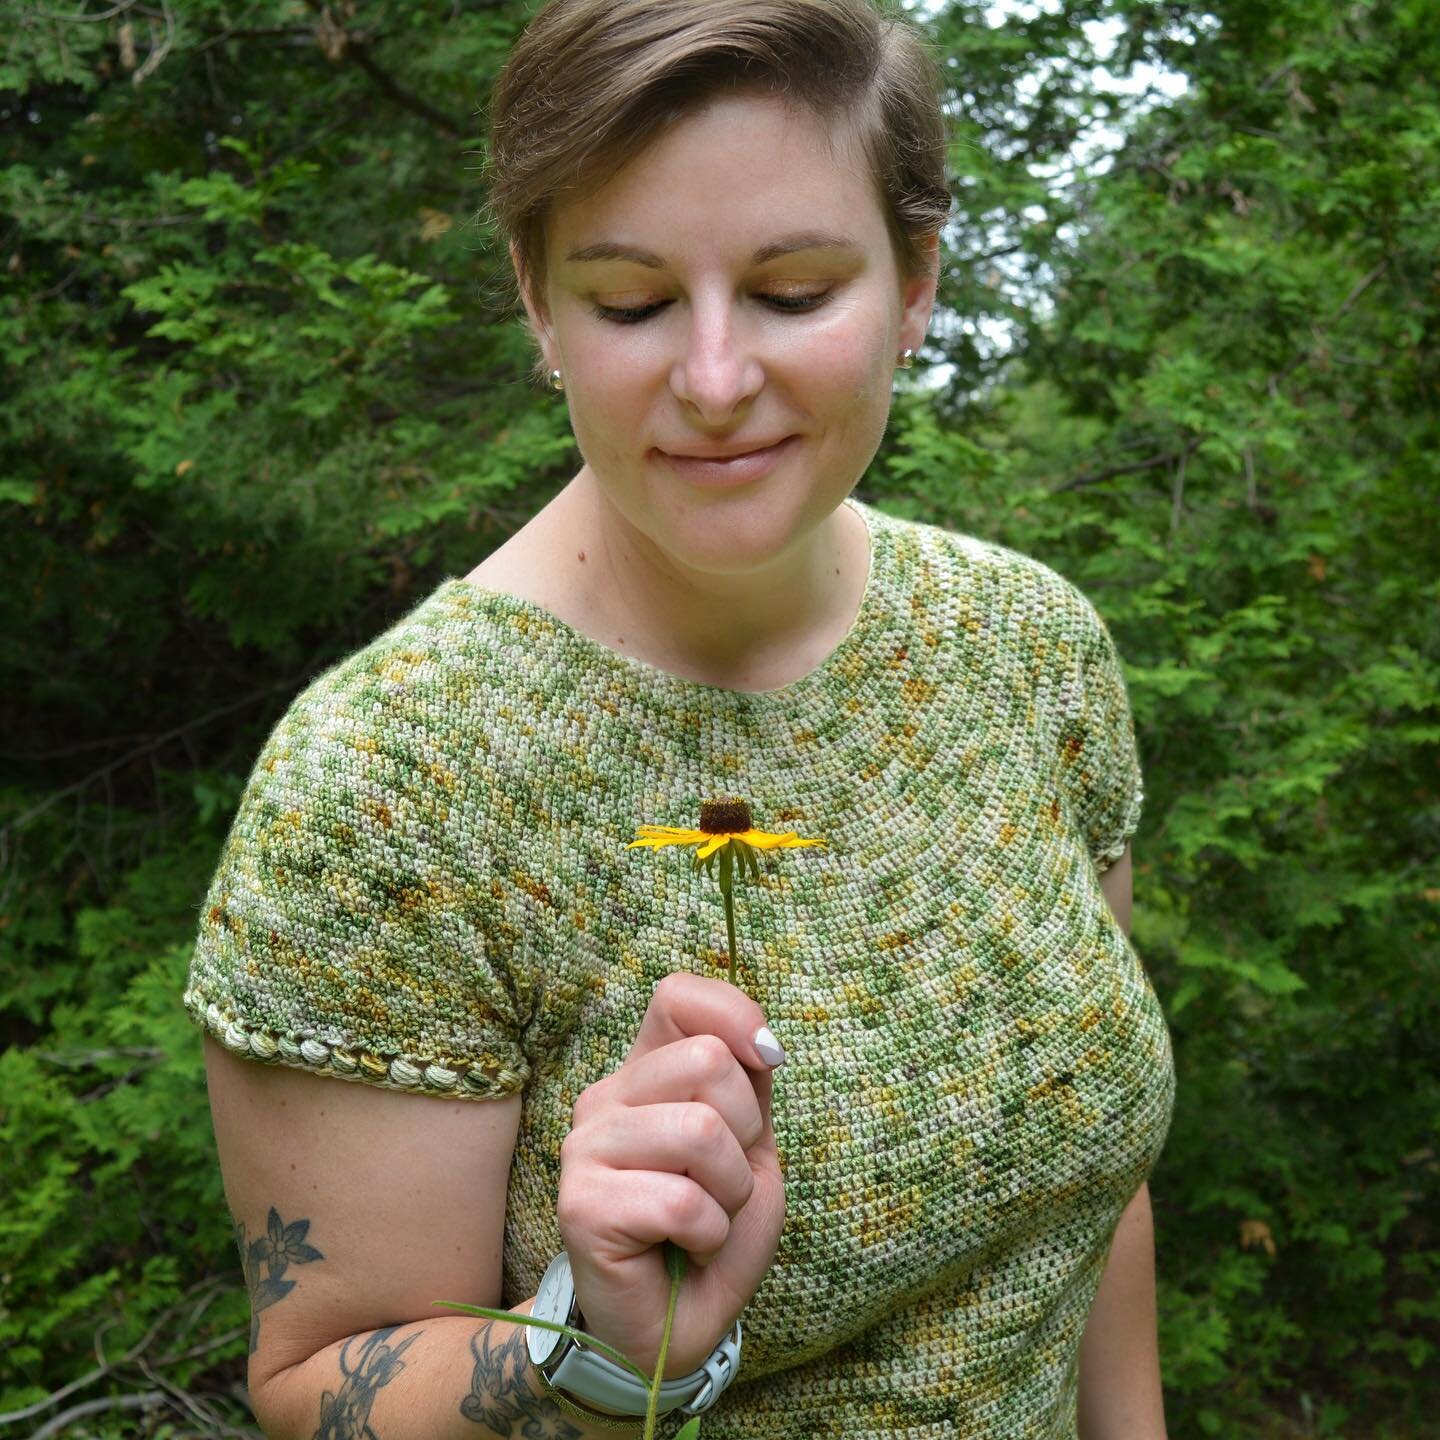
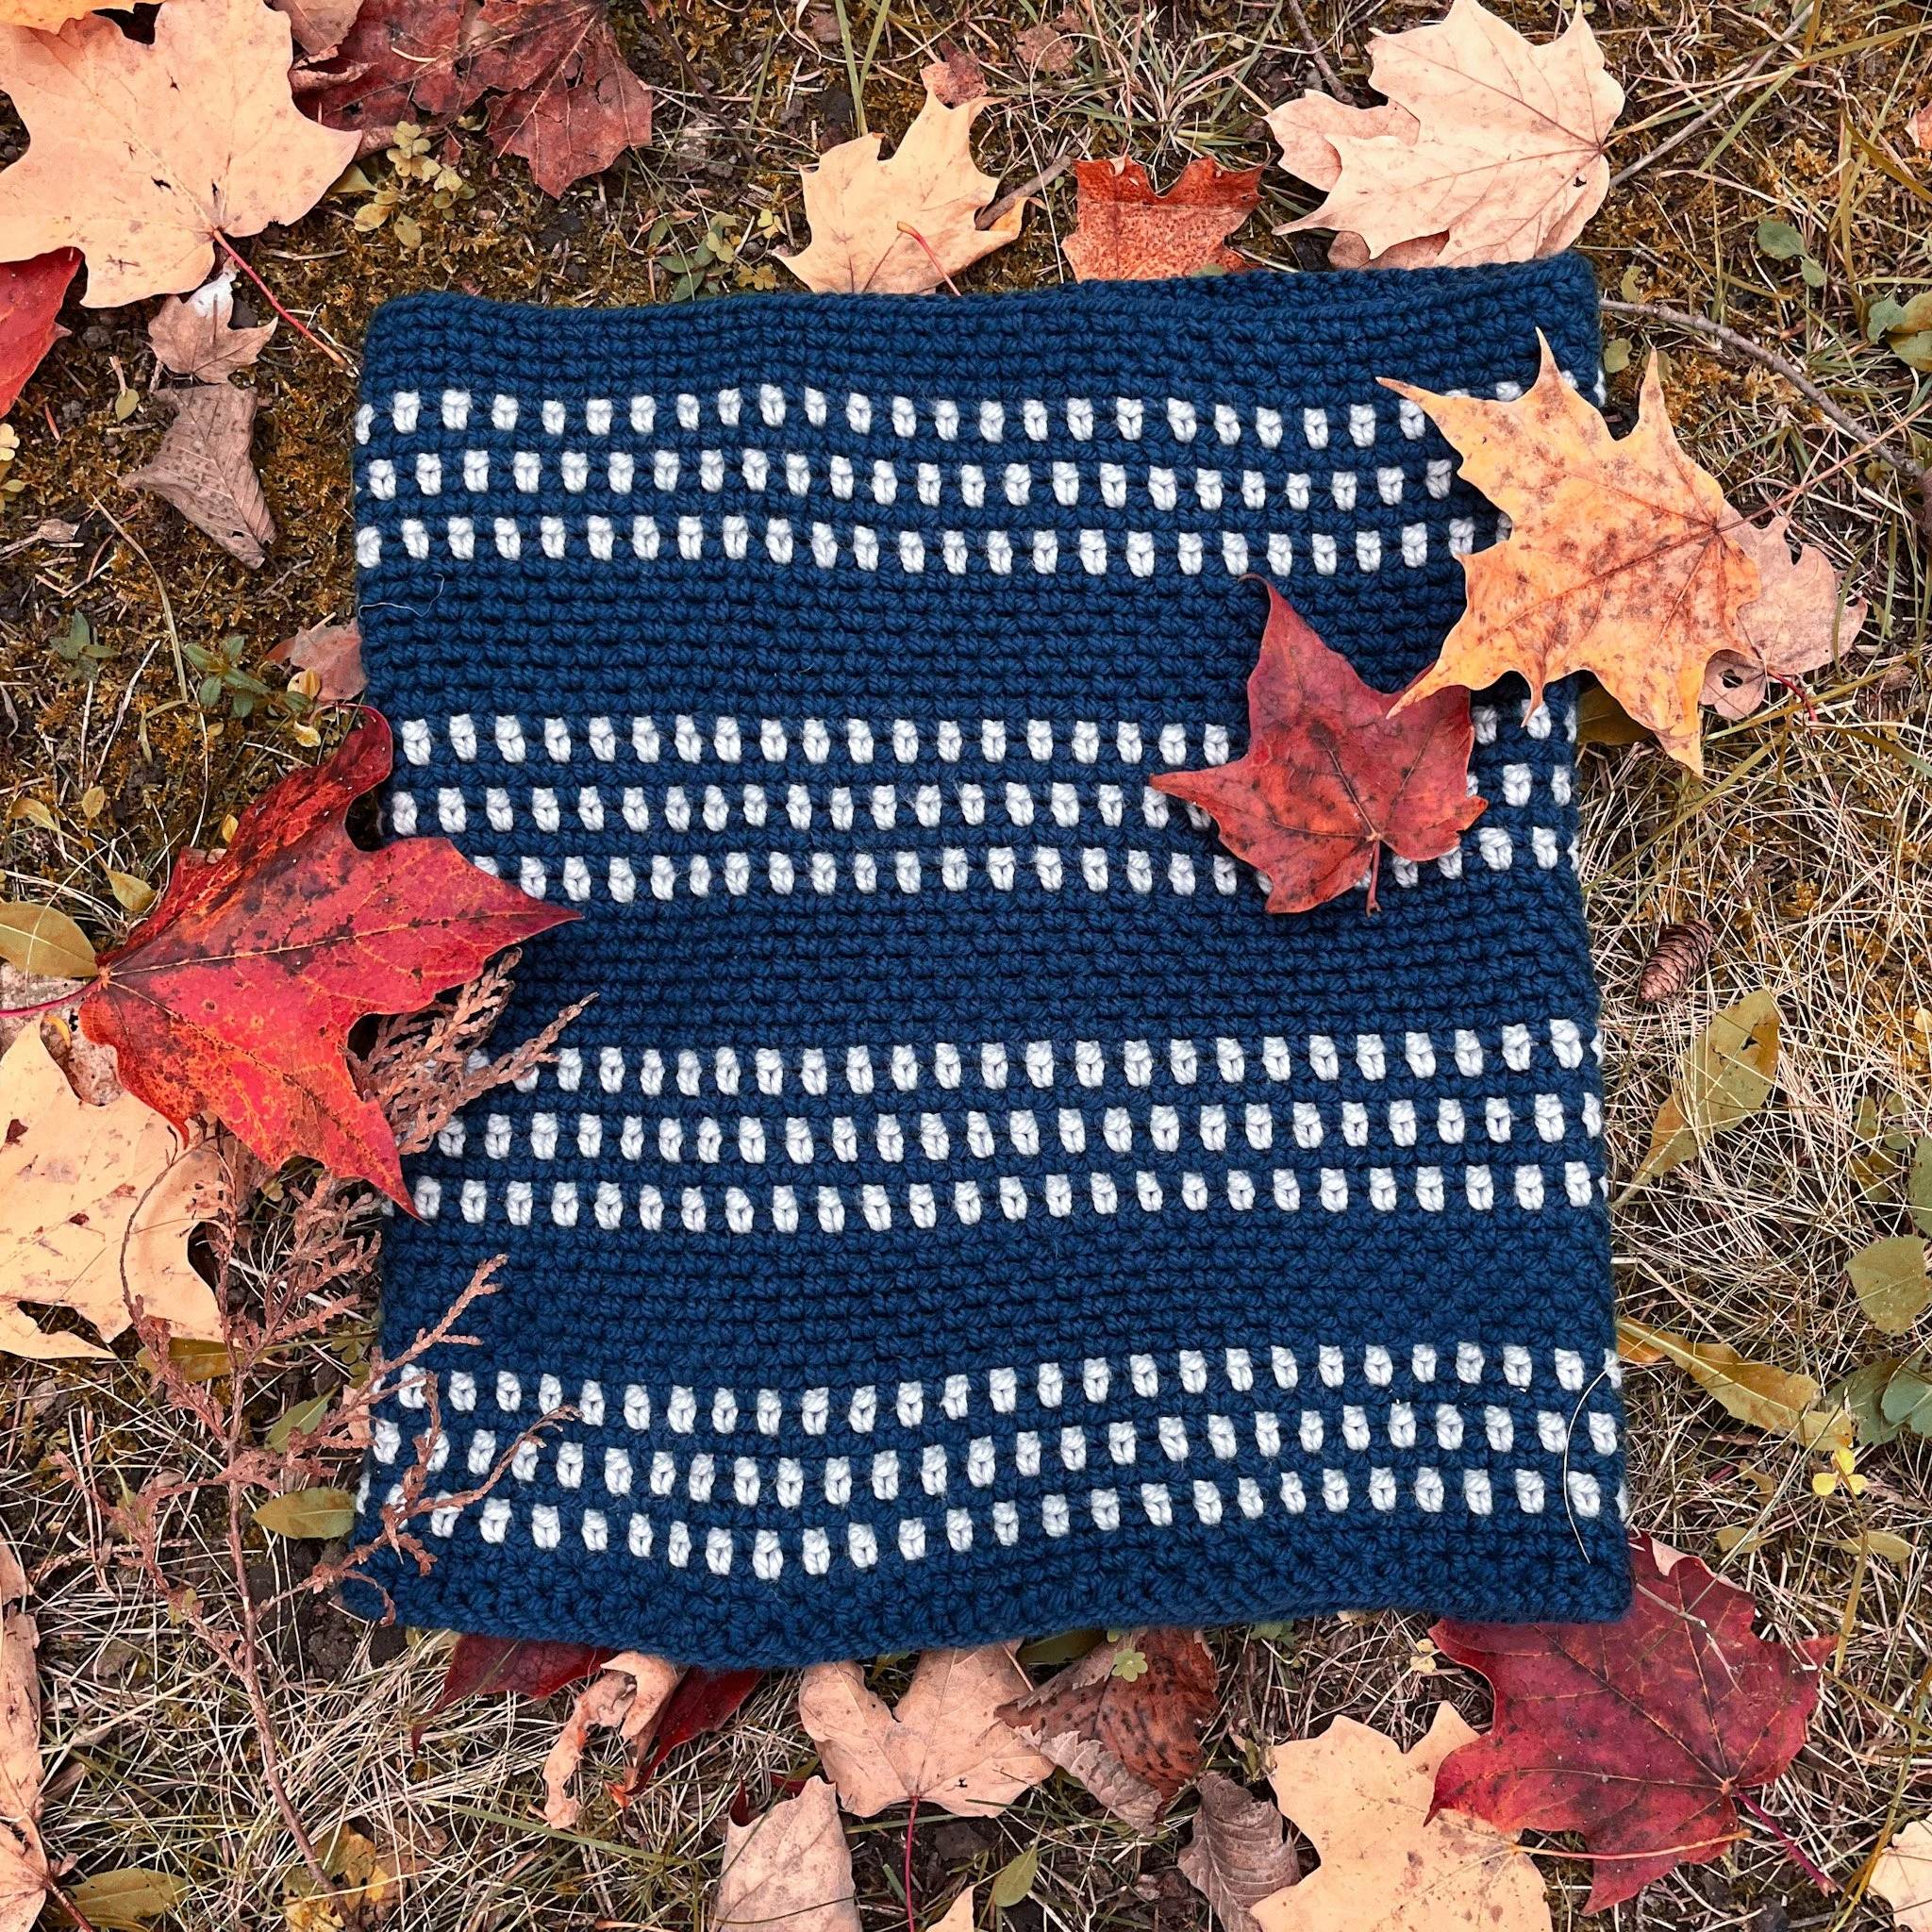
Pointillism Cowl
/This post may contain affiliate links, meaning that if you click through and make a purchase, I earn a small commission at no extra cost to you. This helps support my business and makes it possible for me to bring you free content.
Crochet colour work - wait wait, don’t run away!
If you’re like me, you’re a little intimidated by colour work. Tangled strands, detailed counting and choosing the right colours to work together - it can be a lot, especially if you just want to get down to stitching. But it looks so good! Nothing beats a beautiful high-contrast colour work pattern… *heart eyes*
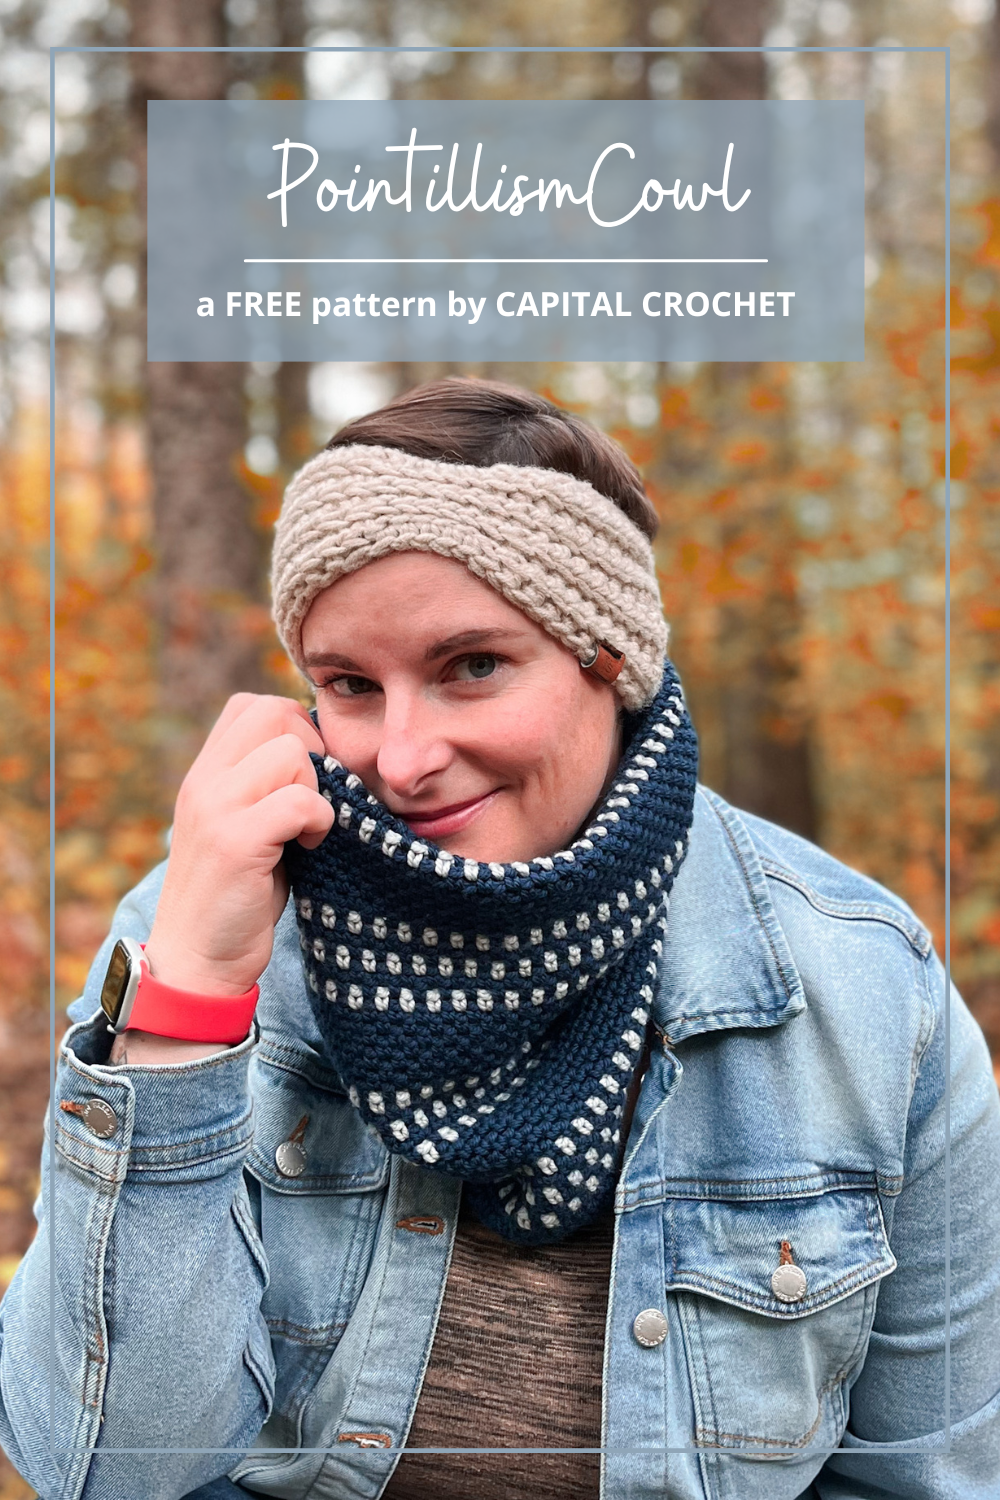
Let me introduce you to a great beginner colour work pattern - the Pointillism Cowl.
Using gorgeous moss stitch and high-contrast colours, this pattern is a great way to dip your toes in multi-colour crocheting. Featuring alternating solid and colour work sections, you’ll get to practice working with multiple strands of yarn in a way that prevents major tangles.
If you can’t get started right away, that’s ok! Save this post to your Pinterest crochet board and come back to it whenever you want.
This pattern is part of the Winter Wonders Blog Hop! Hosted by Hanjan Crochet, Ned and Mimi and Itchin’ for Some Stitchin’, you will find beautiful FREE patterns all month! The Pointillism Cowl will always be free here on the Capital Crochet blog, but for TODAY ONLY you can get the pdf pattern for FREE! Click on the graphic below to head to the round-up post for your discount code.

For this pattern, I’ve chosen Twill Worsted yarn by WeCrochet. It is a fabulously soft and squishy superwash merino wool, and it comes in a series of bold colours that are perfect for high-contrast pairing. It is also a heavier worsted yarn, which means you’ll whip this project up in no time!

Materials
Yarn: WeCrochet Twill Worsted (worsted (4) weight, 100% superwash merino wool, 149yds/136 m, 100g per skein) in 2 colours:
MC: Dungaree – 293 yds/268 m
CC: Sea Salt Heather – 56 yds/51 m
Hook: US J/6mm crochet hook, or size needed to meet gauge
Notions: measuring tape, scissors, yarn needle, locking stitch marker (1), blocking mats
Terminology/Abbreviations
This pattern uses standard US terms as detailed by the Craft Yarn Council:
ch: chain
chsp: chain space (the space created by working a ch 1 and skipping the next stitch)
fsc: foundation single crochet
MC/CC: main colour/contrast colour
sc: single crochet
sk: skip
sl st: slip stitch
st(s): stitch(es)
Notes
This pattern is worked in continuous rounds without joining (with the exception of Round 1). You will work with the right side facing the whole time, never turning your work.
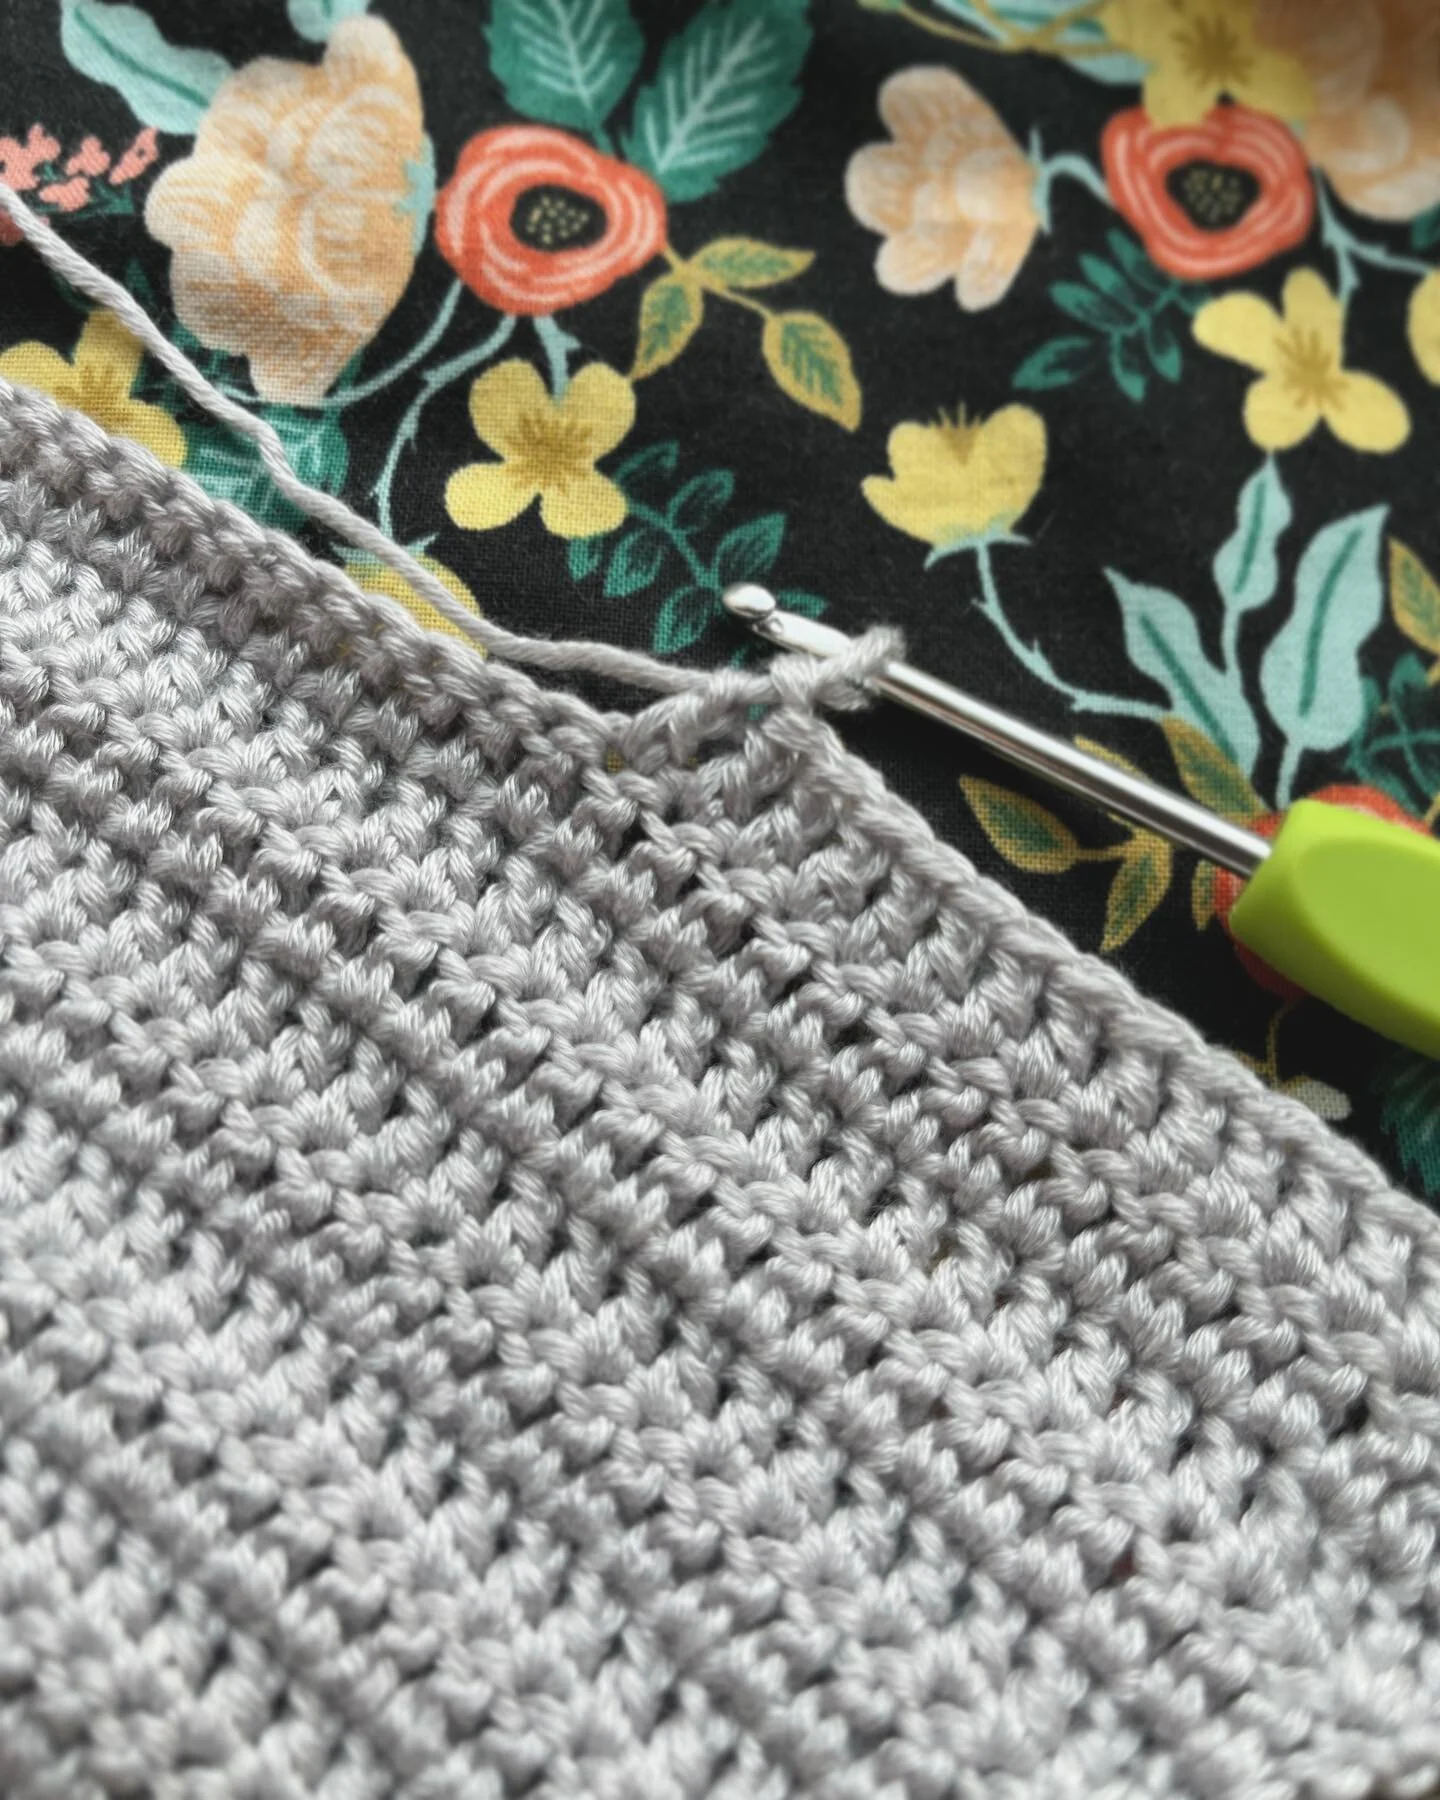
The repeating rounds used in this pattern are commonly called Moss Stitch, Granite Stitch or Linen Stitch.
To change colours, work the final pull through of the last st of the previous round with the new colour. When working the Stripe Sections, I suggest carrying the CC up the wrong side of the cowl so you have fewer ends to weave in at the end.
Sizing
Finished Measurements: 13.5”/35cm long, 12”/30.5cm wide, laid flat after blocking and before wearing.
This pattern is easily customized for size:
To adjust the circumference (how closely it fits around your face and neck), start with any ODD number of stitches in Round 1 of the Set-Up section. Every 9 stitches that you adjust will add or remove approximately 2”/5 cm.
To adjust the length, you can work more or fewer repeats of the Stripe Sections (each section is approximately 3.5”/9 cm), or simply work more or fewer repeats of Rounds 3 and 4 in the Set-Up section or after the last CC portion of the final Stripe Section.
Note that any adjustments made will alter the yardage required.
Gauge: 18 sts x 17 rounds = 4”/10 cm in moss stitch
To make your swatch:
Round 1: Fsc 45. Join with a sl st to first st, taking care not to twist your foundation round.
Round 2: Loosely ch 1 (counts as first chsp; place a marker in this chsp), skip first st, *sc in next st, ch 1, sk 1. Repeat from * around to the marker. Do not join.
Round 3: Sc in marked chsp and move marker up to sc just made. *Ch 1, sk next sc, sc innext chsp. Repeat from * around to the marker.
Round 4: Ch 1, skip marked st and move marker up to chsp just made. *Sc in next chsp, ch1, sk next sc. Repeat from * around to the marker.
Repeat Rounds 3 and 4 until you’ve worked 20 rounds.
Block your swatch (see Blocking section below) and when it is completely dry, lay it flat and measure your gauge in the centre of the swatch.
If there are more than 18 sts or 17 rounds in 4”/10cm, your gauge is too tight; try using a bigger hook.
If there are less than 18 sts or 17 rounds in 4”/10cm, your gauge is too loose; try using a smaller hook.
Pattern Instructions
SET UP
Round 1: With MC, fsc 111. Join with a sl st to first st, taking care not to twist your foundation round.
Round 2: Loosely ch 1 (counts as first chsp; place a marker in this chsp), skip first st, *sc in next st, ch 1, sk 1. Repeat from * around to the marker. Do not join.
Round 3: Sc in marked chsp and move marker up to sc just made. *Ch 1, sk next sc, sc in next chsp. Repeat from * around to the marker.
Round 4: Ch 1, skip marked st and move marker up to chsp just made. *Sc in next chsp, ch1, sk next sc. Repeat from * around to the marker.
STRIPE SECTION 1
Round 5: With CC, repeat Round 3.
Rounds 6-7: With MC, repeat Round 4 then Round 3.
Round 8: With CC, repeat Round 4.
Rounds 9-10: With MC, repeat Rounds 3 and 4.
Round 11: With CC, repeat Round 3.
Rounds 12-19: With MC, repeat Rounds 4 and 3.
STRIPE SECTION 2
Round 20: With CC, repeat Round 4.
Rounds 21-22: With MC, repeat Rounds 3 and 4.
Round 23: With CC, repeat Round 3.
Rounds 24-25: With MC, repeat Round 4 and then Round 3.
Round 26: With CC, repeat Round 4.
Rounds 27-34: With MC, repeat Rounds 3 and 4.
Repeat Stripe Section 1, then repeat Rounds 20-31 of Stripe Section 2. At the end of the last round, sl st into the next chsp and the next sc to even out the continuous rounds.
Fasten off and proceed to the Finishing section.
FINISHING
Blocking: Block your cowl by soaking it for 20 minutes in a sink or tub of cool water and a non-rinse soap like Soak or Eucalan. Drain and lay it out on a towel, then roll it up and step on it to squeeze out all excess water. Then lay your cowl out flat to dry on blocking mats or another protected flat surface, taking care not to overstretch. Shape it so that it is straight and even on all sides. When dry, weave in ends to the wrong side and voila, you’re done!
Variations
This pattern can be easily adjusted to get a perfectly customized fit.
To adjust the circumference (how closely it fits around your face and neck), start with any ODD number of stitches in Round 1 of the Set-Up section. Every 9 stitches that you adjust will add or remove approximately 2”/5 cm.
To adjust the length, you can work more or fewer repeats of the Stripe Sections (each section is approximately 3.5”/9 cm), or simply work more or fewer repeats of Rounds 3 and 4 in the Set-Up section or after the last CC portion of the final Stripe Section.
Keep in mind that any alterations to the stitch or round counts will adjust the yardage required.

Save this pattern to your Ravelry queue, or add a project to the pattern page! Click on the graphic below to go to the Ravelry listing.

Congratulations on finishing your Pointillism Cowl! I hope this simple but stunning piece brings you warmth and comfort the whole Winter through.
I’d love to see your wip and finished cowl pics! Share your cowl on Instagram using the hashtags #PointillismCowl and tag me, @capital.crochet!
You may sell finished items made from this pattern, but please credit me as the designer by linking back to this blog post.
Thank you so much for your support! If you’d like to be the first to know about new patterns in this series and other blog posts, make sure to subscribe to my newsletter below.
For more quick and cozy patterns, check these out!
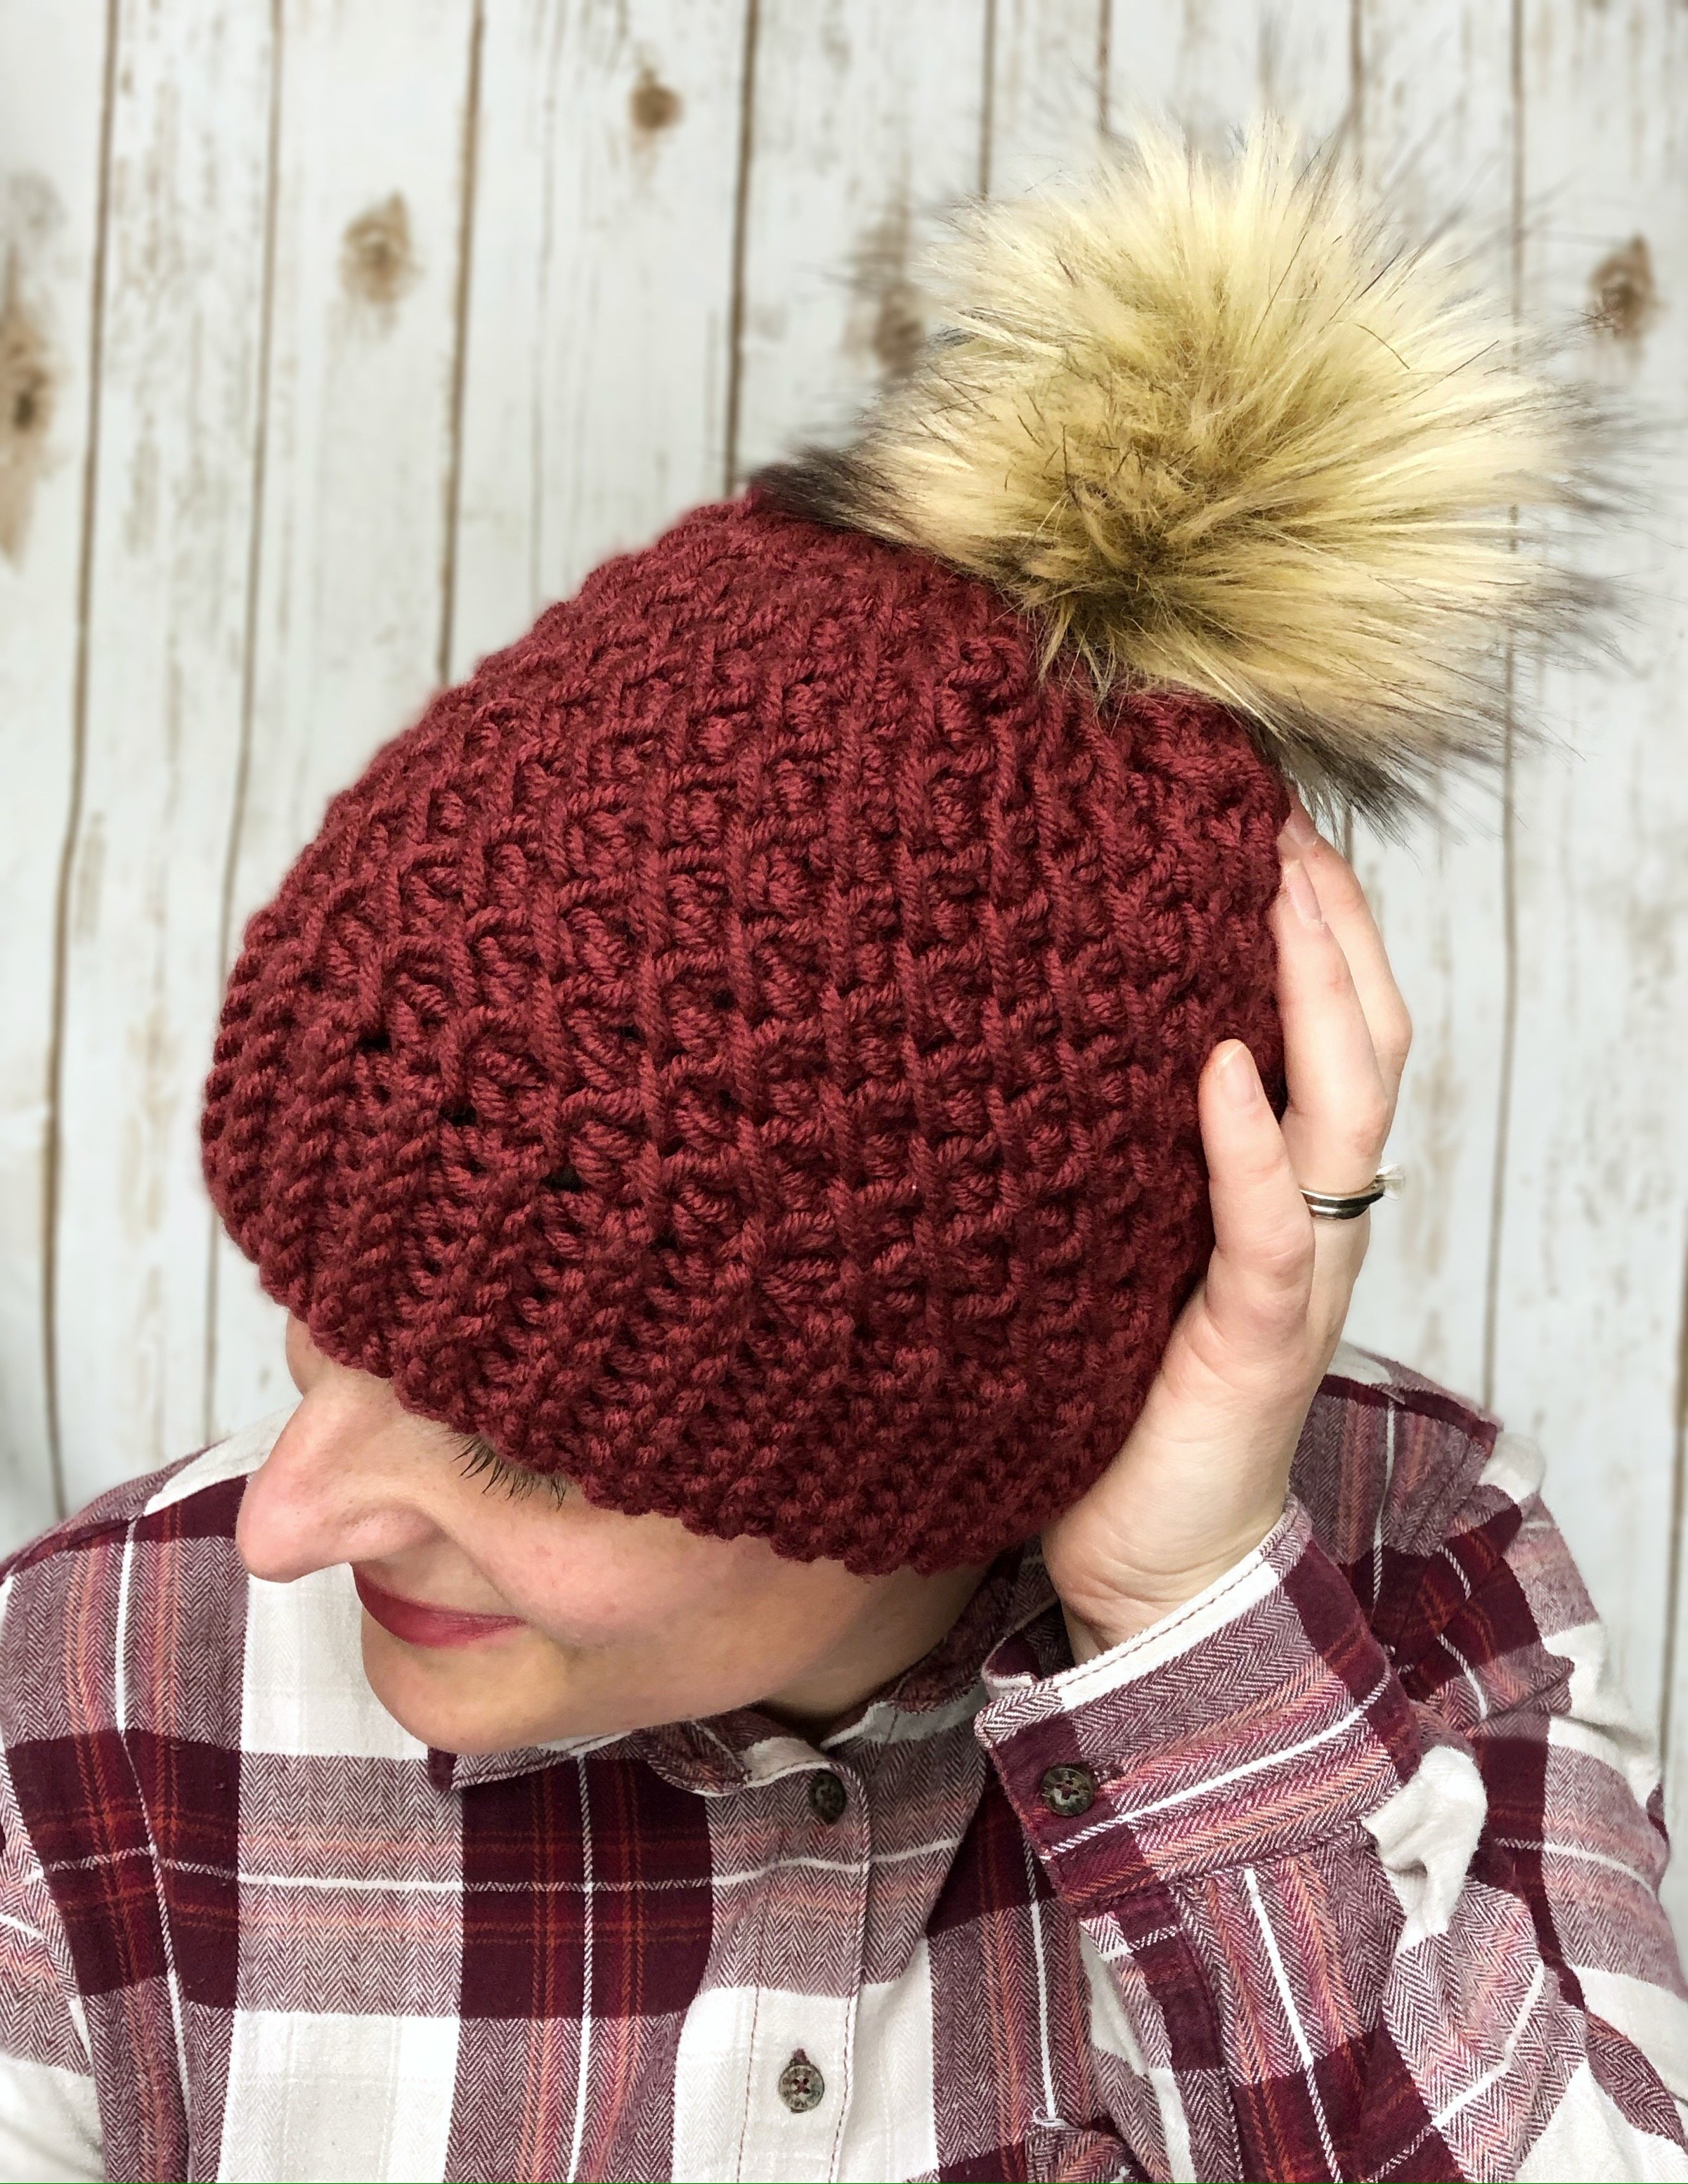
The Thimble Beanie is a quick and easy pattern that uses bulky yarn - perfect for market makes and teacher gifts.
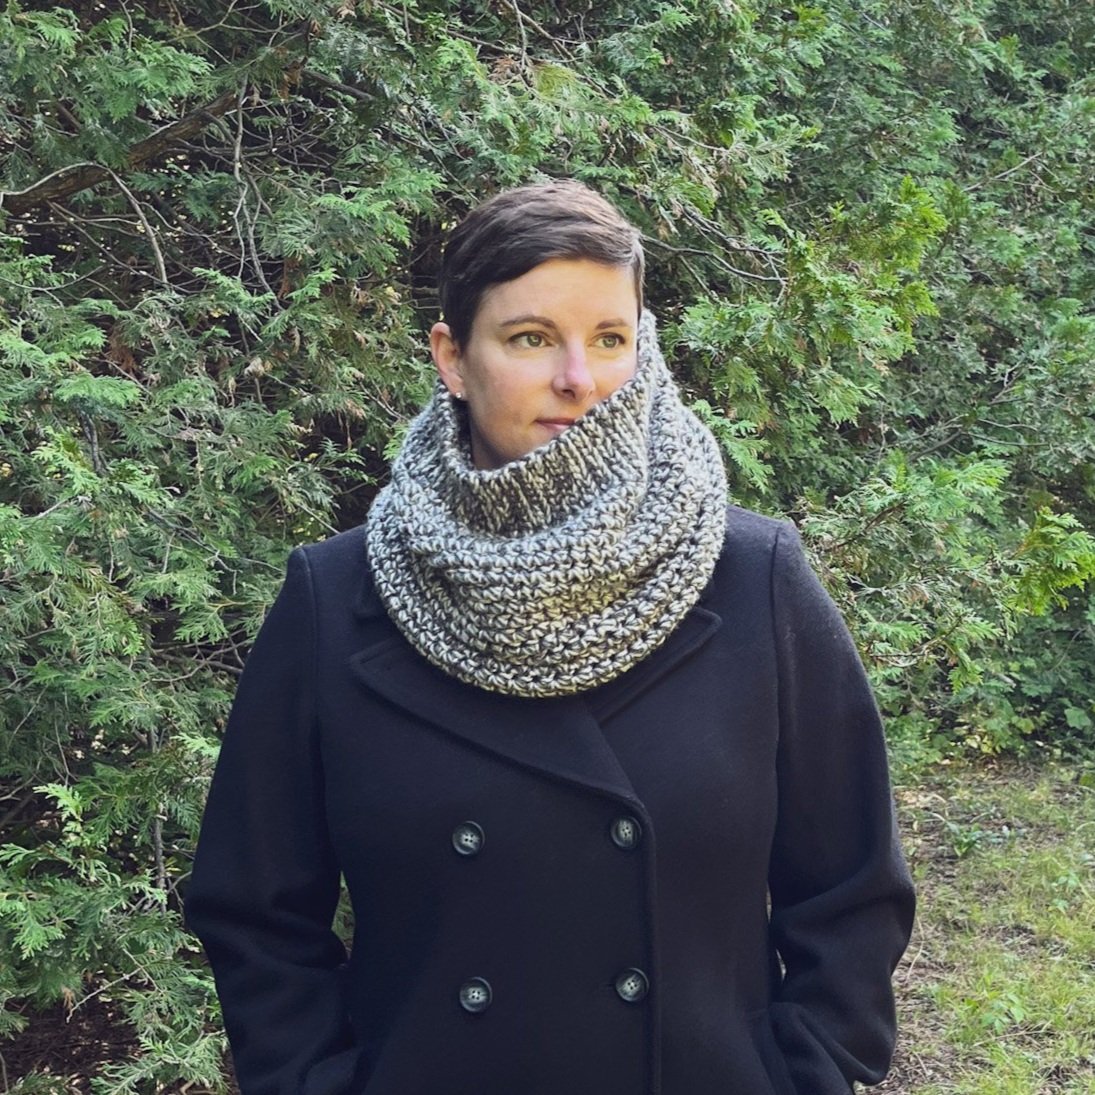
The Verso Cowl is a big, cozy, statement cowl that will ward off icy cold breezes - it’s also available as a Lion Brand kit!
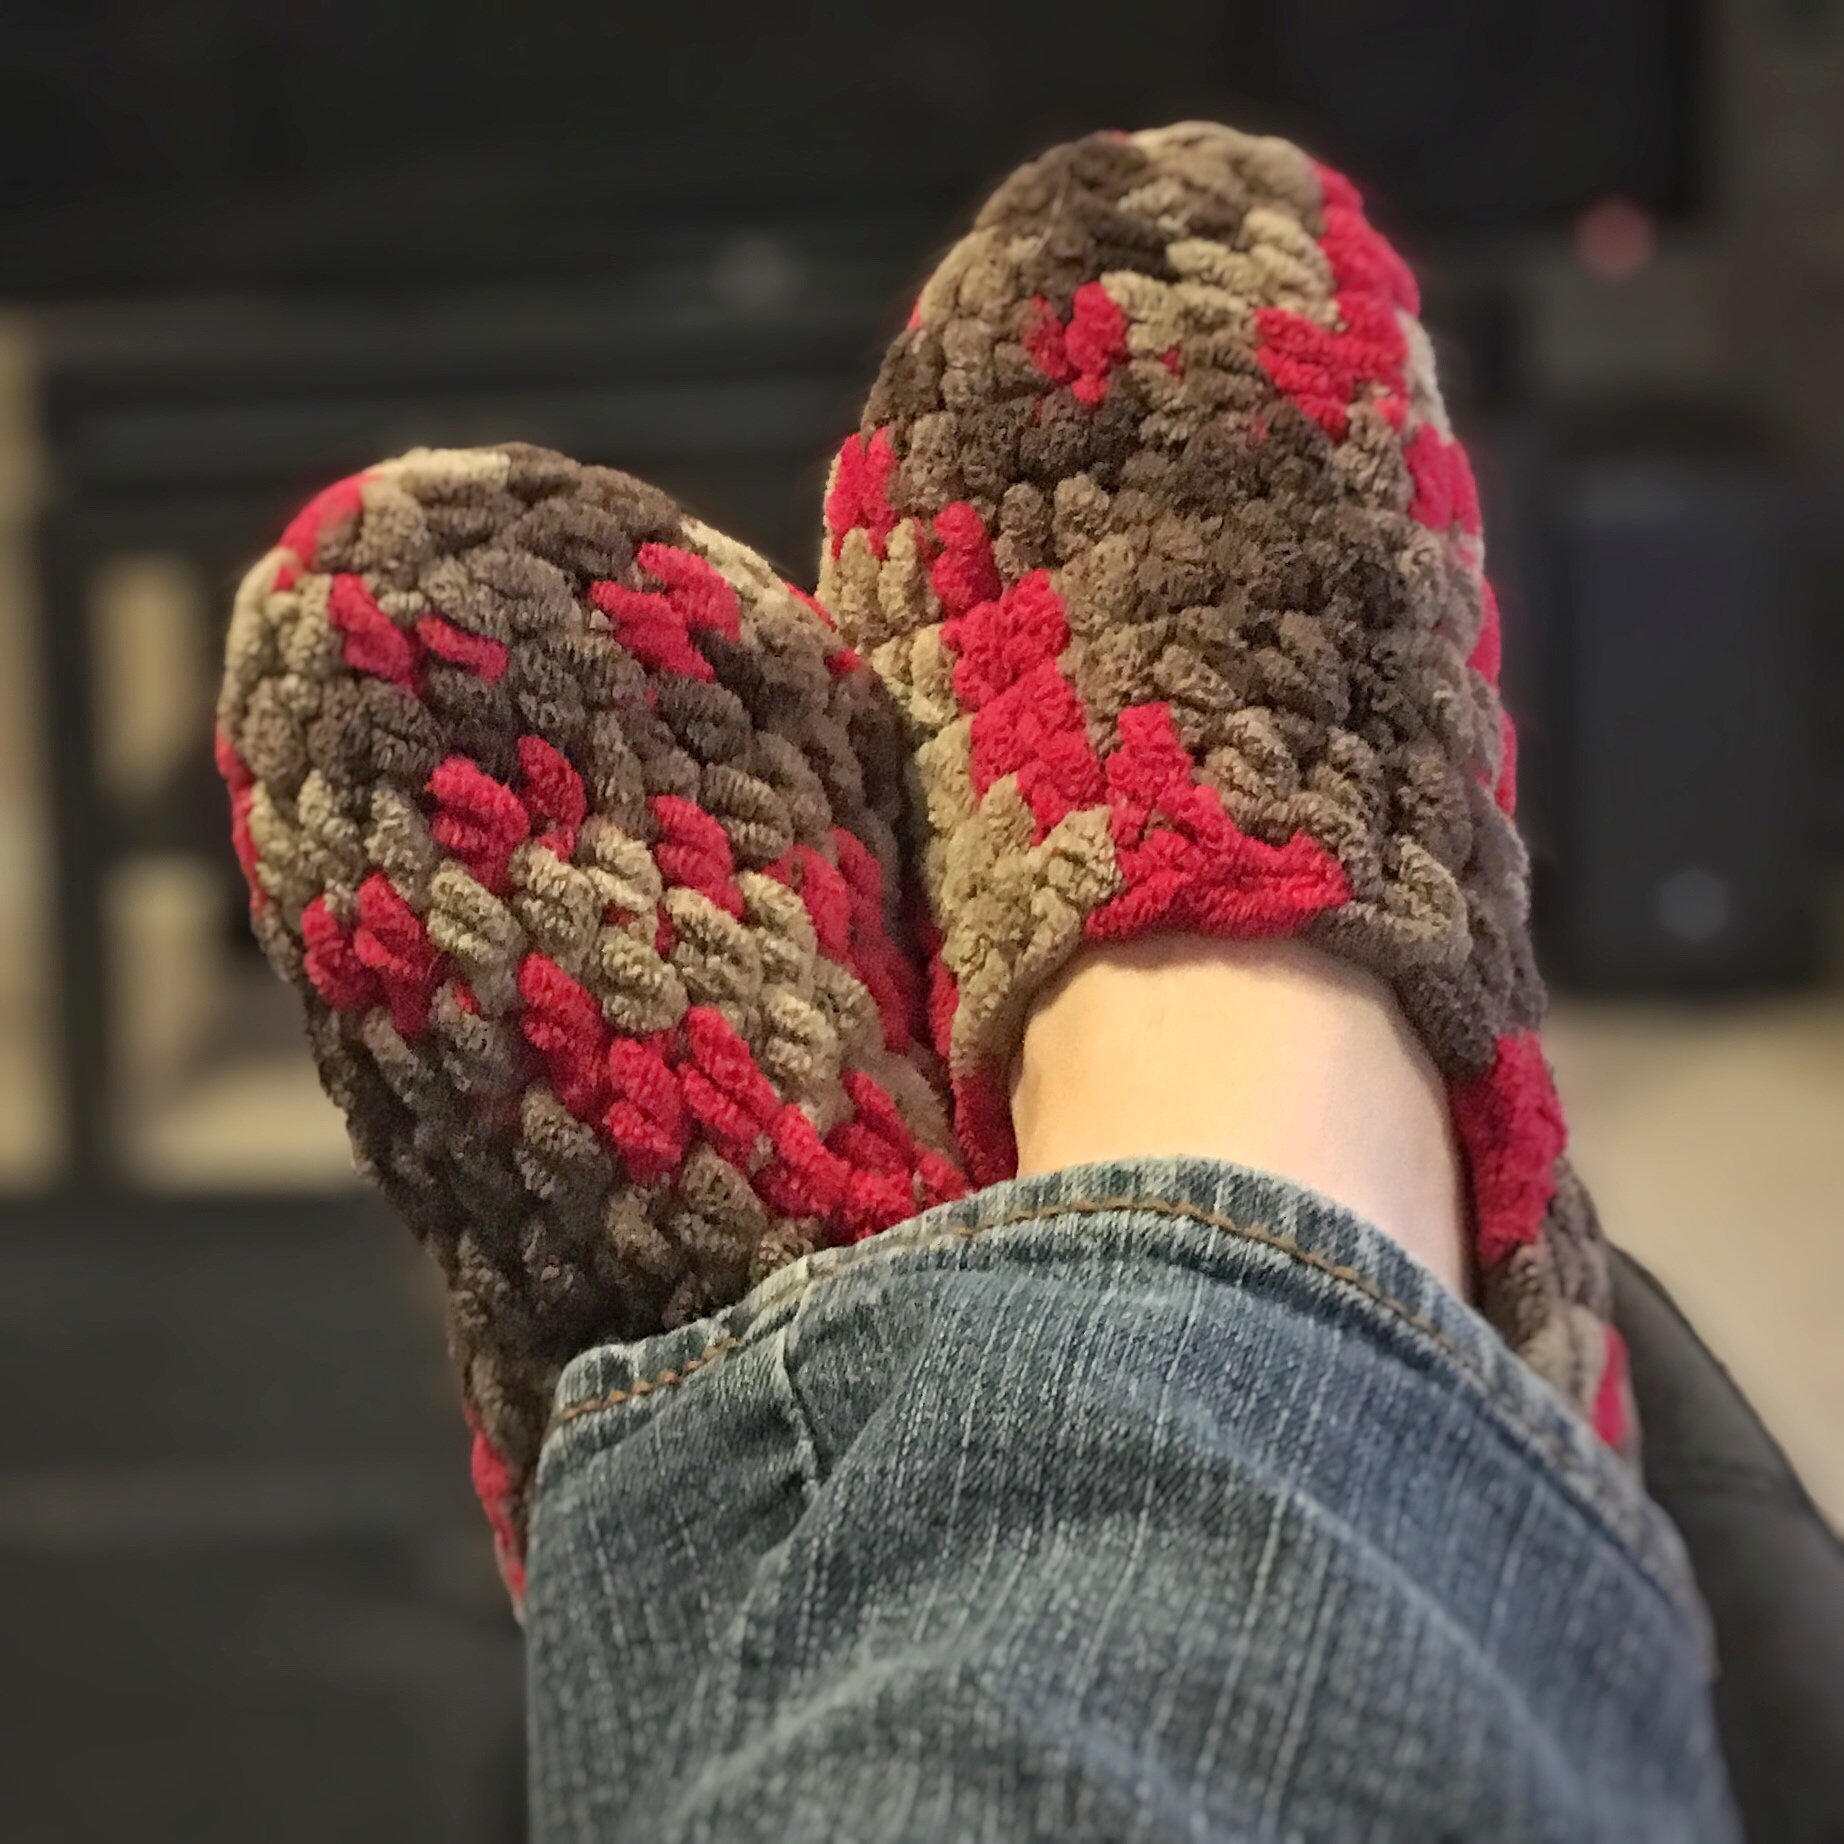
The Homebody Slippers pattern includes 14 sizes, so the whole family can enjoy them! They make great gifts and stocking stuffers.
The Juliet Earwarmer is a beginner-friendly Tunisian crochet pattern, and great for those who don’t care for full hats.