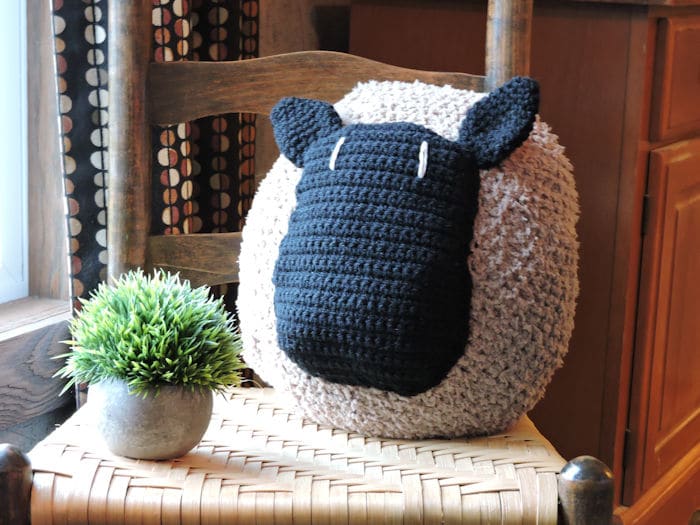
I found an adorable sheep pillow in a catalog and I couldn’t wait to try one of my own. It fits so well in my rustic style. It’s so fun and would make a perfect gift.
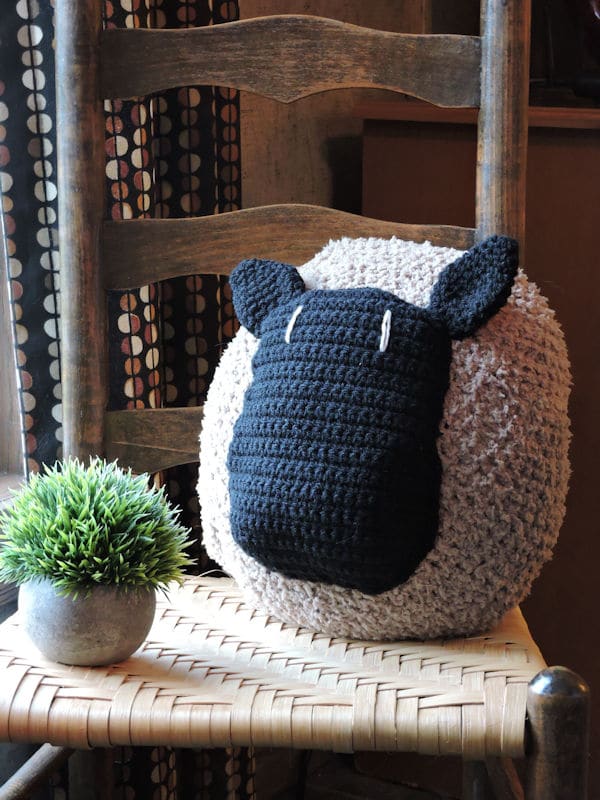
Sheep Pillow
designed by Kim Guzman © Aug. 2018
Please read my Terms of Use
Technique: Regular Crochet
Materials
- Sirdar Snuggly Snowflake Chunky: color 634 Teddy, 3 skeins or approx. 180 yards
- Hayfield Bonus Aran (or any size 4 weight acrylic or wool blend): color Black, approx. 100 yards
- Very small amount Cream for the eyes
- Size L [8mm-11] hook or size to meet gauge as stated in Gauge section
- Size H [5mm-8] hook
- 14″ round pillow form
- Stitch markers
- Yarn needle
- Fiberfill
- Straight pins
Finished Size
14″ round
Gauge
With larger hook and Teddy, 10 sc for 10 rnds measures 4″
Special Stitches
Single Crochet 2 Together (sc2tog): Insert hook in stitch indicated, yarn over, pull loop through, insert hook in next stitch, yarn over, pull loop through, yarn over, pull through 3 loops on hook.
Single Crochet 3 Together (sc3tog): Insert hook in stitch, indicated, yarn over, pull loop through, [insert hook in next stitch, yarn over, pull loop through] twice, yarn over, pull through 4 loops on hook.
Notes
The yarn used for the body of the pillow isn’t the easiest. You need to stitch quite loosely and you have to use feel most of the time instead of sight. It is well worth the end result. Try to count the stitches in every round to ensure that you have the correct number. The stitch count is the important thing. If you are off a stitch or two, just add it on the next round because, just as difficult as it may be to work with this yarn, it’s also very good at hiding any mistakes.
I was able to find both of these yarns at Wool Warehouse. They ship to the US at reasonable rates and wonderful, friendly service.
Crochet Pattern Instructions
Pillow Cover
Use stitch markers as necessary at the first stitch of a round so you’ll know when a round ends and begins. Also, use stitch markers in the center of the 3-sc groups so you will know when to increase. Move stitch markers up as work progresses.
Rnd 1: With Teddy and larger hook, ch 19, 3 sc in second ch, sc in next 16 ch, 3 sc in last sc, turn upside down, sc in 16 across bottom, sl st to first sc: 38 sc.
Rnd 2: Ch 1, sc in same sc, 3 sc in next, sc in next 18 sc, 3 sc in next, sc in next 17 sc, sl st to first sc: 42 sc.
Rnd 3: Ch 1, sc in same sc and in next sc, 3 sc in next, sc in next 20 sc, 3 sc in next, sc in next 18 sc, sl st to first sc: 46 sc.
Rnd 4: Ch 1, sc in same sc and in next 2 sc, 3 sc in next, sc in next 22 sc, 3 sc in next, sc in next 19 sc, sl st to first sc: 50 sc.
Rnd 5: Ch 1, sc in same sc and in next 3 sc, 3 sc in next, sc in next 24 sc, 3 sc in next, sc in next 20 sc, sl st to first sc: 54 sc.
Rnd 6: Ch 1, sc in same sc and in next 4 sc, 3 sc in next, sc in next 26 sc, 3 sc in next, sc in next 21 sc, sl st to first sc: 58 sc.
After rnd 6, piece measures approximately 11″ long by 6″ tall. It will begin to look more like a large beanie as you continue.
Rnd 7: Ch 1, sc in each sc around, sl st to first sc: 58 sc.
Rep rnd 7 until the depth (height) of the “beanie” measures 11″ (approx. 29 rnds).
Insert pillow form into cover. Place two stitch markers, one on each side edge. Begin decreasing as follows.
Rnd 1: Ch 1, sc around, except at sc before each stitch marker, work sc3tog (see Special Stitches above) across 3 sts on each side, sl st to first sc: 54 sc.
Rnds 2-5: Rep rnd 1 of decreasing. On final rnd, 38 sc.
Going through both thicknesses, sl st the top closed, fasten off, weave in ends, as necessary.
Sheep Face
Row 1: Ch 16, sc in second ch from hook and in each ch across, turn: 15 sc.
Rows 2 (RS): Ch 1, 2 sc in first sc, sc to last sc, 2 sc in last sc, turn: 17 sc.
Rows 3-6: Rep row 2. 25 sc on final row.
Rows 7-16: Ch 1, sc in each sc across, turn: 25 sc.
Row 17: Ch 1, sc2tog (see Special Stitches above) across first and next sc, sc to last 2 sc, sc2tog across last 2 sc, turn: 23 sc.
Row 18: Rep row 17: 21 sc.
Row 19: Ch 1, sc in each sc across, turn: 21 sc.
Rows 20-31: Rep row 19.
Row 32: Ch 1, sc2tog across first and next sc, sc to last 2 sc, sc2tog across last 2 sc, turn: 19 sc.
Rows 33-37: Rep row 31. 9 sc on final row.
With RS facing you, ch 1, sc evenly around entire piece, sl st to first sc. Fasten off.
Ears (make 2)
Work in a continuous spiral, without joining the rounds. Use a stitch marker to mark and keep track of the rounds. Move stitch marker up as work progresses.
Rnd 1: Ch 2, 6 sc in second ch from hook: 6 sc.
Rnd 2: [Sc in next sc, 2 sc in next sc] around: 9 sc.
Rnd 3: Sc in each sc around: 9 sc.
Rnd 4: [Sc in next 2 sc, 2 sc in next sc] around: 12 sc.
Rnd 5: Sc in each sc around: 12 sc.
Rnd 6: [Sc in next sc, 2 sc in next sc] around: 18 sc.
Rnd 7: Sc in each sc around: 18 sc.
Rnd 8: Rep rnd 7.
Rnd 9: [Sc in next sc, sc2tog across next 2 sc] around: 12 sc.
Rnd 10: Sc in each sc around: 12 sc.
Rnd 11: [Sc in next 2 sc, sc2tog across next 2 sc] around: 9 sc.
Rnd 12: [Sc in next sc, sc2tog across next 2 sc], sl st to next sc: 6 sc. Fasten off.
Finishing
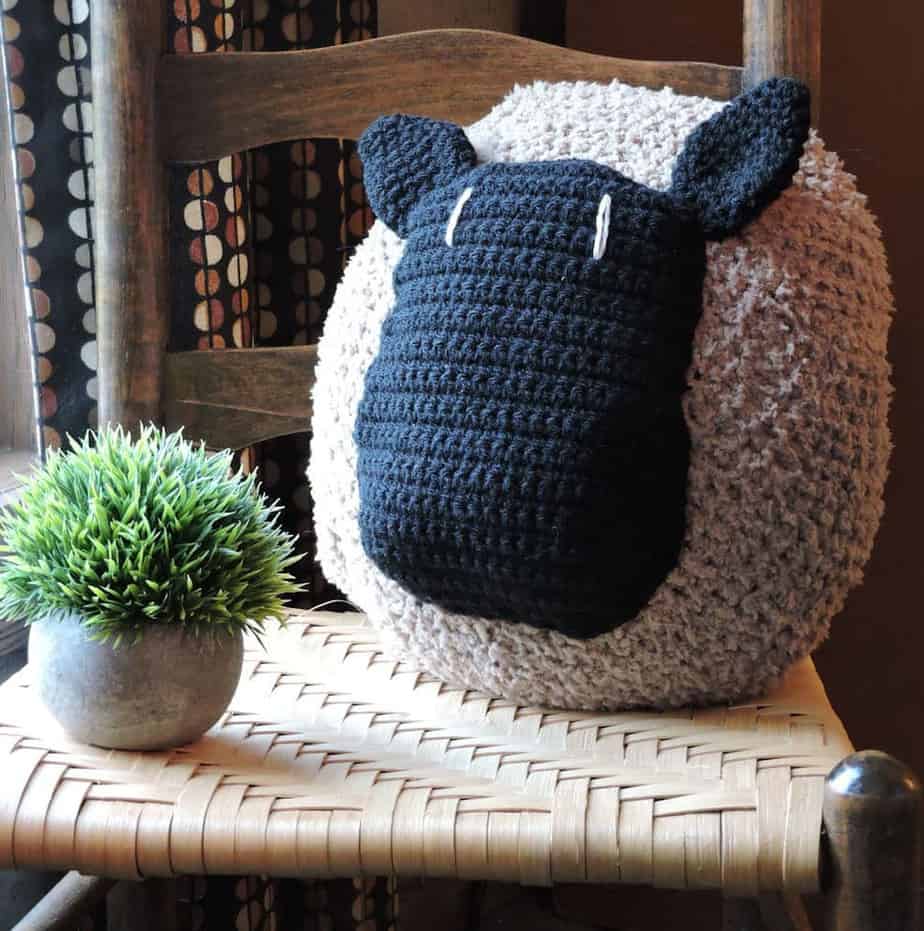
With yarn needle and cream yarn, using photo as a guide, make two straight lines for the eyes.
Using straight pins, temporarily attach face and ears to center of pillow. Starting around the sides and top, seam to pillow with yarn needle. Stuff face lightly with fiberfill as you go. Use a chopstick or knitting needle to help stuff the fiberfill, as necessary.
Weave in all ends securely.
 |