

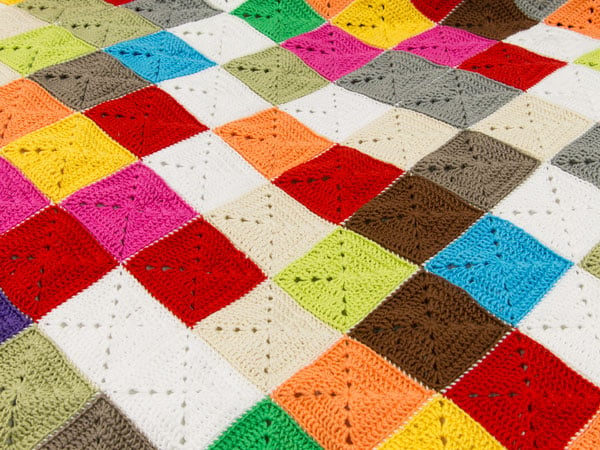
Highly customizable in terms of colour, this lap rug is the perfect snuggle buddy after a long day's work! If you’ve always wanted to learn how to crochet, follow our series of Crochet Fundamentals. This pattern uses US terms and stitches including magic ring, chain (ch), slip stitch (sl st), single crochet (sc) and double crochet (dc).
Supplies
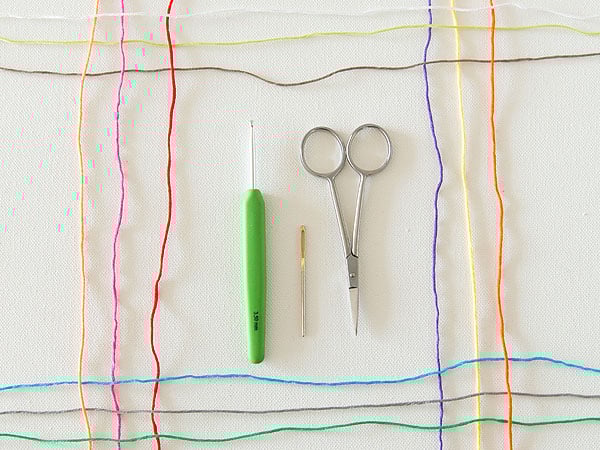

- Yarn
- Crochet hook (I used a 3.5mm hook)
- Darning needle for sewing in the ends
- Scissors
- Click here to learn more about essential crochet tools
The Numbers
For the lap rug in this tutorial, I made 196 squares in total, in 14 different colours. The squares are on the diagonal, so you'll need triangle pieces to straighten out your lap rug. To make a lap rug that's about 1.40m by 1.10m, you'll need 158 squares and 38 triangles. One square is about 10cm across. You can use any colour you like to join your squares and triangles.
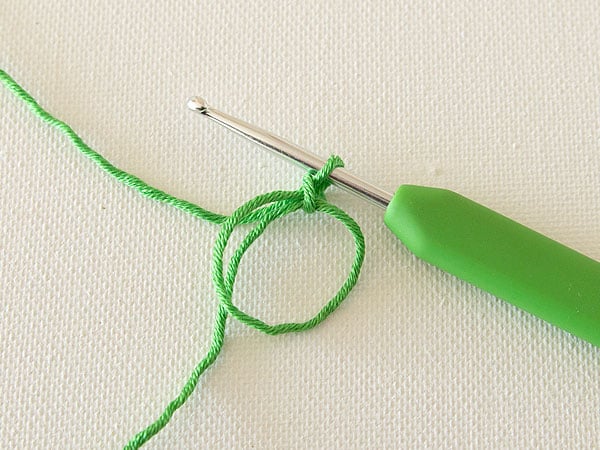
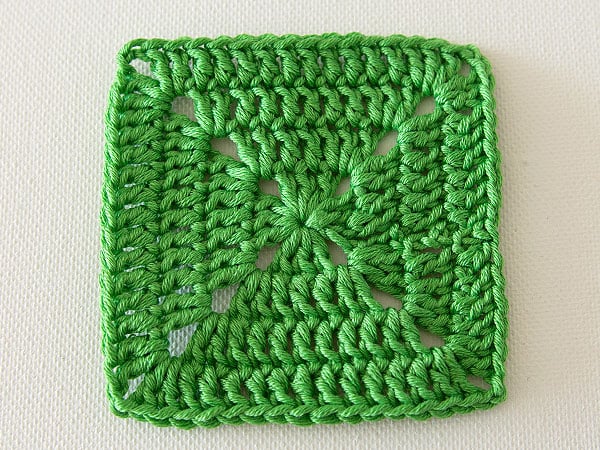
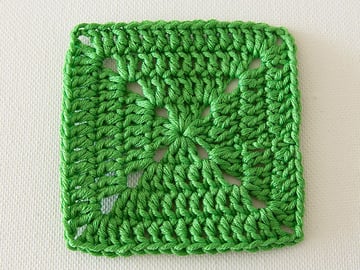
1. Crochet a Square
Step 1
Make a magic ring, and secure with a stitch.

Step 2
Chain 2, then work 2dc into the ring. Chain 2, then work 3dc into the ring. Chain 2 and work 3dc into the ring two more times. Close the ring, and join with a slip stitch to the top ch of the beginning ch2.
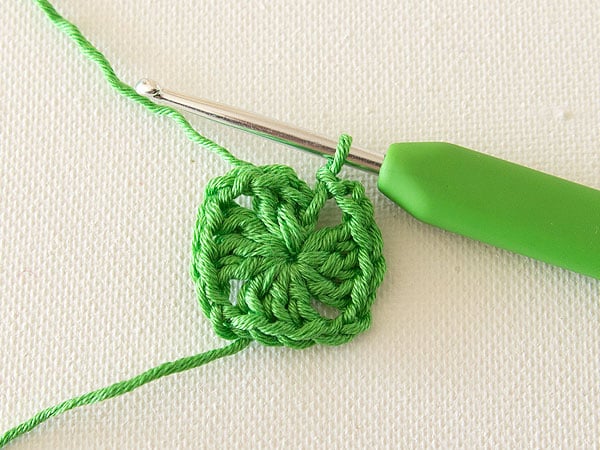

Step 3
Chain 3, and work 1dc into the two underlying dc stitches. Work *2dc, ch 2, 2dc* into the ch2 space from step 2. Go around the square like this, working dc stitches into each dc, and working *2dc, ch 2, 2dc* into each corner space. Join with a slip stitch to the top of your beginning ch3.

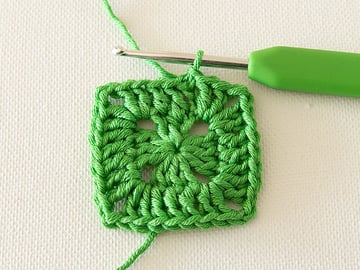
Step 4
Repeat step 3.


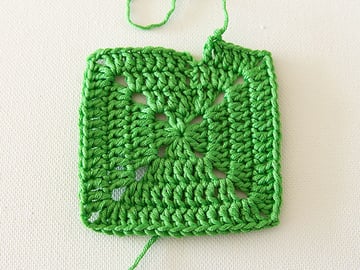
Step 5
Repeat step 3 one more time, but don't join the round. Cut the yarn and pull through the loop on your hook when you've made the last stitch. The total number of stitches on one side of your square should be 15.

Step 6
Grab your darning needle, and thread the yarn. Insert your hook through both loops of the first dc stitch you made, skipping the ch3 you began the round with.

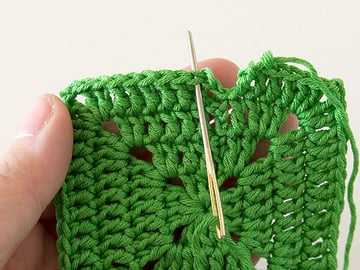
Insert your hook back through the last stitch you made, through the back loop only.


Step 7
Sew in both ends of your square.
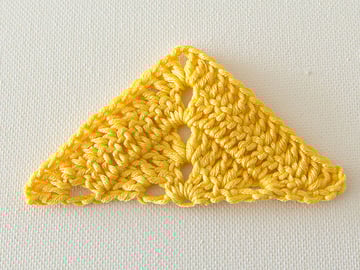
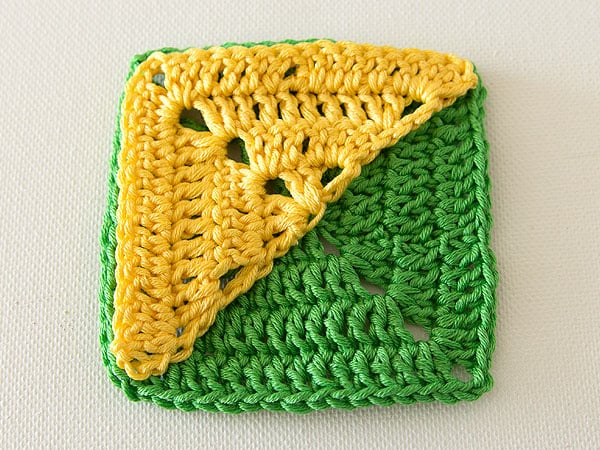
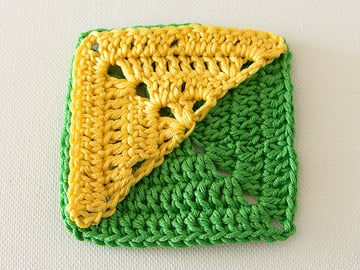
2. Crochet a Triangle
Step 1
Make a magic ring, and secure with a stitch.
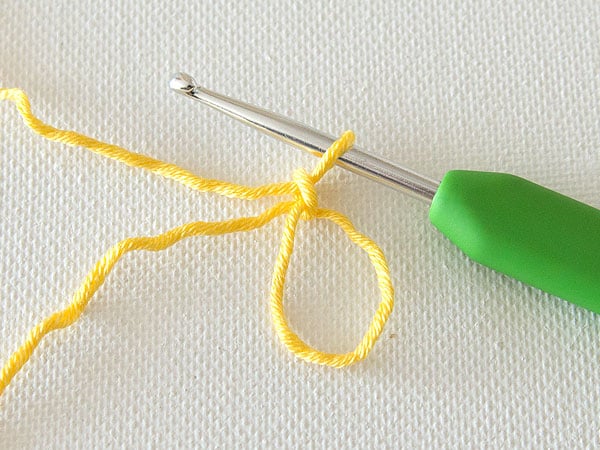

Step 2
Chain 3, then work 2dc into the ring. Chain 2, then work 3dc into the ring. Close the ring (not too tight).


Step 3
Chain 4, and turn your work. Work 2dc into the same stitch, then work 1dc into each dc until you reach the corner space. In the corner space, work *2dc, ch2, 2dc*. Work 1dc into each dc, plus two extra in the last stitch.
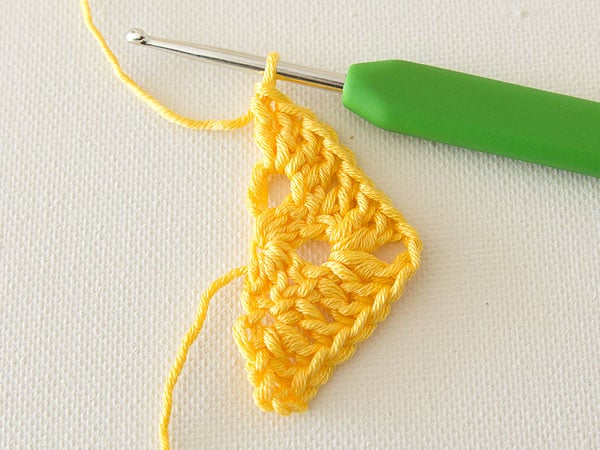

Step 4
Repeat step 3.

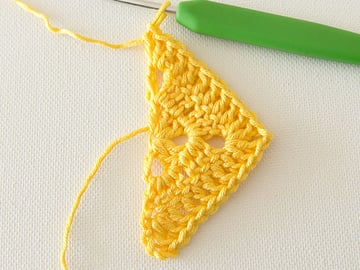
Step 5
Repeat step 3, cut the yarn, and pull through the loop on your hook. The total amount of stitches on one side of your triangle should be 15.


Step 6
Sew in both ends using your darning needle.

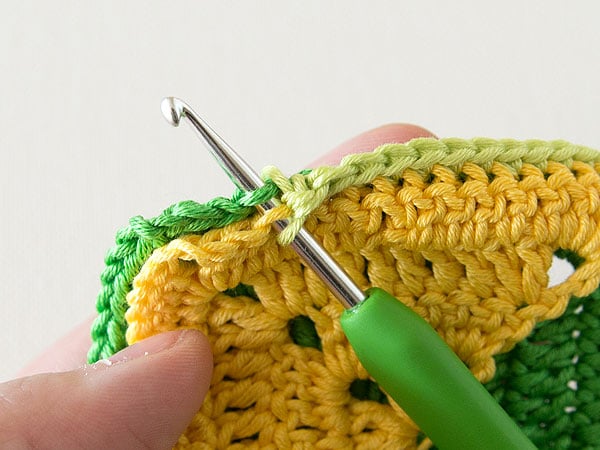
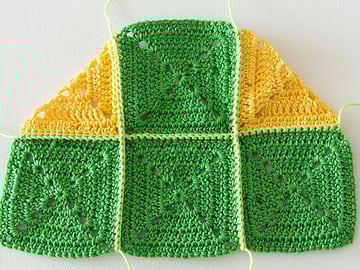
3. Join Your Squares and Triangles
Step 1
Put a triangle and square together, right sides facing.
Step 2
Start with a slip knot on your hook, and from right to left, begin joining your pieces using a single crochet stitch. Insert your hook through the back loops of both pieces to create a nearly invisible join.

Step 3
Continue joining a pair of squares, and a square and a triangle.


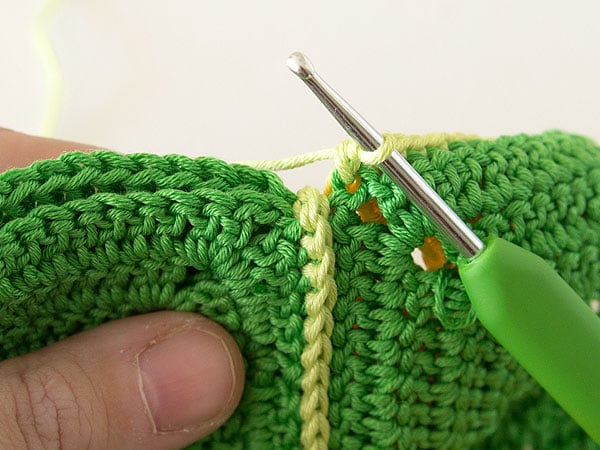
Step 4
Once you have joined all squares and triangles together, it's time to join the open seams that are left. Use the same method of starting with a slip knot and using single crochet stitches to join your pieces. When you reach an intersection, chain 1, and continue through to the next pair of squares.


Step 5
If all your pieces are joined, the back side of your lap rug should look something like this:

The seams should be almost invisible from the front.


Step 6
Sew in the remaining ends of your lap rug using your darning needle.
Admire Your Lap Rug
People will admire the hard work that went into making all those squares and triangles, so it's time to wow the crowds with your stunning lap rug! Because you've made it on the diagonal, your blanket will stand out from the rest. Not to mention, it's nice to snuggle under with a nice cup of tea!


Do you love this crochet project? Are you going to create a lap rug, perhaps in your own colour scheme? We’d love to see your work! Let us know if you have any questions or other comments in the space below.


