Journey Under The Sea Crochet Bag
How do you create knit-look lace stitches with a crochet hook?
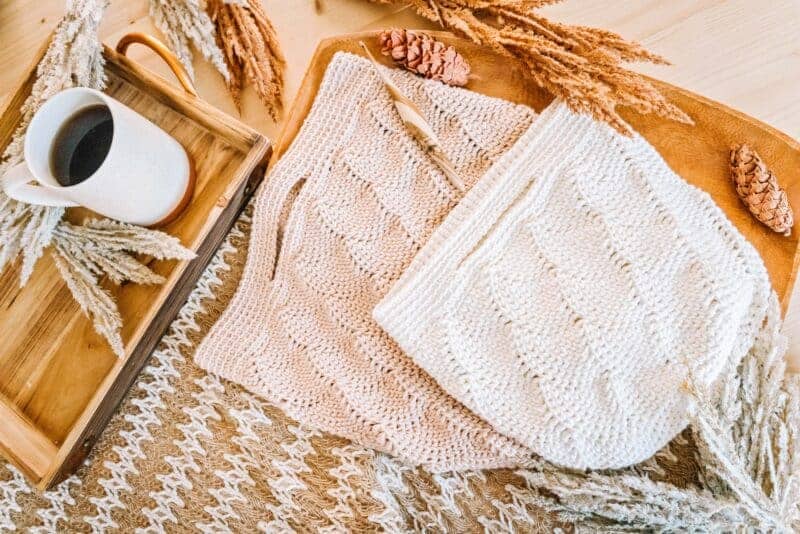
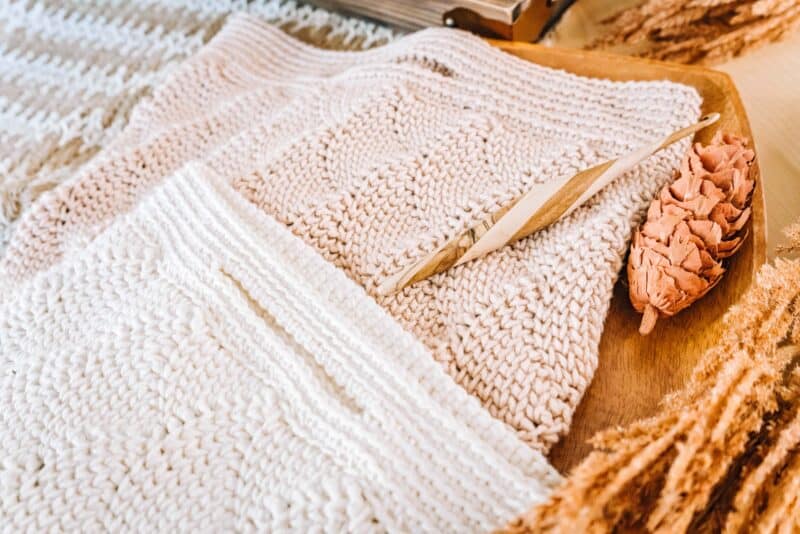
The Journey Under The Sea Crochet Bag is my first pattern that ventures into knit-look crochet lace. It's quickly become a favorite fabric with it's simple repeats and gorgeous crochet texture. And it's part of the Magical Crochet Stitches Course!
But how is this done? I assure you, with a crochet hook. You may have seen this style of stitch before, but only in knit. After lots of time experimenting, I finally figured out how to easily replicate this stitch in crochet. How these stitches lean reminds me of ocean waves which is how this bag got its name. This crochet bag pattern has written and video tutorials to guide you through each important step.
You can now buy a bundle of all the patterns from
the Magical Stitches Course on Etsy; click here!
- Swirls on the Water Crochet Bag
- If The Slipper Fits Crochet Floor Pouf
- Cinderella's Knit-Look Crochet Pumpkin Pattern
- Happily Ever After Crochet Clutch Pattern
- Journey Under The Sea Crochet Bag
- All Cabled Up In Sunshine Socks
- Royal Antler Crochet Mock Cable Bag
- Enchanted Crochet Hat
The Journey Under The Sea Crochet Bag pattern is now available for purchase outside the Magical Stitches course on Ravelry & Etsy
What are Magical Crochet Stitches?
Get the knit look with the crochet hook! This is a method of strategically using crochet stitches in unique increases and decreases, resulting in a knit-look mimic.
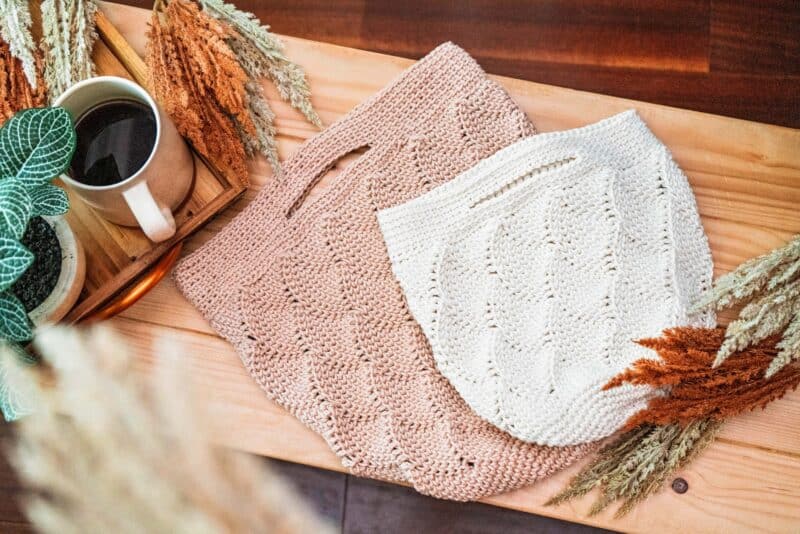
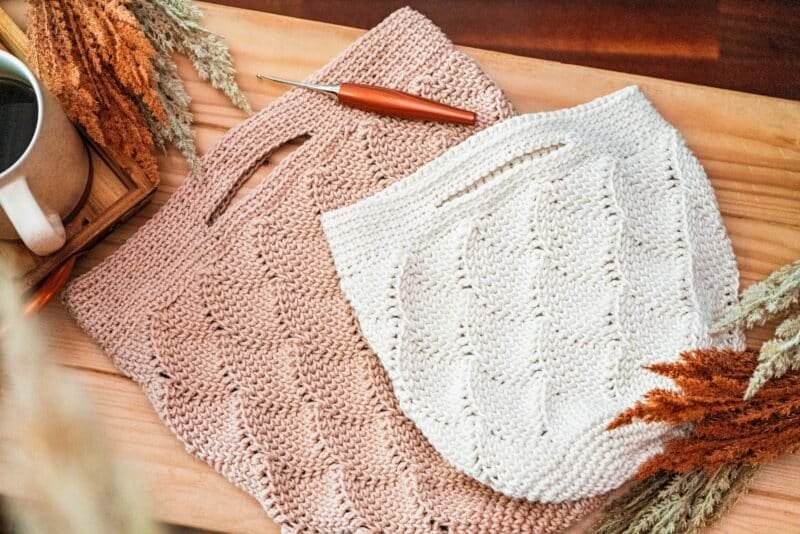
This is still a crochet fabric, however! It's unique on its own and can't be duplicated in the same way in knit. The fabric created for the Journey Under The Sea Crochet Bag has the ability to look lace but still creates a dense and sturdy fabric for a bag.

Journey Under The Sea Bag Construction
The Journey Under the Sea Crochet Bag is worked from the bottom up. This has a simple 7-round repeat to create the wave look, and it’s with stitches you probably already know. No surprise tricks here! I think you might be shocked at what an easy, relaxing project this is.
I have included two styles of charts, one being a knitter-style chart for those who understand knit charts. The charts will be worked from right to left for each round and repeated until the end of the round.
Are there more magical stitch patterns?
Yes! And even more on the way. I am addicted to this new method, and the swatches are taking over my house. Check out all the patterns in the Magical Stitches Course on my blog:
Royal Antler Crochet Bag
All Cabled Up In Sunshine Crochet Socks
Happily Ever After Crochet Clutch
If The Slipper Fits Crochet Pouf
Swirls On The Water Crochet Bag
Enchanted Crochet Hat

Why You Should Use Cotton Yarn & Possible Substitutes:
When it comes to making crochet bags, it's important to use a yarn that will hold up to the intended use. This is why I find cotton yarn to be the best option, as it has little stretch and creates a firm fabric. This will reduce any stretching over time as the bag is used to carry objects.
I love using WeCrochet Dishie Yarn because it's softer than most cotton yarns, but still a strong cotton. Here are some other substitutes I recommend:
Lily Sugar'n Cream Worsted
Premiere Home Cotton Yarn
Cascade Yarns Nifty Cotton
Journey Under The Sea Crochet Bag Intro Video
Journey Under The Sea Crochet Bag Supplies:
Crochet Hook:
Notions:
Removable stitch markers if needed
Yarn needle to weave in ends
Scissors
Yarn & Yardage:
WeCrochet Dishie
100% Cotton, 190yds/100g
Small Bag: 255yds (2 Balls)
Large Bag: 465 yds (3 Balls)
Abbreviations/Stitches:
blo - back loop only
ch - chain
rnd- round
sc - single crochet
ssc - split single crochet
sl st - slip stitch
st(s) - stitch(es)
Gauge:
14 sts x 19 rows = 4x4 inches in body stitch pattern, Rnds
2-8.
Skill Level:
Intermediate
Size/Measurements:
Laid Flat:
Small Bag: 10.5” wide by 10.5 inches tall
Large Bag: 13” wide by 13” tall
Journey Under The Sea Crochet Bag Notes:
The Journey Under the Sea Crochet Bag is worked from the bottom up. This has a simple 7-round repeat to create the wave look, and it’s with stitches you probably already know. No surprise tricks here! I think you might be shocked at what an easy, relaxing project this is.
I have included two styles of charts, one being a knitter-style chart for those who understand knit charts. The charts will be worked from right to left for each round and repeated until the end of the round.
Special Stitches:
Split Single Crochet (ssc): This stitch is also known as the waistcoat stitch. This stitch is worked as single crochet but where the hook is inserted is the only difference. The hook will be inserted between the ‘V’ of the stitch.
Insert hook between the legs of the stitch (on the back of work, the hook should be under the horizontal bar and between the upside-down ‘V’ shape as well), yarn over, pull up a loop to the height of a single crochet, yarn over, pull through both loops on hook. Keep your hands loose and comfortable. If your hands start to hurt, then the tension of the stitch is too tight. When entering the stitch, pull up the loop a bit more than you normally would, it will give the ‘V’ more space for the next round and make working the ssc comfortable. Video tutorial: https://brianakdesigns.com/split-stitch-mania/