Ice Cream Party Cardi, free children’s cardigan crochet pattern
This post includes:
◉ FREE Pattern: The entire written pattern for FREE.
◉ Video Tutorials: Helpful video tutorials going over special techniques needed for this pattern.
The Ice Cream Party Cardi is a simple and classic children’s cardigan. While the body uses a basic stitch, special care is given to the shoulder area for a good fit.
This cardigan is seamed, has a deep V-neck and a modified drop shoulder. Each piece is worked flat from the bottom up and mattress stitched together. After seaming, slip stitch ribbing is applied around the bottom, neckline, and sleeves of the cardigan.
Find a printer-friendly, PDF version of the Ice Cream Party Cardi at mandobug.com and on Ravelry.
The Cardi’sConstruction
The Ice Cream Party Cardi is a seamed modified drop shoulder, deep V-neck cardigan. The cardigan consists of 5 pieces crocheted seperately and seamed together. Each piece is worked flat from the bottom up and mattress stitched together. You’ll create a back panel, a front left panel, a front right panel, and two sleeves. After seaming, slip stitch ribbing is applied around the bottom, neckline, and sleeves of the cardigan. I have created video tutorials going over how to assemble and mattress stitch the cardigan together. I also made tutorials for how to work the applied slip stitch ribbing and create the buttonholes along the front buttonband.
Choosing the Right Yarn
This project uses a category 4 medium worsted weight cotton acrylic blend. I used Lion BrandIce Cream Cotton Blend which is now a discontinued yarn. The blend of cotton and acrylic adds an amazing drape to be desired for garments and the fiber content is an easy to care for blend that is machine washable. When looking for a substitute I recommend searching for an acrylic cotton blend such as theses yarns:
⊛ Mayflower Easy Care Classic Cotton Merino
⊛ Knit Picks Comfy Worsted
⊛ Caron Cotton Cakes
⊛ Plymouth Yarn Jeannee Worsted
And not to worry! If you’re not a fan of acrylic or cotton, this cardigan will work up wonderful in wool as well!
225 yds (206 m) / 3.5 oz (100 g) (shown in color Strawberry)
Hooks
US size H-8 (5.0 mm) hook or size needed to obtain gauge for body.
US size J-10 (6.0 mm) hook for ribbing or hook 1.0 mm larger than hook used for body.
Notions
6 Size ¾” buttons
I used “You’re Sweet” buttons from Shelly’s Buttons and More
Sewing Needle
Coordinated Thread
Tapestry Needle
5 Sewing Pins or Stitch Markers
Gauge
14.5 stitches, 11.5 rows = 4” in half double crochet.
Abbreviations
ch(s) – chain(s)
hdc2tog – half double crochet two together
hdc – half double crochet
sp – space
sc – single crochet
sl st – slip stitch
st(s) – stitch(es)
Special Stitches
Half Double Crochet Two Together (hdc2tog)
[Yarn over, insert hook in next stitch, yarn over and pull up loop] 2 times, yarn over and draw through all loops on hook.
Find a printer-friendly, PDF version of the Ice Cream Party Cardi at mandobug.com and on Ravelry.
Ice Cream Party Cardi Free Crochet Pattern
The Ice Cream Party Cardi is a seamed modified drop shoulder deep V-neck cardigan. Each piece is worked flat from the bottom up and mattress stitched together. After seaming, slip stitch ribbing is applied around the bottom, neckline, and sleeves of the cardigan.
Notes
Pattern is written using US crochet terminology.
Ch-1 at the beginning of the row is not worked into and does not count as a stitch.
Work slip stitch ribbing loosely.
Back Panel
Using smaller hook,
Ch 48, 50, 54 (58, 62, 64)
Rows 1 – 24, 30, 30 (32, 32, 38): ch 1, does not count as a st, and is not worked into here and throughout, hdc across, turn.
(48, 50, 54 (58, 62, 64) hdc)
You will now create a cut out for the armhole on both sides.
Row 25, 31, 31 (33, 33, 39): sl st in next 4 hdc, (sl st, ch 1, hdc) in next hdc, hdc across until last 4 hdc, leave those sts unworked, turn. (40, 42, 46 (50, 54, 56) hdc)
With wrong sides facing each other, mattress stitch the left front panel to the left side of the back panel along the shoulder shaping.
With wrong sides facing each other, mattress stitch the right front panel to the right side of the back panel along the shoulder shaping.
Top Sleeve Seams
Open the top shoulder seams just created, with right sides facing up, align sleeve in the arm hole cut out. Secure with pins or stitch markers. Mattress stitch the top of the sleeve into the front and back panels.
Side Body and Sleeve Seams
Fold the cardigan in half lengthwise along the top shoulder seam, with wrong sides facing each other, mattress stitch the front panel to the back panel along the side of the cardigan and down the folded sleeves.
Using larger hook, with right side facing up, join to a stitch near sleeve seam at wrist using a sl st,
Ch 6,
Row 1: ch 1, skip chain closest to hook, loosely sl st in back loop only of each st across, sl st in next 2 sts of wrist, turn.
Row 2: sk 2 sl sts, sl st in back loop only of each st across, turn.
Repeat Rows 1 and 2 around wrist.
Join ribbing by slip stitching through back loops of first and last rows. Fasten off yarn.
Bottom Ribbing
Using larger hook, with right side facing up, join to bottom front edge of left front panel using a sl st,
Ch 6,
Row 1: ch 1, skip chain closest to hook, loosely sl st in the back loop only of each st across, sl st in next 2 sts of bottom edge, turn.
Row 2: sk 2 sl sts, sl st in back loop only of each st across, turn.
Repeat Rows 1 and 2 around bottom of cardigan. Fasten off yarn.
Button Band Ribbing
Note – You will work ribbing into the side of the bottom ribbing of the front panel, then you will work ribbing into the hdc row ends of the front panel. Evenly space slip stitches along the hdc row ends by working 3 rows of ribbing over 2 hdc row ends.
Using larger hook, with right side facing up, join to the edge of the bottom ribbing on the right front panel using a sl st,
Ch 6,
Row 1: ch 1, skip chain closest to hook, loosely sl st in back loop only of each st across, sl st 2 into front panel edge, See Note above, turn.
Row 2: sk 2 sl sts, sl st in back loop only of each st across, turn.
Repeat Rows 1 and 2 across the front left panel of the cardigan, across the back panel, and across the front right panel until you reach its straight edge. See Button BandDiagram.
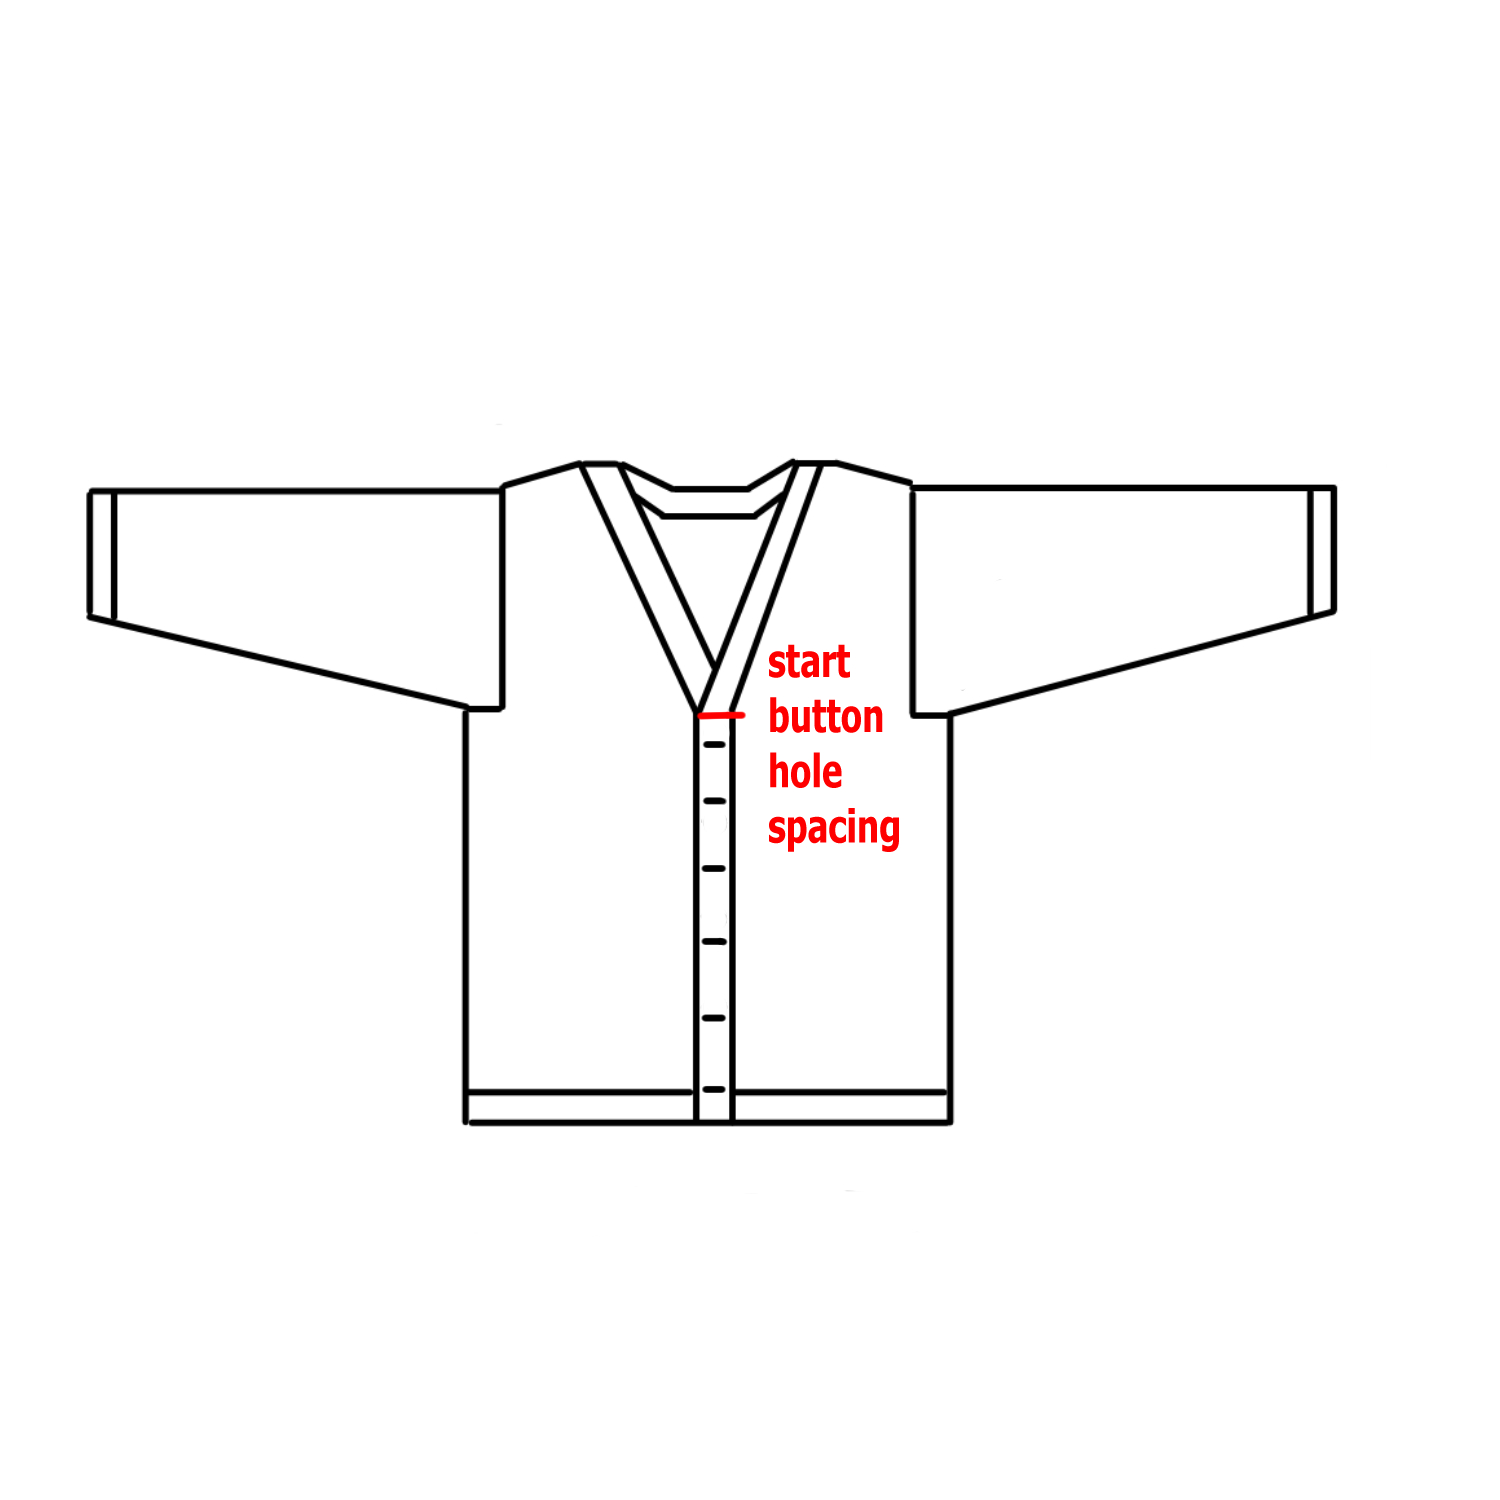
Buttonhole Row: ch 1, skip chain closest to hook, loosely sl st in the back loop only of next 2 sts, ch 2, sk 2 sts, sl st in back loop only of next two sts, sl st in next 2 sts of front panel, turn.
Next Row: sk 2 sl sts, sl st in back loop only of next 2 sl sts, 2 sc in ch-2 sp, sl st in back loop only of next 2 sl sts, turn.
Continue repeating Rows 1 and 2 along straight edge of front left panel evenly spacing out 5 more buttonhole rows. This will be approximately every 6, 8, 8 (8, 8, 10) rows. You can use stitch markers to mark where you’d like to place your button holes to ensure they are evenly spaced.
Fasten off yarn.
Buttons
Using a sewing needle and coordinating thread, sew each ¾” button centered on left front panel ribbing across from buttonholes.
Weave in any remaining ends using a tapestry needle.
Questions or Comments?
Please email me at info@mandobug.com if you need additional pattern support.
Share your finished object on social media using @mandobug#icecreampartycardi
Thank You!
Thank you for supporting me as a designer! And a huge thank you to my tech editorFiat Fiber Arts and pattern testers!