Hi all!
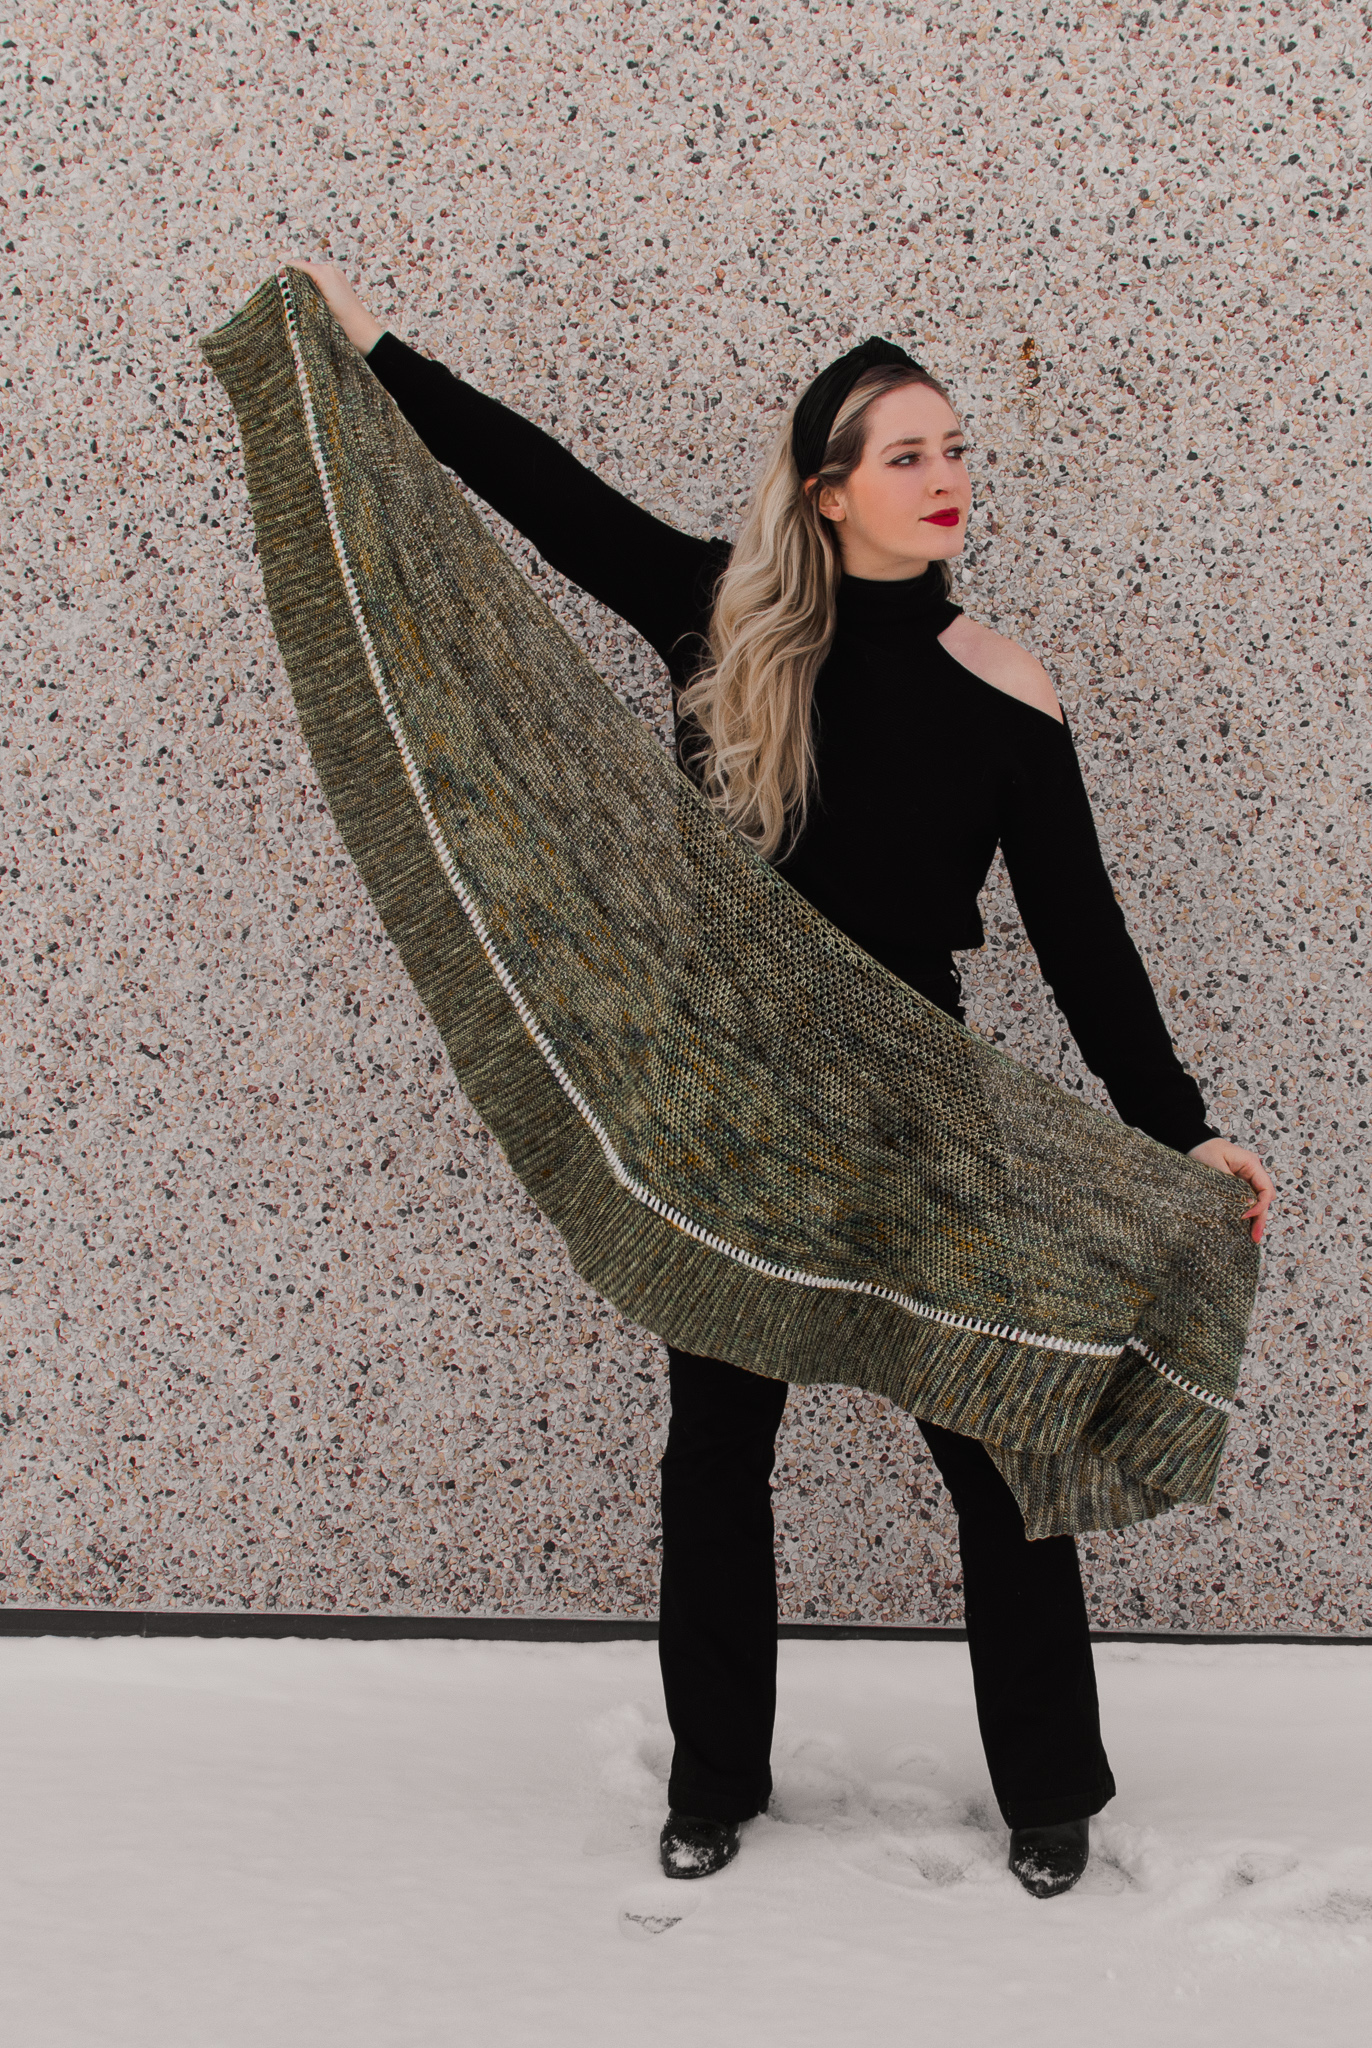
This post includes everything you need to know about the Hazeldell Wrap, a free crochet pattern for a deliciously squishy fingering weight shawl utilizing short-rows and two main increase rows to create a gentle crescent shape.
Before we begin, here are some quick links for you:
- Find the PDF version on Ravelry, Etsy, and my website.
- Thank you in advance for your support! xo
- Add your finished project to Ravelry here!
- Shop the recommended yarns, WeCrochet Hawthorne, here.
- For any questions about this pattern, please email knitsnknotswpg@gmail.com and I’ll get back to you asap!
Shop my new book – Modern Crochet Sweaters: 20 Chic Designs for Everyday Wear – here!
If you want to be notified of all new pattern releases (and get exclusive discounts on all new paid patterns), sign up below!
This post contains affiliate links. This means, should you make a purchase, I will receive a small portion of the sale at no extra cost to you. All opinions are my own. View my Privacy + Disclosures Policy here.
About
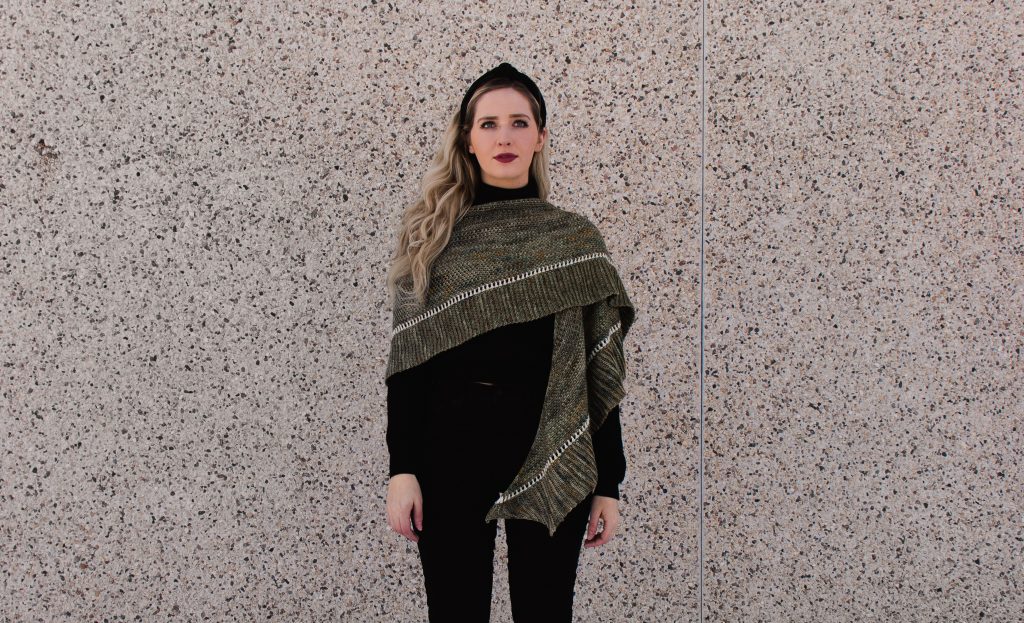
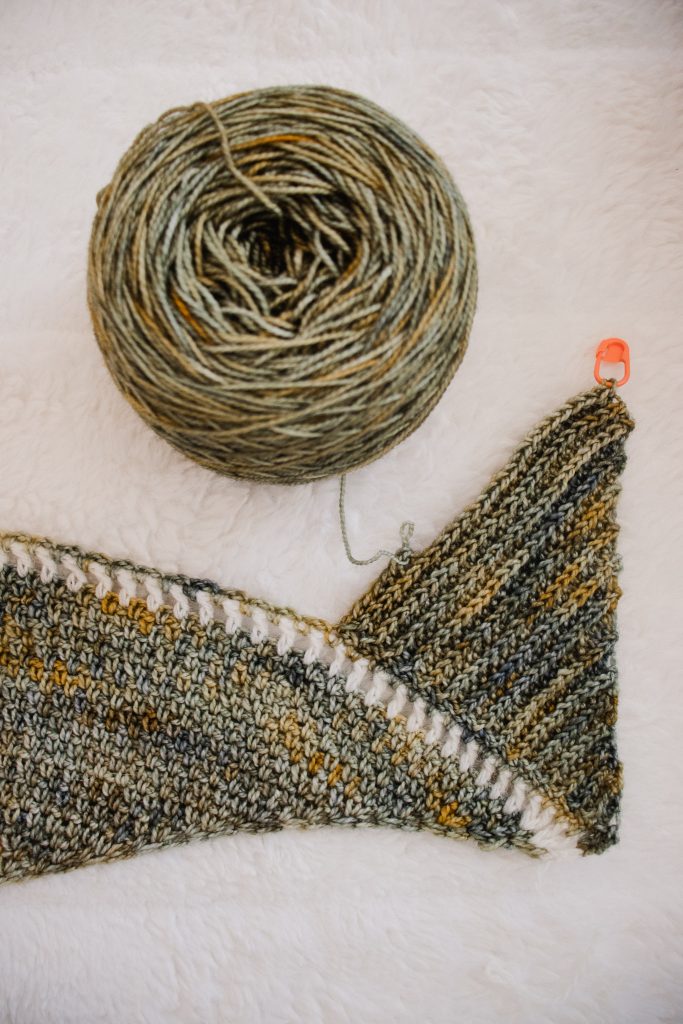
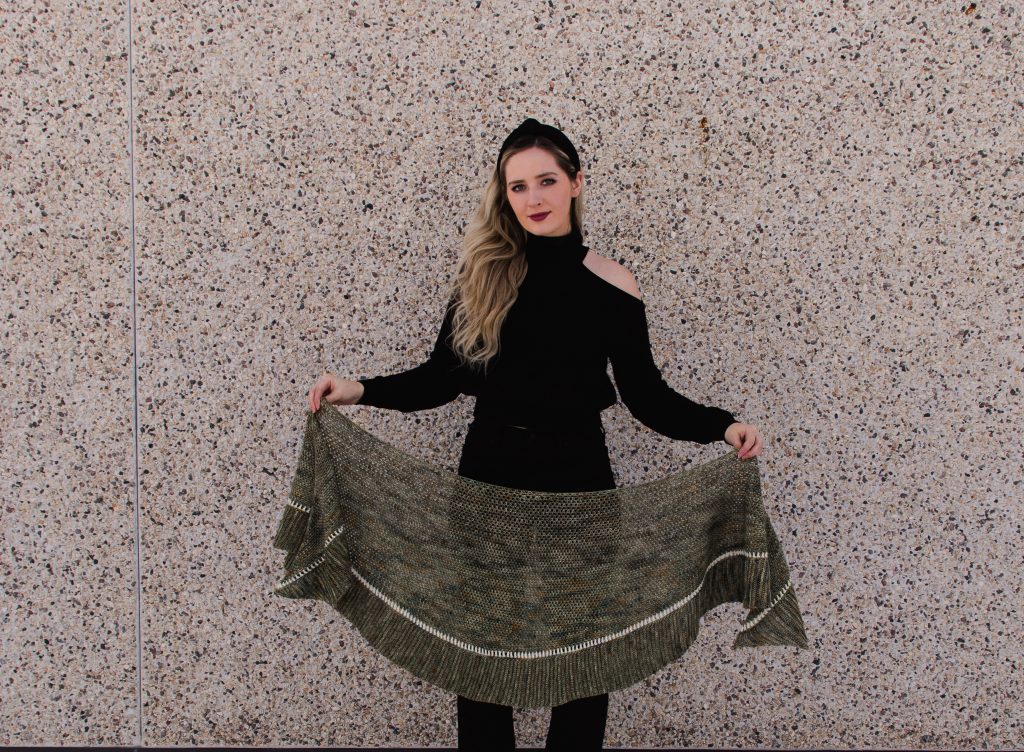
Hazeldell is a fingering-weight shawl utilizing short-rows and two main increase rows to create a gentle crescent shape. My goal was to design a striking wrap with an unconventional shape that is achievable for most skill levels. This piece uses fundamental crochet stitches that any beginner crocheter can master; however, when combined with thoughtful increase techniques, produces a stunning wrap without the complicated stitchwork.
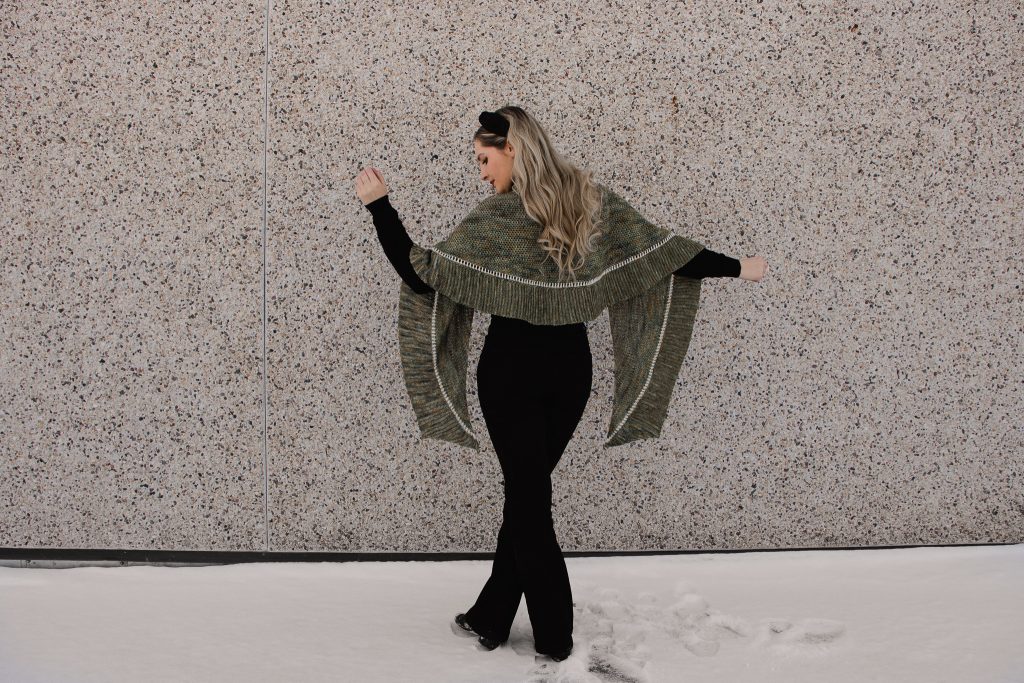
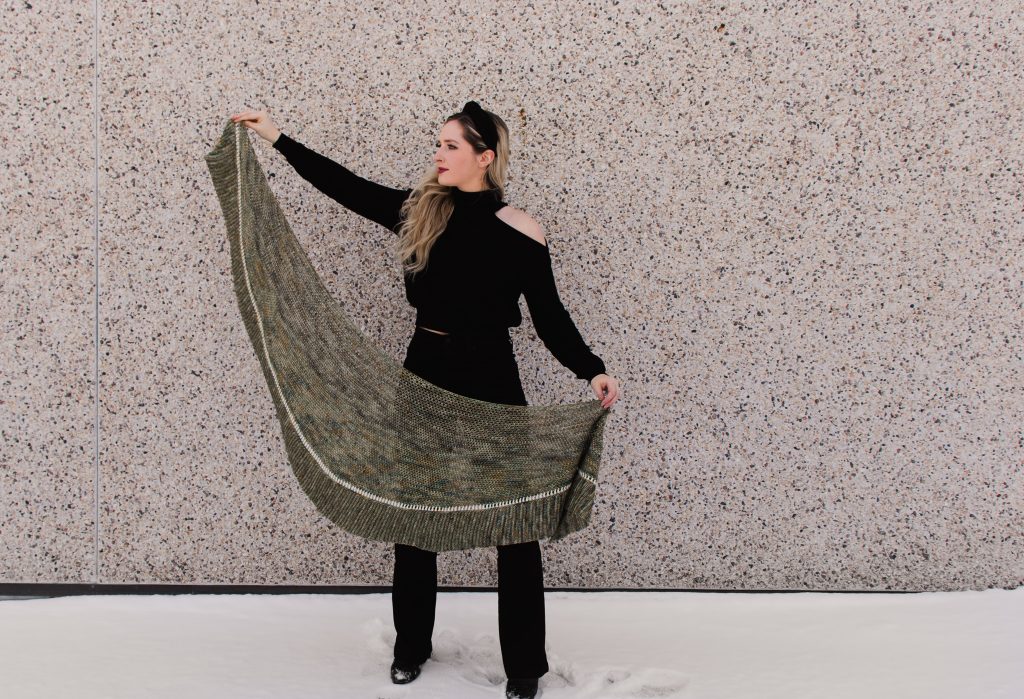
I’ve had multiple hanks of WeCrochet Hawthorne in my stash for over a year now that I initially received in 2019 when I was designing my Golden Leaves Wrap and thought this would be a great opportunity to use up the rest of this yarn. The main body of this piece uses the linen stitch, which is a beginner-friendly stitch pattern using single crochets and chains to create a mesh-like fabric. To create the crescent shape, there are increases placed in the first and last chain space of every row, allowing your project to grow outwards. There are also a couple of rows with increases spread evenly throughout the entire row to accommodate for the curving that takes place, allowing the piece to lay flat without puckering. My favourite element of this entire design is the wide section of ribbing at the bottom outer edge, created with the half double crochet slip stitch. I was looking for a crochet ribbing that looked like knit stitches when I came across this beautiful stitch – yoslst – that does exactly that. Wear this piece draped over your back like a shawl, or wrap it the opposite way and wear as a scarf. However you choose to style it, I hope you love it for years to come.
Materials
Yarn (Main Colour): 4 hanks or 1320 yds [1208 m] of WeCrochet Hawthorne Fingering Weight in Eliot
- 80% Superwash Fine Highland Wool, 20% Polyamide
- this particular yarn is great because it’s superwash, meaning it’s machine washable + dryable!
- this yarn is USD $13.99 per ball and will create a truly stunning piece
- 357 yds [327 m] per 100 g [3.5 oz] hank
- Find this yarn on crochet.com or visit yarnsub.com to find comparable substitutes; any fingering weight yarn should work out fine.
- View my Hawthorne Yarn Review here.
- There are so many Hawthorne lines: kettle dyed, speckled, multi, so there is definitely a colourway to suit any colour preferences! Make sure to check them all out to find the colourway that speaks to you 🙂
Yarn (Accent Colour): You will also need 10 yds [10 m] of any fingering weight accent colour
- I used WeCrochet Palette for my accent row – a great accent yarn since it’s only $3.99 per ball and comes in a ton of colours. I used the Bare colourway I had on hand from another project, which can be found here.
- Feel free to skip this accent row and use your main colour for the entire wrap, or take a look at your stash and use any scraps you have on hand!
Total Yardage: You will need 1330 yds [1218 m] if you choose to use one unifying color throughout.
Hook: Size US F/5 3.75 mm or size needed to obtain gauge
Notions: Tapestry needle, 2 locking stitch markers
Abbreviations
Written in US Crochet terms
ch: chain
ch-sp: chain space
dc: double crochet
yoslst: yarn over slip stitch – Yarn over, insert hook into 3rd loop of designated st, yarn over, draw loop through stitch and immediately through both loops on hook
rep: repeat
sc: single crochet
sk: skip
sl st: slip stitch
st(s): stitches
Gauge
4 x 4” (10 x 10 cm) = 25 sts x 18 rows in linen stitch, blocked, where each sc and each ch count as a stitch
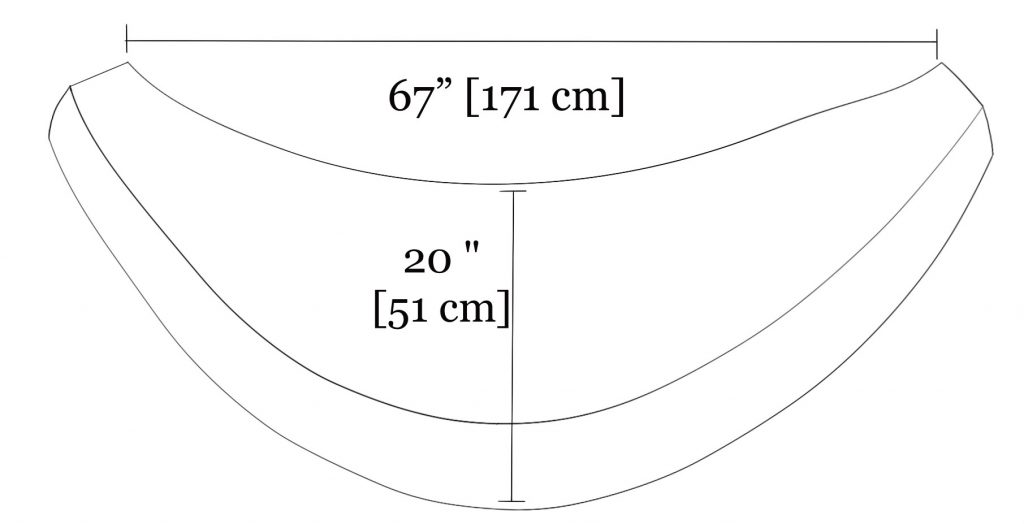
Measurements
Finished wrap has a 67” (170 cm) wingspan and a 20” (51 cm) depth, after blocking.
Pattern Notes
Skill Level: Intermediate
When pattern indicates to work a sequence in parentheses, all instructions within the parentheses will be worked into the same stitch.
- For example, “(sc, ch 1, sc) in next ch-sp” means to work 1 sc and 1 ch and then 1 more sc all into the same ch-sp, a method of increasing.
Turning Chain: For the entirety of the linen stitch portions, the turning chain (chain 2) counts as 1 sc and 1 ch.
Stitch Counts: Stitch counts are listed after each row. If no stitch count is given, there has been no change since the previous row.
Reversible: There is no right side or wrong side of this fabric. You choose which side to wear as the “right side”.
Changing Colors: When changing colors, work your final stitch of the row with the old color as usual, but use the new color for the final yarn over to close the stitch. Then, drop the old color and continue crocheting with the new color.
Puckering is Normal: After stitching the 2 main increase rows, you will notice your wrap is puckering from all of the added stitches; don’t worry about this – blocking at the end will completely smooth them out and you won’t have any puckering whatsoever (it’s like magic).
Blocking: Blocking is crucial for this project – don’t skip this step!
-
- I soaked my finished wrap in a room temperature water bath in my kitchen sink with a little bit of dish soap for about half an hour, then wrapped it in a towel to blot out any access water.
- Next, I hung my wrap by the two points at either end on my clothesline to dry. I know this isn’t normally how you would block something (usually it’s done on a drying rack or blocking mats), but the top of this wrap is very rigid and provides great structure due to the initial chain and the way the increases are placed at either end. Normally, we wouldn’t want our completed projects to stretch out too much, but in this case, the weight of the damp wrap while hung provides a really beautiful drape and we are going to use this to our advantage to really stretch out the stitches.
PATTERN
Section 1: Linen Stitch
Ch 146.
Row 1: Sc in 4th ch from hook, *ch 1, sk next ch, sc in next ch; rep from * to end of row, turn. [73 sc]
Row 2: Ch 2 (counts as 1 sc + 1 ch here and throughout linen stitch section), sk first sc, (sc, ch 1, sc) in first ch-sp, *ch 1, sk next sc, sc in next ch-sp; rep from * across until 1 ch-sp remains, ch 1, sk next sc, (sc, ch 1, sc) in last ch-sp, turn. [75 sc]
First Increase Row
Row 3: Ch 2, sk first sc, (sc, ch 1, sc) in first ch-sp, *ch 1, sk next sc, sc in next ch-sp, ch 1, sk next sc, (sc, ch 1, sc) in next ch-sp; rep from * until 1 ch-sp remains unworked, ch 1, sk next sc (sc, ch 1, sc) in last ch-sp, turn. [113 sc]
Row 4-17: Rep Row 2. [141 sc]
Second Increase Row
Row 18: Rep Row 3. [212 sc]
You may notice puckering from these additional sts; don’t worry about this – blocking at the end will completely smooth them out.
Row 19-50: Rep Row 2. [276 sc]
Section 2: Short Rows
Before you begin each short row, count 10 sc from the opposite end and place a marker in this sc. For each short row, you will work the final sc into the ch-sp right before this marker.
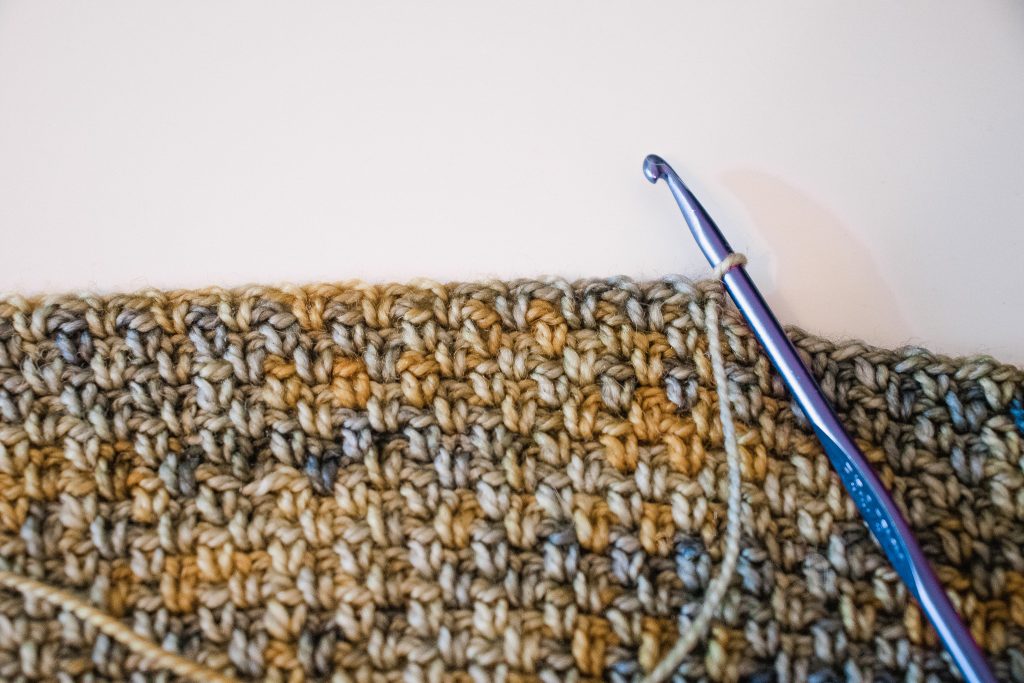
Row 51: Ch 2 (counts as 1 sc + 1 ch), sk first sc, (sc, ch 1 ch) in first ch-sp, *ch 1, sk next sc, sc in next ch-sp; rep from * across until 10 ch-sp remain unworked, stop here, turn work. See photo below.
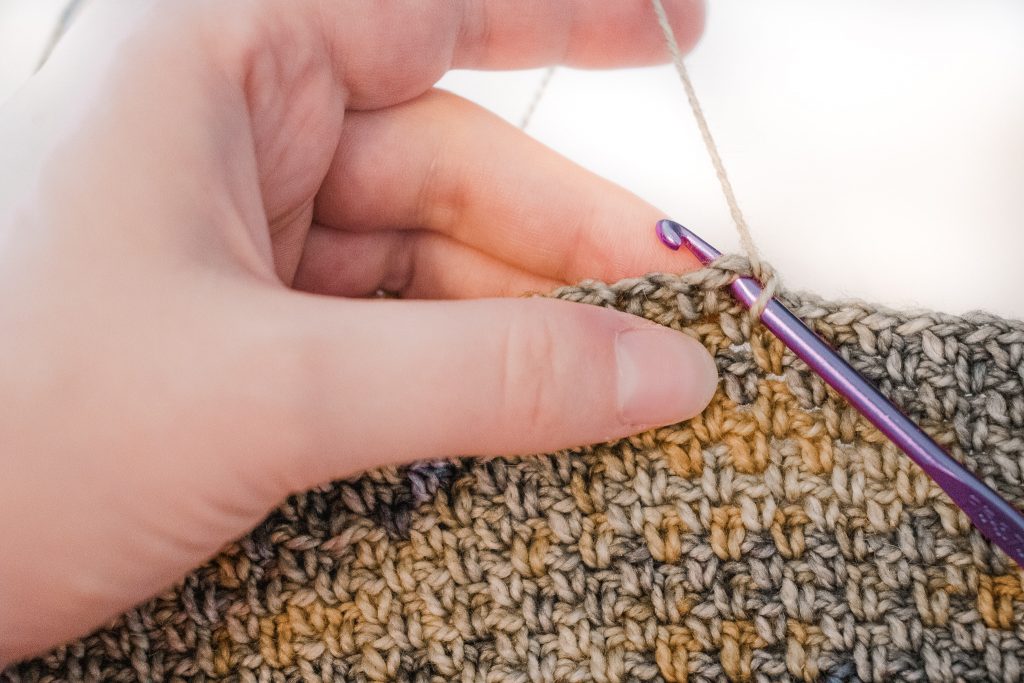
Row 52: [No turning chain] skip the first sc and work a sc directly into the first ch-sp (see photo below) ch 1, sk next sc, sc into next ch-sp; rep from * across row until 10 ch-sp remain unworked, stop here, turn work.
Each row will be shorter than the row before.
Rep Row 52 until your row is too short to continue. The exact number of stitches at this point doesn’t matter, you can stop at any point. Do not turn work after last short row.
Section: Working over the short-rows
Continuing in the same direction as your previous row, we are going to work over all of our short-rows to hide the jogs and create one long row again.
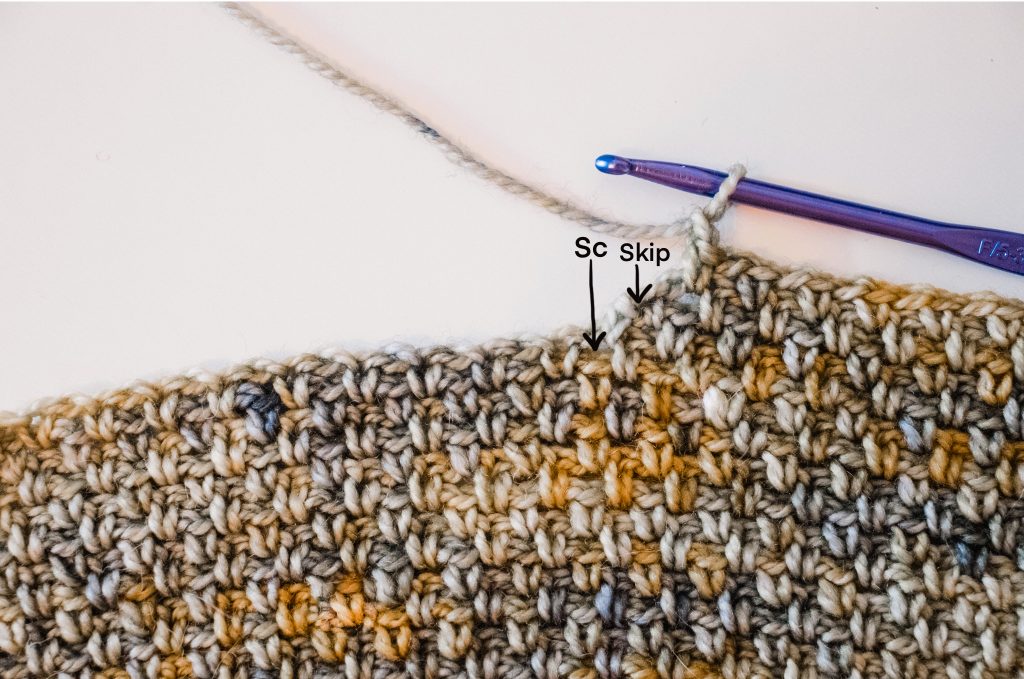
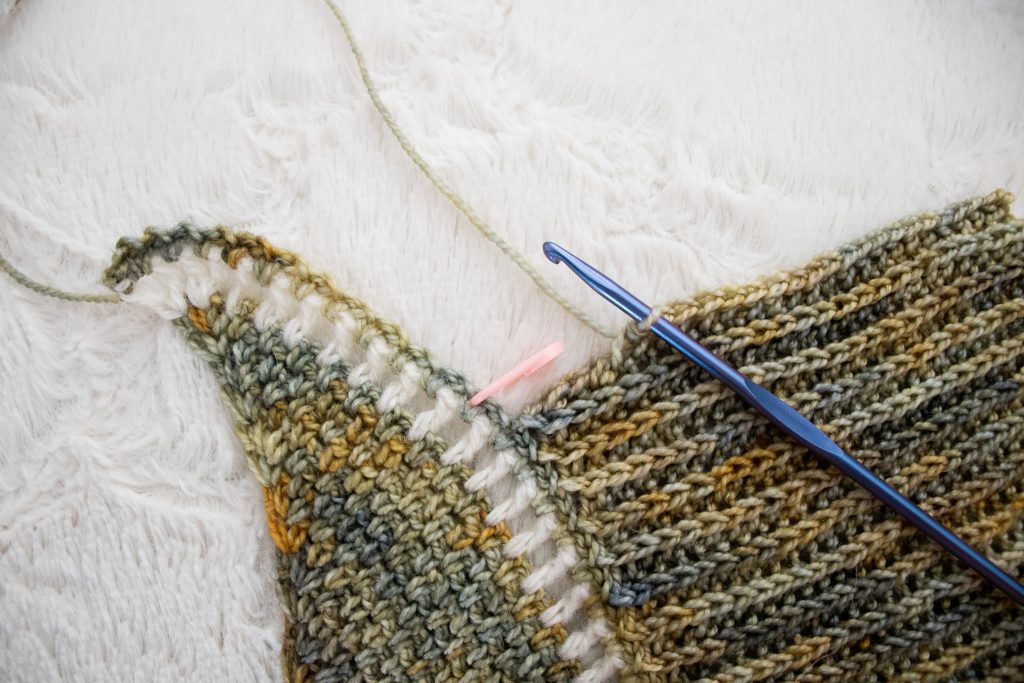
Work in linen stitch until reaching your first jog, finishing with a sc in the last ch-sp of the row as shown below, ch 1, sk the sc below and sc directly into the next ch-sp. This will be the same ch-sp that your previous short-row was worked into.
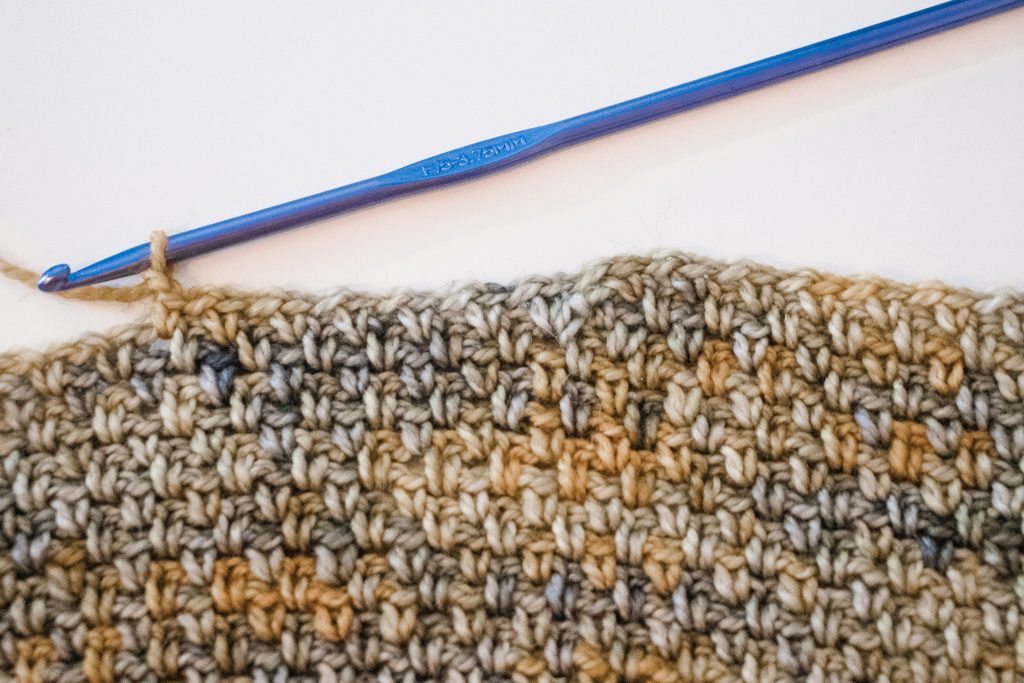
Continue working in linen stitch until reaching the next short-row jog, and repeat the same process until reaching the corner of your wrap. In the very last ch-sp of the row, work a (sc, ch 1, sc), and turn work.
At this point, you should have worked across the short-row jogs on approximately half of your wrap. On this next row, we will work across the entire width of the wrap to smooth out the jogs on the other half.
Next Row: Ch 2, sk first sc, (sc, ch 1, sc) in first ch-sp, continue in linen stitch until reaching the first short-row jog, and repeat the same process as the first half of the wrap until working across the entire piece and reaching the final ch-sp, work a (sc, ch 1, sc) in the final ch-sp, turn.
Next 2 Rows: Ch 2, sk first sc, (sc, ch 1, sc) in first ch-sp, *ch 1, sk next sc, sc in next ch-sp; rep from * across until 1 ch-sp remains, ch 1, sk next sc, (sc, ch 1, sc) in last ch-sp, turn.
Work final yarn over of last st in accent color. Cut main color.
Section: Accent Row
Using your accent colour, ch 4 (counts as 1 dc and 1 ch) sk the first sc, (dc, ch 1, dc) in first ch-sp, ch 1, sk next sc, (dc, ch 1, dc) in next ch-sp, *ch 1, sk next sc, dc in next ch-sp; rep from * until 2 ch-sp remain unworked, ch 1, sk next sc, (dc ch 1, dc) in next ch-sp, ch 1, sk next sc, (dc, ch 1, dc) in last ch-sp, turn.
Work final yarn over of last st in main color and cut accent color.
Section: Ribbing
Using your main color, you are going to work one row of linen stitch that will act as the set-up row for the applied ribbing.
Linen Stitch Set-Up Row: Ch 2 (counts as 1 sc and 1 ch), sk first dc, (sc, ch 1, sc) in first ch-sp, *ch 1, sk next dc, sc in next ch-sp; rep from * until last ch-sp, ch 1, sk next dc, (sc, ch 1, sc) in last ch-sp, turn.
To work the ribbing, you are going to work in back-and-forth rows, perpendicular to your wrap, as you can see in Fig. 2. To attach each row to your existing work, you will slip stitch into the single crochet stitches from the Linen Stitch Set-Up Row you just completed, then turn your work to crochet back over the single crochet row. The first couple rows are the trickiest since they are so short, but you will get the hang of it once your rows grow a little bit.
Ribbing Increases
Row 1: Ch 2, yoslst in 2nd ch from hook, sl st into next sc from set-up row, turn. [1 yoslst]
Row 2: Sk the sl st just worked, work 2 yoslst in the yoslst from previous row, turn. [2 yoslst]
Row 3: Ch 1, work 2 yoslst in first st, yoslst in next st, sl st into next sc from set-up row, turn. [3 yoslst]
Row 4: Sk the sl st just worked, yoslst in each st across until last st, work 2 yoslst in last st, turn. [4 yoslst]
Row 5: Ch 1, work 2 yoslst in first st, yoslst in each st across, sl st into next sc from set-up row, turn. [5 yoslst]
Rep Rows 4 and 5 ten more times. [25 yoslst]
The increasing is complete. Now you will work straight across, each row containing 25 sts.
Row 26: Sk the sl st just worked, yoslst in each st across, turn.
Row 27: Ch 1, yoslst in each st across, sl st into next sc from set-up row, turn.
Count 13 sc from opposite corner (25 sts total including the ch-sps), and place a stitch marker in this sc. This will mark the point at which you will begin decreasing.
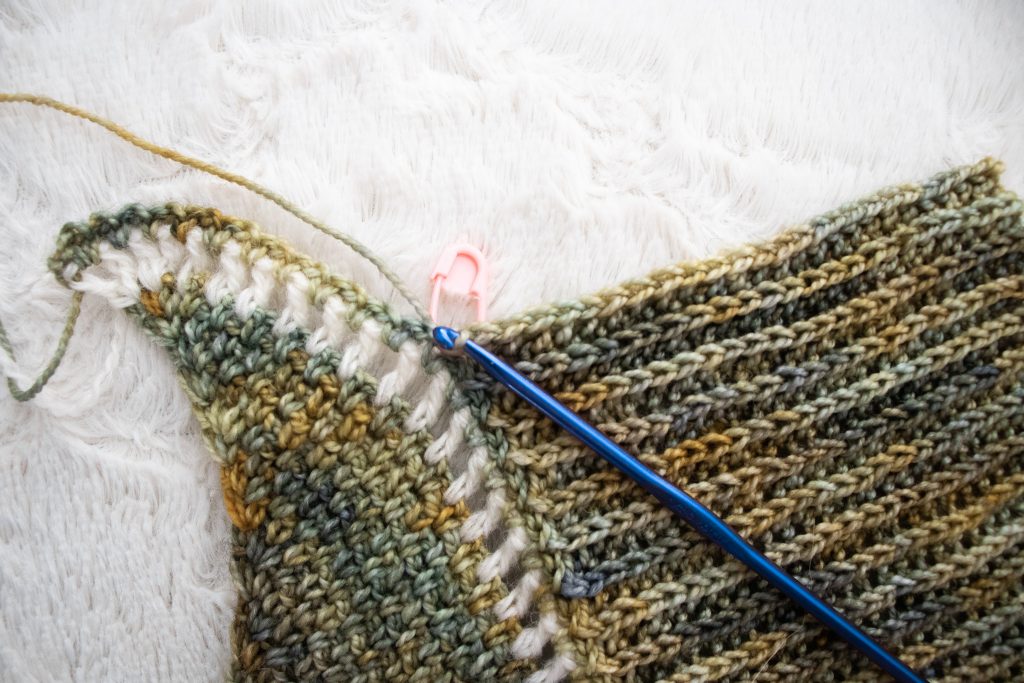
Rep Rows 26 and 27 all the way across until reaching this marker. (See photo below)
Sl st into the marked st (see photo below), turn work.
Next Row: Sk the sl st just worked, yoslst in each st across to last 2 sts, sk next st, yoslst into last st, turn. [24 yoslst]
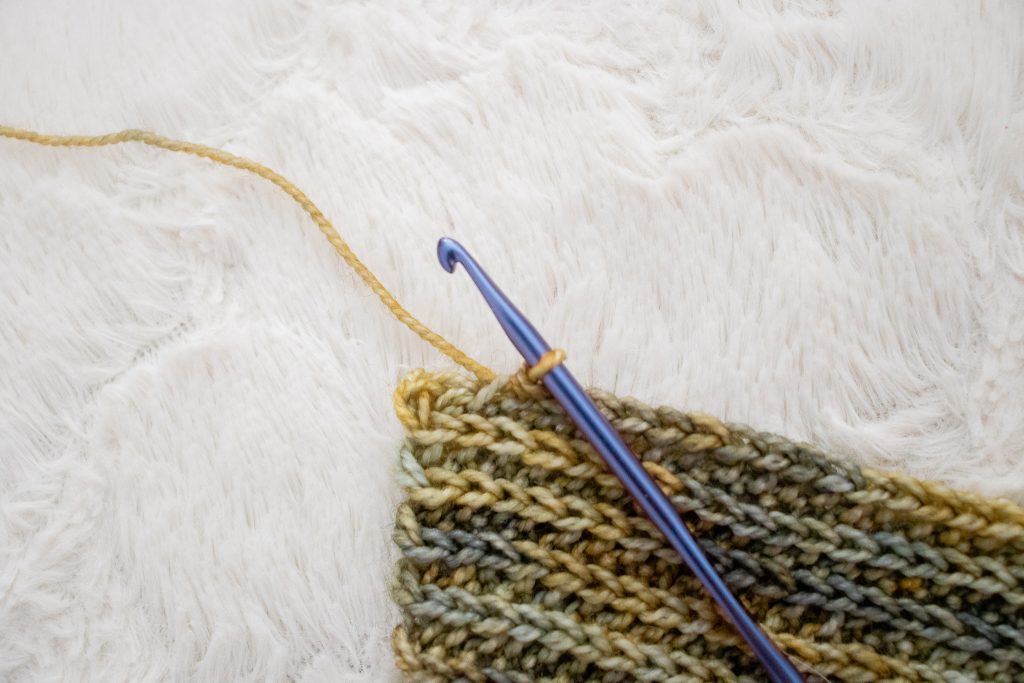
Rep last 2 rows until reaching end of your wrap, working 1 decrease at the outer edge of each row until you have only 1 st in your final row, sl st into corner of wrap to secure, fasten off.
Blocking
Wet-block your finished wrap and hang to dry.
Blocking: Blocking is crucial for this project – don’t skip this step! Here is how I blocked my wrap:
- I soaked my finished wrap in a room temperature water bath in my kitchen sink with a little bit of dish soap for about half an hour, then wrapped it in a towel to blot out any excess water. You can squish the water out, but do not wring it out as this will cause your wrap to become misshapen.
- Next, I hung my wrap by the two points at either end on my clothesline to dry. (You can also use a shower curtain rod.) Blocking is usually done on a drying rack or blocking mats with your work lying flat, but the top of this wrap is very rigid from the beginning chain and provides great structure without causing your work to become misshapen. Normally, you wouldn’t want your completed projects to stretch out too much, but in this case, the weight of the damp wrap while hanging to dry provides a really beautiful drape, so you are going to use this to your advantage and allow the weight of your wrap to stretch out the stitches.
#HazeldellWrap
Thanks so much for reading!
I hope you love your new wrap!
Grab 4 hanks of WeCrochet Hawthorne yarn here!
Find the PDF pattern in these places:
- On Ravelry
- On Etsy
- On My website
Make sure to tag me on Instagram (@knitsnknotswpg) and use #HazeldellWrap to show off your work.
I have dozens more free crochet patterns on my blog! Find more free patterns here.
x
Janine
You can find my full print book, Modern Crochet Sweaters: 20 Chic Designs For Everyday Wear on the shelves of all major retailers or see purchasing options here!
For exclusive discounts on all new patterns, join the Knits ‘N Knots newsletter list here!
You May Also Like