

Pattern also available as a downloadable pdf for purchase on Ravelry.
Caron. Cake. MANIA.
Oh my gosh, y'all. It's crazy! And I HAD to take advantage of it.
Once I finally managed to get my hands on the colors I wanted (I'll belabor the misery of having a tiny Michaels store at a later time) I set to work on a pair of blankets in a pattern that I designed ages ago. I never really gave much thought to publishing it because it was such a simple thing. Really just a modified granny square. But this yarn brought a fun new element to it and suddenly I was excited to see what I could do with it!

Made with 2 Caron Cakes in Lemon Lime and 2 skeins Caron Simply Soft Party in Fuchsia Sparkle, approx 35"

Made with 7 skeins Caron Simply Soft Party in Black Sparkle and 1 Caron Cake in Rainbow Sprinkles, approx 43"
The problem is that now I want to try the bumbleberry cake with some silver. And the faerie cake with a fun orange. And buttercream with gold! Or maybe the boston cream cake. Or faerie with silver. Or blueberry cheesecake with orange! I want to try them ALL!!!
All right, I sound like a maniac now. I know. A fiber arts loving maniac. That's not so bad, is it? I'll just keep telling myself that...
But let's talk for a second about WHY this yarn has been such a trendy hit. Yeah you could easily change your own colors. In fact, in this blanket some might prefer it that way. But what Caron has given us in these scrumptious little yarn cakes is warm, squishy convenience. The colors are already chosen for us. Even the amount of each color. Do you want to change colors after two rows or three? Or maybe only one? How is that going to pair up with the next color? Is it the right shade? Maybe the lighter blue would be better. Or perhaps teal? Wait, HOW many colors of blue do I have!?
Color, shade, color weight, color combination - the options are literally endless. And some of us simply don't have color intuition. Well with Caron cakes you don't have to! They've collected colors into 18 yummy little bundles of you-don't-have-to-think-about-it. You just have to crochet! Or knit, if that's your poison.
One of the most exciting things about this yarn are the LONG segments of color. A lot of variegated yarns have short, quick color changes, which often just looks muddled if you don't find the right pattern to showcase the yarn. With yarns like this, we see actual stripes of color, which can be a really fun element, particularly for all the lazy stitchers in the world, like myself, who like the variety of different colors in one project but don't like all the extra work. O.o Why aren't there more yarns like this out there? Beats the soup out of me.
Different cakes start with different colors so even if two people make the same project, they might look completely different because of the color they started with. Which makes every single caron cake project unique.
And bonus? Fewer ends to weave in!
Well, maybe not with this blanket since we alternate yarns on each round, but it's worth it in the end.
Let's take a closer look, shall we?
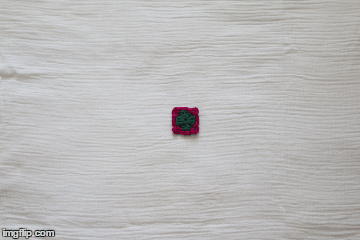
Hee hee! So that was fun. I wish I'd taken more pictures so we could have watched it grow even bigger! But I figured the first eight rounds would be enough. Let's slow it down a bit:
All rounds are worked into the spaces between stitches, so this is a very multitasking friendly project. I definitely did some Netflix binge watching while I felt my way through a few rounds of the rainbow blanket! Also, since it's worked in the round, you can simply keep adding rounds until the blanket is as large as you want it - or until you run out of yarn, which is my favorite way to decide a blanket's final dimensions, ha ha.
But it's a great way to use up random skeins of yarn that you happen to have. You know, like that yarn you bought one or two skeins of ages ago that you just couldn't resist? Well, pull it out and pair it up with a contrasting color to make it really pop!
In fact, that's how this pattern came to be. I originally designed this blanket almost... six (!) years before revisiting it to write up the pattern - I can't hardly believe it's been that long! It's a simple modification of the traditional granny square but it lends itself so well to experimenting with higher contrast colors since the rounds are weighted differently.

The original Gemma Blanket, which measures about 35” x 35”; I used a G/4.00mm hook, 1004 yds MC (a stash yarn I inherited!), and 279 yds (CC) Bernat Satin Solids in Lavender.
Gauge:
Gauge isn’t overly important with this project. Simply choose a hook size that gives you a fabric you like the look and feel of with the yarn you’ve selected. For your reference, though, my gauge with the suggested materials listed below worked out to be approximately 3.25" across the first four rounds.

Suggested Materials:
Worsted Weight (4) Yarn in two colors
H/5.0mm Crochet Hook
Stitch Marker(s)
Scissors
Small Darning Needle
Notes:
If you work this pattern with the right side always facing, you may notice that the corners develop a bit of a twist or spiraling. This is due to the natural lean of the crochet stitches and while I think it adds a fun element, if it bugs you, simply work every other MC round with the wrong side facing. Return to working right side facing on the next sc round and this should counteract most of the lean. See below for images illustrating this.
All rounds are joined with a sl st in the top of the 1st st of the round OR with the invisible join, which works best by eliminating the final chain stitch of each round. I thread my yarn onto a needle for the invisible join and sew in my ends after every MC row after verifying my stitches are all correct. Choose whichever joining and finishing method works best for you!
Special Stitches:
Picot: I like to work a modified picot because I dislike working sl sts in ch sts, but feel free to use the traditional picot or any other variety that you prefer. Here is mine: ch 3, sl st in top of previously worked dc. That’s it! It creates a slightly sturdier little nubbin, too, I think.
Instructions:
Rnd 1: With MC and beginning with magic loop or ch 4 joined with a sl st, work ch 3 or faux dc into ring (counts as 1st dc). Continue working into the ring and make 2 more dc. (Ch 2, 3 dc) into the ring three times, ch 2, join. (12 dc, 4 ch 2 sps)
Rnd 2: Join CC in any ch 2 corner sp with standing sc, (ch 3, sc) in same corner sp. *Ch 3, (sc, ch 3, sc) in next ch 2 corner sp. Repeat from * two more times. Ch 3, join. (8 sc, 8 ch 3 sps)
Rnd 3: Join MC in any ch 3 corner sp with standing dc, (2dc, ch 2, 3 dc) in same corner sp. *Ch 1, 3 dc in next ch 3 sp, ch 1, (3 dc, ch 2, 3 dc) in next ch 3 corner sp. Repeat from * two more times. Ch 1, 3 dc in next ch 3 sp, ch 1, join. (36 dc, 4 ch 2 sps, 8 ch 1 sps)
Rnd 4: Join CC in any ch 2 corner sp with standing sc, (ch 3, sc) in same corner sp. *(ch 3, sc in next ch 1 sp) twice, ch 3, (sc, ch 3, sc) in next ch 2 corner sp. Repeat from * two more times. (Ch 3, sc in next ch 1 sp) twice, ch 3, join. (16 sc, 16 ch 3 sps)
Rnd 5: Join MC in any ch 3 corner sp with standing dc, (2dc, ch 2, 3 dc) in same corner sp. *(Ch 1, 3 dc in next ch 3 sp) across to next corner. Ch 1, (3dc, ch 2, 3 dc) in ch 3 corner sp. Repeat from * two more times. (Ch 1, 3 dc in next ch 3 sp) across to 1st corner, ch 1, join.
Rnd 6: Join CC in any ch 2 corner sp with standing sc, (ch 3, sc) in same corner sp. * (Ch 3, sc in next ch 1 sp) across to next corner. Ch 3, (sc, ch 3, sc) in corner ch 2 sp. Repeat from * two more times. (Ch 3, sc in next ch 1 sp) across to 1st corner, ch 3, join.
Repeat rnds 5-6 until desired size is reached.
Last rnd: Join MC in any ch 3 corner sp with standing dc, (2 dc, picot, 3 dc, picot) in same corner sp. *(3 dc in next ch 3 sp, picot) across to next corner. (3 dc, picot, 3 dc, picot) in ch 3 corner sp. Repeat from * two more times. (3 dc in next ch 3 sp, picot) across to 1st corner, join.
Finish off and weave in all ends.

I hope you enjoyed this project and I’d love to see your creations, too, so if you feel like sharing, pop on over to my Facebook page or tag me @crochetcetera on Instagram or Twitter and show me what you come up with!
Many thanks to my pattern testers, including Kathleen – I couldn’t do this without them!!
This pattern will always remain free here on my website and for your convenience, you may also download a pdf for this pattern, which includes a color coded chart as a bonus feature, for a small fee through Ravelry. Enjoy!

© 2016 Crochet Cetera by Connie Lee
I invite and encourage you to sell any items made from my patterns; I simply ask that you credit me
for the design, especially if listing online, by linking back to the source of the pattern.
Copying, redistributing, or selling the pattern itself or a derivative thereof is strictly prohibited.
You can contact me at crochet.cetera@gmail.com or find me online here:
Website: http://www.CrochEtCetera.com
Facebook: http://www.facebook.com/CrochEtCetera
Instagram: http://instagram.com/crochetcetera