DIY GRANNY SQUARE CROCHET TOP.
/Learn how to make this simple, modern crochet top using 2 giant granny squares with this easy free pattern. The perfect Summer top.

Here, as promised is my finished granny square crochet top. It's basically 2 big granny squares joined together with extra rows added for the sleeves and a couple of rows of single crochet to finish the edges.
A couple of years ago I made a giant granny square crochet baby blanket (similar to this one) for a friend so when I was looking for my next crochet project I felt confident a granny square was something I could make. I googled something like 'easy granny square projects' and came across this fantastic project for a granny square top from Maria Valles. I fell in love with it as soon as I saw it and knew I wanted to make one myself.

How I Made My Own Granny Square Crochet Summer Top.
I used 7 50g balls of the Rico essentials cotton in white and a 3.5mm crochet hook. It was my first time using 100% cotton and I did find it a little tricky to work with. Less forgiving of any mistakes and I did have to undo my work a couple of times where I'd snagged the yarn.

I started off making two big granny square. I know there's quite a few different ways for starting and making granny squares but I like this method over on the Craftsy blog. I used an existing jumper as a guide and crocheted 21 rows, the finished squares measured 21 inches wide.
To join the squares lay them flat on top of each other with the right sides facing in. I whipstitched the side seems together leaving a 7 inch holes at the top for the sleeves and 2 inch gaps at the bottom for side slits. Whipstitch the shoulder seems together in the same way. I left a 10 inch hole for the neck. You may want to use different measurements and use mine as a guide.
Don't forget to weave in any loose ends.

Here are my 2 squares joined together.

In Maria's original tutorial she left the sleeves as they were and just added a couple of rows or single crochet to finish the edge. After trying mine on I decided I wanted to make the sleeves a little longer.
I joined the yarn under the arm (where the side seem finished) and continued the granny stripe pattern in the round. I chained 3 into the hole, this counted as the first double crochet and then did 2 more double crochets. Next I chained 2 and repeated the granny stripe until the first round was completed. Slip stitch to join the round and repeat until the sleeve is the desired length.
I did 5 rounds in total to make each of my sleeves and then did 2 rounds of single crochet to give a nice neat finish to the edges.

To finish the neck I did another 2 rows of single crochet. I joined the yarn in the corner of the neck hole and single crocheted in each stitch.
For the bottom hem of my crocheted top I joined the yarn in the corner of the side slit and did another 2 rows of single crochet. The only difference this time was that I made 3 single crochets in each of the corners like in the original pattern.

To finish the top weave in any loose ends and block.
Blocking a crochet project gives it a shape and smooths out any kinks. I had no idea what blocking was until I started this top so I did a bit of googling to see what my options were and decided to go with wet blocking. I handwashed my top and then laid it out flat on a towel. I rolled the top and towel up to squeeze out as much water as possible. I pulled it out into the desired shape and left it flat to air dry.
If like me you're still a beginner when it comes to all this and have no idea what blocking is I've added a few links that should help.
Tips for blocking crochet from Craftsy.
What is blocking, and how do I do it? from Lion Brand Yarns.
How (and why) to block crochet and knit projects from Little Birdie Secrets.

And here's the finished top on. I hope you love it as much as I do.
Don't forget to check out the original pattern from Maria. She makes beautiful things.


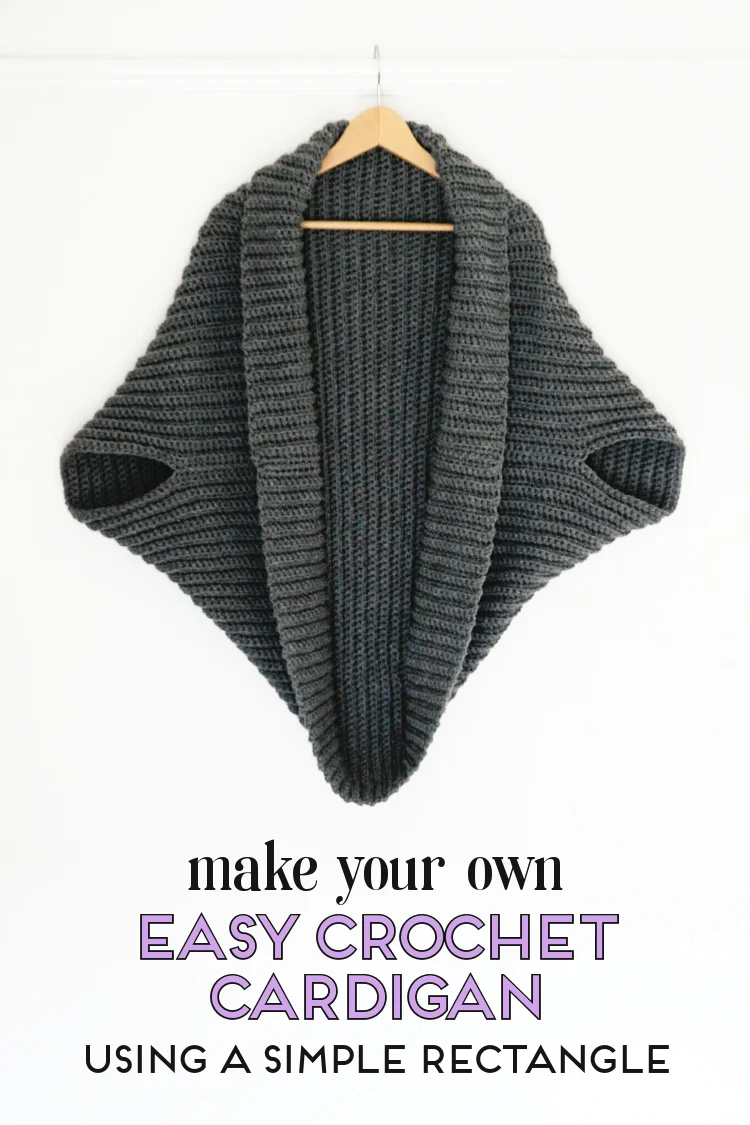
P.S. If you like this you might like to check out my simple crochet cardigan project. It's a good project for beginners, all you need to know is how to single crochet and you end up with this awesome shrug.