Crochet Desert Sun Hat Free Pattern


I have two sun hat patterns in my Etsy shop, the Petals Sun Hat & the Piña Colada Sun Hat, which have both been my biggest sellers this summer! I’m thrilled to see them getting so much attention (thank you!!) and it reminded me that I have another one that I never got around to releasing!
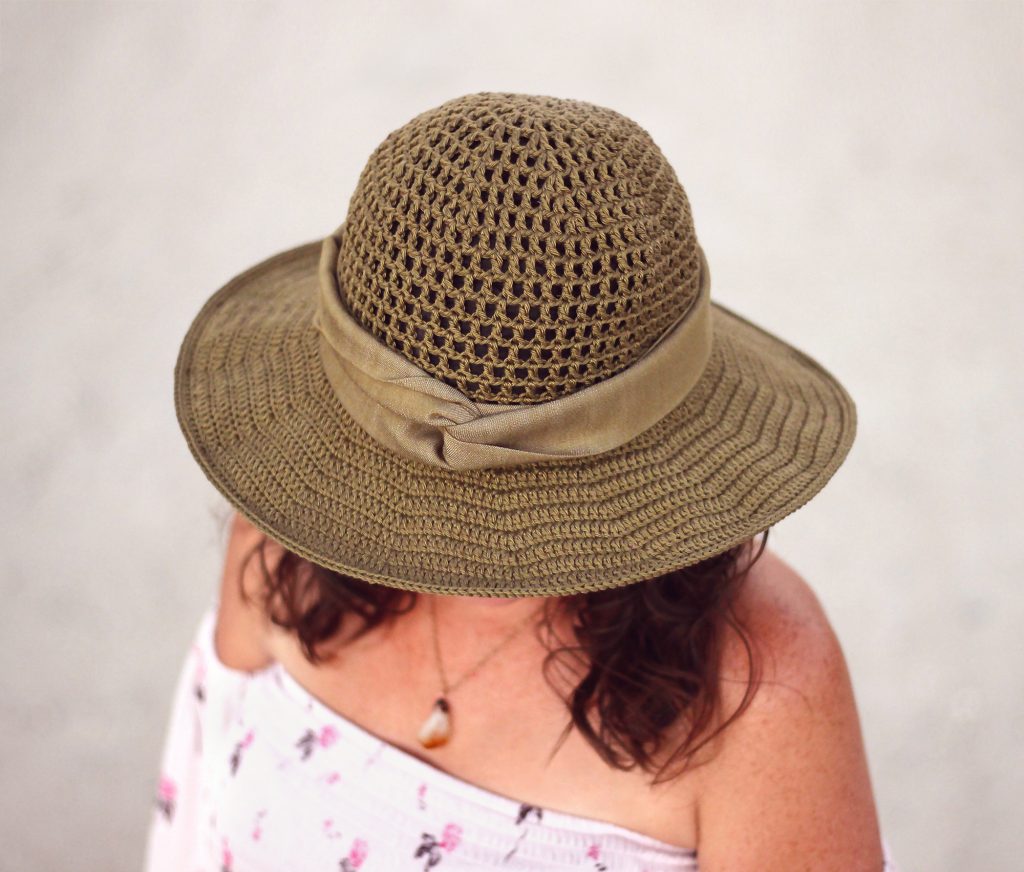
Meet the Desert Sun Hat! I originally designed this one for myself when I was going on a trip to Death Valley. I wanted it to be very open on top so it would be comfortable to wear in the heat. The top is a very basic, airy, mesh pattern and it has a solid brim to keep the sun out of your eyes.

Along with this new design, I’m happy to share that I found a way to create the perfect brim! In my previous designs, I used jewelry wire and while it worked, I was never happy when it would get bent out of shape. For this hat, I tried something new (to me!); millinery wire! It’s a clear plastic wire that perfectly holds shape and doesn’t get bent! You can find it on Amazon or Etsy for fairly cheap!
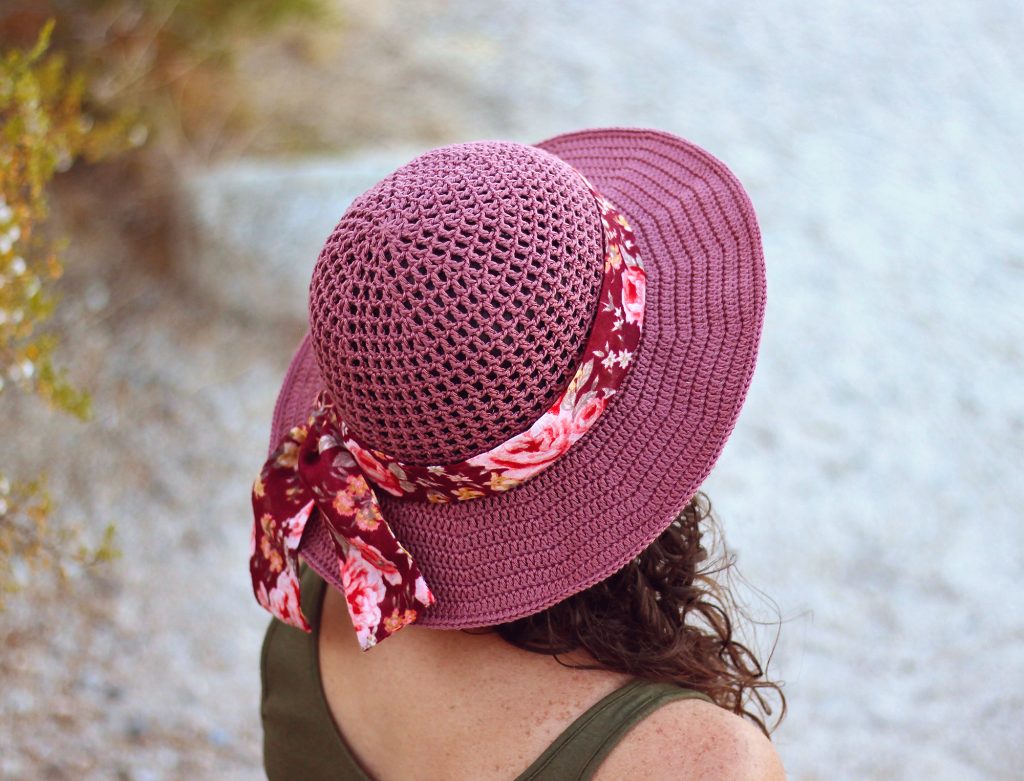
With this design being so simple, one of my favorite things about it is how I can accessorize it in all sorts of ways. You can make a crochet chain to tie around it with some beads added to the ends, borrow a hat band from another hat you own, or even wrap a bandana or headband around it!

DOWNLOAD THE PATTERN
You can find the FREE pattern by scrolling down. A print-friendly, ad-free PDF of this pattern is also available to download for a small fee. If you enjoy my patterns, please consider purchasing the PDF – your support is greatly appreciated and will help me keep the new patterns coming! :)
>> CLICK HERE TO GET THE PDF ON ETSY <<
>> CLICK HERE TO GET THE PDF ON RAVELRY <<

TERMS OF USE
You are welcome and encouraged to sell any items you make using this pattern! When selling online, please credit Julie King / Gleeful Things by linking to www.gleefulthings.com or tagging @gleefulthings. You may NOT sell the pattern, distribute it in any form, post it online, or alter it to claim it as your own.
Yarn
#3 DK weight yarn: approximately 240 yards of Cascade Ultra Pima in #3745 Olive or #3792 Brick
Yarn substitutes: Knit Picks CotLin, Paintbox Cotton DK, Patons Grace, Stylecraft Classique Cotton DK
Disclosure: This post contains affiliate links. If you click & make a purchase, I will receive a small commission at no extra cost to you. This helps to ensure that I’m able to continue posting free patterns and tutorials! Thank you for your support! :)
Materials
US Size E/4 (3.5mm) crochet hook or size needed to obtain gauge, yarn needle, scissors, 1.2mm clear millinery wire, crimp connector, wire cutter & pliers.
Difficulty
Easy
Finished Measurements
Length: 6.5”, Around: 20”, Brim Circumference: 44”
Gauge
[dc, ch 1] 10 times & 8 rows = 3”

Abbreviations
ch(s) – chain(s), sc – single crochet, dc – double crochet, st(s) – stitch(es), sl st – slip stitch
Notes
- Ch 3 at beginning of rounds will always count as 1 dc + 1 ch.
- Ch 2 at beginning of rounds will always count as 1 dc.
- Pattern is worked in joined rounds with the exception of round 20 where there is no need to join.
- Round 21 will be worked into round 19, in the same sts where the sl sts in round 20 are worked.
- In round 29, you will need to crochet over a piece of wire to help hold the shape of the brim.
Instructions
Round 1: Make a magic ring, ch 3 (counts as 1 dc + 1 ch now and throughout), [1 dc in ring, ch 1] 7 times, sl st to 2nd ch to join – 8 dc + 8 ch 1 spaces.
Round 2: Ch 3, 1 dc in same st, ch 1, *1 dc in next st, ch 1, 1 dc in same st, ch 1; repeat from * around, sl st to 2nd ch to join – 16 dc + 16 ch 1 spaces.
Round 3: Ch 3, 1 dc in next st, ch 1, 1 dc in same st, ch 1, *[1 dc in next st, ch 1] 2 times, 1 dc in same st, ch 1; repeat from * around, sl st to 2nd ch to join – 24 dc + 24 ch 1 spaces.
Round 4: Ch 3, [1 dc in next st, ch 1] 2 times, 1 dc in same st, ch 1, *[1 dc in next st, ch 1] 3 times, 1 dc in same st, ch 1; repeat from * around, sl st to 2nd ch to join – 32 dc + 32 ch 1 spaces.
Round 5: Ch 3, [1 dc in next st, ch 1] 3 times, 1 dc in same st, ch 1, *[1 dc in next st, ch 1] 4 times, 1 dc in same st, ch 1; repeat from * around, sl st to 2nd ch to join – 40 dc + 40 ch 1 spaces.
Round 6: Ch 3, [1 dc in next st, ch 1] 4 times, 1 dc in same st, ch 1, *[1 dc in next st, ch 1] 5 times, 1 dc in same st, ch 1; repeat from * around, sl st to 2nd ch to join – 48 dc + 48 ch 1 spaces.
Round 7: Ch 3, [1 dc in next st, ch 1] 5 times, 1 dc in same st, ch 1, *[1 dc in next st, ch 1] 6 times, 1 dc in same st, ch 1; repeat from * around, sl st to 2nd ch to join – 56 dc + 56 ch 1 spaces.
Round 8-18: Ch 3, *1 dc in next st, ch 1; repeat from * around, sl st to 2nd ch to join – 56 dc + 56 ch 1 spaces.
Round 19: Ch 1 (does not count as a st), 1 sc in same st, 1 sc in next ch space, *1 sc in next st, 1 sc in next ch space; repeat from * around, sl st to 1st sc to join – 112 sc.
Round 20: 1 sl st in each st around – 112 sl st.
* All sts in round 21 will be worked into round 19, behind the sl sts from round 20 *
Round 21: Ch 2 (counts as 1 dc now & through out), 1 dc in each of the next 5 sts, 2 dc in next st, *1 dc in each of the next 6 sts, 2 dc in next st; repeat from * around, sl st to 2nd ch to join – 128 dc.
Round 22: Ch 2, 1 dc in each of the next 6 sts, 2 dc in next st, *1 dc in each of the next 7 sts, 2 dc in next st; repeat from * around, sl st to 2nd ch to join – 144 dc.
Round 23: Ch 2, 1 dc in each of the next 7 sts, 2 dc in next st, *1 dc in each of the next 8 sts, 2 dc in next st; repeat from * around, sl st to 2nd ch to join – 160 dc.
Round 24: Ch 2, 1 dc in each of the next 8 sts, 2 dc in next st, *1 dc in each of the next 9 sts, 2 dc in next st; repeat from * around, sl st to 2nd ch to join – 176 dc.
Round 25: Ch 2, 1 dc in each of the next 9 sts, 2 dc in next st, *1 dc in each of the next 10 sts, 2 dc in next st; repeat from * around, sl st to 2nd ch to join – 192 dc.
Round 26: Ch 2, 1 dc in each of the next 10 sts, 2 dc in next st, *1 dc in each of the next 11 sts, 2 dc in next st; repeat from * around, sl st to 2nd ch to join – 208 dc.
Round 27: Ch 2, 1 dc in each of the next 11 sts, 2 dc in next st, *1 dc in each of the next 12 sts, 2 dc in next st; repeat from * around, sl st to 2nd ch to join – 224 dc.
Round 28: Ch 2, 1 dc in each of the next 12 sts, 2 dc in next st, *1 dc in each of the next 13 sts, 2 dc in next st; repeat from * around, sl st to 2nd ch to join – 240 dc.
* Work round 29 over a piece of millinery wire. At the end of the round, before finishing, cut the wire to size and use a crimp connector to secure the ends, using pliers to pinch the connector shut, then complete the round. *
Round 29: Ch 1 (does not count as a st), *1 sc in each of the next 14 sts, 2 sc in next st; repeat from * around, invisible join to 1st sc and fasten off – 256 sc.
A quick tip for adding wire to the brim: When you’re almost done with round 29, lay the hat brim flat on a table and smooth it out. You don’t want it to be stretched around the wire and you don’t want it to be scrunched up either. Then when you think you have it about right, tape the wire together (don’t cut it!) and try the hat on to see what the brim looks like. If it’s too wavy, you likely have too much wire in there. Try removing an inch, tape and try it on again. I repeat this until I like the way it looks before finishing.

Share!
I hope you’ve enjoyed this pattern and I would love to see your finished work! Please share your photos on social media and tag me @gleefulthings or use hashtag #gleefulthings.


I am having slight trouble with round 21. How do I work the dc behind the sl sts? Please help!
Work in the same sts that the sl sts are made in. :)