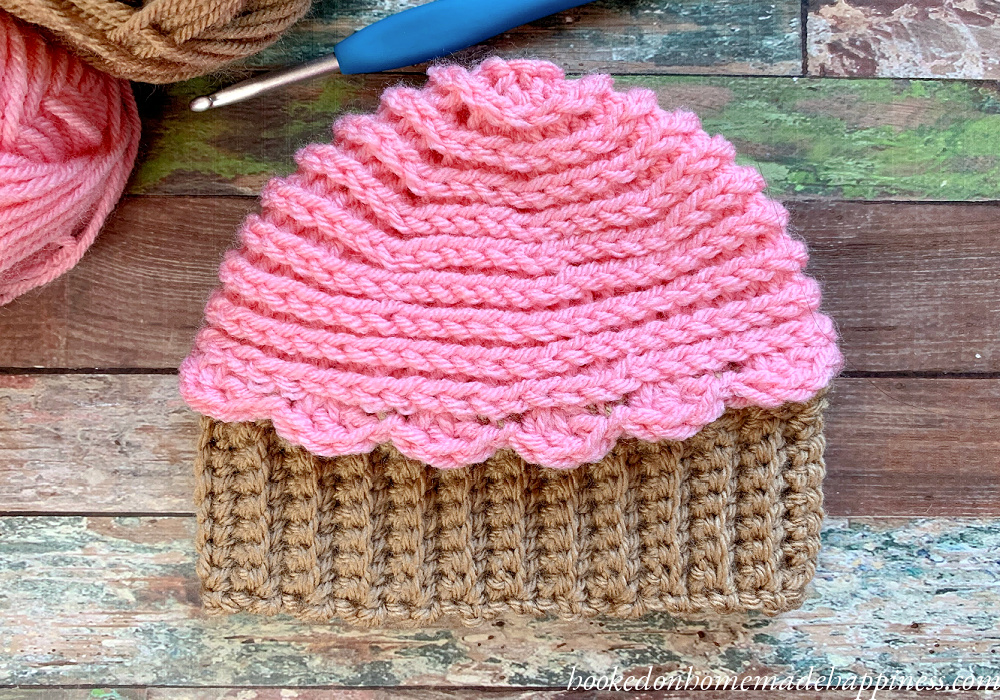
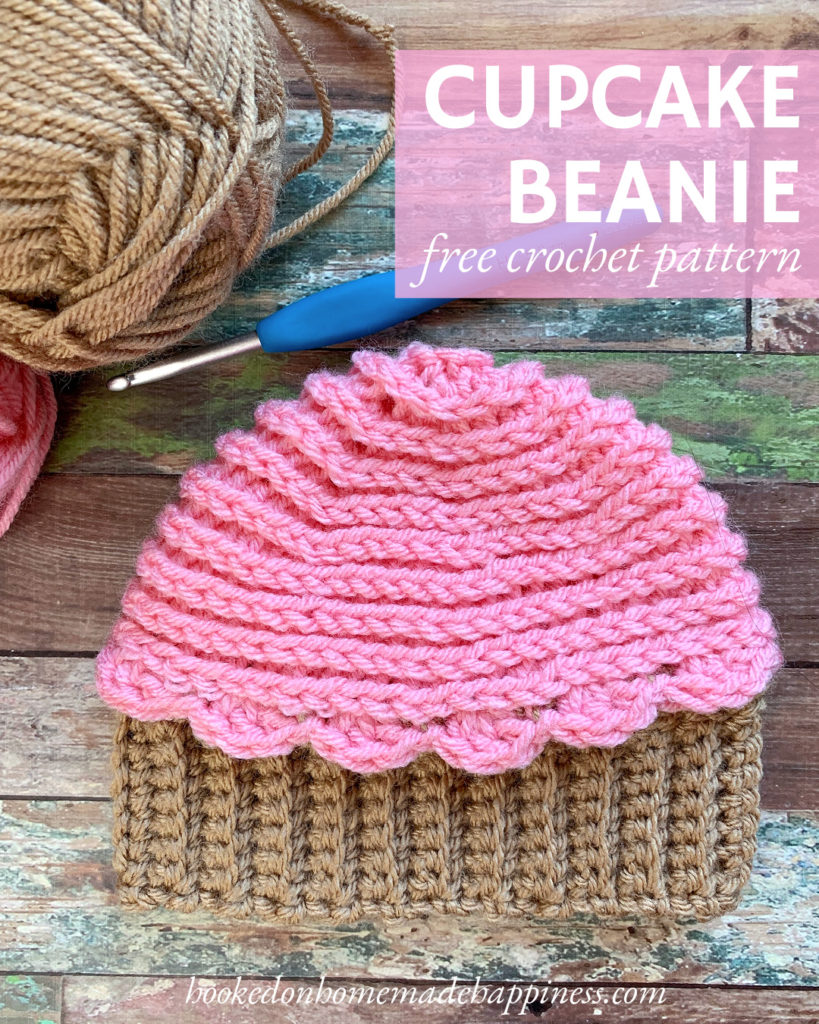
This Cupcake Beanie Crochet Pattern is just too cute! By using a few different crochet techniques this adorable baby beanie can be made in no time. The sample is made in a newborn baby size, but it can easily be adjusted by adding an increase round or two.
This hat is the 10th pattern in the Crochet Along for a Cause. We are making 1 hat per week to donate to a cancer center, school, or homeless shelter for 12 weeks. There’s always time to join! You can find all the details and hat patterns HERE.
More Homemade Happiness:


Elmo Beanie // Unicorn Hooded Scarf // Basic Baby Bonnet
click here to pin for later >>>
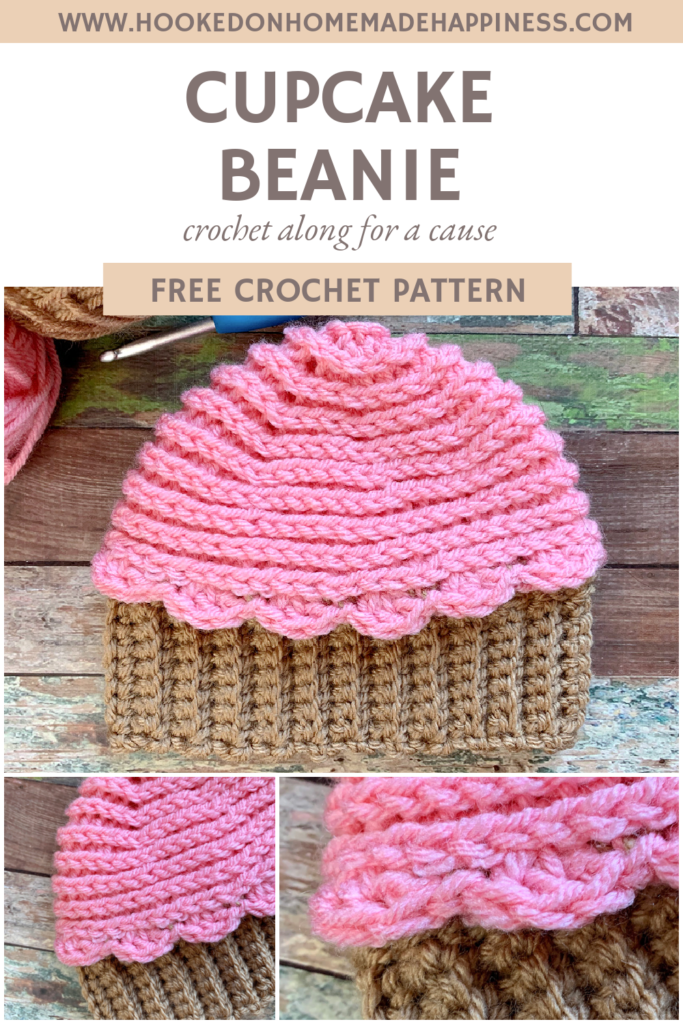
Cupcake Beanie Crochet Pattern
Get the full pattern below or download the ad-free, printable PDF for free HERE
PIN for later HERE
Add to your Ravelry Queue HERE
Materials
50g/109yds worsted weight yarn (I used Brava Worsted in Cotton Candy and Almond)
H/5.0 mm hook
yarn needle
scissors
stitch marker
Level
intermediate
Pattern notes & Stitches to Know
Magic circle
ch – chain
sl st – slip stitch
hdc – half double crochet
sc – single crochet
TL – third loop – insert hook into the horizontal loop on back of hdc and work stitch
sc blo – single crochet back loop only
· Written in US terms
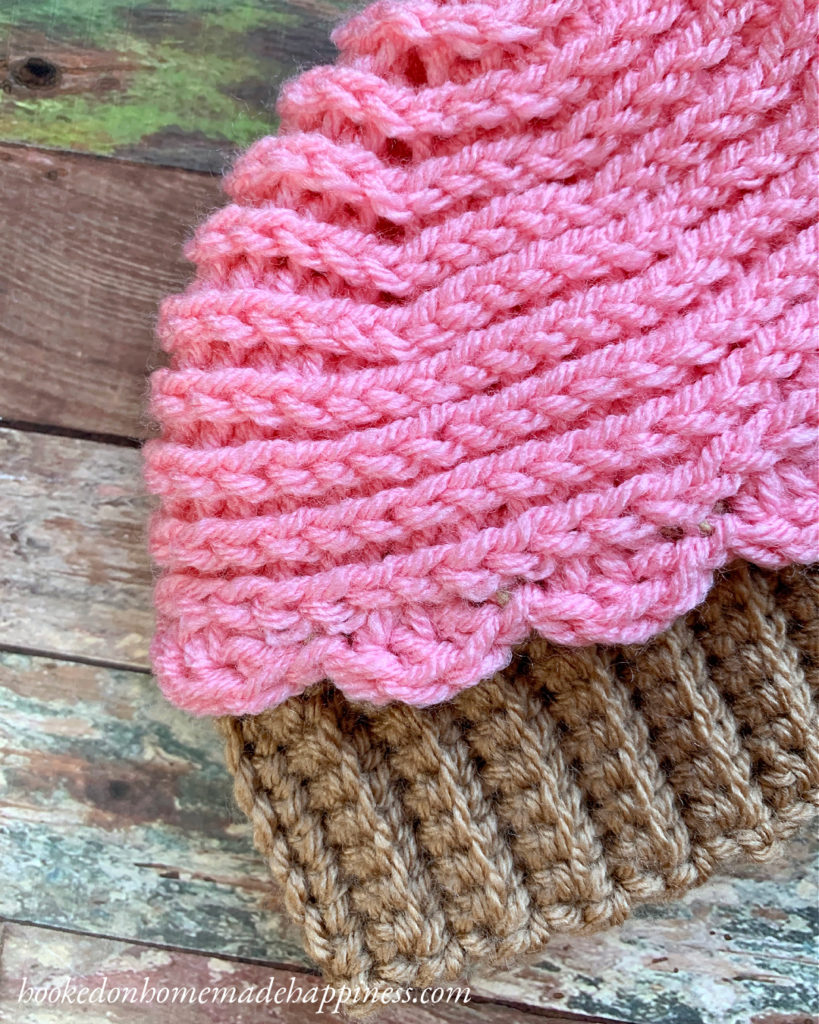
· This beanie is made from the top down in continuous rounds. Then the ribbing is added using the applied ribbing method (video linked in pattern)
· Cotton Candy is Color A. Almond is Color B.
· To change the pattern size, go up or down a hook size. You can also add or take out an increase round
Approx Finished size (newborn – 3mo) – 12” x 5.5”
CUPCAKE BEANIE CROCHET PATTERN
With Color A, make a magic circle
Round 1: ch 1, 8 hdc in circle, pull circle closed tight, do not join (8 hdc)
Do not to join. Continue the next round working in the first stitch of round 1. You will be working in a continuous spiral. Put your stitch marker in the first hdc of the next round.
Round 2: 2 hdc TL in each stitch around (16 hdc)
Move stitch marker to first hdc in next round. Continue for each round.
Round 3: *hdc TL in next, 2 hdc TL in next* repeat from * to * around (24 hdc)
Round 4: *hdc TL in next 2 stitches, 2 hdc TL in next* repeat from * to * around (32 hdc)
Round 5: *hdc TL in next 3 stitches, 2 hdc TL in next* repeat from * to * around (40 hdc)
Round 6: *hdc TL in next 4 stitches, 2 hdc TL in next* repeat from * to * around (48 hdc)
Crown diameter is approx. 4.5”. To change the size, add or take out increase rounds.
Round 7 – 10: hdc TL in each stitch around (48 hdc)
Sc in next 2, sl st in next. Fasten off.
Join with color B in the sl st.
Round 11: ch 1, sc TL in each stitch around, join to first sc with sl st (48 sc)
Do not fasten off.
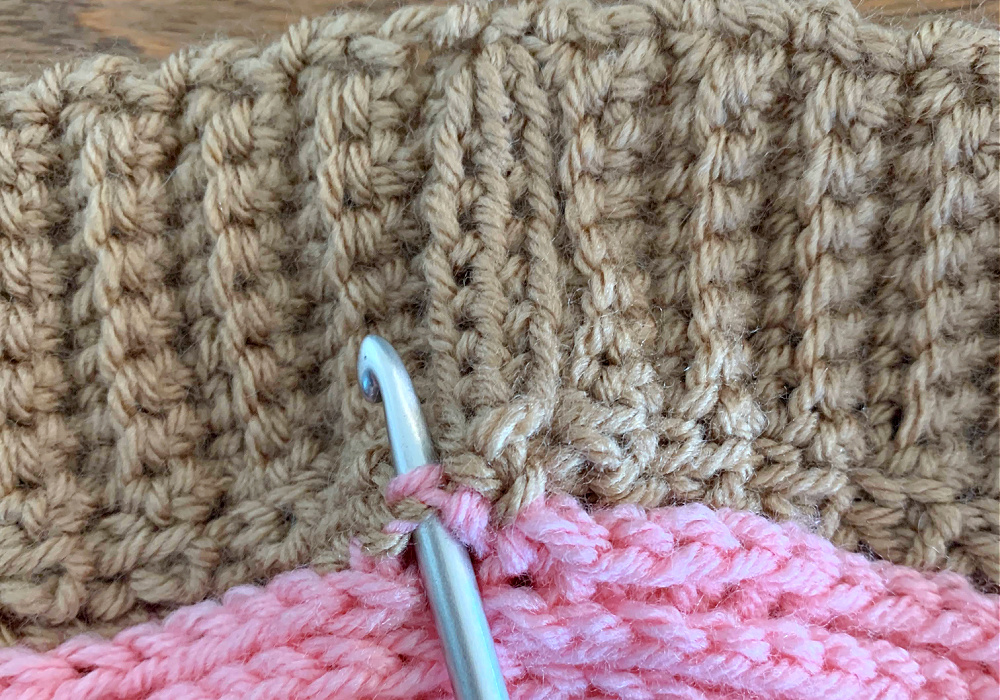
APPLIED RIBBING >>VIDEO TUTORIAL<<
ch 9
Row 1: sc in 2nd ch from the hook and in each ch across, join to the last round of the beanie with sl st (8 sc)
Row 2: sl st to next stitch in the last round of the beanie, turn, sc in first stitch, sc blo in next 6, sc in last stitch (8 sc)
Row 3: ch 1, turn, sc in the first stitch, sc blo in next 6, sc in the last stitch, sl st to the last round of the beanie (8 sc)
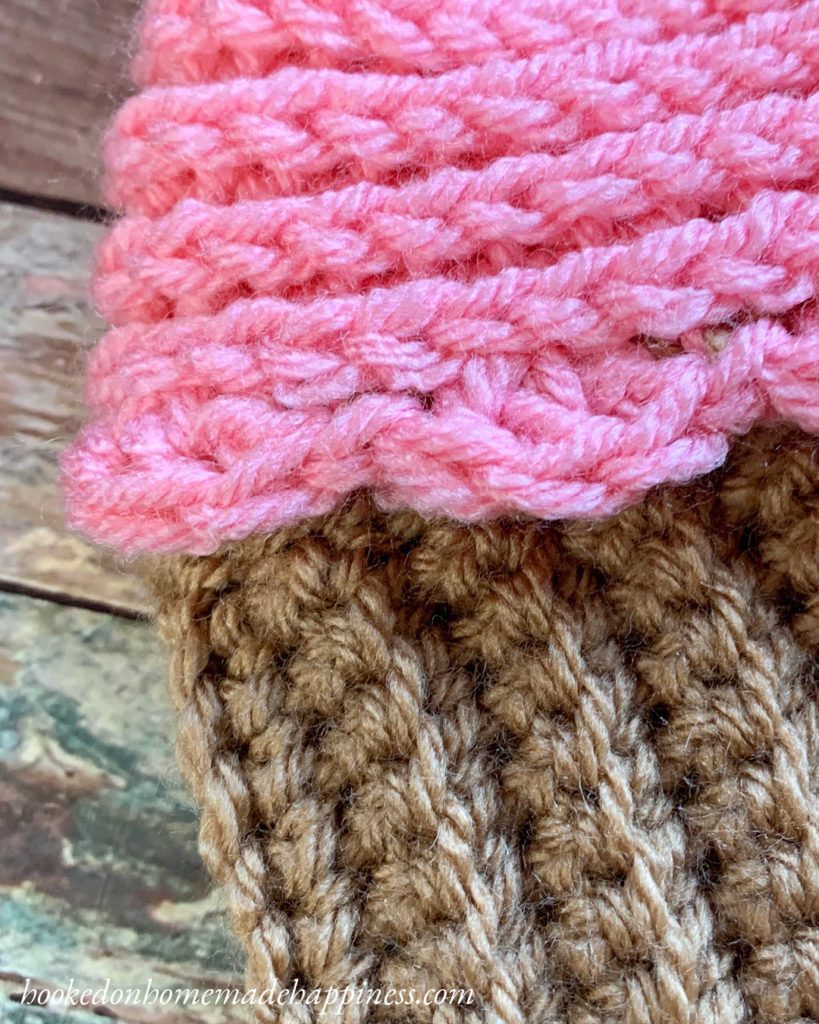
Repeat rows 2 & 3 until you work all the way around the beanie. Sew the ribbing closed with a whip stitch
Fasten off. Weave in the ends.
SCALLOPS
The scallops are worked on top of the ribbing.
Join Color A to the beginning of Round 11 in the same stitch as first the color change.
Round 1: ch 1, sl st in same stitch, skip 1 stitch, 3 dc in next, *skip 1 stitch, sl st in next, skip 1 stitch, 3 dc in next* repeat from * to * around, join to first sl st with sl st
Fasten off. Weave in the ends.


Only registered users can comment.