

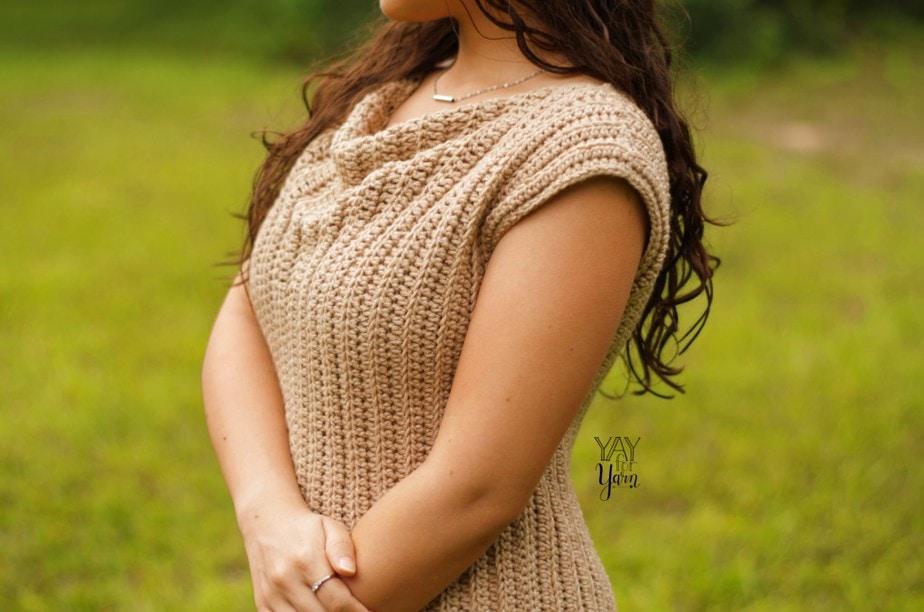
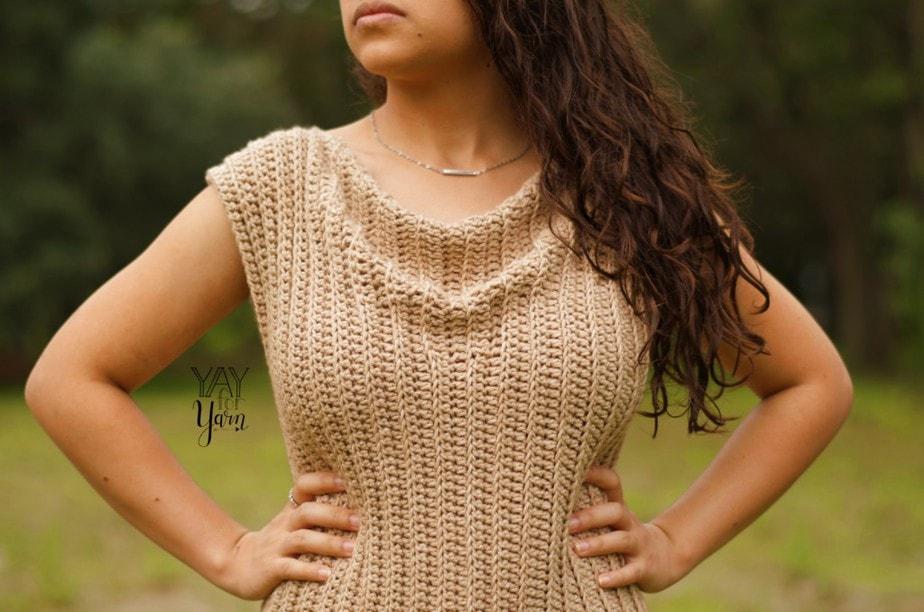
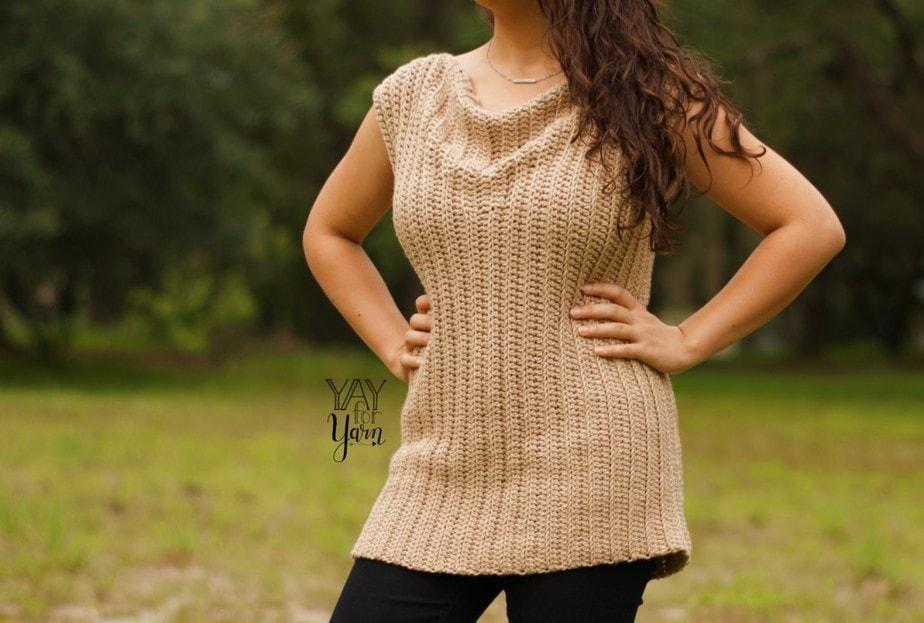
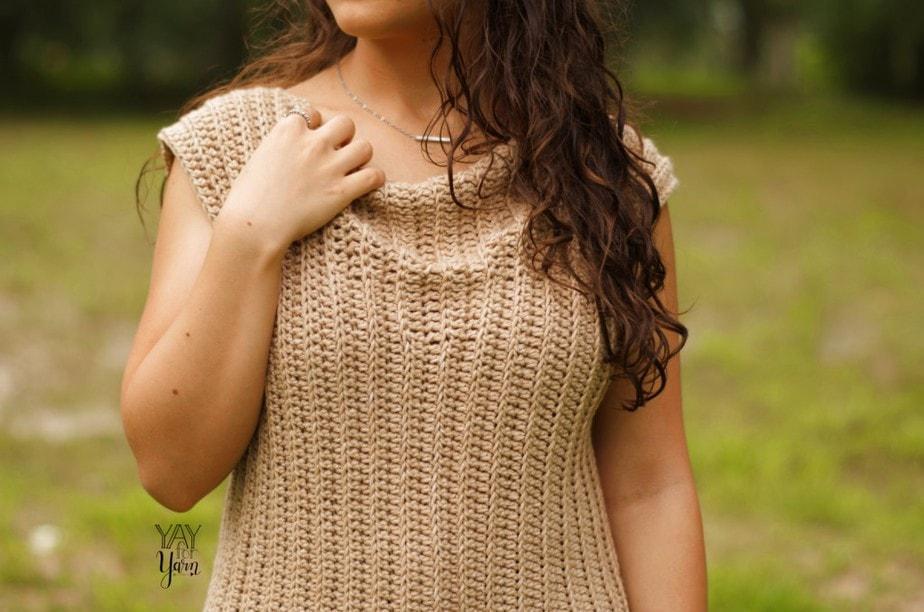
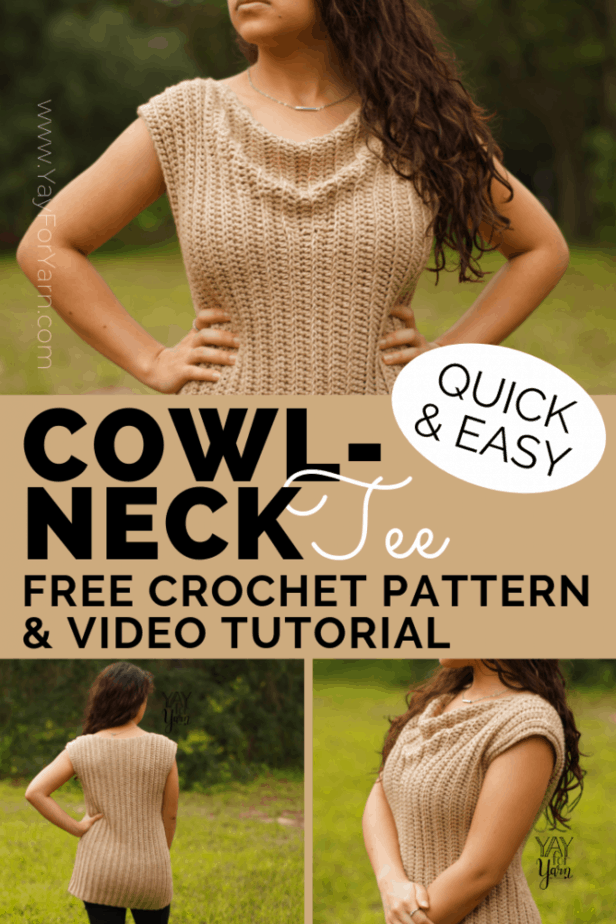
This simple, cowl-neck tee is made from just two rectangles! It’s a classic style that can be worn many different ways. Grab your favorite worsted weight yarn and make this top today!
Table of Contents
Cowl Neck Tee Crochet Pattern
by Yay For Yarn
Skill Level: Advanced Beginner
Sizing:
Sizing follows the Craft Yarn Council’s standards for Women’s sizes.
Instructions and yarn requirements for size X-Small are given outside the parentheses, with Small, Medium, Large, X-Large, 2X, 3X, 4X, and 5X given inside the parentheses, like this:
X-Small (Small, Medium, Large, X-Large, 2X, 3X, 4X, 5X).
When only one number is given, it applies to all sizes.
When a dash “-” is given instead of a number, it is a placeholder. This is shown when a row does not apply to all sizes. Because some sizes do not work that row, the dash “-” is shown for those sizes instead of a number.
To Fit Bust:

Finished Bust Measurement:

Finished Length:

To choose the correct size, measure around the fullest part of the wearer’s bust. Choose the size that is the closest to that measurement in the first chart that says “To Fit Bust”. I recommend printing the pattern out and circling or highlighting all numbers that pertain to your size before beginning.
You Will Need:
Approx. 730 (818, 925, 1015, 1104, 1219, 1310, 1431, 1524) yards of #4 Worsted Weight Yarn. I used Lion Brand Jeans Colors in Khaki, 3 (4, 4, 5, 5, 5, 6, 6, 7) skeins
US Size I / 5.5 mm Crochet Hook (or size needed to obtain gauge)
Scissors
Measuring Tape
Yarn Needle or Blunt Tapestry Needle
Gauge: 16 stitches = 4” (10 cm), 10 rows = 4” (10 cm) in BLO half-double crochet
Abbreviations:
st: stitch
sts: stitches
ea: each
nxt: next
beg: beginning
sk: skip
ch: chain
sp: space
BLO: back loop only
hdc: half-double crochet
dc: double crochet
*fhdc: foundation half-double crochet
*This is a special stitch. See instructions below to learn how to work this stitch.
(This stitch is not required and may be substituted if you like, as directed in the pattern. However, I recommend that you use this stitch in the project for best results.)
Fhdc (video tutorial):
To begin, chain 2. Yarn over, insert hook into the 2nd chain from the hook. Yarn over, pull up a loop . Yarn over, pull through one loop on hook. Yarn over, pull through all 3 remaining loops on hook.
For all following stitches: Turn work upside-down so the bottom (foundation) edge is facing you. On the bottom of the previous stitch, there is what looks like the top of a normal crochet stitch. Yarn over and insert hook into both strands of that “stitch”. Yarn over, pull up a loop. Yarn over, pull through one loop on hook. Yarn over, pull through all 3 remaining loops on hook.
BLO:
This is not a stitch as such, but is a way of working into the stitches from the previous row. When you look at the top of the stitch, there are two strands of that stitch. The one closest to you is the front loop, and the one furthest from you is the back loop. When we work into the back loop only, we only insert the hook into the back loop to work each stitch.
Cowl Neck Tee Instructions
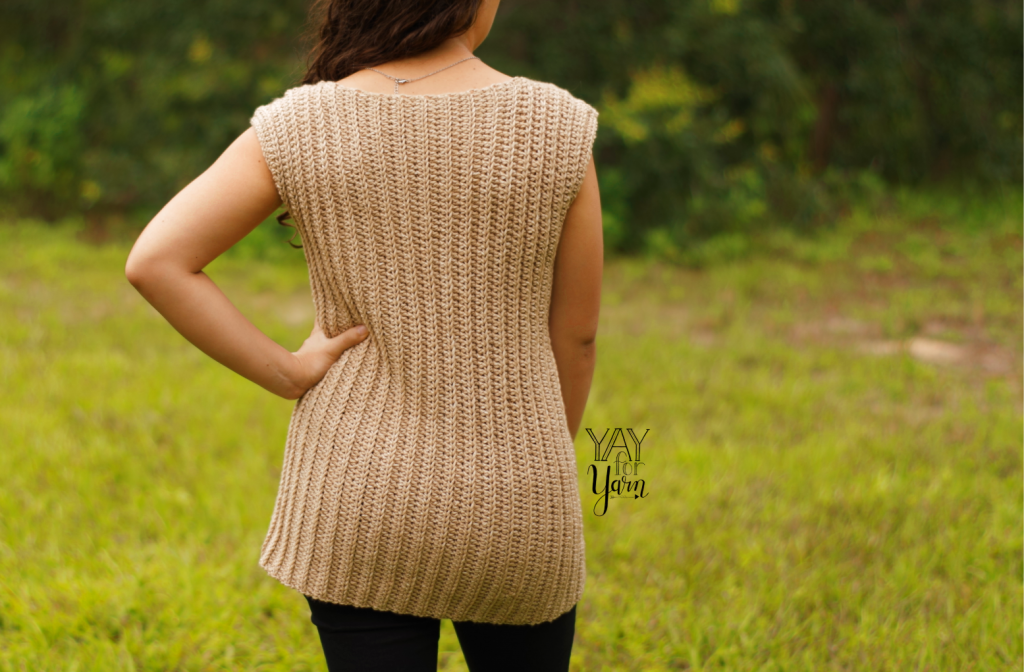
This top is made from 2 rectangles, one for the front, and one for the back.
Back Panel:
Row 1 (using foundation half-double crochet):
Leave about 1 yard / 1 meter of a tail before beginning. Ch 2, fhdc in 2nd ch from hook. Work 89 (89, 91, 91, 91, 93, 93, 95, 95) more fhdc. You should have 90 (90, 92, 92, 92, 94, 94, 96, 96) stitches, not including beg ch sp.
OR
Row 1 (using a regular foundation chain):
Leave about 1 yard / 1 meter of a tail before beginning. Ch 92 (92, 94, 94, 94, 96, 96, 98, 98). Sk 2 chs, hdc in 3rd ch from hook. Hdc in nxt 89 (89, 91, 91, 91, 93, 93, 95, 95) sts. You should have 90 (90, 92, 92, 92, 94, 94, 96, 96) stitches, not including skipped chs from beg of row.
Row 2: ch 2, turn. Hdc in BLO of same st. Hdc in BLO of each st across. You should have 90 (90, 92, 92, 92, 94, 94, 96, 96) stitches, not including beg ch sp.
Repeat Row 2; 38 (43, 48, 53, 58, 63, 68, 73, 78) more times. Tie off, leaving a tail about 1 yard long.
Front Panel:
This panel is worked in 4 sections.
Section 1:
Row 1 (using foundation half-double crochet):
Leave about 1 yard / 1 meter of a tail before beginning. Ch 2, fhdc in 2nd ch from hook. Work 89 (89, 91, 91, 91, 93, 93, 95, 95) more fhdc. You should have 90 (90, 92, 92, 92, 94, 94, 96, 96) stitches, not including beg ch sp.
OR
Row 1 (using a regular foundation chain):
Leave about 1 yard / 1 meter of a tail before beginning. Ch 92 (92, 94, 94, 94, 96, 96, 98, 98). Sk 2 chs, hdc in 3rd ch from hook. Hdc in nxt 89 (89, 91, 91, 91, 93, 93, 95, 95) sts. You should have 90 (90, 92, 92, 92, 94, 94, 96, 96) stitches, not including skipped chs from beg of row.
Rows 2-10: ch 2, turn. Hdc in BLO of same st. Hdc in BLO of each st across. You should have 90 (90, 92, 92, 92, 94, 94, 96, 96) stitches, not including beg ch sp.
Section 2:
Some of the sizes do not use all of these rows. Stop working these rows when instructed to stop, then skip to Section 3.
Row 11: ch 3, turn. Dc in BLO of same st, dc in BLO of nxt 15 sts. Hdc in BLO of nxt 74 (74, 76, 76, 76, 78, 78, 80, 80) sts. You should have 90 (90, 92, 92, 92, 94, 94, 96, 96) stitches, not including beg ch sp.
Row 12: ch 2, turn. Hdc in BLO of same st, hdc in BLO of nxt 73 (73, 75, 75, 75, 77, 77, 79, 79) sts. Dc in BLO of nxt 16 sts.
Repeat Rows 11-12 one more time.
Row 13: ch 3, turn. Dc in BLO of same st, dc in BLO of nxt 21 sts. Hdc in BLO of nxt 68 (68, 70, 70, 70, 72, 72, 74, 74) sts. You should have 90 (90, 92, 92, 92, 94, 94, 96, 96) stitches, not including beg ch sp.
Row 14: ch 2, turn. Hdc in BLO of same st, hdc in BLO of nxt 67 (67, 69, 69, 69, 71, 71, 73, 73) sts. Dc in BLO of nxt 22 sts. You should have 90 (90, 92, 92, 92, 94, 94, 96, 96) stitches, not including beg ch sp.
Repeat Rows 13-14 one more time.
Row 15: ch 3, turn. Dc in BLO of same st, dc in BLO of nxt 27 sts. Hdc in BLO of nxt 62 (62, 64, 64, 64, 66, 66, 68, 68) sts. You should have 90 (90, 92, 92, 92, 94, 94, 96, 96) stitches, not including beg ch sp.
Row 16: ch 2, turn. Hdc in BLO of same st, hdc in BLO of nxt 61 (61, 63, 63, 63, 65, 65, 67, 67) sts. Dc in BLO of nxt 28 sts.
Repeat Rows 15-16; 1 (3, 6, 1, 1, 1, 1, 1, 1) more time(s).
For X-Small, Small, and Medium, stop here and skip to Section 3.
For all remaining sizes, continue working following rows.
Row 17: ch 3, turn. Dc in BLO of same st, dc in BLO of nxt 33 sts. Hdc in BLO of nxt – (-, -, 58, 58, 60, 60, 62, 62) sts. You should have – (-, -, 92, 92, 94, 94, 96, 96) stitches, not including beg ch sp.
Row 18: ch 2, turn. Hdc in BLO of same st, hdc in BLO of nxt – (-, -, 57, 57, 59, 59, 61, 61) sts. Dc in BLO of nxt 34 sts. You should have – (-, -, 92, 92, 94, 94, 96, 96) stitches, not including beg ch sp.
Repeat Rows 17-18; – (-, -, 4, 7, 9, 1, 1, 1) more time(s).
For Large, X-Large, and 2X, stop here and skip to Section 3.
For all remaining sizes, continue working following rows.
Row 19: ch 3, turn. Dc in BLO of same st, dc in BLO of nxt 39 sts. Hdc in BLO of nxt – (-, -, -, -, -, 54, 56, 56) sts. You should have – (-, -, -, -, -, 94, 96, 96) stitches, not including beg ch sp.
Row 20: ch 2, turn. Hdc in BLO of same st, hdc in BLO of nxt – (-, -, -, -, -, 53, 55, 55) sts. Dc in BLO of nxt 40 sts. You should have – (-, -, -, -, -, 94, 96, 96) stitches, not including beg ch sp.
Repeat Rows 19-20; – (-, -, -, -, -, 8, 10, 13) more times. Move on to Section 3.
Section 3:
Some of the sizes do not use all of these rows. Skip to the instructions for your size, and only work the rows specified for the size you are making.
For 3X, 4X, and 5X, start here:
Repeat rows 17-18; – (-, -, -, -, -, 2, 2, 2) more times.
For Large, X-Large, and 2X, start here:
Repeat rows 15-16; – (-, -, 2, 2, 2, 2, 2, 2) more times.
For X-Small, Small, and Medium, start here:
Repeat rows 13-14 two more times (all sizes).
Repeat rows 11-12 two more times (all sizes).
Section 4:
Repeat Row 2; 10 (11, 10, 11, 10, 11, 10, 11, 10) more times.
Tie off, leaving a tail about 1 yard long.
To Block (video tutorial):
For natural fibers, pin each rectangle out to the correct measurements on foam blocking mats. Spray with water until fully saturated, allow to dry.
OR
For acrylic fibers, pin each rectangle out to the correct measurements on an ironing board or several layers of towels. Hold a steaming iron 2”-3” over the surface of the fabric, making sure all of the fabric is penetrated by the steam. Allow to cool / dry.
Since my yarn was 100% acrylic, I chose to steam block my panels. Make sure that on the front panel, you spread out the wider upper section while blocking for best drape.
To Assemble:
Lay both panels out in front of you so the foundation edge of each panel is at one side and the top edge of each panel is at the other side. Lay the back panel down, and lay the front panel on top of it. The foundation edges and top edges should be together.
Make sure that the side and bottom edges and corners are lined up. The neckline edge of the front panel will not line up with the neck edge of the back panel, because the neck edge of the front panel is much wider. You should have a long yarn tail at each corner.
1st Side Seam:
Thread one of the yarn tails at a bottom corner through your yarn needle. Starting at that bottom corner, begin whip stitching the two panels together up one side. Stop when you have 6 ½” (7”, 7 ½”, 8”, 8 ½”, 9”, 9 ½”, 10”, 10 ½”) OR 16.5 cm (17.8 cm, 19 cm, 20.3 cm, 21.6 cm, 22.9 cm, 24.1 cm, 25.4 cm, 26.7 cm) left before you reach the top edge of the panels. (This leaves an opening for the armhole.) Take one more stitch in the same place as the previous stitch, wrap the yarn around the needle, and pull the needle through to make a knot. Weave in the yarn tail.
2nd Side Seam:
Thread the yarn tail at the other bottom corner through your yarn needle. Repeat the same instructions for the previous seam with that tail on the other side, and weave in the yarn tail.
Shoulder Seams:
Thread one of the yarn tails from a top corner through your yarn needle. Starting at that top corner, begin whip stitching the two panels together across the top edge. As you stitch each shoulder seam, try to always keep the rows on one side aligned with the rows on the other side. Stop when you have stitched the ends of 10 rows together (10 rows from the front stitched to 10 rows from the back). Take one more stitch in the same place as the previous stitch, wrap the yarn around the needle, and pull the needle through to make a knot. Weave in the yarn tail.
Thread the other yarn tail at the other top corner through your yarn needle. Repeat the same instructions for the previous shoulder seam with that tail on the other side, and weave in the yarn tail.
This pattern is intended for your personal use only. You may not share it, copy it, sell it, give it away, or mass-produce the finished product. However, you may sell the finished items on a small scale, as long as you convey in your item description that you used a Yay For Yarn pattern.
Yay For Yarn Copyright© 2019 – Current. All patterns and photos are owned by Yay For Yarn.
Pin the image below to save this project for later!
")


I found the video which answered my question. Thank you so very much.
Is this Cowl Neck Tee worked crosswise rather bottom up? I love the look of this tee.
I love the simplicity of this pattern. I have been trying to find a sleeveless tunic pattern. But I need it for lace weight yarn #1. Can this be adapted to that weight?
Hi Cheryl. I don’t generally recommend using a yarn of different thickness than what the pattern calls for, but if you feel comfortable altering the gauge of a pattern, it could be done. You would need to make a gauge swatch, block it, and measure your gauge with the yarn you are using. Then, you can use that to calculate the number of stitches and rows you’ll need to get the correct length and width for the size you’re making. As for the cowl neck portion, that is done by replacing the half double crochets near the neckline with double crochet stitches. Toward the center of the front panel, the double crochets replace more of the half double crochets. This is what adds the width to the top of the front panel, creating the cowl neck. I hope this helps!
Thanks so much. I think I will give it a try. I have until Christmas. Lol. I will let you know how it goes.
I found the yarn in worsteted (medium) weight and it worked wonderfully. I wish I could send you a picture.
Hi Cheryl! If you’d like to send a picture, you can email it to me at blogger[at]yayforyarn.com. I’m glad you’re happy with your Cowl-Neck Tee!
This pattern is so cute. I am working on the medium size and I am wondering if the front is supposed to have fewer rows then the back. I did 48 rows for the back and the front works out to 44 rows
Hi Jane! Yes, the front and back panels do not have the exact same number of rows. I hope this helps!
Yes, you would need to do a swatch in the yarn you plan to use, then do a lot of math to make the adjustments in the pattern.
Simple, yet quite beautiful!
are the # of rows different for front and back panels?
Hi Dawn! Yes, the front and back panels do not have the exact same number of rows. I hope this helps!
Can you shorten the shirt without changing the width (bust measurement)?
Hi! Yes, you could shorten this tee if you like. However many stitches you remove, you will need to take that many stitches off of the number of half-double crochets in each row. You do not want to remove any double-crochets, as that is what shapes the cowl neckline. I hope this helps!
I have some yarn I would love to use for this pattern, but it is slightly lighter in weight than worsted, it lists it as “light” instead of medium. Do you have any suggestions on how I should adjust this pattern to use a smaller weight yarn? Thanks!
Hi Liz. If your yarn is labeled as #3 Light instead of #4 Medium, you would have to adjust the pattern a lot to use that yarn. If you feel comfortable altering patterns, you could try it, but I generally don’t recommend substituting a different yarn weight than a pattern calls for. You would have to add extra stitches for length and extra rows for width to get the piece to the right size. I hope this helps!
This is beautiful and I cannot wait to try this!!!! Would you consider making a long sleeve option for this? 🙂
Thank you for sharing this!
I love this!! Thank you so much.
Laura