While ago I was trying to figure out how to play with short rows and recreate in crochet some of the classic knitted sweaters. I got many remarks from people who knit, why I am trying to make crochet look like knitting and don’t simply knit. Well, I could knit too, but not all of us can also knit. And maybe if you are only crocheting you will like to know how to make a sweater that looks like knit.
I also know, that are so many crochet designers that are focused only on finding and designing clothes that look knit, and I don’t want to do that. It was a challenge for me to design a sweater like this which I am happy I completed. 🙂
You can Purchase the easily printable PDF version of this pattern here:
This post contains affiliate links. By purchasing from this page I may receive some commissions. This won’t cost you anything, no additional costs for you as the commission is paid by the merchant.
In this way you support me and I will be extremely grateful.
MATERIALS
• Yarn: Aran Weight yarn (Size 4, Medium)
•Crochet Hook
- 8 mm crochet hook (I used my favorite Streamline Resin Hook by Furls Crochet)
- yarn needle for weave in ends
- Stitch markers
- Scissors
NOTES ABOUT DESIGN
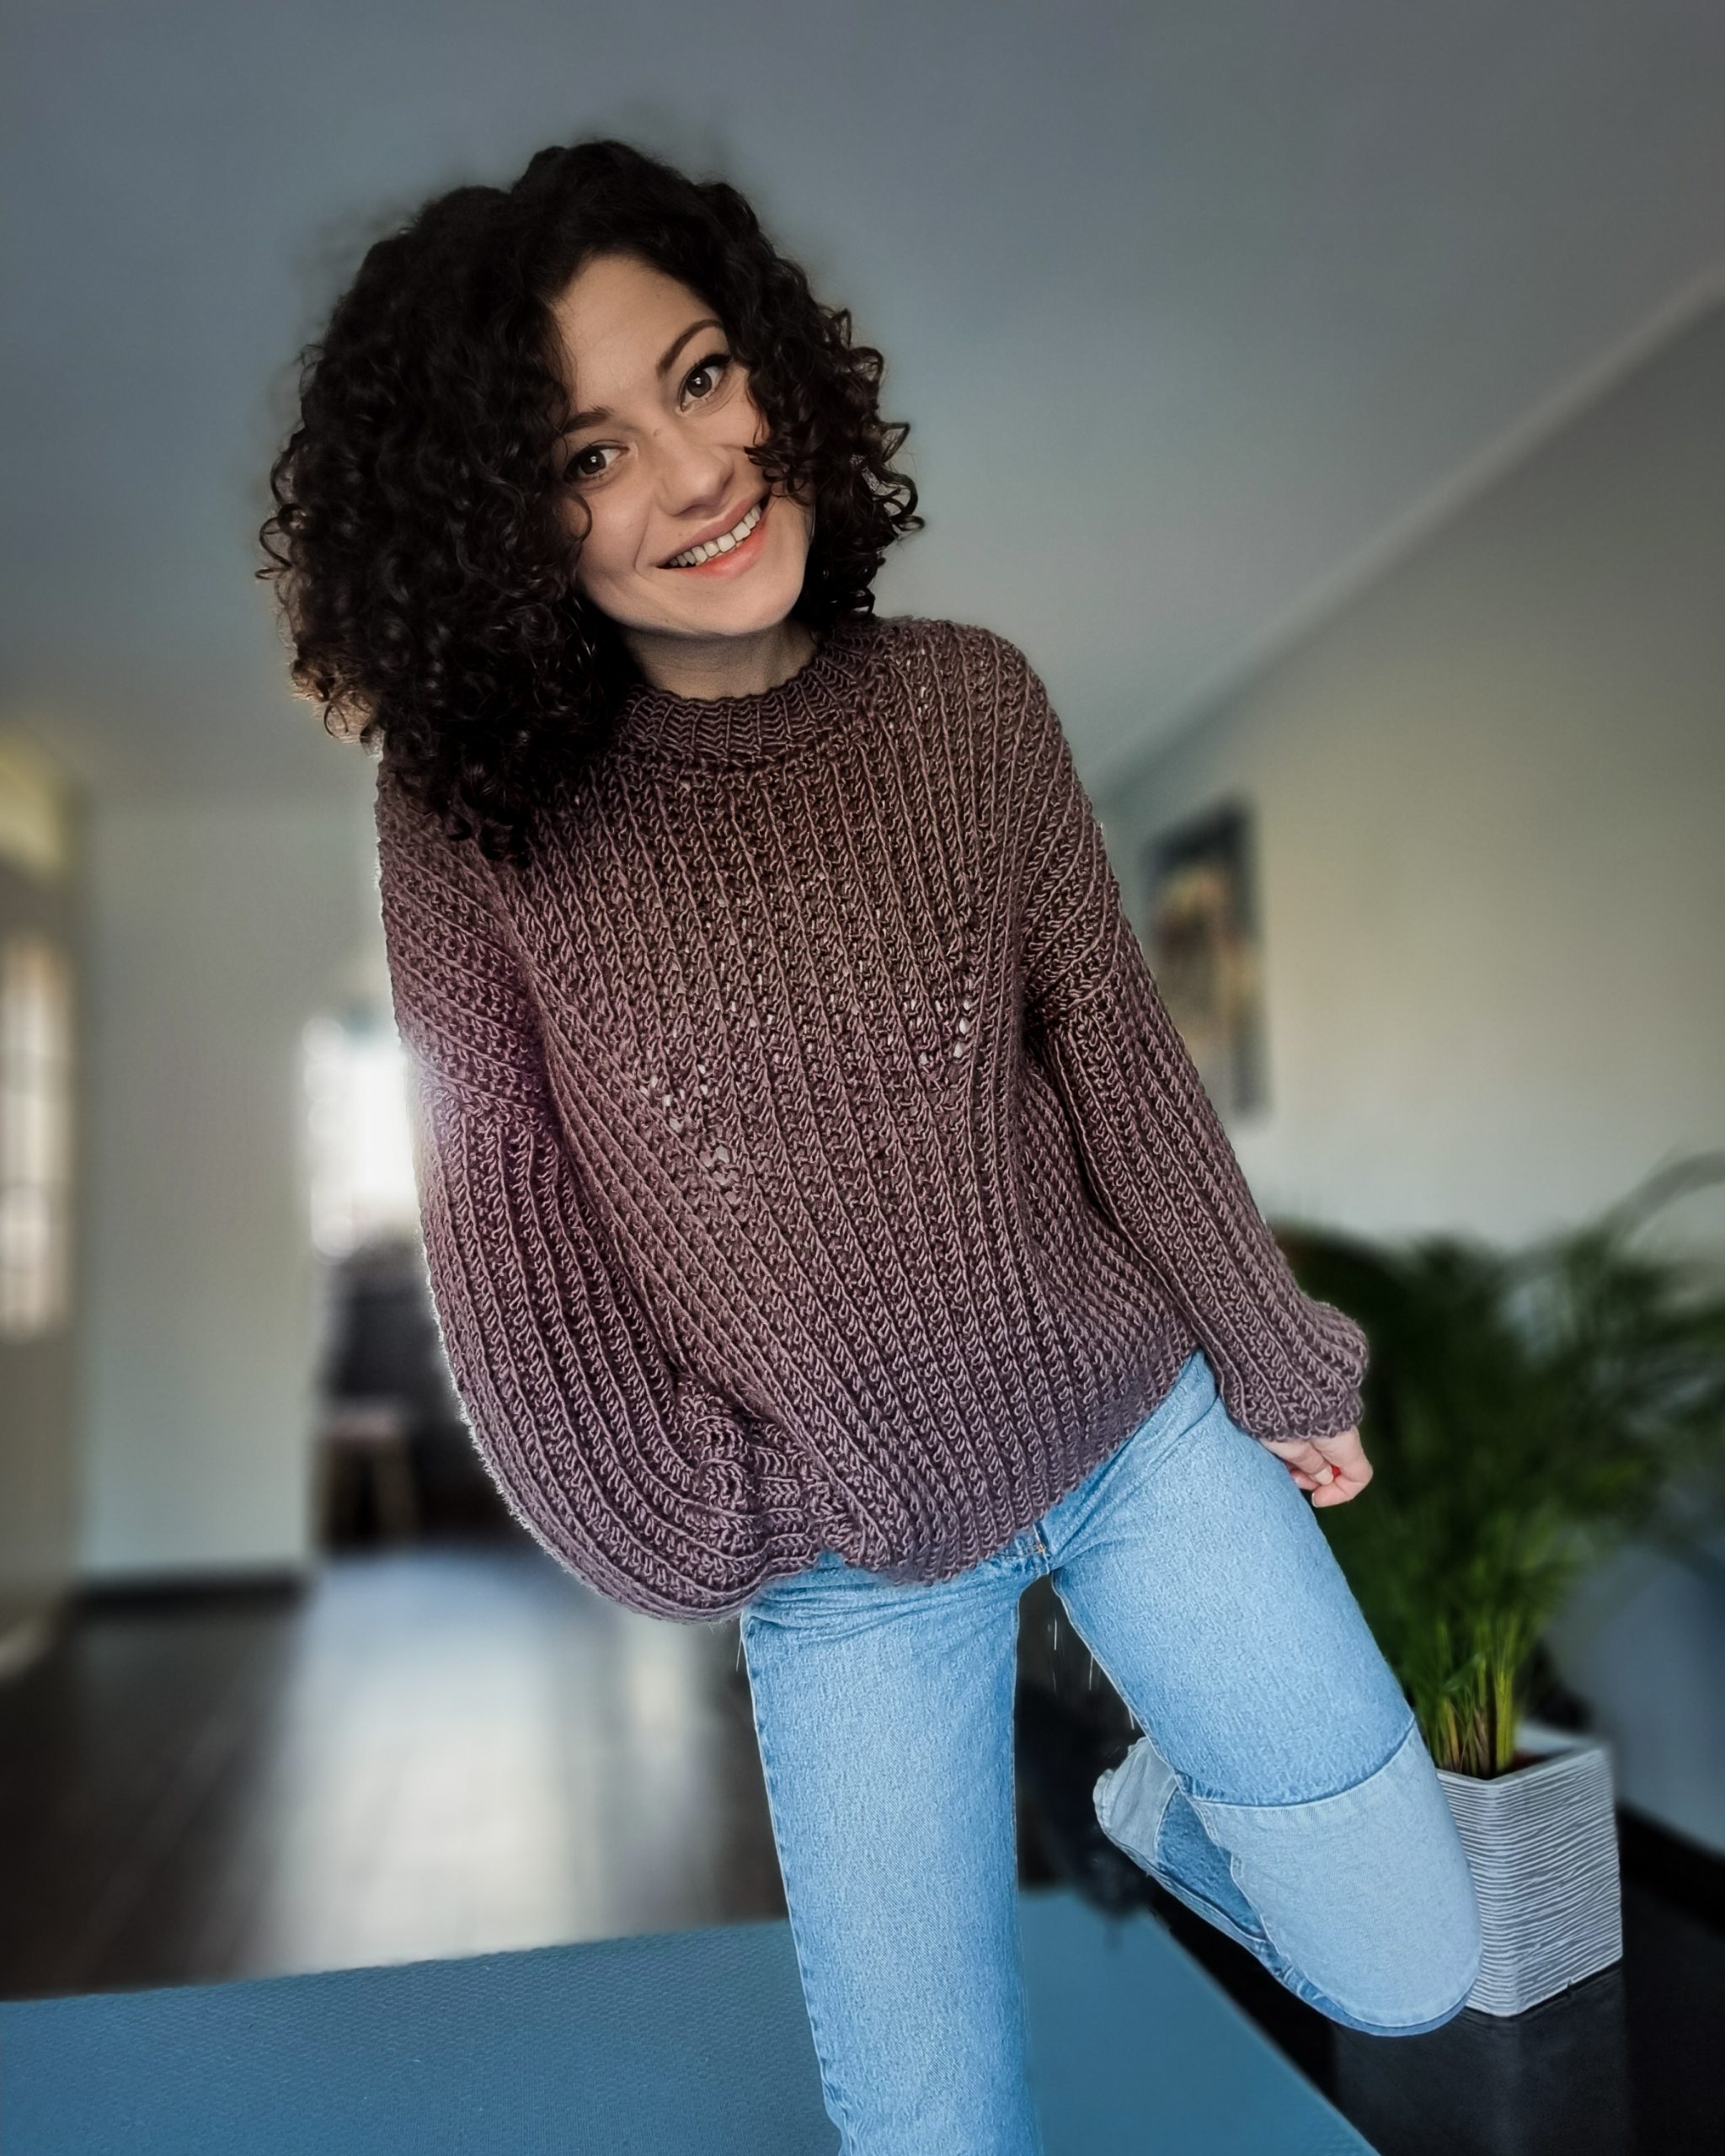
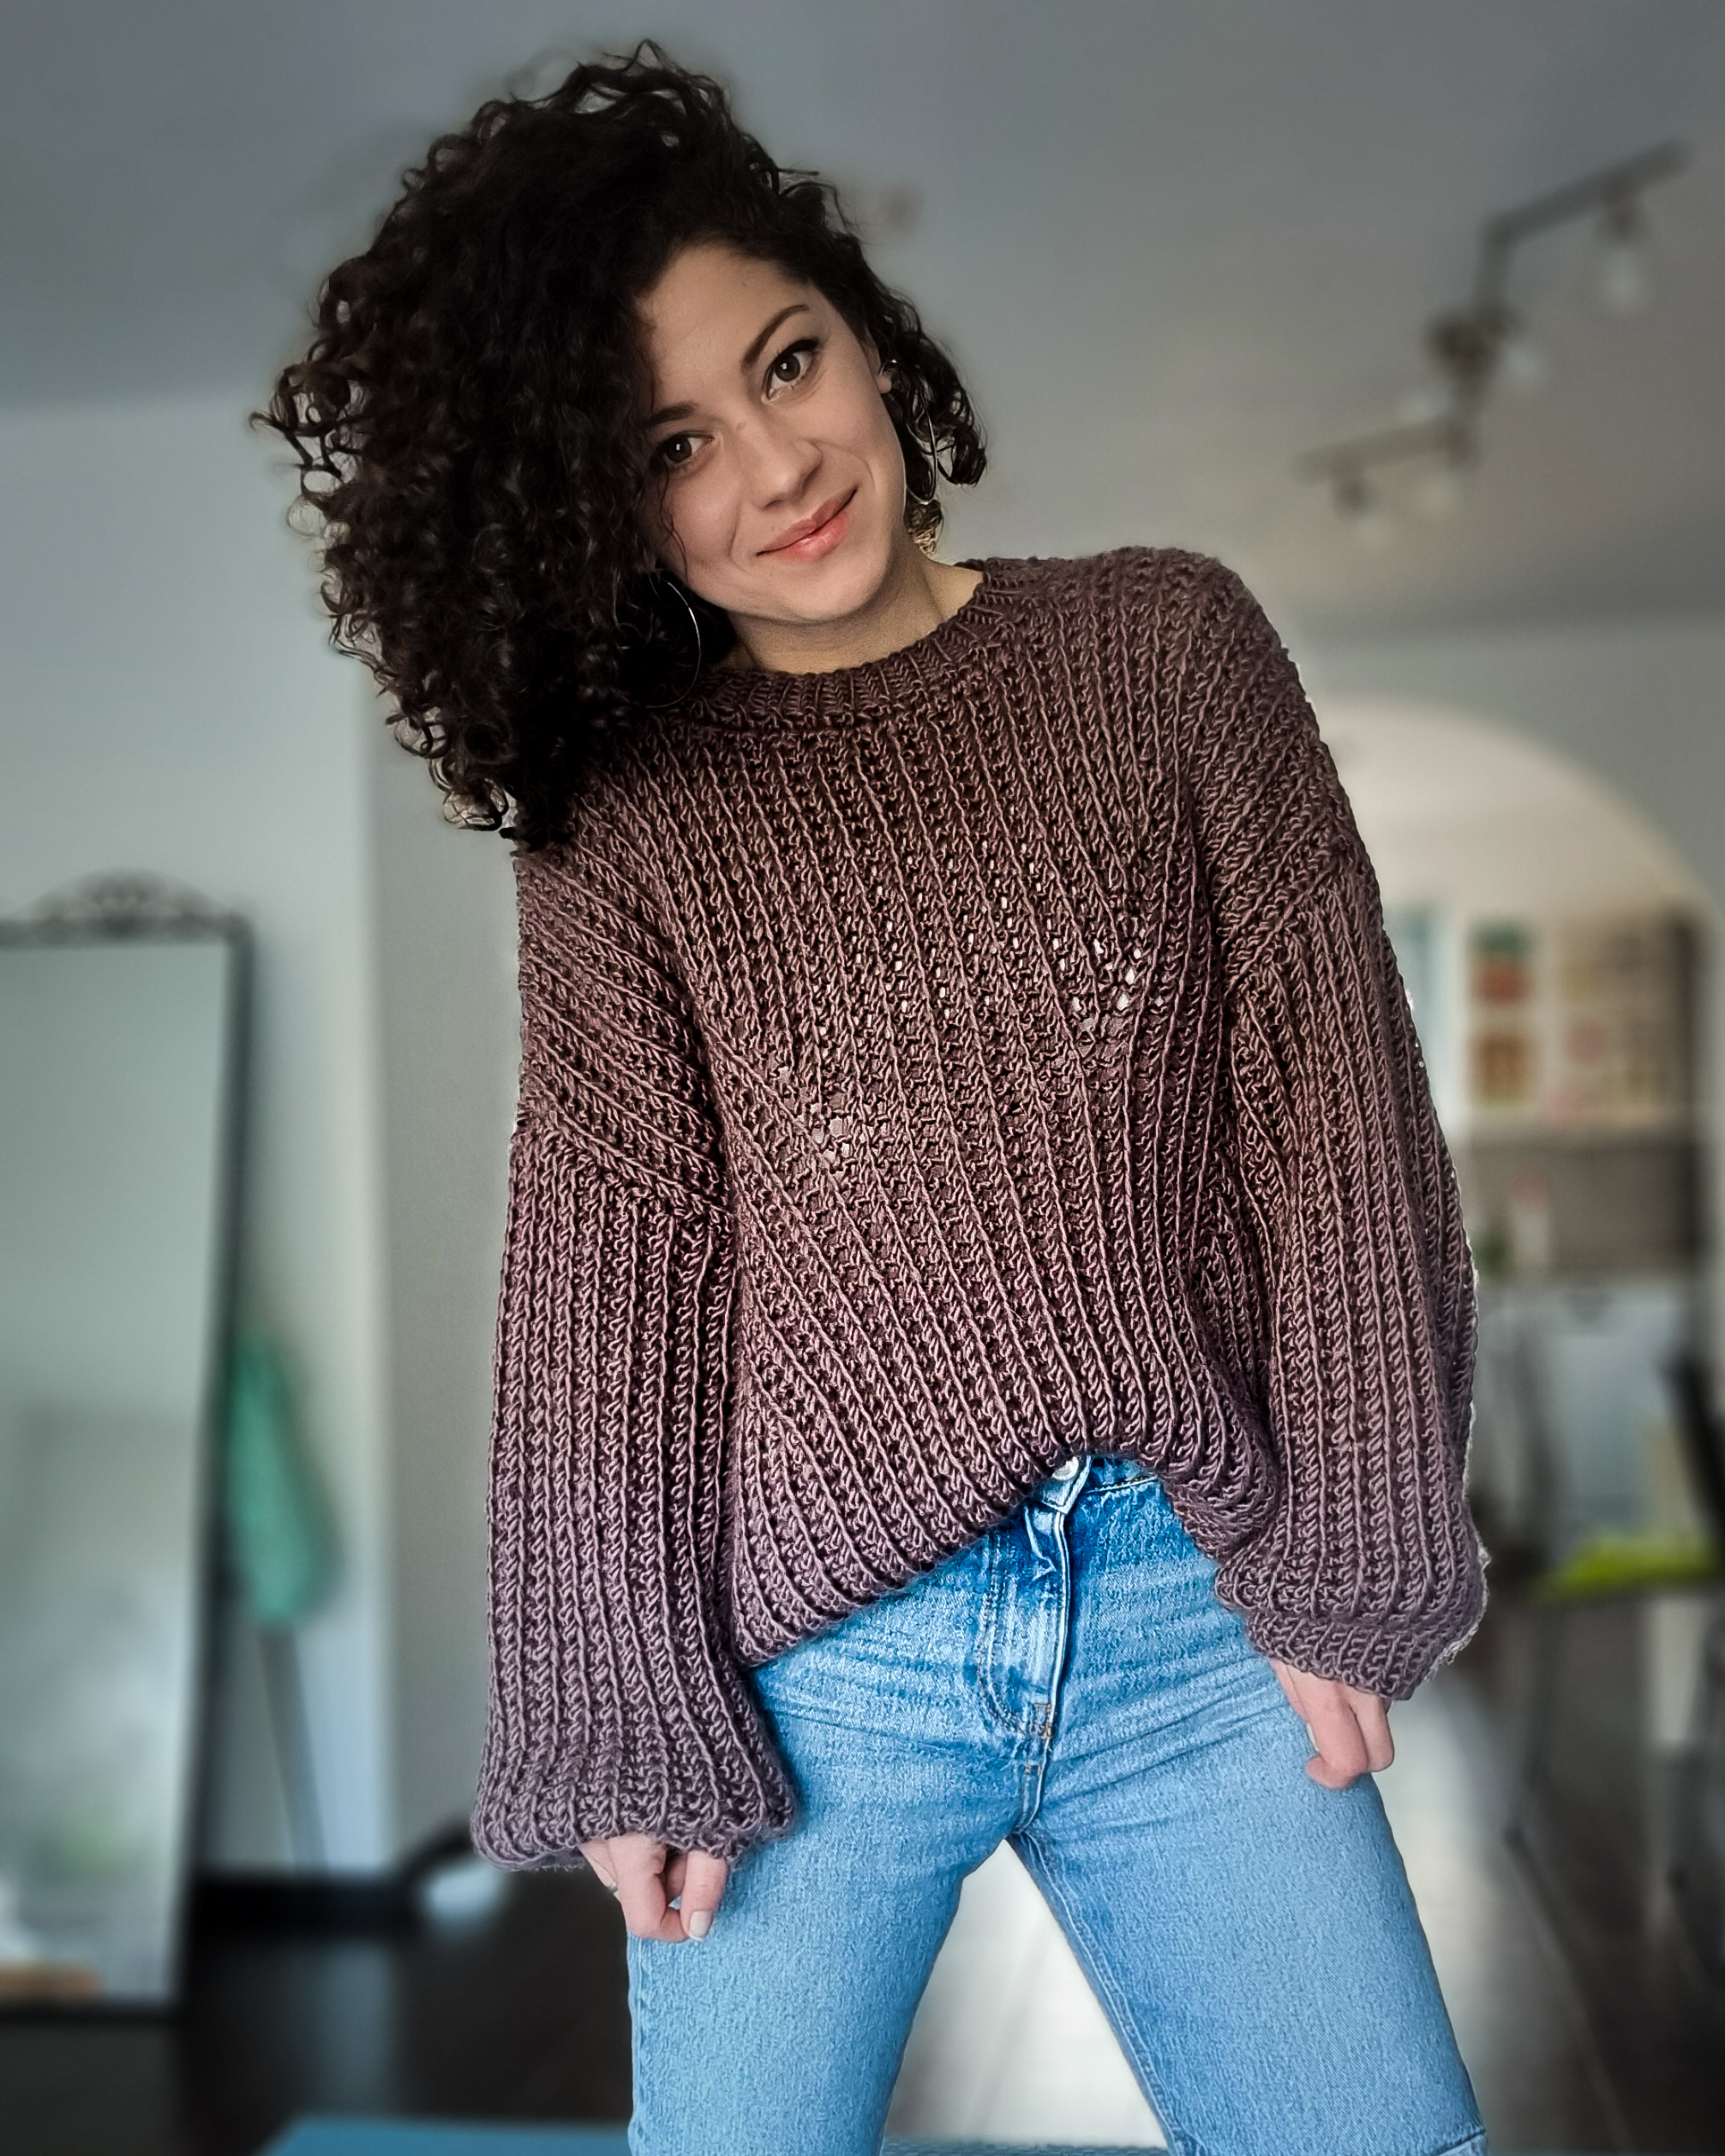
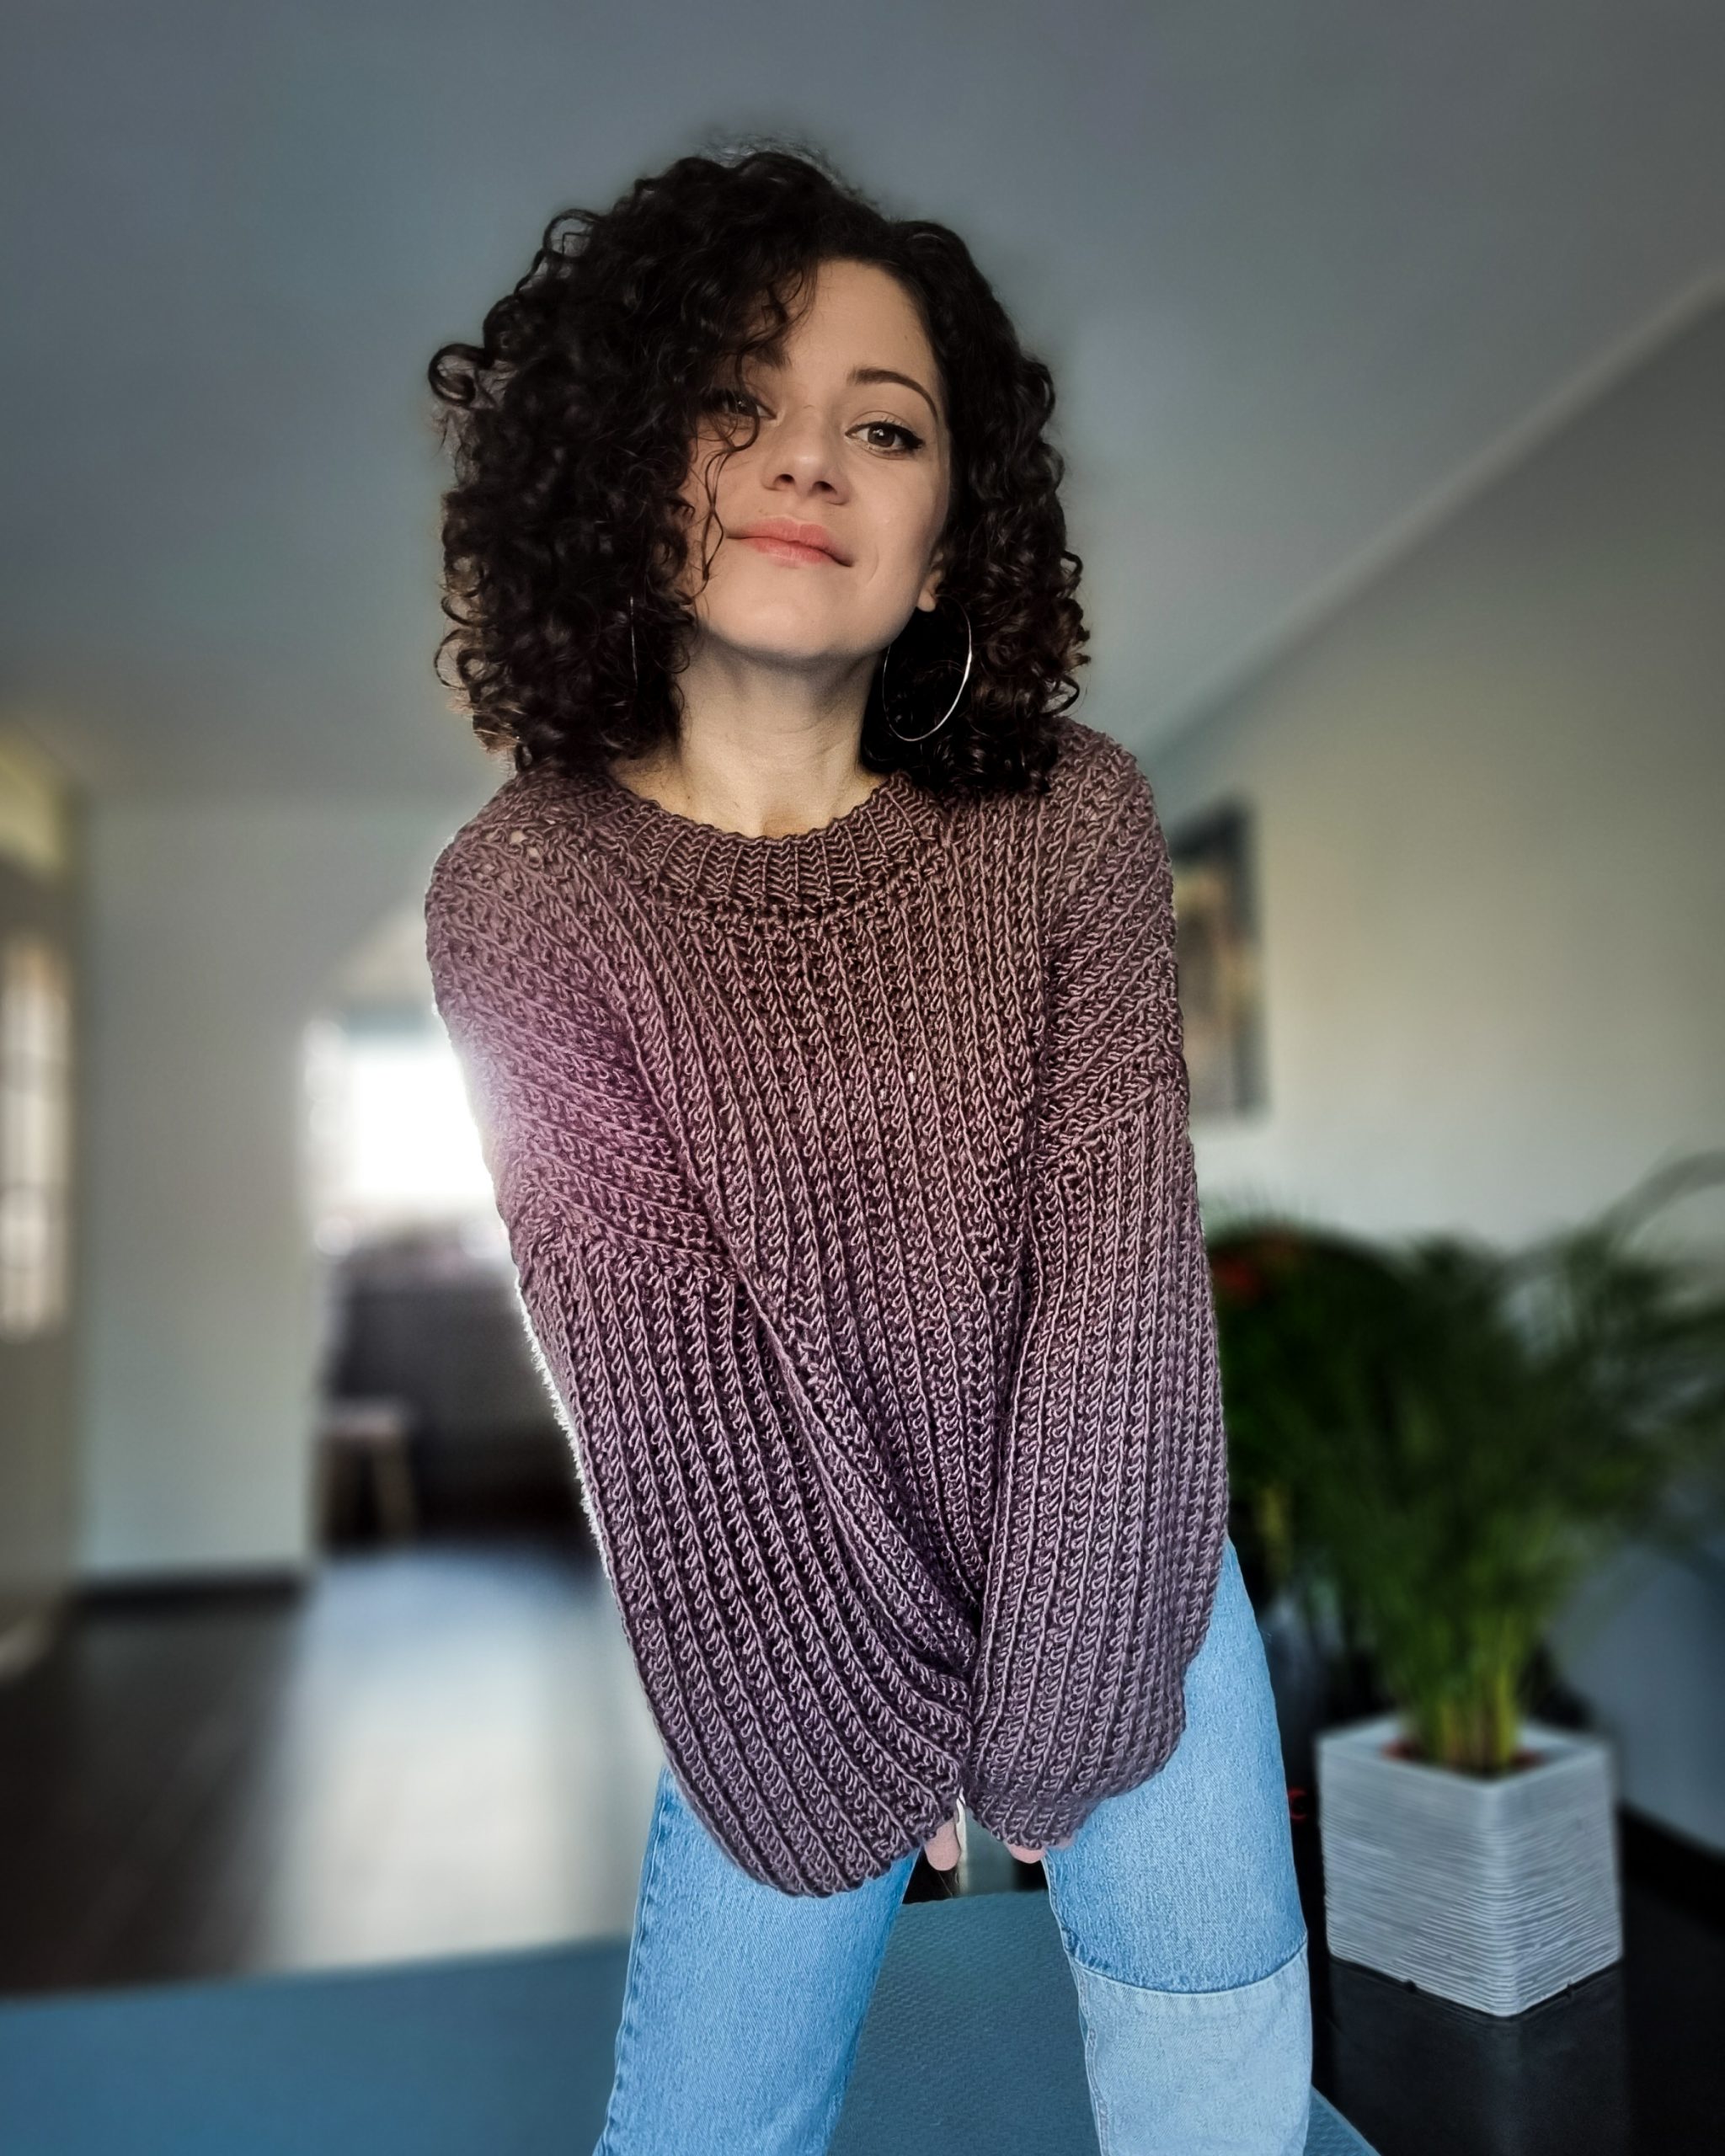
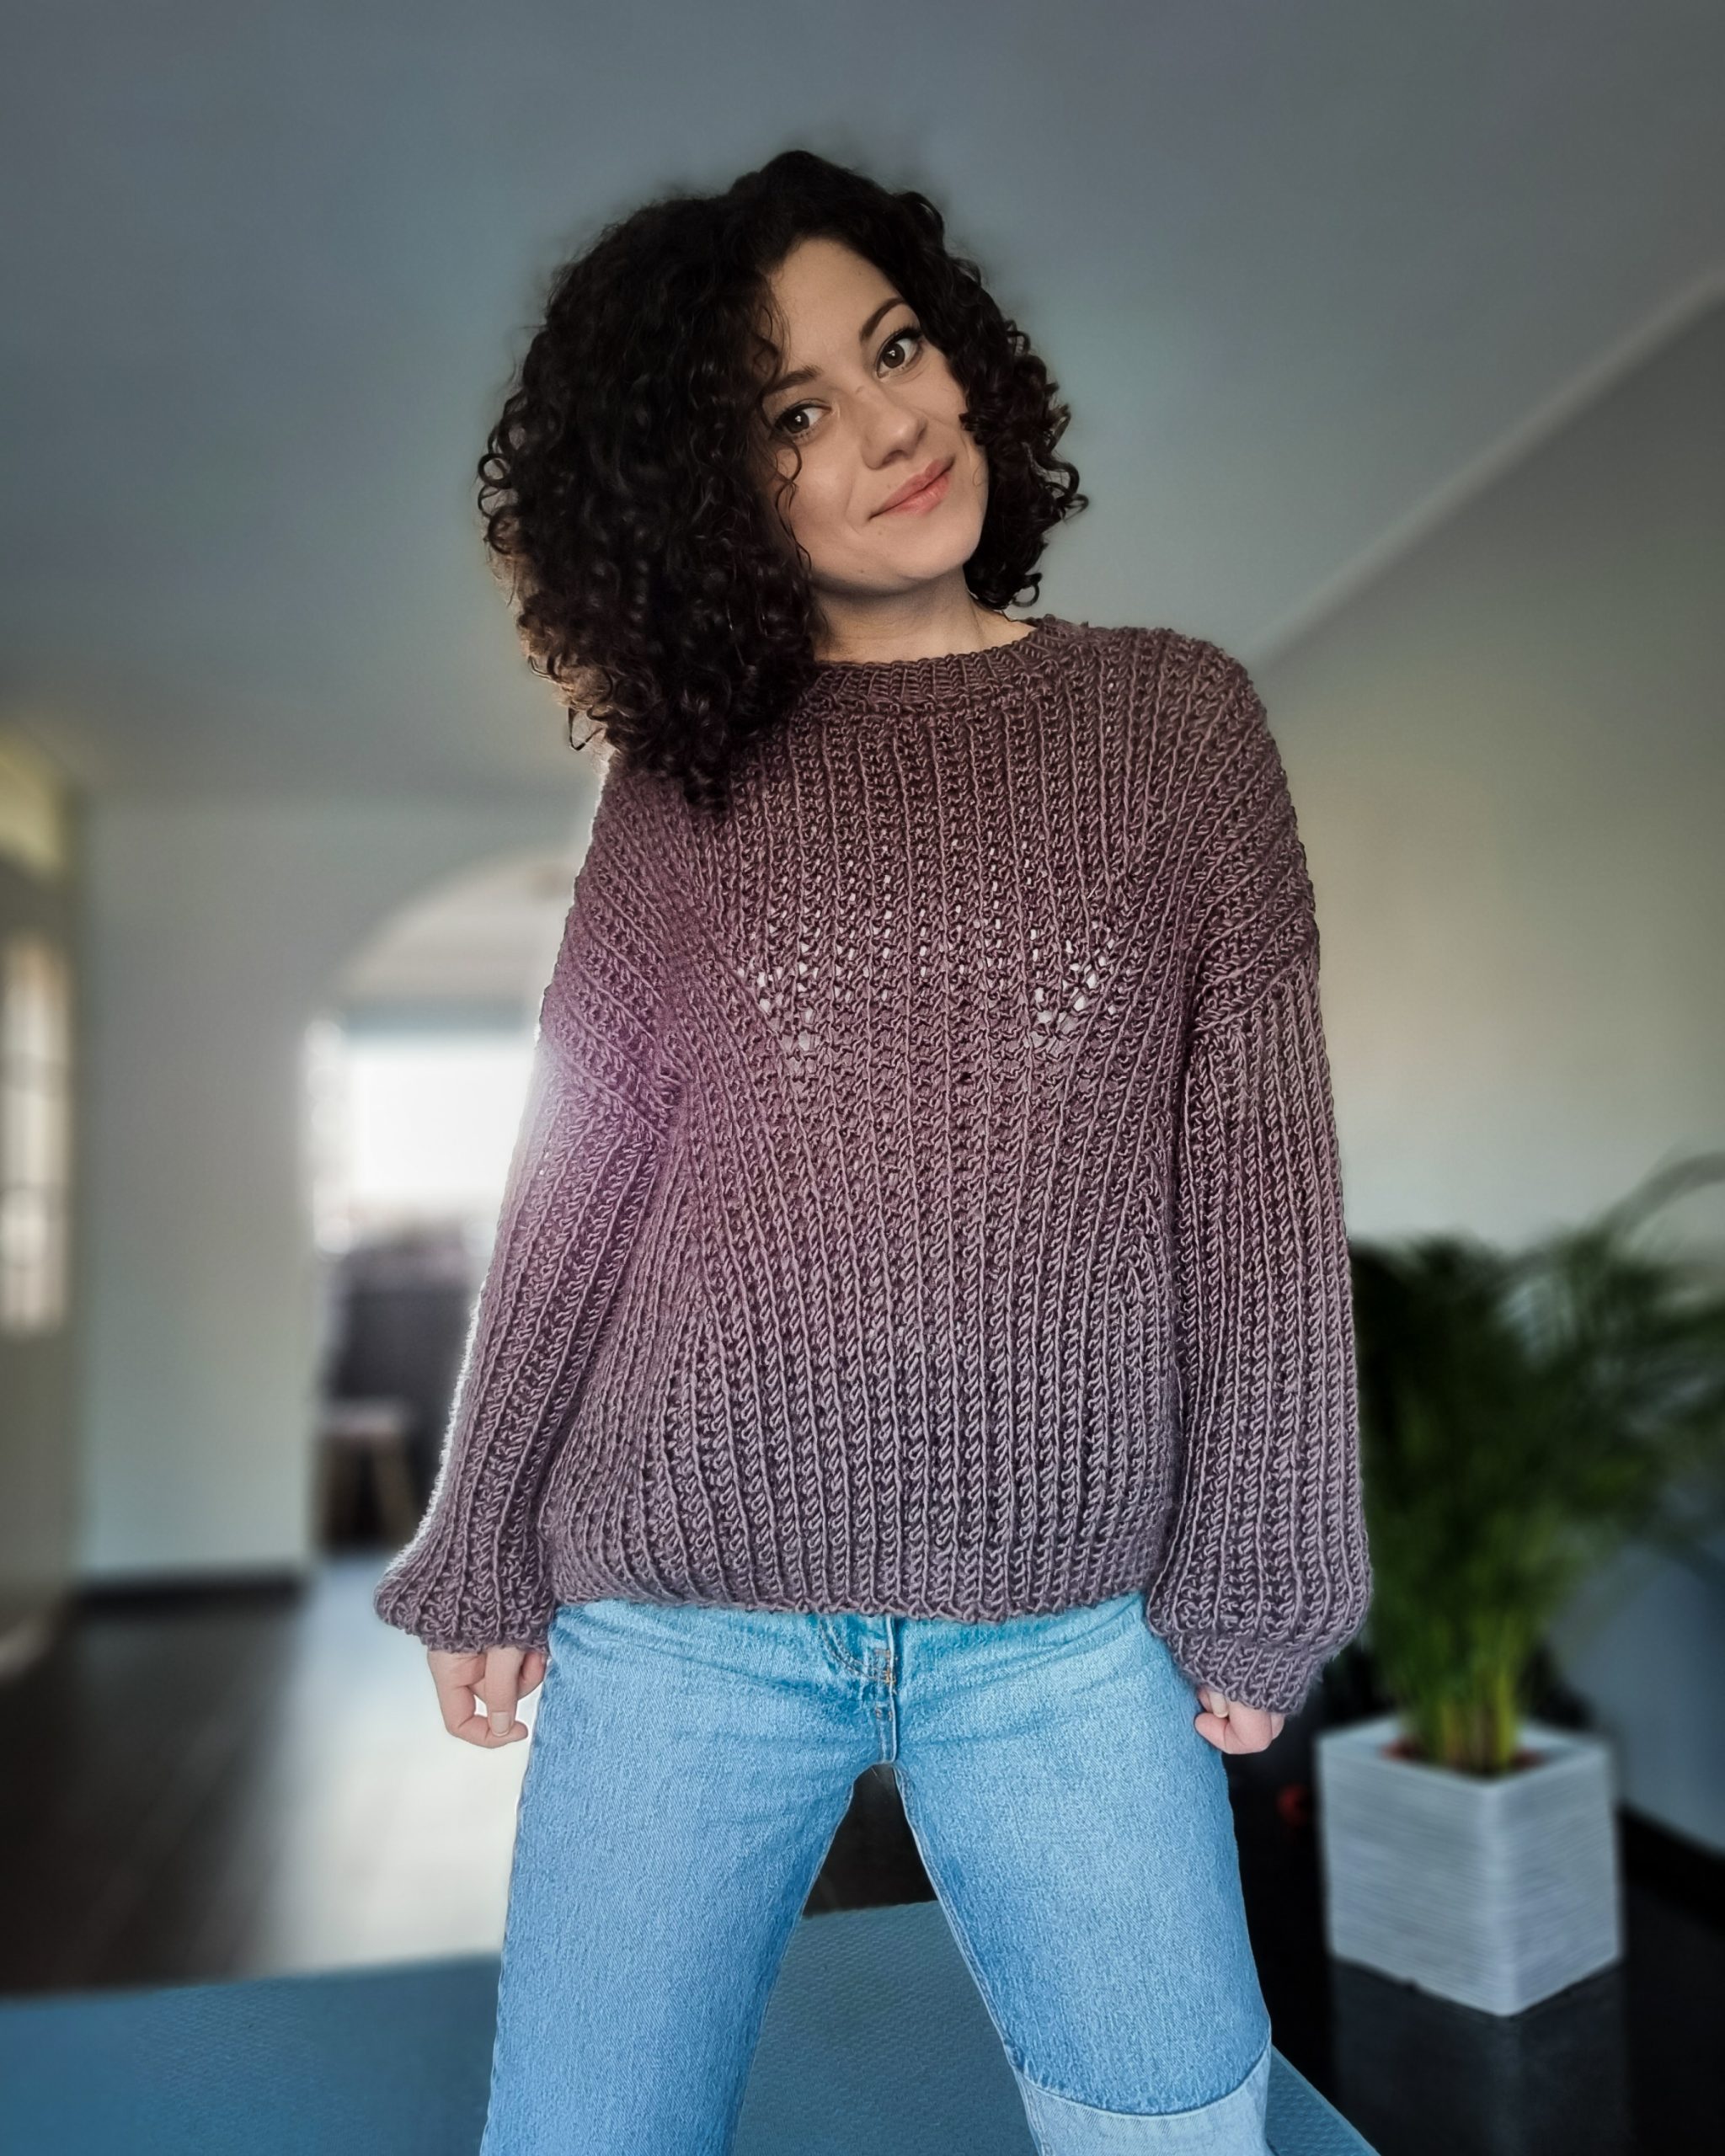
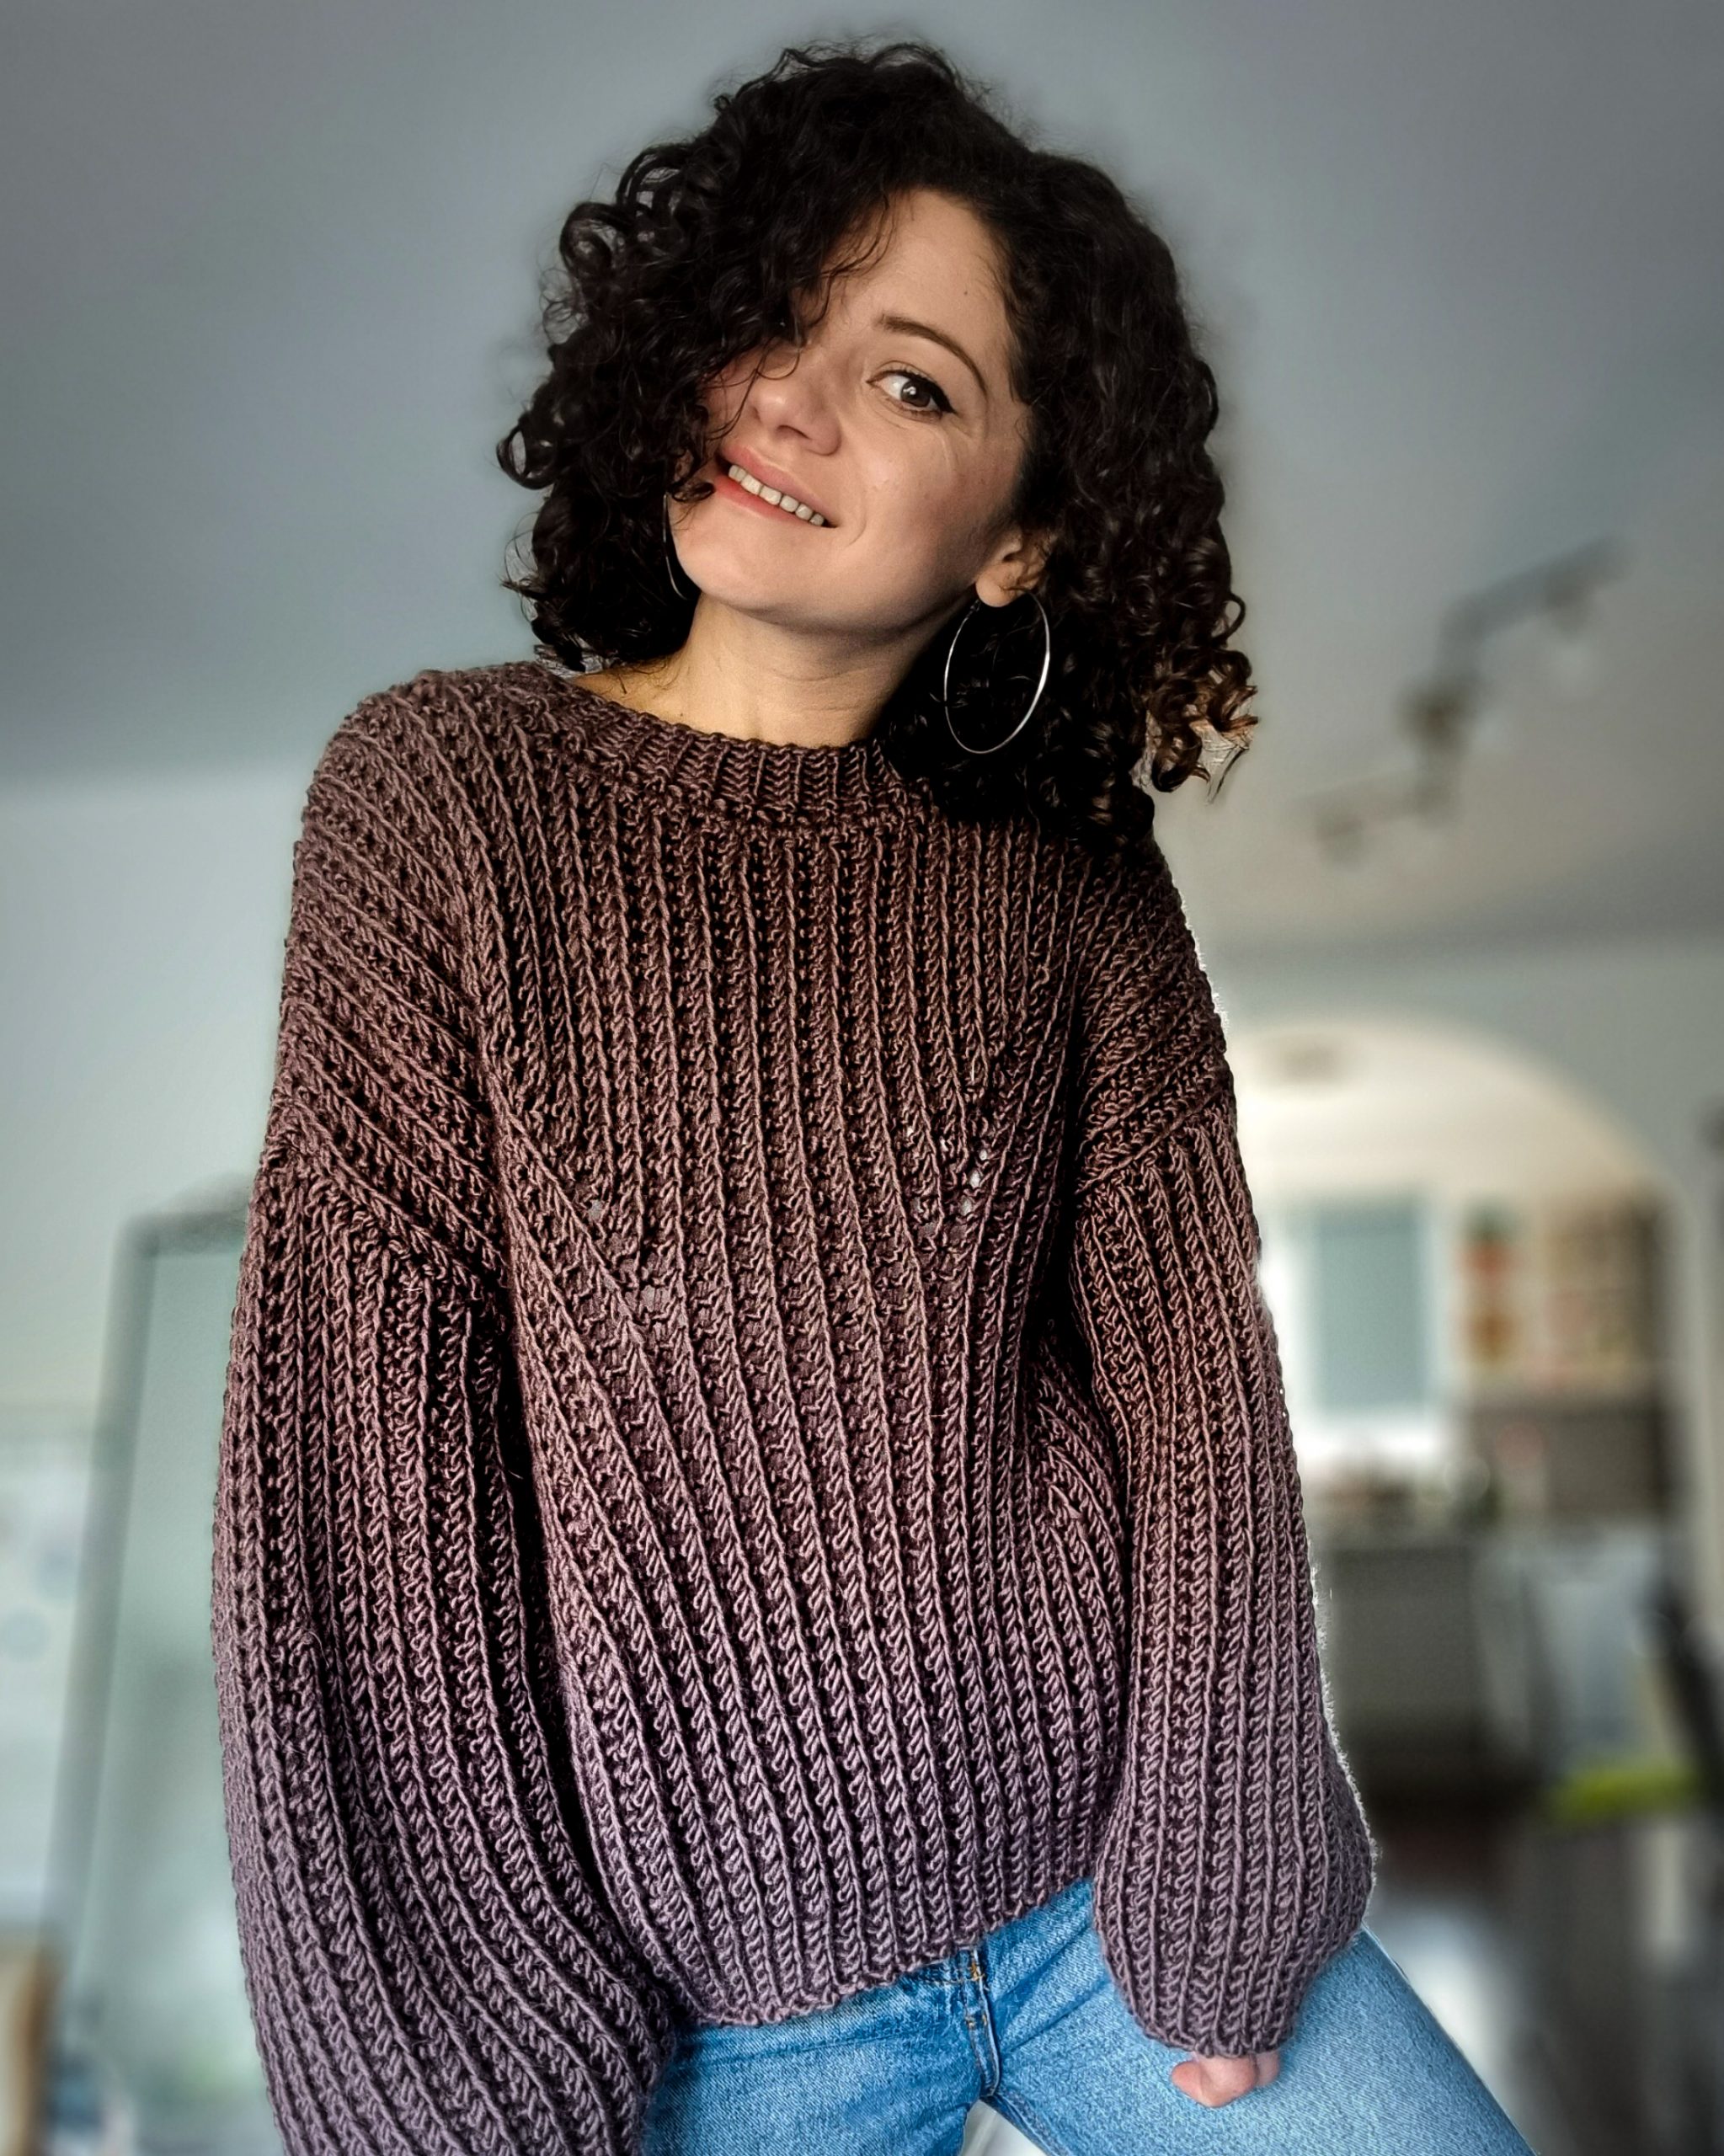
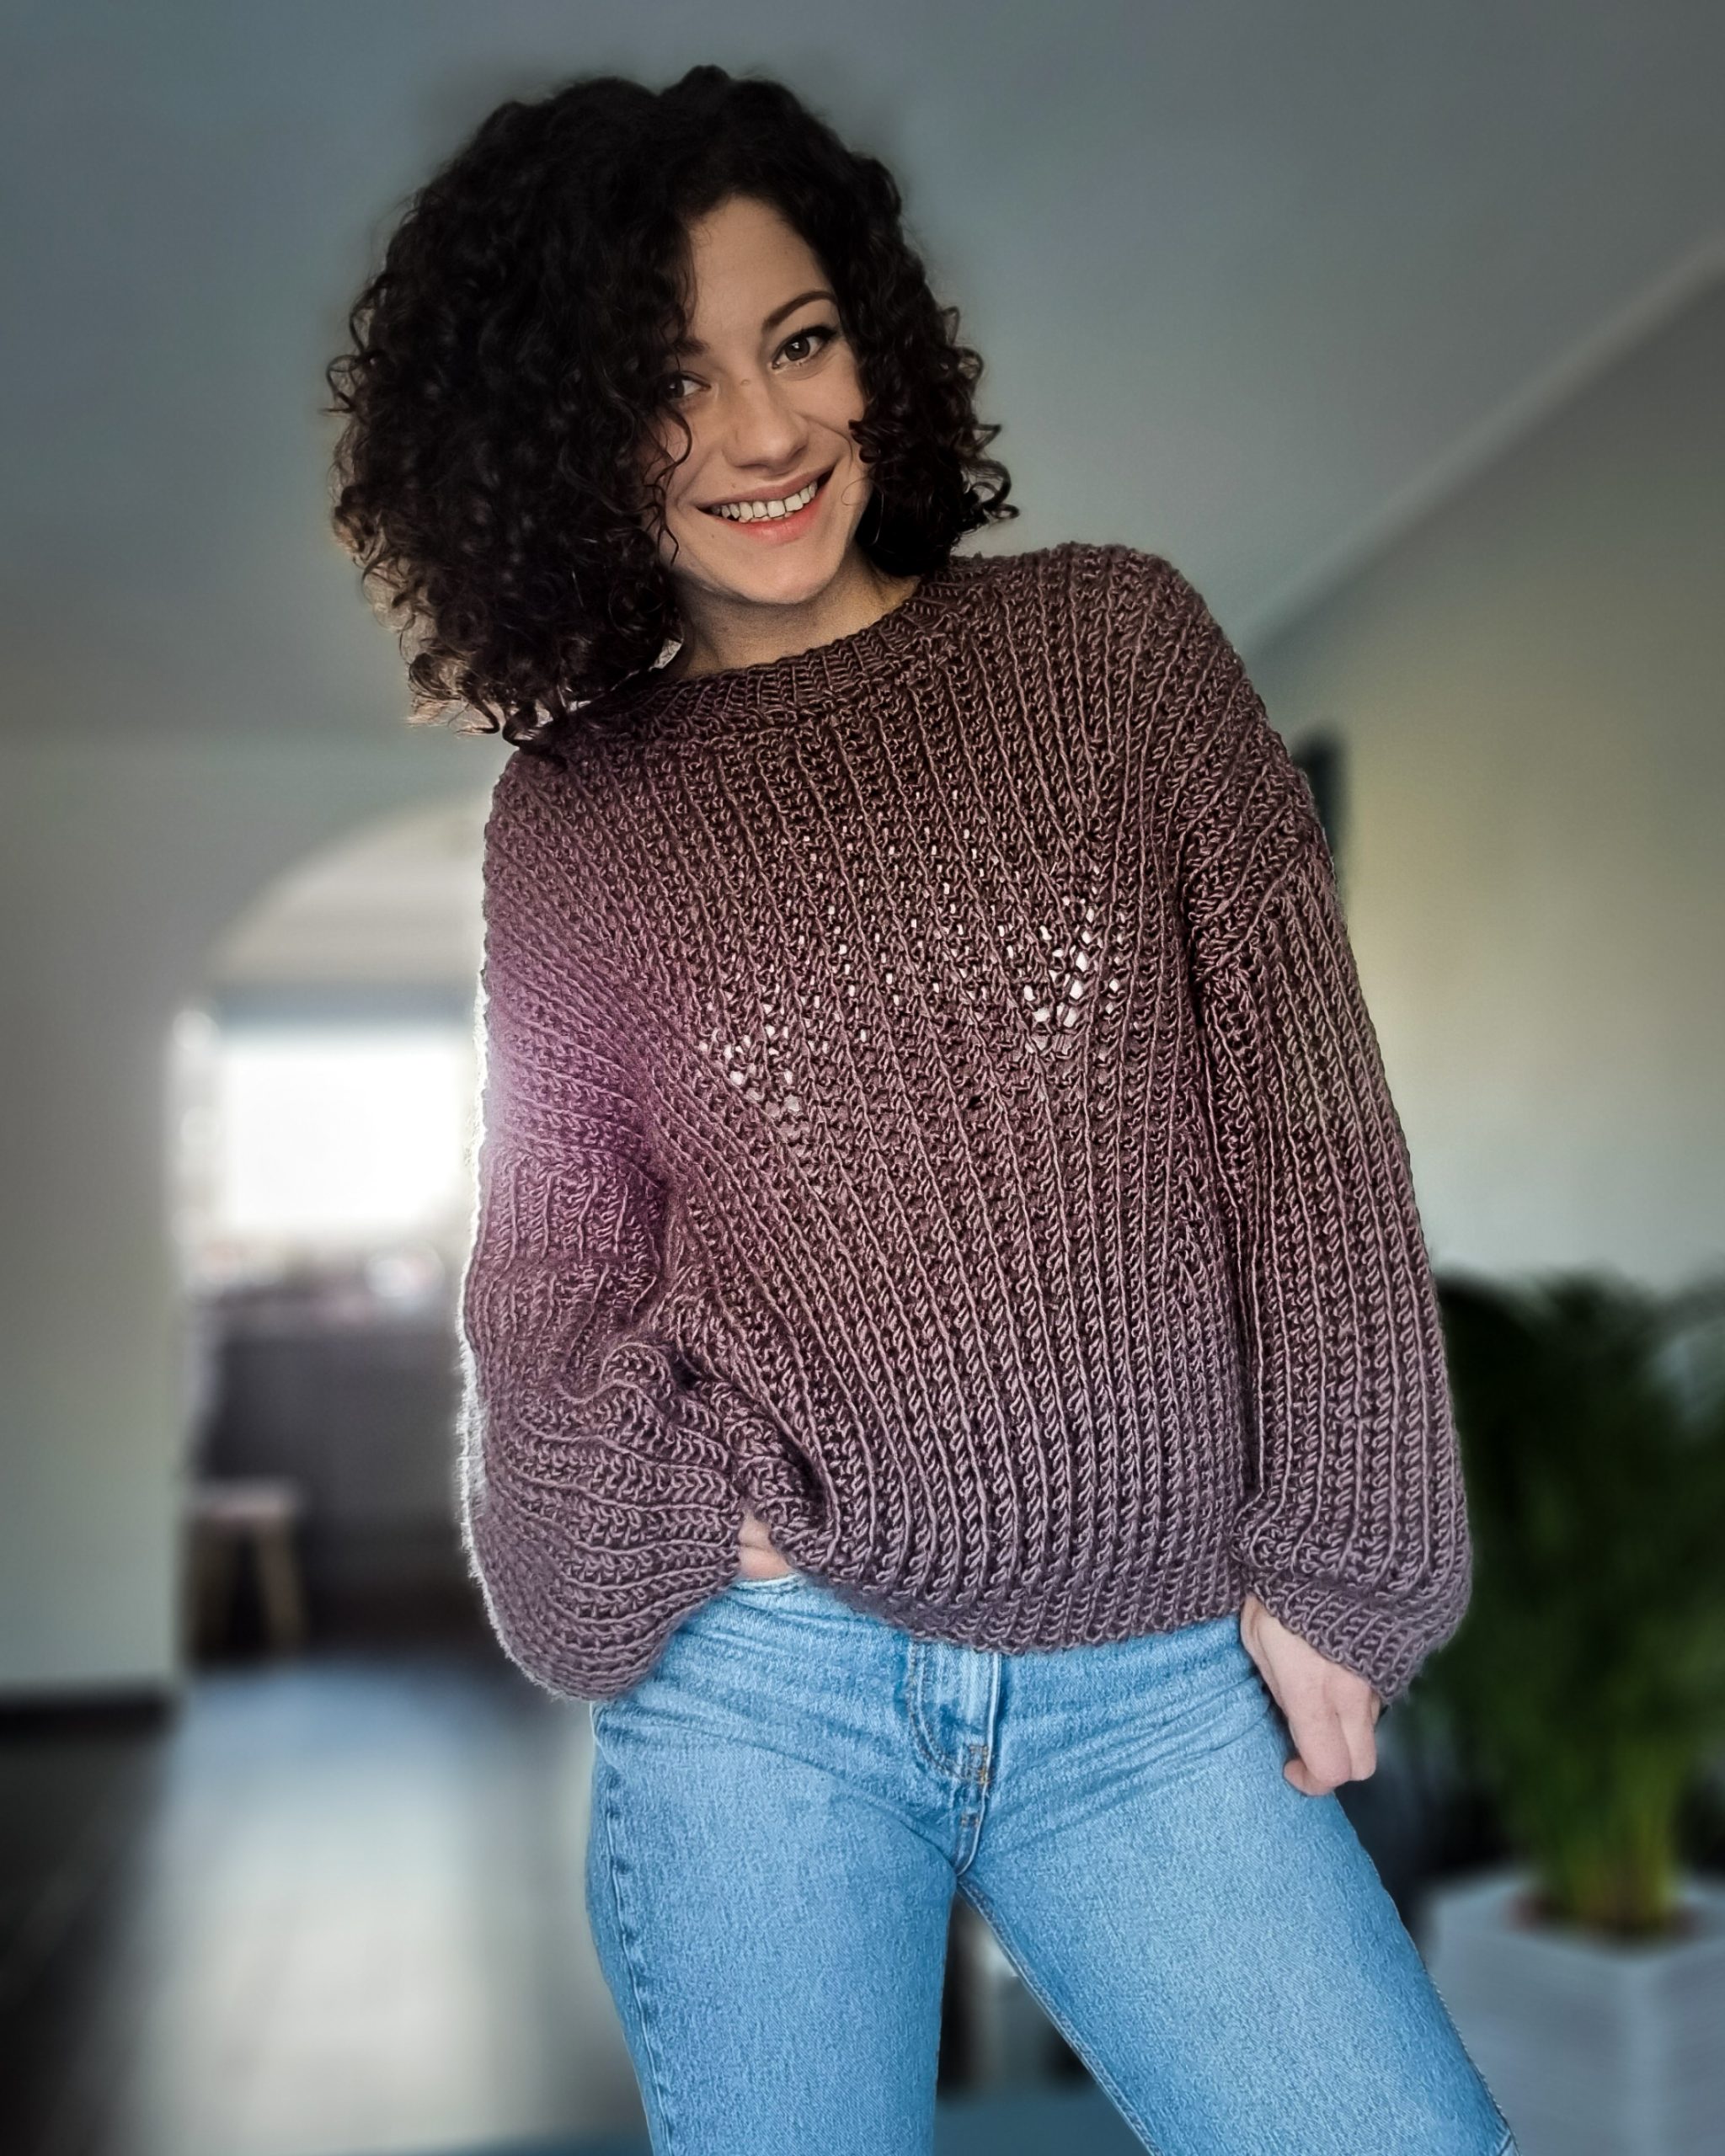
The Cold Brew Sweater is a classic knitted inspired sweater. Is cozy and has a beautiful drape.
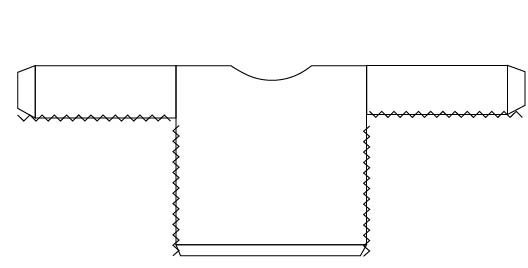
The sweater is worked in 4 panels, assembled at the end. The rows are worked vertically in double slip stitches to recreate the knitting look of the fisherman ribbing.
The short rows technique is used to create the pattern on the front panel.
This Cold Brew Sweater has an oversized fit, with a positive ease of 26 cm around Bust Circumference.

MEASUREMENTS AND SIZES
The Cold Brew Sweater Pattern is available in 8 sizes, from Small up to 5X Large.
The model is 168 cm tall and wears size Small.
Neckline a: 20 cm (22, 22, 24, 24, 25, 25, 25)
Bust width b: 56 cm (61, 68, 71, 76, 81, 86, 91)
Sleeve length c: 37 cm (37, 39, 39, 40, 40, 41, 41)
Sleeve width d: 19 cm (22, 22, 25, 25, 28, 28, 28)
Length e: 50 cm (53, 53, 56, 56, 59, 59, 59)
- You can Purchase the easily printable PDF version of this pattern here:
How much yarn do you need?
I used:
Supreme Merino by Katia in color Aubergine (99)
Each ball has 50 grams and approximately 75 meters
Yarn composition: 45% Acrylic – 45% Merino – 10% Superfine Alpaca
Below you can find some other yarn suggestions or you can check the link below for other yarn substitutions by yarnsub.com
Supreme Merino by Katia substitution
Hobbii Easy Care Merino Big
Hobbii Wool Power
Patons Alpaca Blend
We Are Knitters Meriwool
For each size you will need:
13 (15, 17, 18, 19, 22, 23, 24) balls or
960 (1110, 1210, 1350, 1420, 1600, 1670, 1740) meters
ABBREVIATIONS
Ch – chain
Sc – single crochet
Dssblo – double slip stitch
Fhdc – foundation half double crochet
ss /ssblo- slip stitch /back loop only
St(s) – stitch(es)
R – rounds
** – repeated section.
TENSION
Using 8 mm crochet hook in the Dss stitch pattern
11 sts = 10 cm
12 rows = 10cm
- You can Purchase the easily printable PDF version of this pattern here:
STITCH PATTERN AND TECHNIQUES
The main stitch pattern is the double slip stitch or half double crochet slip stitch.
For the edging, the stitch pattern is slip stitch in the back loop only
Special stitches:
Dssblo (double slip stitch in the back loop only):
Yarn over, insert the hook into the back loop of the next st, yarn over and pull out a loop and pass it through both loops on your hook.
Fhdc (foundation half double crochet):
*for this particular pattern, used for increasing on the neckline
Yarn over and insert the hook into the side of the last st; yarn over and pull out a loop, yarn over and pass it through the first loop on your hook, yarn over and pass it through all three loops on your hook.
Yarn over and insert the hook into the bottom loops of the previous st and repeat the steps above.
PATTERN NOTES
- Work all pieces flat; turn after each row.
- Work 1ch before starting a row 1ch does not count as first st.
- Work the first and last st in a row through both loops, not only the back loop.
the bottom ribbing and sleeves ribbing is worked at once with the rest of the panels, but in a different stitch pattern - place a stitch marker at the end of each section of the front panel; this will help to track the rows easier.
INSTRUCTIONS
Numbers for sizes M, L, XL, XXL, 3XL, 4XL, and 5XL are written between brackets; if not pattern applies for all sizes.
BACK PANEL
Start: ch57 (61, 61, 65, 65, 67, 67, 67) sts
R1: starting with the second st, 1ss in the next 6sts, 1dss in each st until the end of the row. 1ch and turn.
R2: 1dss in the first st, 1dssblo in each of the next sts except the last 6, 1ssblo in the last 6sts. 1ch and turn
R3: 1ssblo in first 6sts, 1dssblo in each of the following sts except the last one, 1dss in the last st. 1ch and turn.
Rep. R2 and R2 until you have in total 66 (74, 82, 84, 90, 96, 102, 108) rows.
Fasten off.
FRONT PANEL
The pattern is written per section (see the diagram below), but work the front panel in one single piece:
In the PDF version, you can find a chart for each size with the front panel of the Cold Brew Sweater.
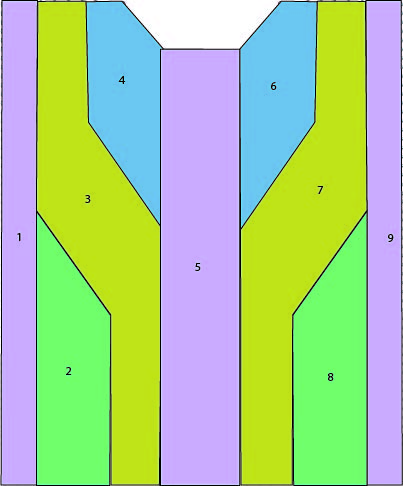
FRONT PANEL
Section 1
Start: ch57 (61, 61, 65, 65, 67, 67, 67) sts
R1: staring in the second st, 1ss in next 6sts, 1dss in each st until the end of the row. 1ch and turn.
R2: 1dss in the first st, 1dssblo in each of the next sts except the last 6, 1ssblo in the last 6sts. 1ch and turn
R3: 1ssblo in first 6sts, 1dssblo in each of the following sts except the last one, 1dss in the last st. 1ch and turn
Rep. R2 and R3 until you have 6 (6, 6, 8, 8, 8, 10, 10) rows.
Place a stitch marker
Section 2
R1: 1ssblo in first 6sts, 1dssblo in each of the next 25 (29, 31, 33, 33, 34, 34,36)sts. 1ch and turn.
R2:1dss in the first st, 1dssblo in each of the next sts except the last 6, 1ssblo in the last 6sts. 1ch and turn
R3: 1ssblo in first 6sts, 1dssblo in each of the following sts except the last 2sts*. 1ch and turn.
*don’t work into the last 2sts. This is how we decrease with 2sts
*with each right-side row you will decrease with 2sts at the end of the row
Rep. R2 and R3 until you have for section 2: 12 (14, 16, 14, 16, 18, 16, 20) rows.
Place a stitch marker
Section 3
In section 3 we will work again on the entire row. To pass over the short rows, insert the hook into the side of the last st of the previous short row (the one on top you’re currently working), and into the next st of the next short row, and work 2 stitches together:
Yarn over, insert the hook into the side of the last st of the previous short row, then insert the hook into the next st of the next short row, yarn over, and pass it through all the loops on the hook.
When the pattern says to work into each st, you will need to pass over the short rows as explained above.
After completing the sts of the first short row, you will then work 2sts on each next short row, and finish the row with the rest of the stitches from the last row of section 1.
R1: 1ssblo in next 6sts, 1dssblo in each st until the end of the row, except the last st, 1dss into the last st, 1ch and turn.
At the end of R1, you need the have the same number of sts
R2: 1dss in the first st, 1dssblo in each of the next sts except the last 6sts, 1ssblo in the last 6sts. 1ch and turn
Rep. R1 and R2 until you have 9 (11, 11, 11, 13, 15, 15, 15) rows.
The last row was a right-side row.
Place a stitch marker
Section 4
R1:1dss into the first st, 1dssblo into the next 14 (16, 16, 22, 20, 19, 21, 19) sts, 1ch and turn
R2: 1dss into the first st, 1dssblo in each of the following sts except the last one, 1dss into the last st. 1ch and turn.
R3: 1dss into the first st, 1dssblo in each of the next sts of the previous row, 1dssblo into the next 2sts of Section 3. 1ch and turn
Rep. R2 and R3 until you have 5 (5, 5, 5, 7, 7, 7, 9).
*R6 (6, 6, 6, 8, 8, 8, 10): 1dss into the first st, 1dssblo in each of the following sts except the last 3sts, 1dss into the next st. 1ch and turn.
*we start decreasing for shaping the neckline; don’t work the last 2sts.
R7 (7, 7, 7, 9, 9, 9, 11): rep. R3
Rep. the last 2 rows until you have in total for section 4: 12 (12, 12, 12, 14, 14, 14, 16) rows.
The last row will end at the neckline.
For size S, Section 4 is done.
Only sizes: – (M, L, XL, XXL, 3XL, 4XL, 5XL)
R: – (13, 13, 13, 15, 15, 15, 15, 17): rep. R3
R: – (14, 14, 14, 16, 16, 16, 16, 18): Rep. R2
For sizes M and XL the Section 4 is done.
Only sizes – (-, L, -, XXL, 3XL, 4XL, 5XL)
Rep. last 2 rows (R3 and R2) until you have for section 4: – (-, 16, -, 16, 18, 16, 20) rows.
Section 4 is done.
The last row ends at the neckline.
Place a stitch marker.
- You can Purchase the easily printable PDF version of this pattern here:
Section 5
At the end of Section 4, you have 19 (21, 25, 29, 29, 30, 30, 32) sts
We decreased 6 sts for the neckline.
For Section 5 we will work again on the entire row.
After finishing working over the sts of Section 4, you will continue working over the sts of Section 3, including the ribbing sts, until you complete the row.
At the end of the first row of Section 5, you will have 6sts less than the number of sts you started with.
R1:1dss in the first st, 1dssblo in each of the next sts except the last 6, 1ssblo in the last 6sts. 1ch and turn
R2: 1ssblo in the first 6sts, 1dssblo in each of the following sts except the last one, 1dss in the last st. 1ch and turn
Rep. R1 and R2 until you have in total for Section 5: 12 (12, 12, 16, 16, 16, 20, 20) rows.
Section 6
R1: 1dss in the first st, 1dssblo in each of the next 18 (20, 24, 28, 28, 29, 29, 31) sts. 1ch and turn.
R2 Only sizes -(M, L, XL, XXL, 3XL, 4XL, 5XL)
1dss into the first st, 1dssblo in each of the following sts except the last one, 1dss into the last st. 1ch and turn.
R3 Only sizes -(M, L, XL, XXL, 3XL, 4XL, 5XL)
1dss into the first st, 1dssblo in each of the following sts except the last 3sts, 1dss into the next st. 1ch and turn.
R4 Only sizes -(-, L, -, -, 3XL,-, 5XL)
Rep. R2
R5 Only sizes -(-, L, -, -, 3XL,-, 5XL)
Rep. R3
Next, we will start to increase to shape the neckline.
The next row is for each size R2(4, 6, 4, 4, 6, 4, 6). So you worked until now for
Section 6: 1 (3, 5, 3, 3, 5, 3, 5) rows.
R2(4, 6, 4, 4, 6, 4, 6): 1dss into the first st, 1dssblo in each of the following sts except the last one, 1dss into the last st, *2fhdc, 1ch and turn
*see the STITCH PATTERN AND TECHNIQUES section.
R3 (5, 7, 5, 5, 7, 5, 7): 1dss into the first st, 1dssblo in each of the following sts except the last 3sts, 1dss into the next st. 1ch and turn.
Rep. last 2 rows until you have for Section 6:
7 (9, 11, 9, 9, 11, 9, 11) rows.
R8 (10, 12, 10, 10, 12, 10, 12): 1dss into the first st, 1dssblo in each of the following sts except the last one, 1dss into the last st, 1ch and turn.
R9 (11, 13, 11, 11, 13, 11, 13):1dss into the first st, 1dssblo in each of the following sts except the last 3sts, 1dss into the next st. 1ch and turn.
Rep. the last 2 rows until you have in total for Section 6: 12 (14, 16, 14, 16, 18, 16, 20) rows.
Section 6 is done.
Place a stitch marker.
Section 7
In Section 7 we will start to work the entire row. You will have to rep. Section 3. Work the same number of rows and pass over the short rows in the same way.
The last row of Section 7, ends with the ribbing.
Section 8
R1: 1ssblo in first 6sts, 1dssblo in each of the next 15 (17, 17, 21, 19, 18, 20, 18)sts. 1ch and turn.
R2:1dss in the first st, 1dssblo in each of the next sts except the last 6, 1ssblo in the last 6sts. 1ch and turn
R3:1dss into the first st, 1dssblo in each of the next sts of the previous row, 1dssblo into the next 2sts of Section 7. 1ch and turn
Rep. R2 and R3 until you have for Section 7:
12 (14, 16, 14, 16, 18, 16, 20) rows.
Section 9
At the end of Section 8, you have 125 (29, 31, 33, 33, 34, 34,36)sts
For Section 9 we will work again on the entire row.( similar as section 5)
After finishing working over the sts of Section 8, you will continue working over the sts of Section 7, until you complete the row.
R1: 1ssblo in next 6sts, 1dssblo in each st until the end of the row, except the last st, 1dss into the last st, 1ch and turn.
At the end of R1, you need the have the same number of sts as the one you started with
R2:1dss in the first st, 1dssblo in each of the next sts except the last 6sts, 1ssblo in the last 6sts. 1ch and turn
Rep. R1 and R2 until you have 6 (6, 6, 8, 8, 8, 10, 10) rows.
Fasten off.
FRONT PANEL is done.
To summarize:
We worked 9 sections and we have for each section:
Section 1: 6 (6, 6, 8, 8, 8, 10, 10) rows.
Section 2: 12 (14, 16, 14, 16, 18, 16, 20) rows.
Section 3: 9 (11, 11, 11, 13, 15, 15, 15) rows.
Section 4:12 (14, 16, 14, 16, 18, 16, 20) rows.
Section 5: 12 (12, 12, 16, 16, 16, 20, 20) rows.
Section 6:12 (14, 16, 14, 16, 18, 16, 20) rows.
Section 7: 9 (11, 11, 11, 13, 15, 15, 15) rows.
Section 8: 12 (14, 16, 14, 16, 18, 16, 20) rows.
Section 9: 6 (6, 6, 8, 8, 8, 10, 10) rows.
In the end, you should have for the front panel, the same number of rows for the back panel. (you can easily count the rows at the ribbing)
SLEEVES
Start: ch44 (44, 46, 46, 47, 47, 48, 48) sts
R1: starting with the second st, 1ss in the next 6sts, 1dss in each st until the end of the row. 1ch and turn.
R2: 1dss in the first st, 1dssblo in each of the next sts except the last 6, 1ssblo in the last 6sts. 1ch and turn
R3: 1ssblo in first 6sts, 1dssblo in each of the following sts except the last one, 1dss in the last st. 1ch and turn.
Rep. R2 and R2 until you have in total 46 (52,52, 60, 60, 68, 68, 168) rows.
Fasten off.
- You can Purchase the easily printable PDF version of this pattern here:
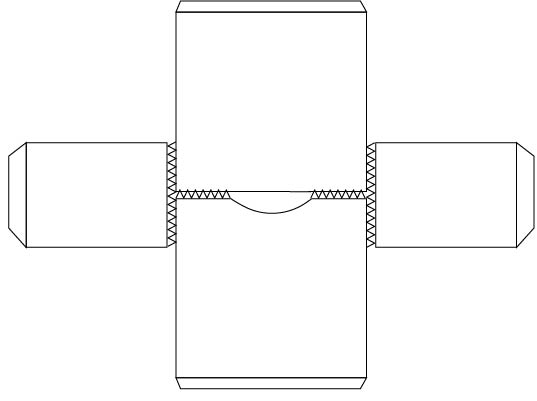
ASSEMBLING
Step 1: lay front and back panel shoulder next to shoulder and stitch them together.
Step 2: Lay the sleeves next to the armhole; the middle row has to be next to the shoulder seam and stitch them with the front and back panel.
Step 3: Fold the piece in half and stitch the sides.
NECKLINE RIBBING
Rejoin yarn into the neckline edge.
R1: 1ch, 1sc in each stitch around (1 side row = 1st)
RIBBING
ch7
R1: 1ss into next 6ch-sts, 1ss into the next 2sts of the neckline edge. turn
R2: 1ssblo in each 6sts, 1ch and turn
R3: 1ssblo in each 6sts, 1ss into the next 2sts of the neckline edge.
Rep. R2 and R2 until you complete the entire circumference
Join the ends using slip stitches.
TO FINISH
Weave in all looser ends and block to measurements.
I hope you like this cardigan, and you will make one. I can’t wait to see the colors you have.
Happy Crocheting!


5 Comments
About to finish the Nuage sweater using a couple really good synthetic yarns from Hobby Lobby.
I had planned another one using two silky synthetic yarns this time when I saw this pattern. Let me go order it now.
But I’m omitting the sleeves so I can get more wear out it in a tropical climate.
Thanks for such lovely designs!
~DH
Oh… and I’m one of those patrons who doesn’t know how to knit; only crochet.
So I appreciate the knit-looking crochet designs. ♥♥♥
Thanks!
~DH
I love this interesting pattern. I love when people think outside the box!
Thank you!
Soy súper fan de tus proyectos.. Cada uno es más bonito que el anterior ….yo solo tejo crochet y ya hice my precios sweater y su hermano waw..este color berenjena me encanto de verdad.
Saludos cordiales .
Hello Katerina! I hope you are doing well! I am working on your Cold Brew Sweater, and I’m working in the back panel. After row 3, it says to “Repeat R2 and R2 until you have in total…..” Should this say repeat R2 and R3 until you have….”?
Thank you in advance for your help!