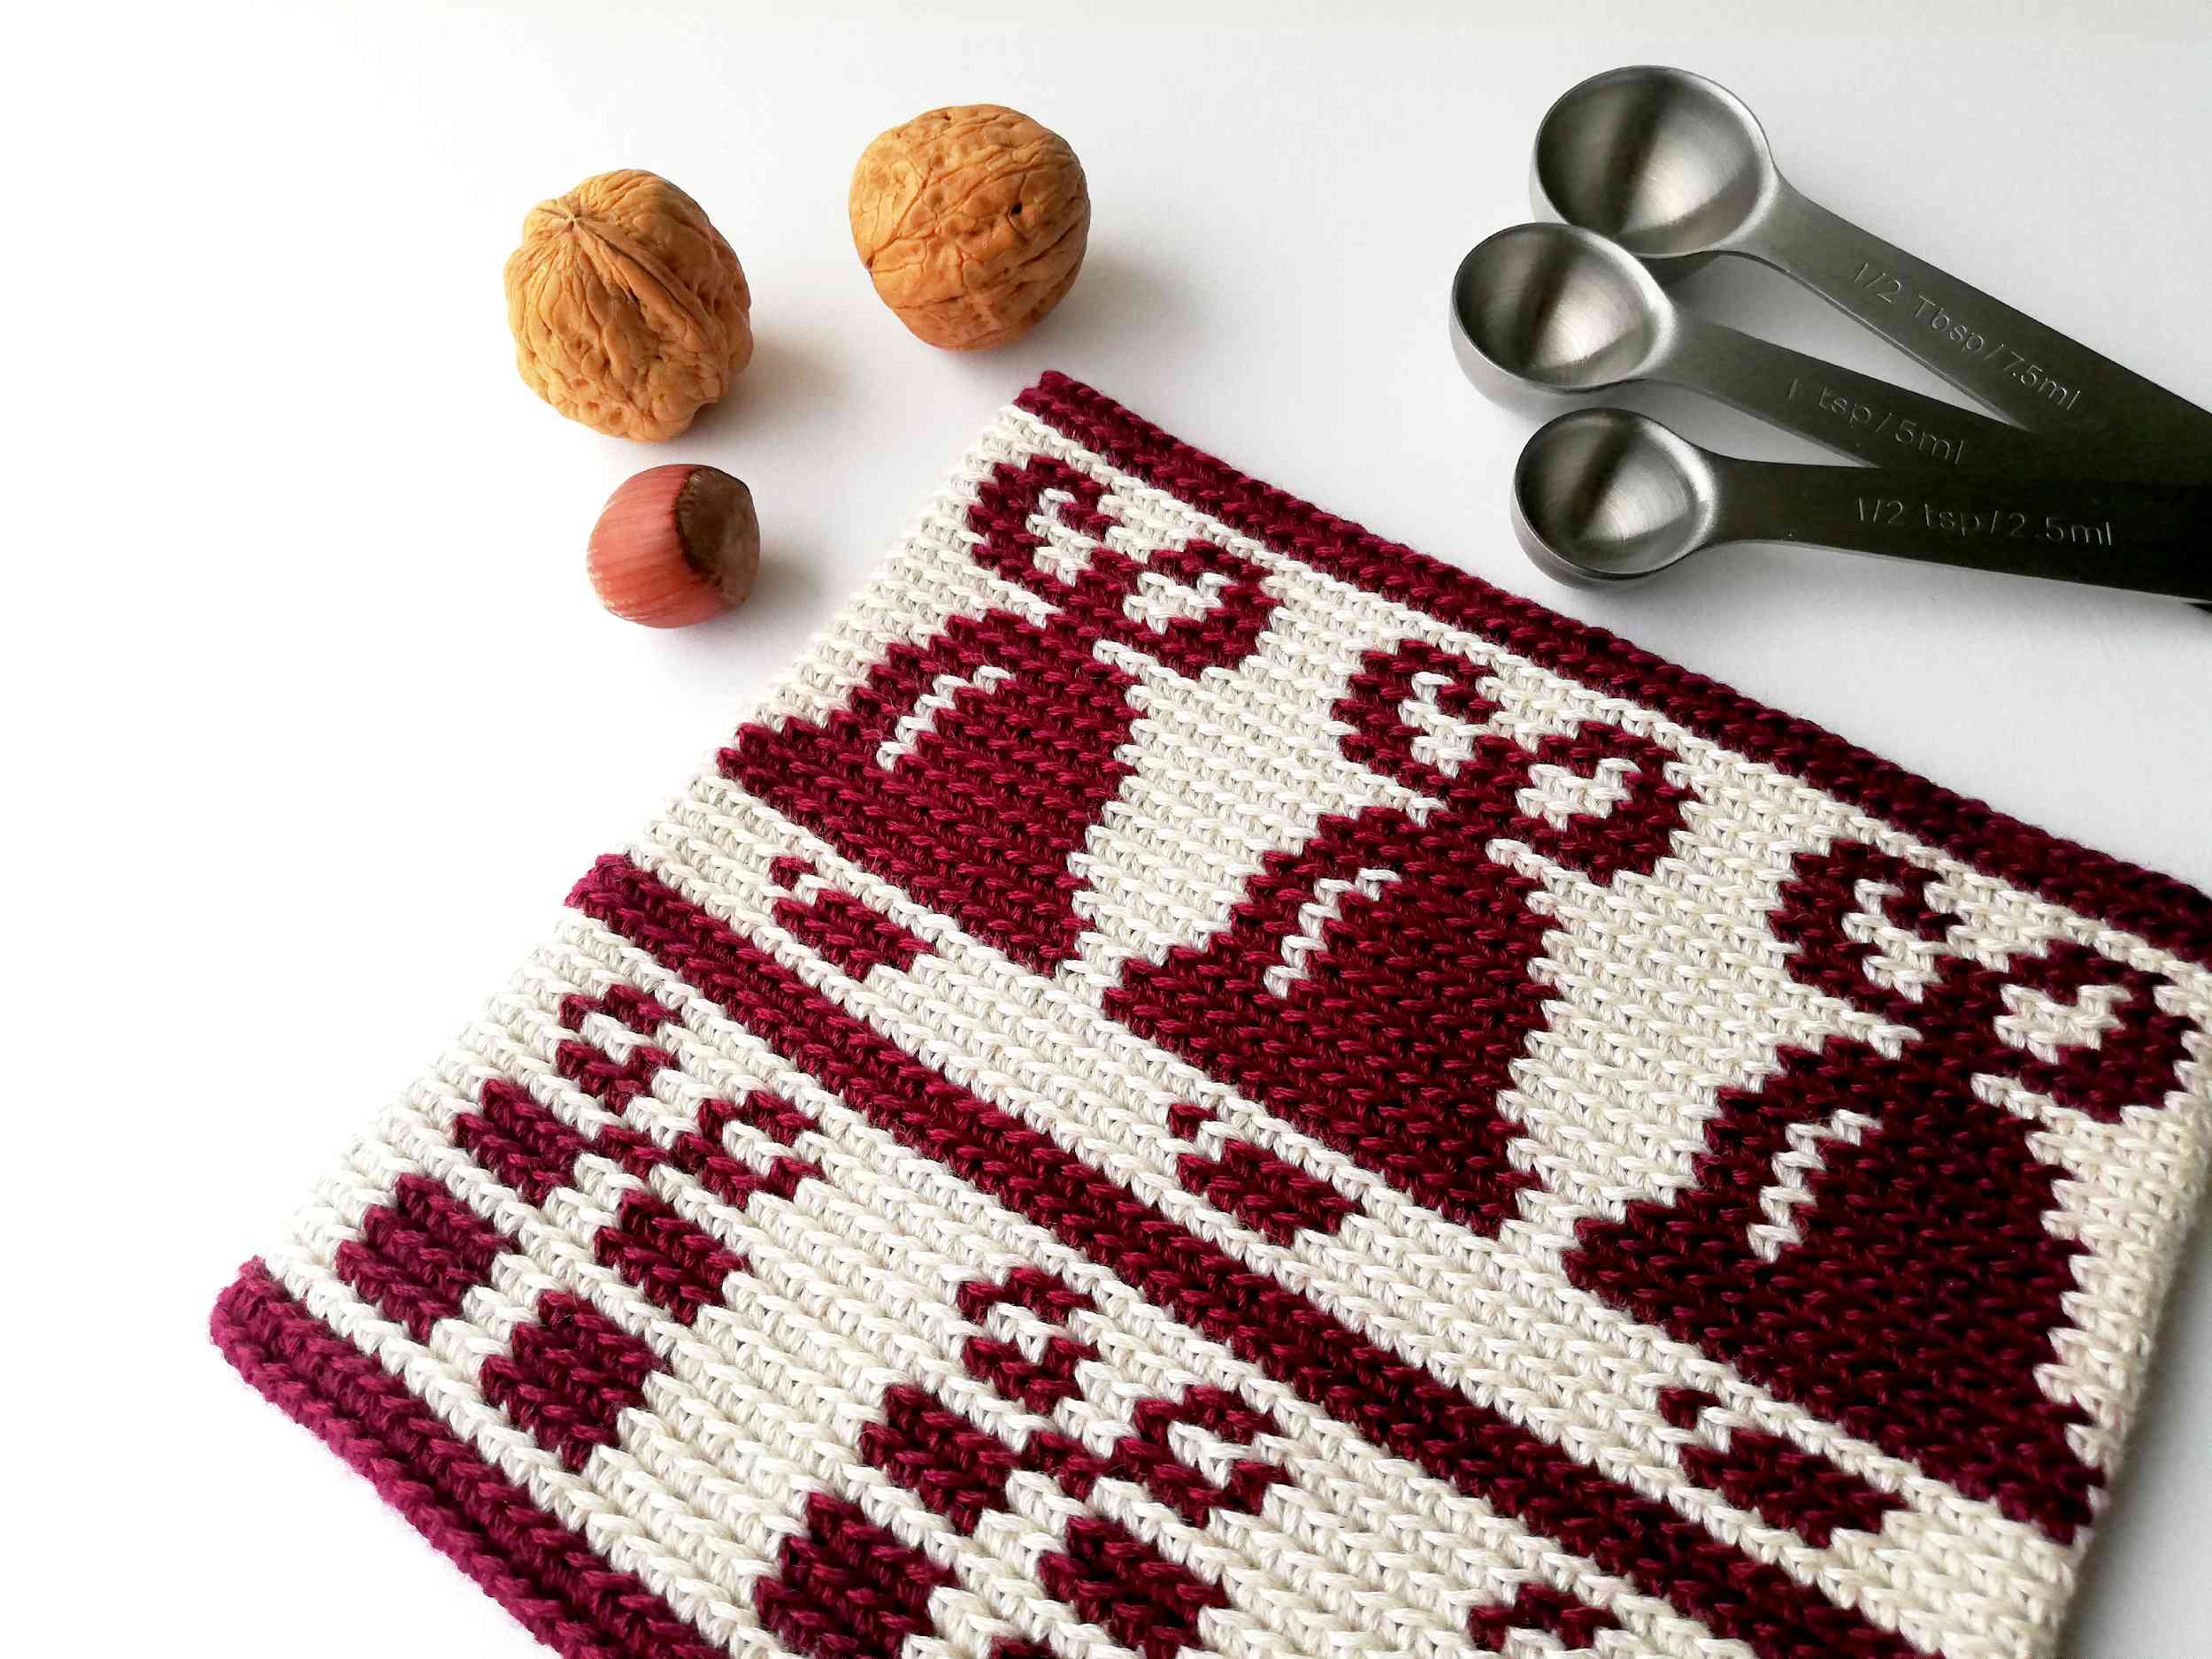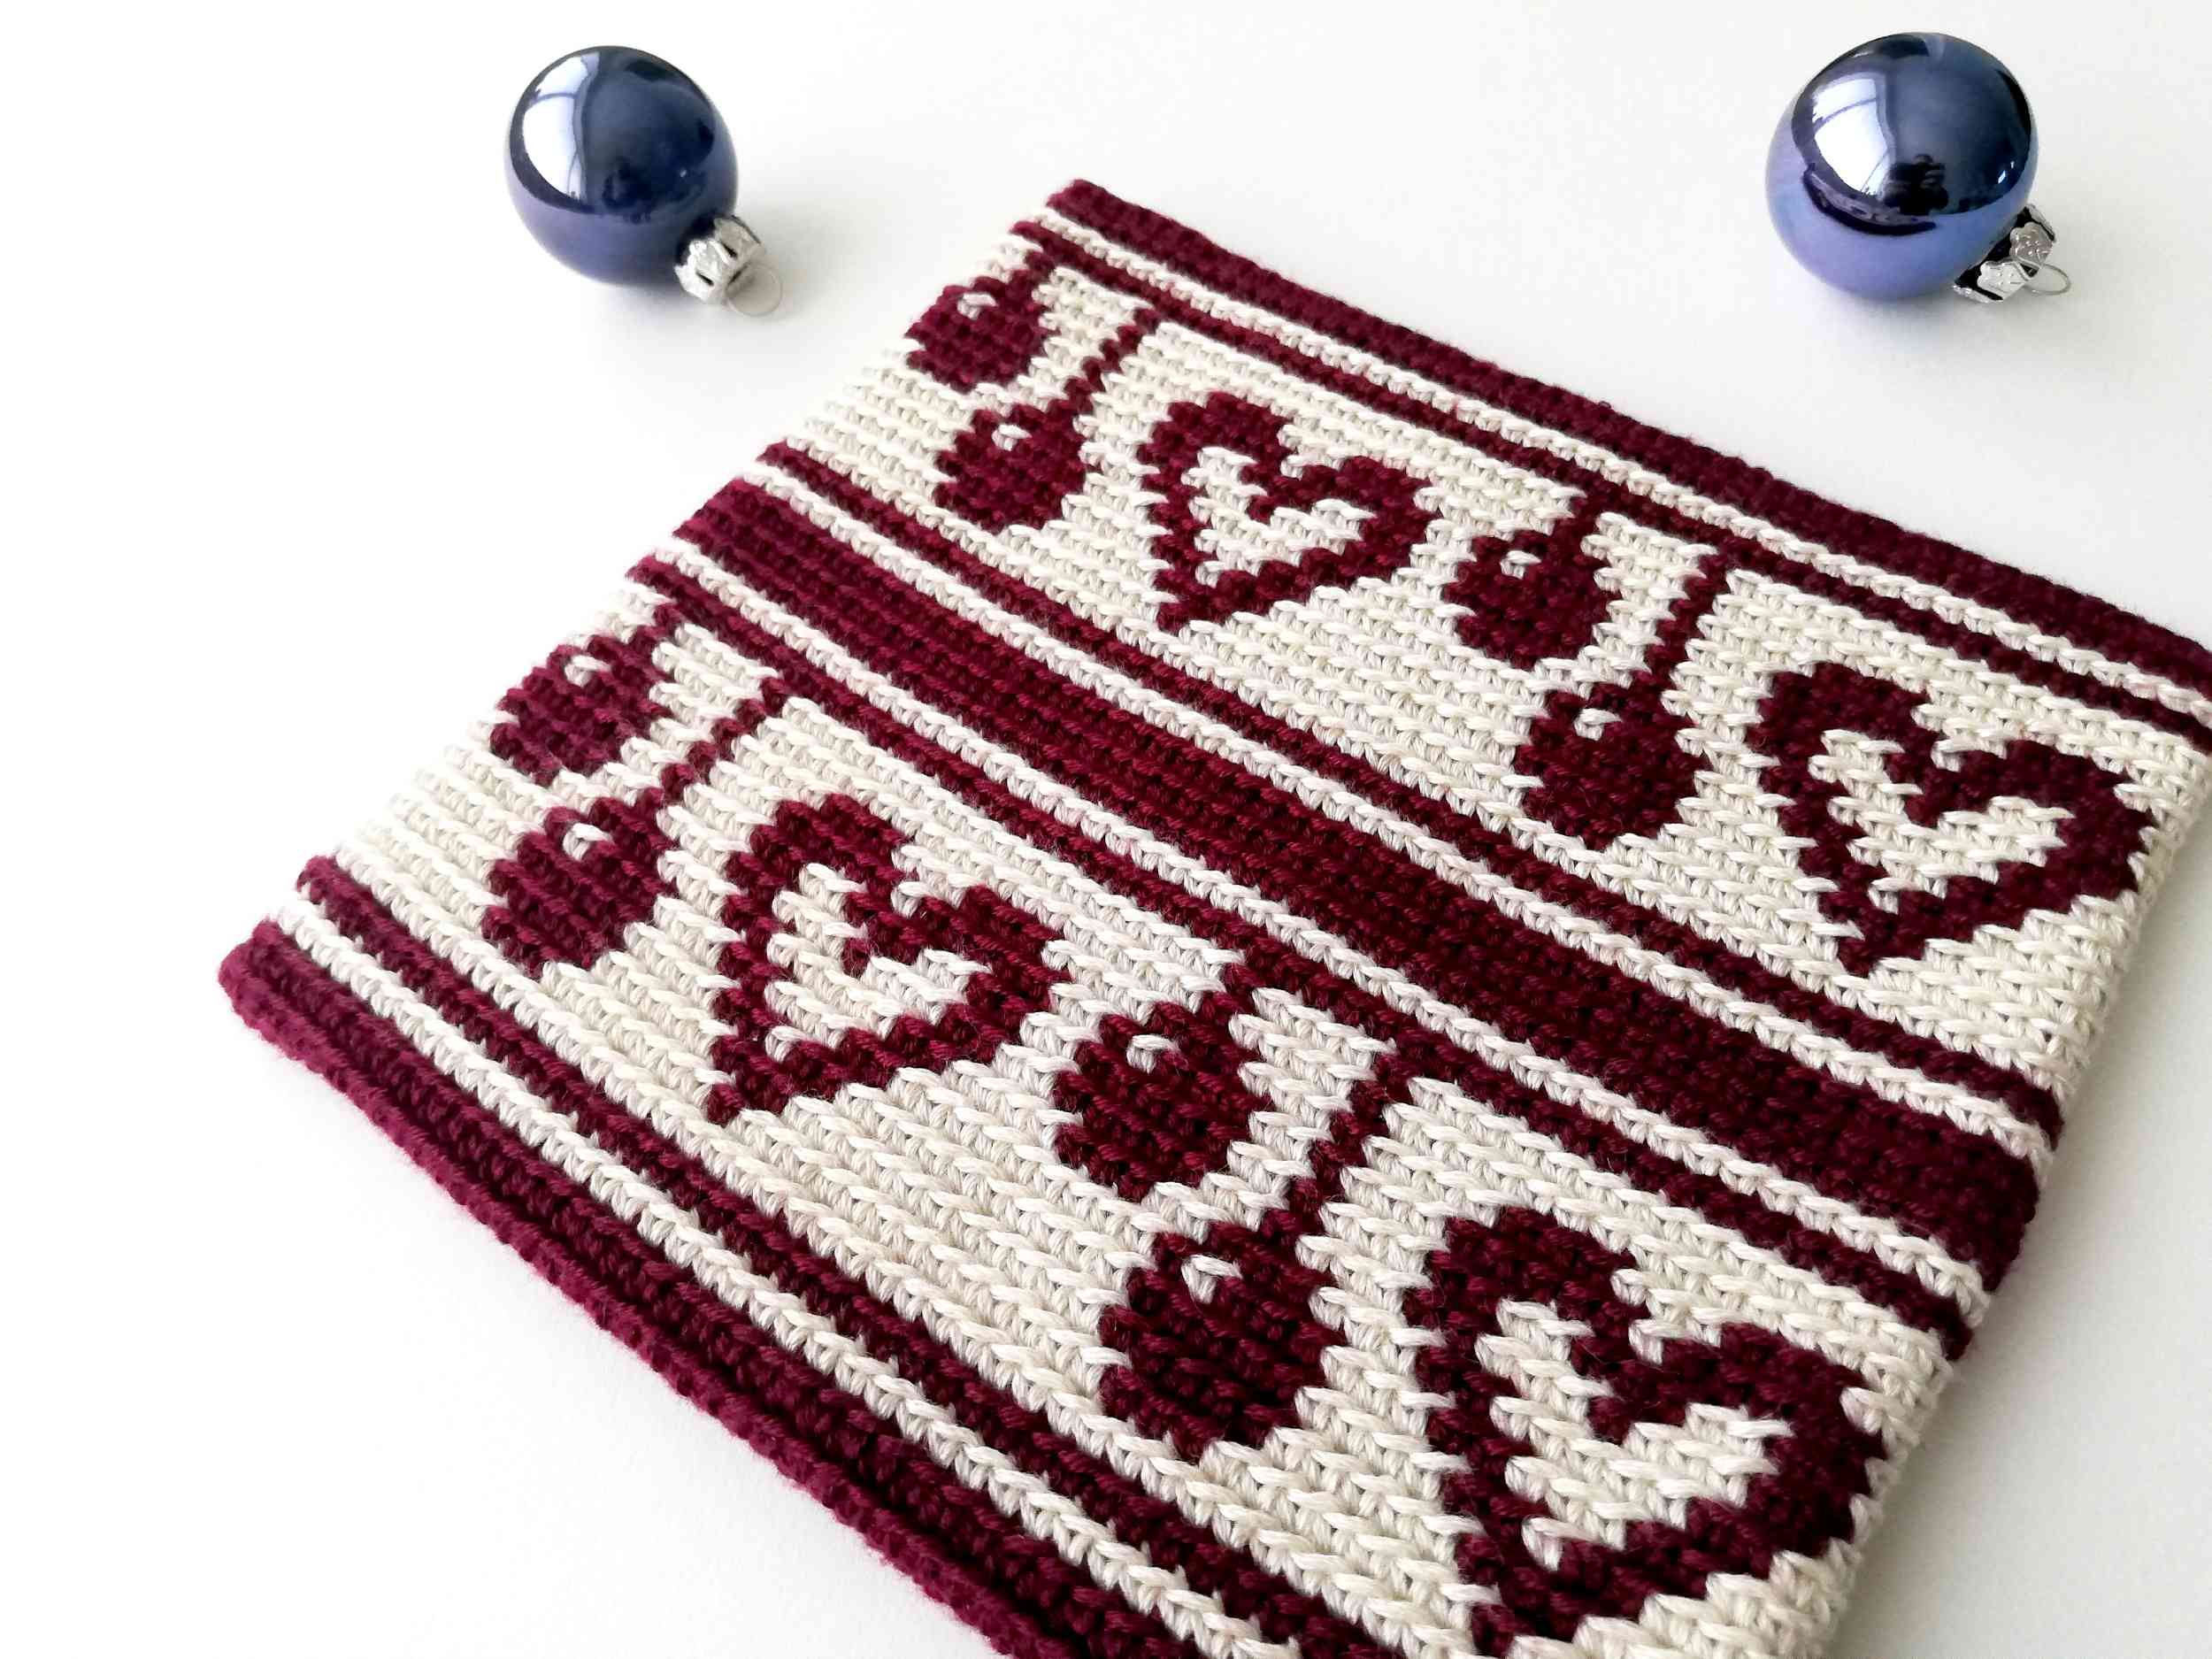
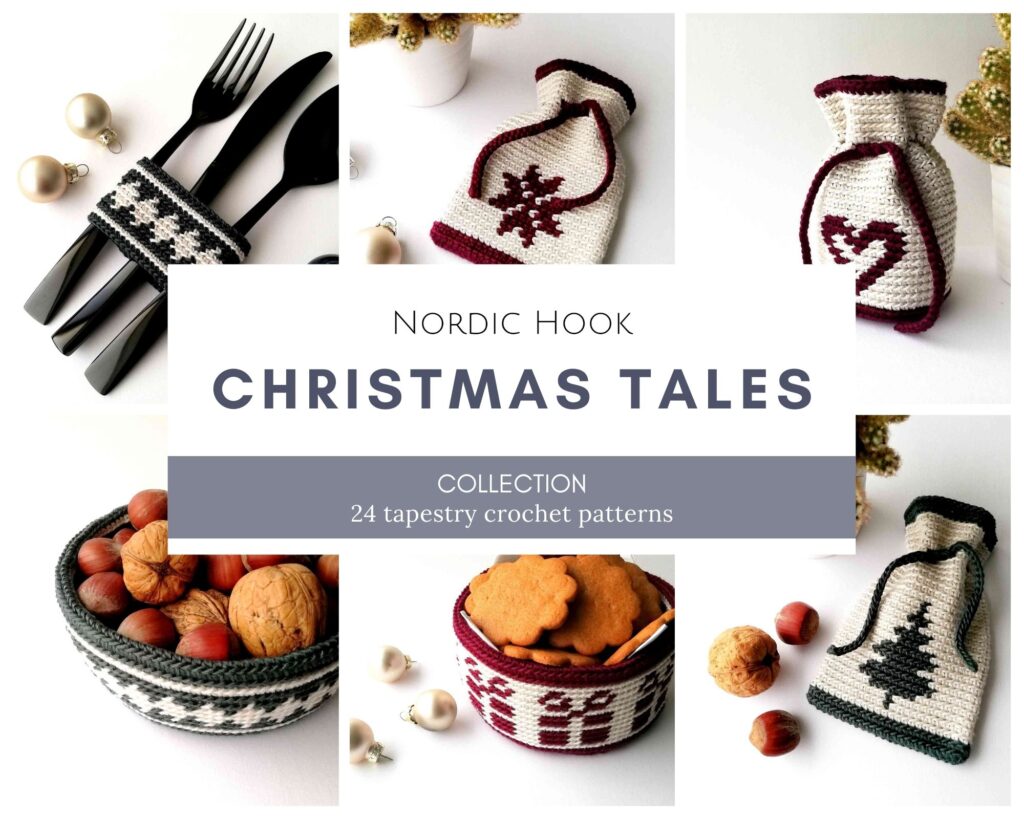
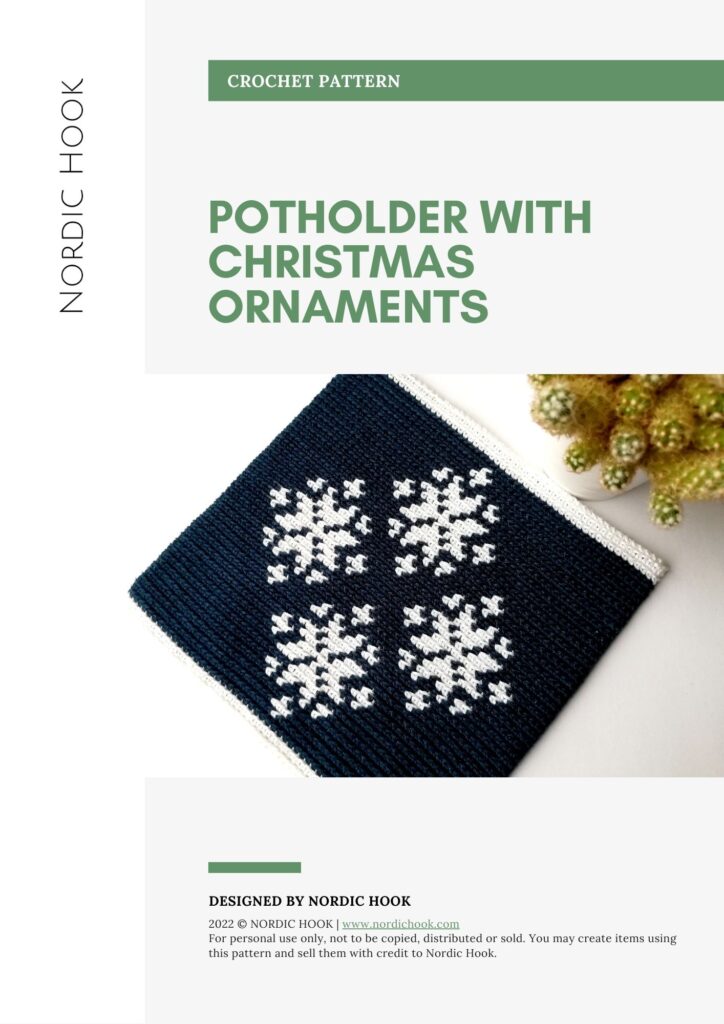
It is time to start making Christmas presents! Here is a free pattern for a potholder with Christmas ornaments. It is not so complicated to make and it does not take long. It could be such a useful Christmas gift! Or you could just make it for yourself 🙂
If you haven’t tried tapestry crochet before, you can take a look at my tutorial here.
You can find my other free patterns here.
Also, don’t forget to take a look at my Christmas pattern collection Christmas Tales here!
Good luck!
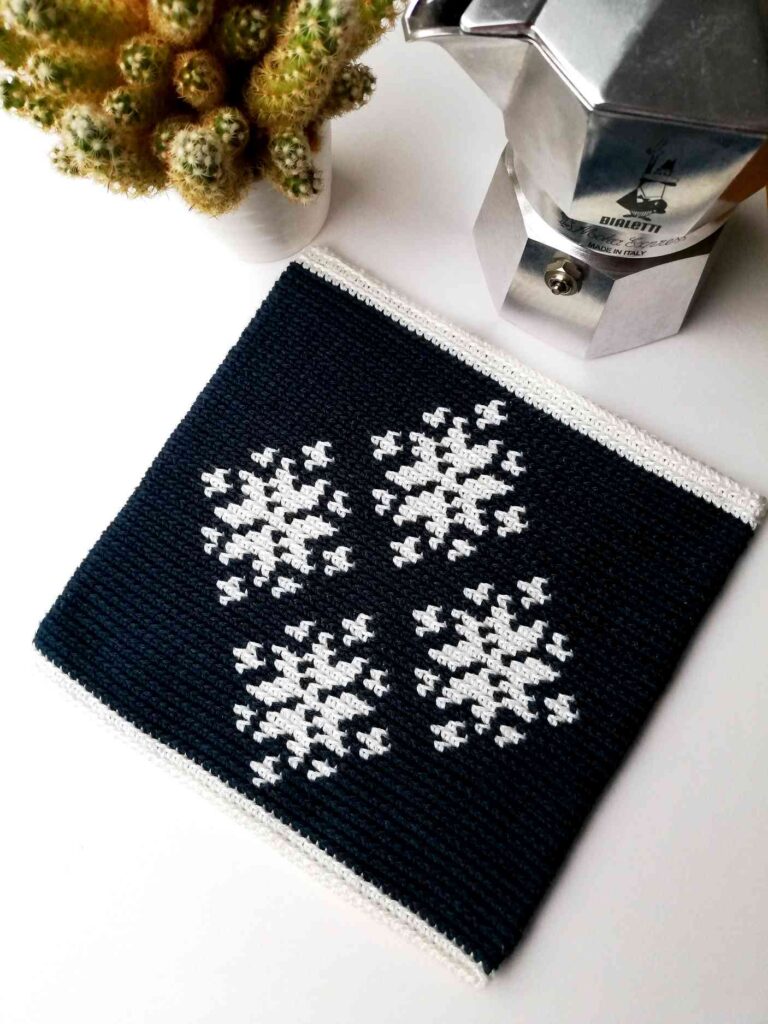
Potholder with Christmas ornaments
PDF: If you prefer a printable PDF pattern without ads, you can buy it here.
Pinterest: Also, you can save it to Pinterest for later here.
Materials
- Yarn: any thin yarn will work. I used Strik & Smil “Art silk garn”, 100% viscose, 50 g (~140m), colors: white and blue.
- Hook: as suggested on your yarn label. I used hook size 2.0.
Abbreviations (US terms)
- ch: chain
- sl st: slip stitch
- sc: single crochet
- msc: modified single crochet
- prev: previous
- st: stitch
Notes
The size of my potholder is 19.0 x 18.0 cm.
For this pattern you should be familiar with the tapestry crochet (you can find the tutorial here). Photo instructions below show the main steps how to make a potholder. This pattern uses a modified single crochet: make a single crochet back loop only, just instead of yarning over for the last step, yarn under (see the tutorial here).
You will work in continuous rounds, which means that in the end of a round you don’t join with a slip stitch, but instead continue making modified single crochets in the top of the first stitch of the round. Remember to use a marker showing the beginning of each round. Follow the color chart showing how you should change colors.

Pattern
Start by chaining 54 with white yarn.
Round 1: To make the first round, you will work down the chain, then turn and work in the other side of the chain. Make sc in every st of the chain starting from the second chain from your hook. Turn. 1 sc in the end of the chain, make sc in every st (starting with the one you have just worked into; now that st has 3 sc in total) until you come back to the beginning of the chain. 1 sc in the end of the chain. In total you should have 108 st. Don’t join with a sl st, instead continue with the next round.
Now add blue yarn and follow the color chart for all rounds until the end.
Round 2-45: msc in every st of the prev round.
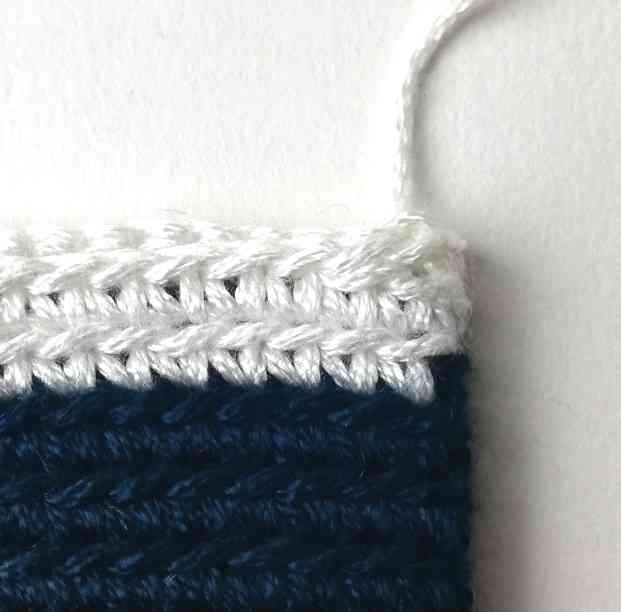
In the end make a sl st in the back loop only in the next st to even out the edge. Fasten off. Cut the white yarn so it would be around three times the width of the potholder and sew together both sides like it is shown in the photo instructions.
Color chart
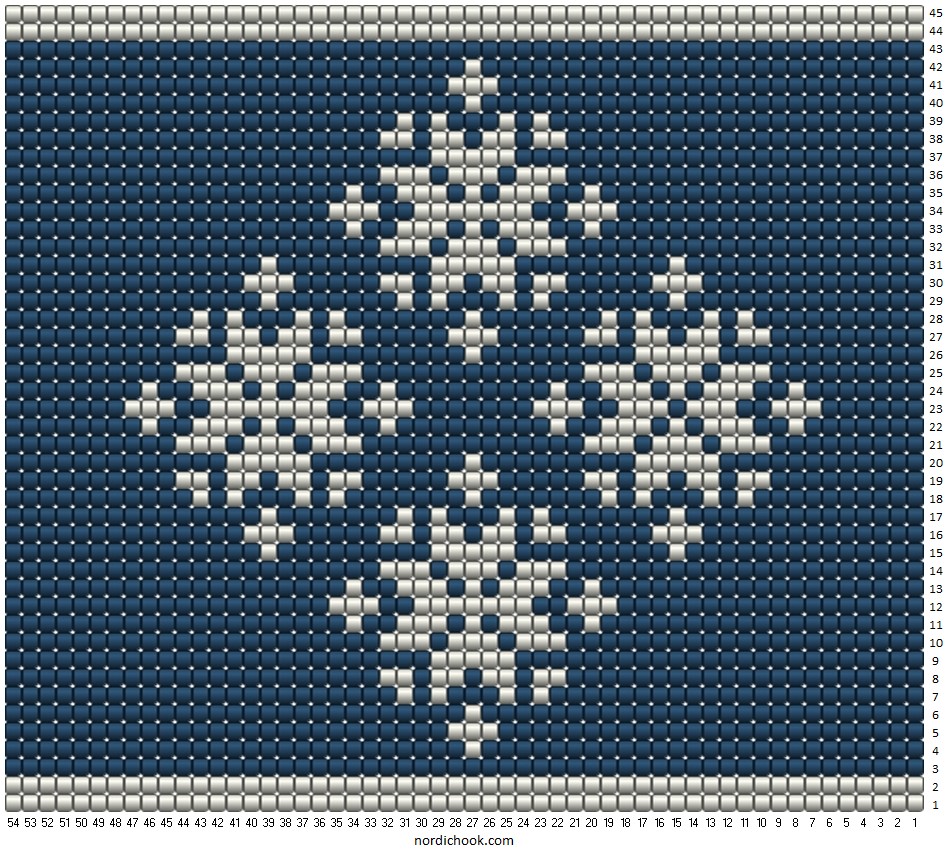
How to read the chart
Each square represents a stitch and its color. In each round you have 108 stitches. The chart above shows only one half of the pattern, the front side of the potholder (columns 1-54 in the chart). Columns 55-108 are the same as column 1. Rows represent rounds. For each round you have to read the row in the chart from right to left.
Photo instructions for the potholder with Christmas ornaments
Round 1
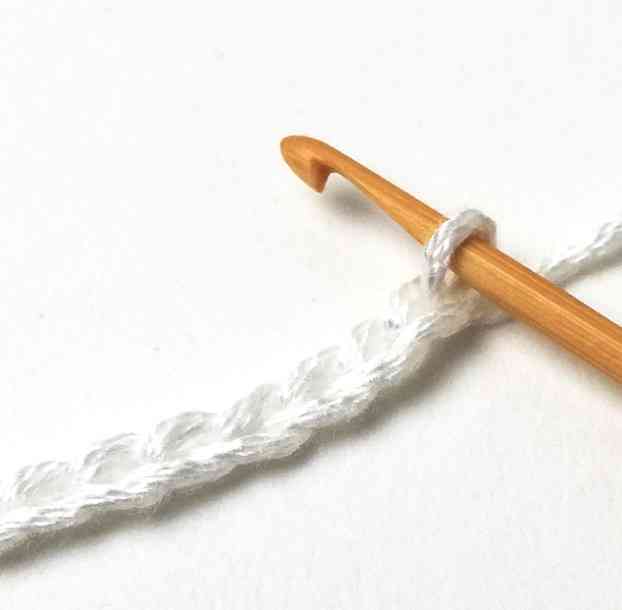
1. Start by chaining 54 with white yarn. You will start working in the second chain from your hook.
2. So, make a single crochet in the second chain from your hook.
3. Keep making single crochets in every stitch until the end of the row.
4. Then make one single crochet in the end of the chain.

5. Turn your work and make one more single crochet in the same stitch.
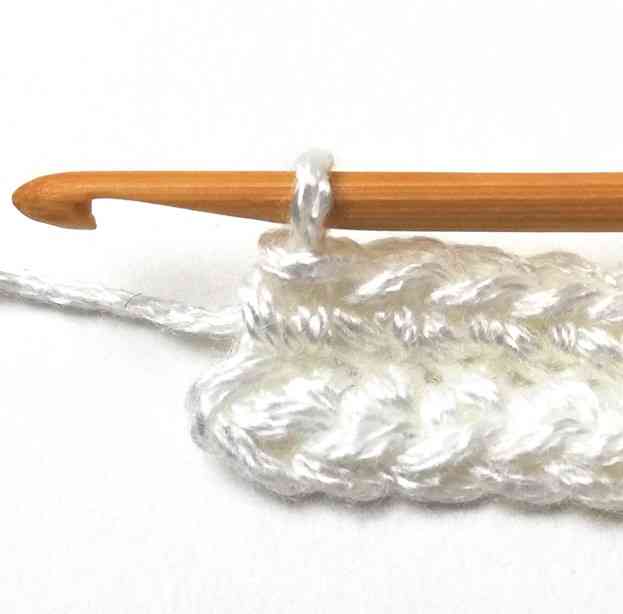
6. Then continue making single crochets in every stitch until you reach the end.
7. Make one single crochet in the end of the chain. In total you should have 108 stitches.
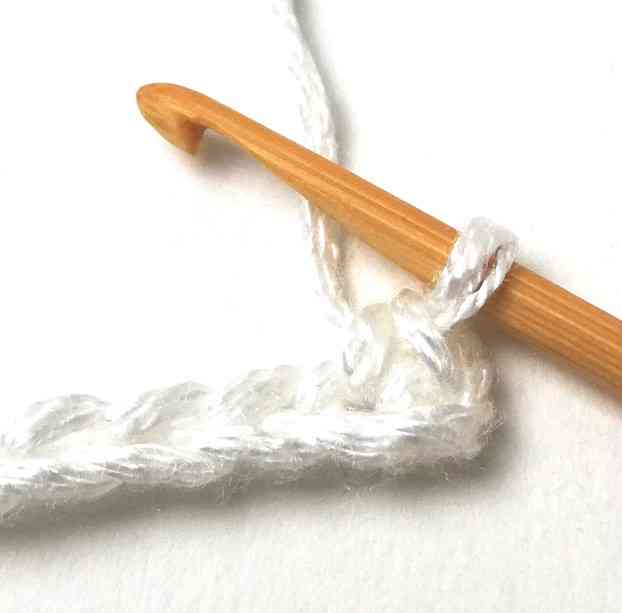
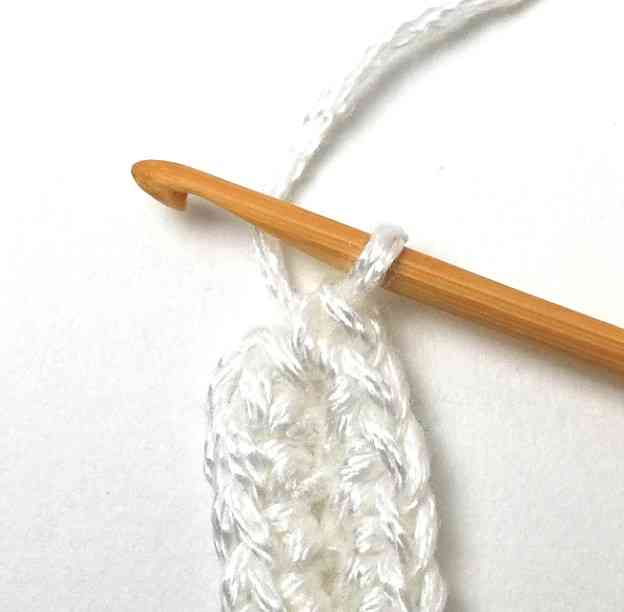
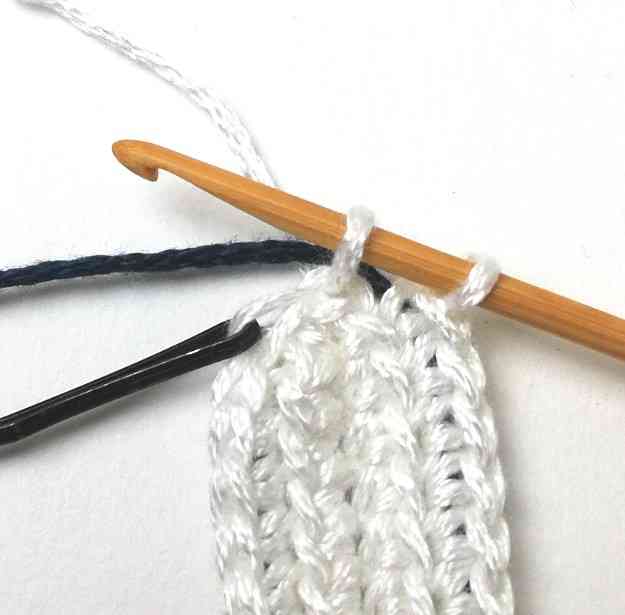
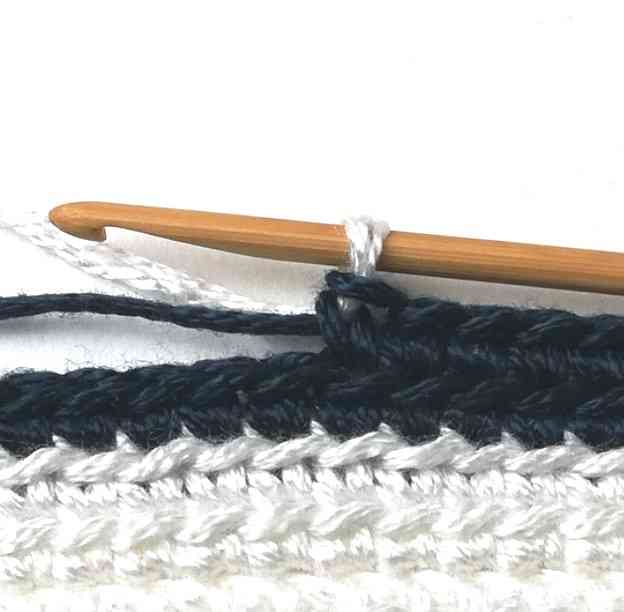
Round 2
8. Don’t join with a slip stitch. Instead insert your hook in the top of the first single crochet of the first round grabbing just the back loop.
9. Yarn over and pull the through. Now you have two loops on your hook.
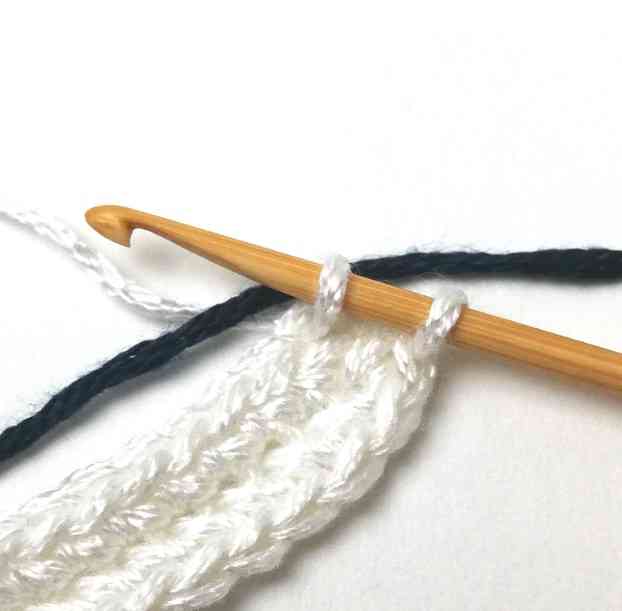
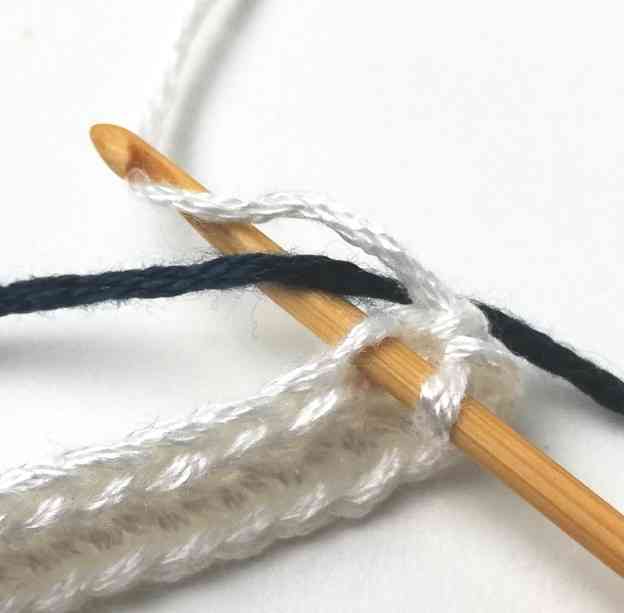
10. In round 2 you have to introduce the blue yarn. So, take your blue yarn and put it behind your hook and in front of the white yarn like it is shown in the picture.
11. Yarn under the white yarn.
12. Pull the yarn through. Notice how the blue yarn is wrapped around with the white yarn.
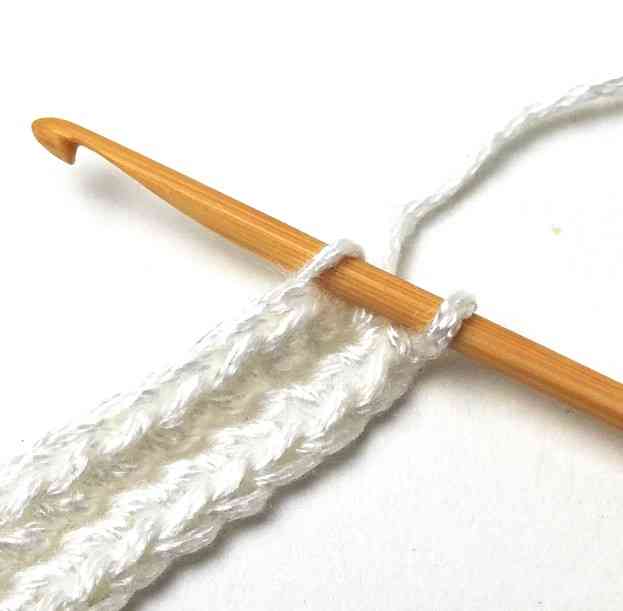
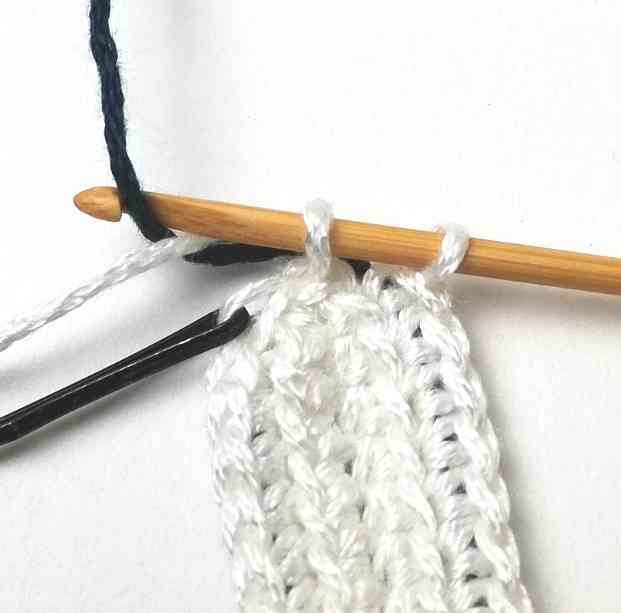
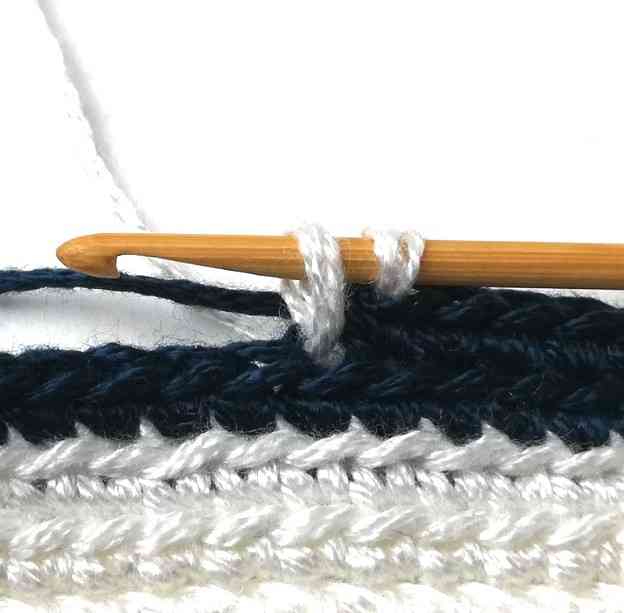
13. Then insert your hook in the next stitch grabbing just the back loop.
14. Yarn over the white yarn.
15. Pull the yarn through. Now you have two loops on your hook.
16. Yarn under the white yarn.
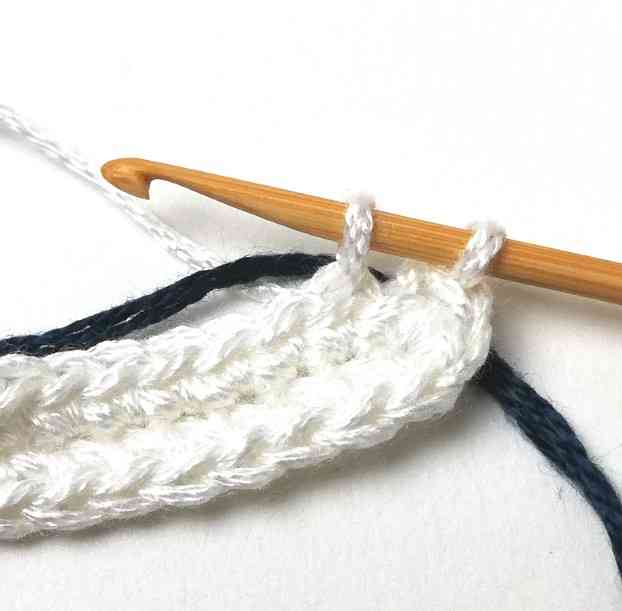
17. Pull the yarn through. You have just made a modified single crochet.
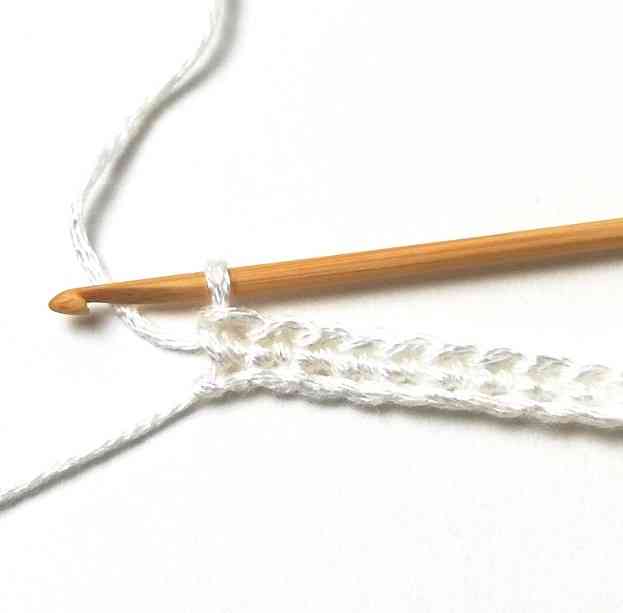
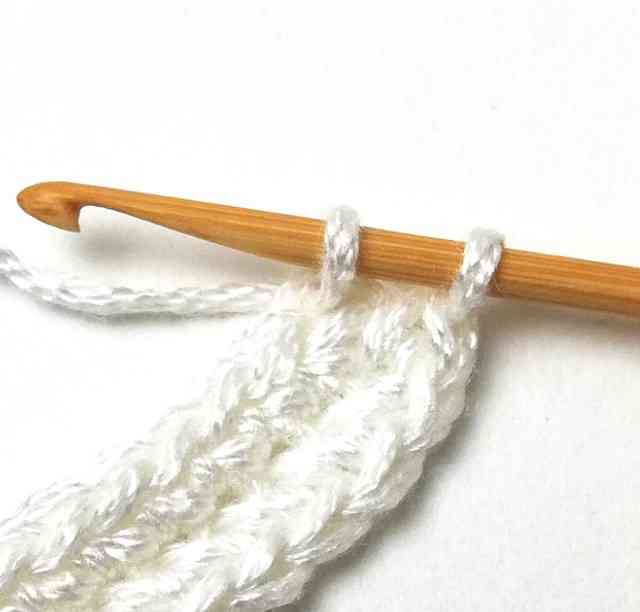
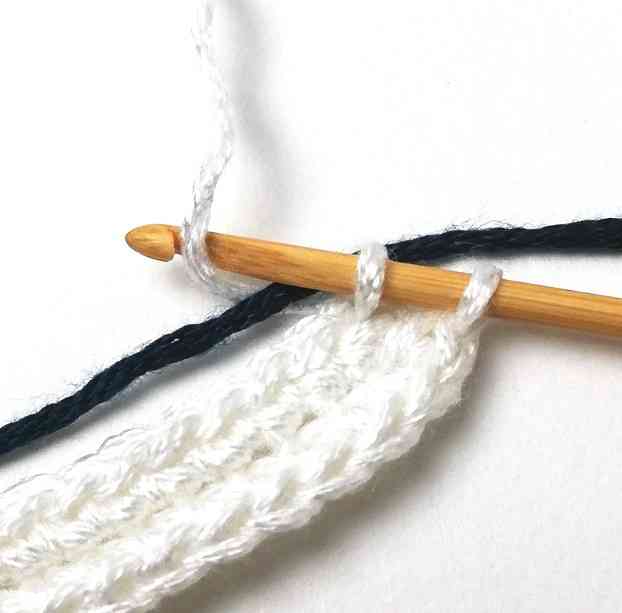
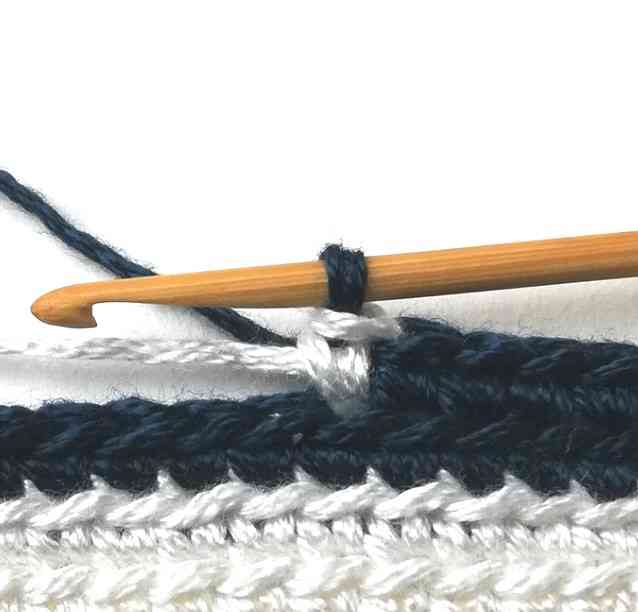
18. Keep working in the same way until the end of the round. When you make the last modified single crochet, don’t finish it, stop when you have two loops on your hook. The first stitch in round 3 should be blue, therefore, you need to change yarn color.
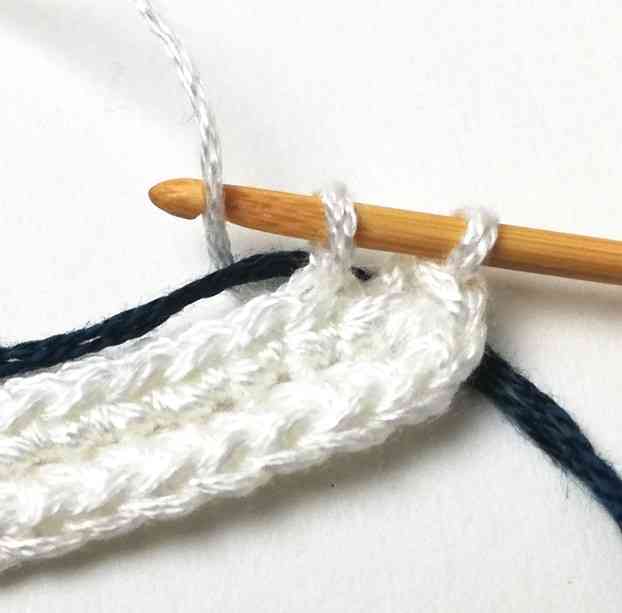
19. So, put the blue yarn up and yarn under.
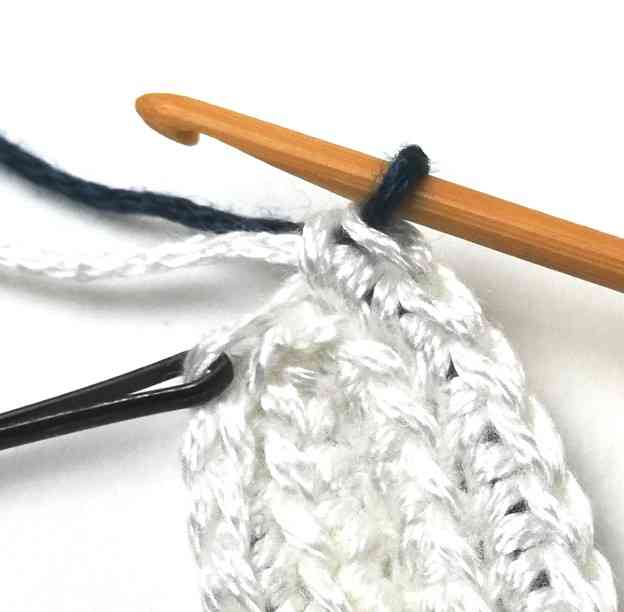
20. Pull the yarn through. Now your blue yarn is ready to use.
Round 3

21. Make the next stitch with the blue yarn.
Round 4
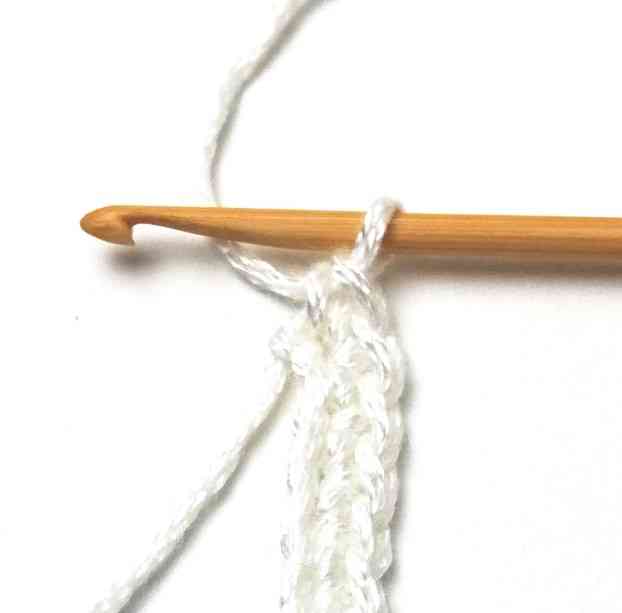
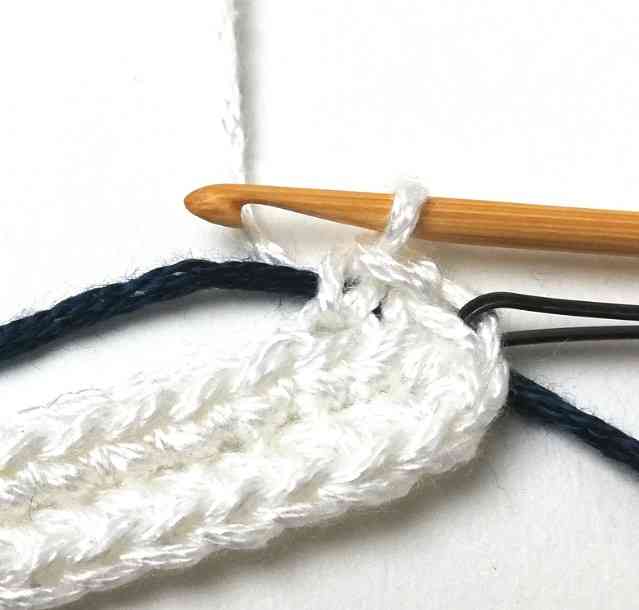
22. The 27th stitch in round 4 should be white. So, start making the 26th stitch with the blue yarn, but stop when you have two loops on your hook, because you have to change yarn color.
23. Then put the white yarn up. Yarn under and pull the yarn through. The white yarn is ready to use again.
24. Start making the 27th stitch, but don’t complete it, because you have to change color again.
25. So, complete the 27th stitch with the blue yarn.

26. Continue to follow the color chart.
Round 45
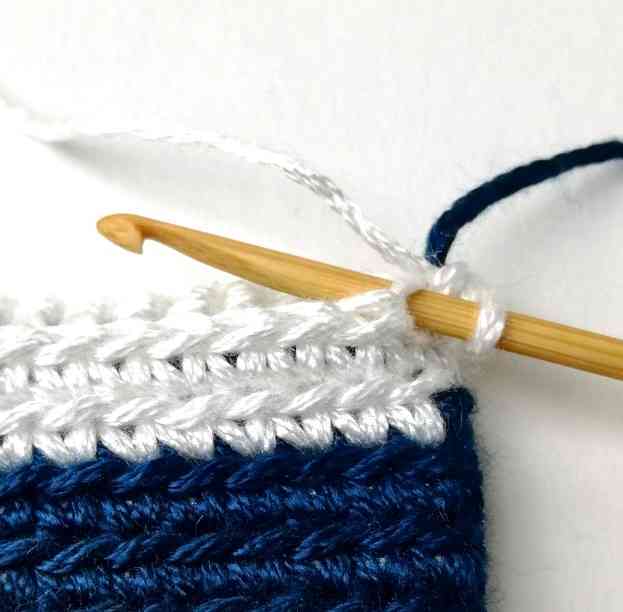
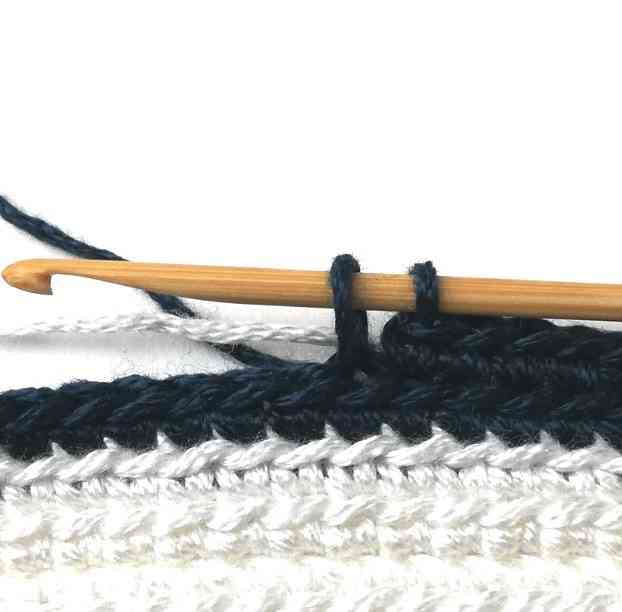
27. When you complete round 45, you have to even out the edge by making a slip stitch in the back loop only. So, leave the blue yarn aside and insert your hook in the next stitch grabbing just the back loop.
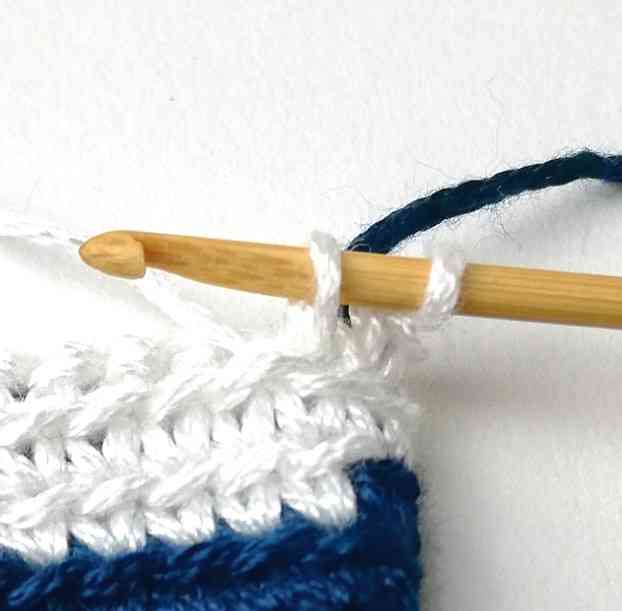
28. Yarn over and pull the yarn through. Now you have two loops on your hook.
29. Then pull the first loop through the second one. You have just made a slip stitch in the back loop only.
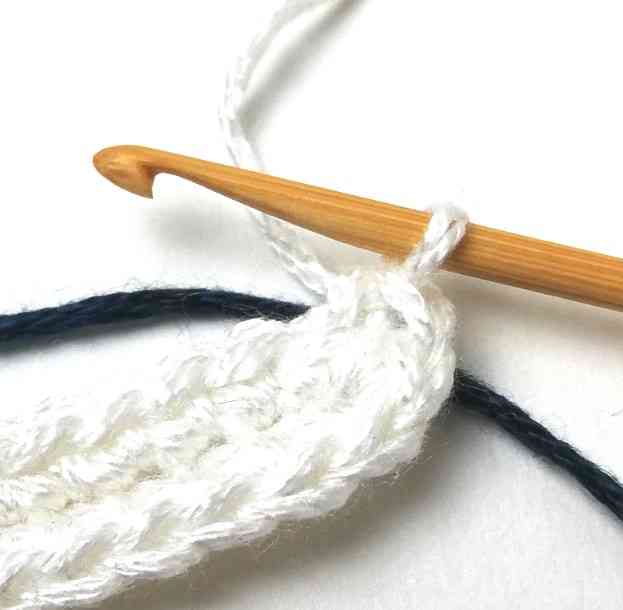
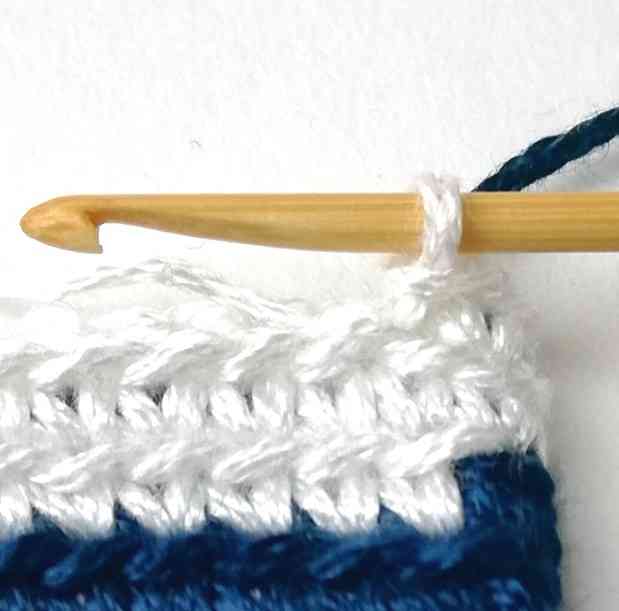
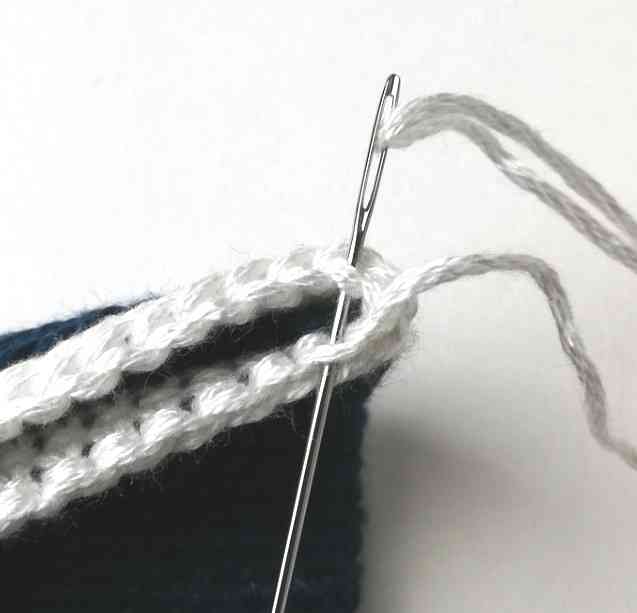
30. Cut the blue yarn and weave in its end. Then cut the white yarn so it would be around three times the width of the potholder. Take your tapestry needle and insert it like it is shown in the picture.
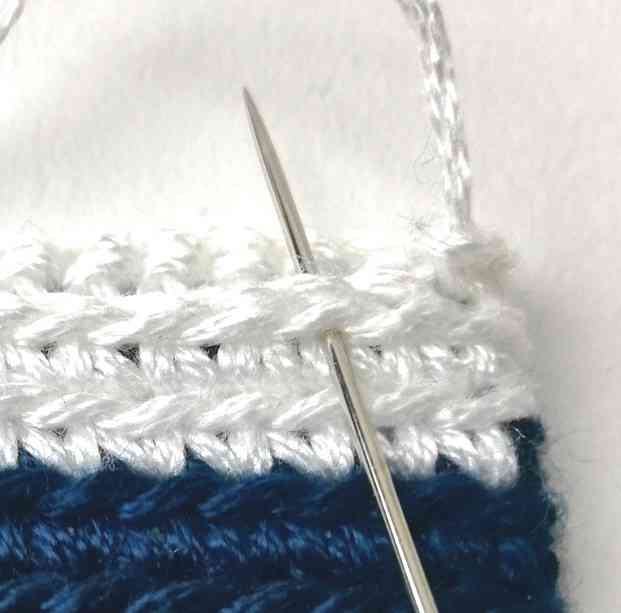
31. Pull the yarn through. Then insert your needle in the middle of the chain where the white yarn is coming from.
32. Pull the yarn through.
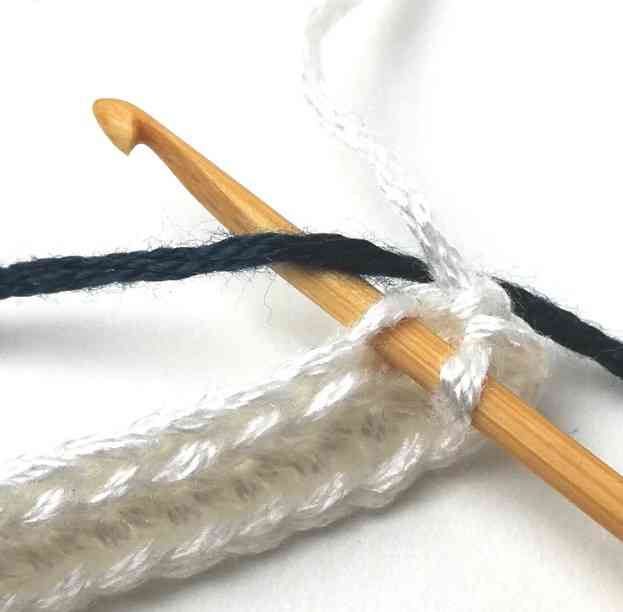
33. Now you have to close the potholder by sewing both sides together. So, insert your needle in two opposite chains grabbing the loops that are closer to the inside.
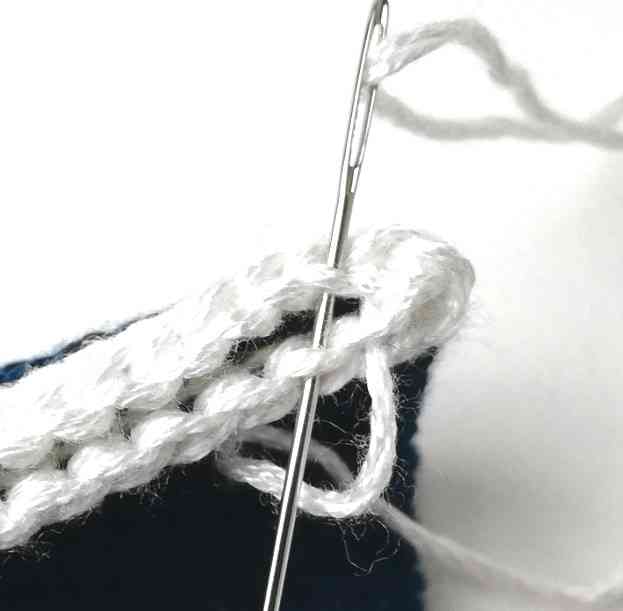
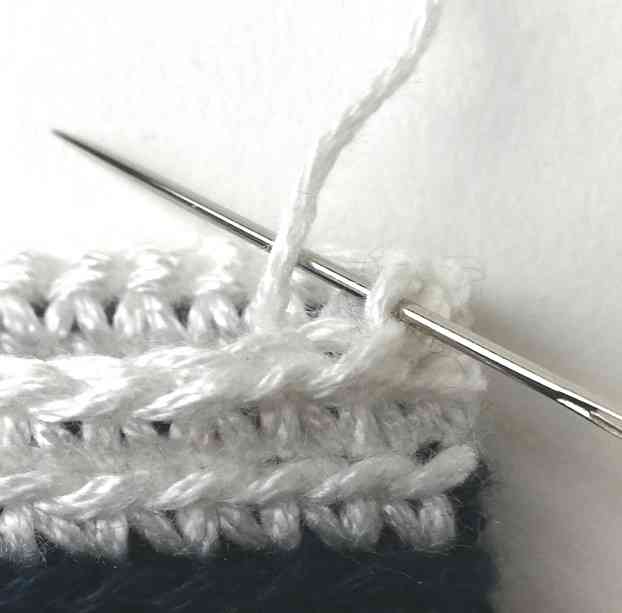
34. Pull the yarn through. Do the same for the next two chains.
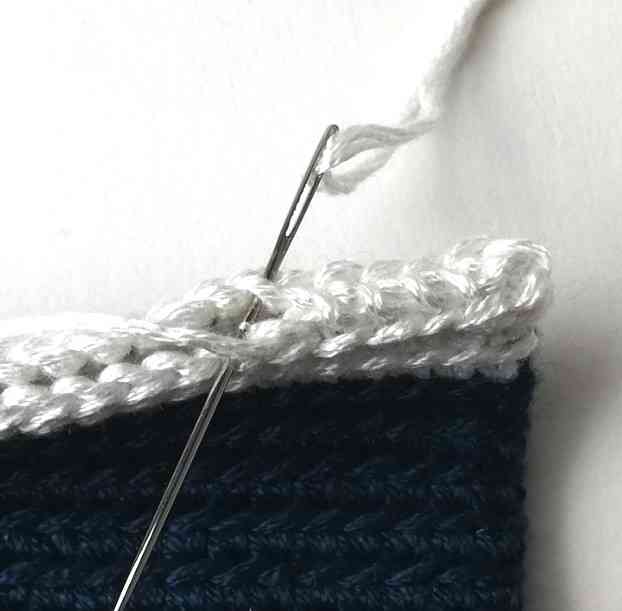
35. Continue working in the same way until you reach the end. Fasten off.
Finished potholder with Christmas ornaments
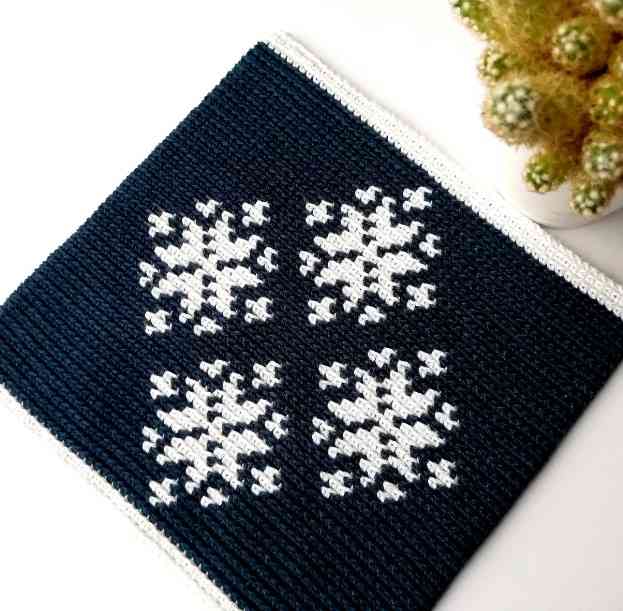
36. Done!
Enjoy your potholder with Christmas ornaments!
PDF: If you prefer a printable PDF pattern without ads, you can buy it here.
You can save this pattern to your Pinterest crochet board here.