


Christmas is almost here, and what better way to get in the holiday spirit than crocheting your own ornaments! This week you'll learn how to crochet these fun rainbow Christmas lights. If you’ve always wanted to learn how to crochet, follow our series of Crochet Fundamentals. This pattern uses US terms and stitches include single crochet (sc), single crochet 2 together (sc2tog) and chain (ch).
Supplies
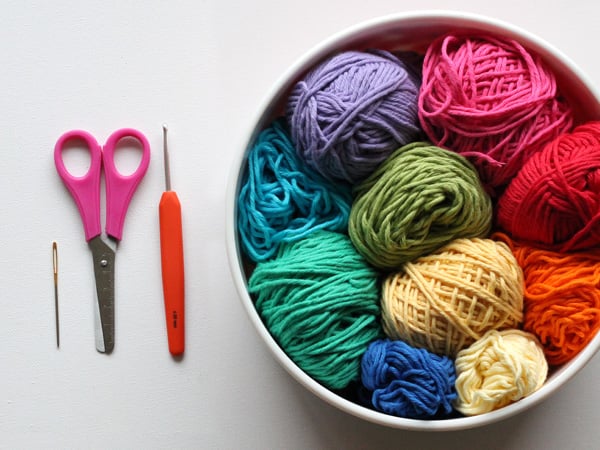

- Yarn (I used Drops Paris cotton)
- Crochet hook
- Darning needle for sewing in the ends
- Scissors
- Polyfill stuffing (not shown)
- Click here to learn more about essential crochet tools
1. Crochet the Bulb
Step 1
Start by making a slip knot on your hook.

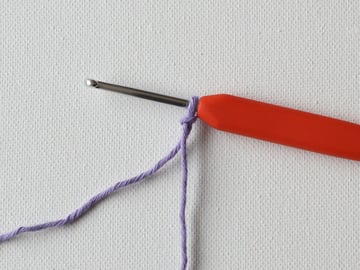
Chain 4.


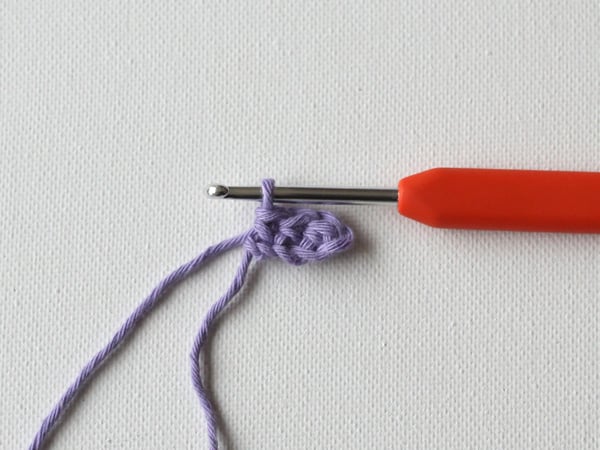
Step 2
Turn your work, and work 3 single crochet stitches, skipping the first chain.

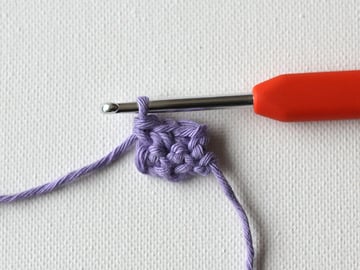
Step 3
Chain 1, and turn your work. Crochet 3 single crochet stitches.

Step 4
Chain 1, and turn your work. Work 2 single crochet stitches into the first stitch, 1 single crochet in the next stitch, and 2 single crochet stitches into the last stitch. You now have 5 single crochet stitches. Chain 1, and turn your work. Crochet 5 single crochet stitches.

Step 5
Chain 1, and turn your work. Work 2 single crochet stitches into the first stitch, 1 single crochet in the next 3 stitches, and 2 single crochet stitches into the last stitch. You now have 7 single crochet stitches. Chain 1, and turn your work. Crochet 7 single crochet stitches.

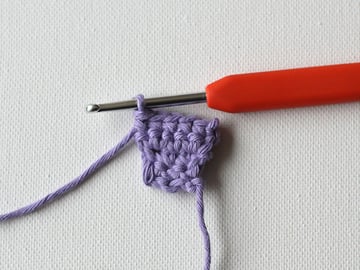
Step 6
Chain 1, and turn your work. Work 2 single crochet stitches into the first stitch, 1 single crochet in the next 5 stitches, and 2 single crochet stitches into the last stitch. You now have 9 single crochet stitches. Chain 1, and turn your work. Crochet 9 single crochet stitches.

Step 7
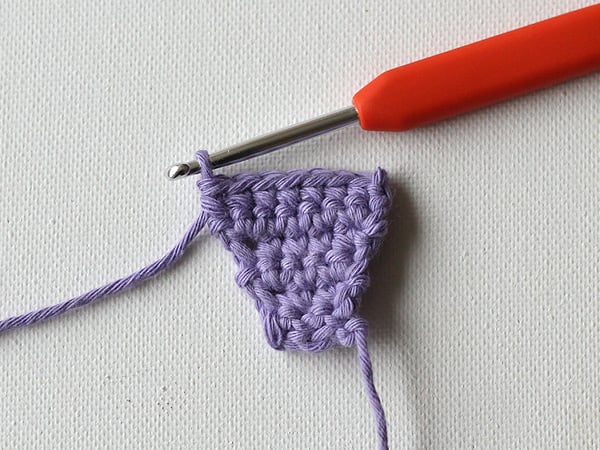
Work 2 more rows of single crochet stitches.

Step 8
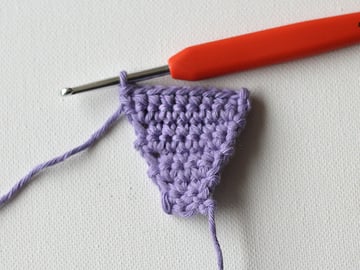
Chain 1, and turn your work. We're now going to crochet the first two stitches together; this is called a decrease. Insert your hook into the first stitch and pull up a loop, insert your hook into the second stitch and pull up a loop, yarn over and pull through both loops on your hook. This is called a single crochet 2 together, and the abbreviation is sc2tog. After the sc2tog, work 5 single crochet stitches, then work another sc2tog into the last 2 stitches. You now have 7 stitches.
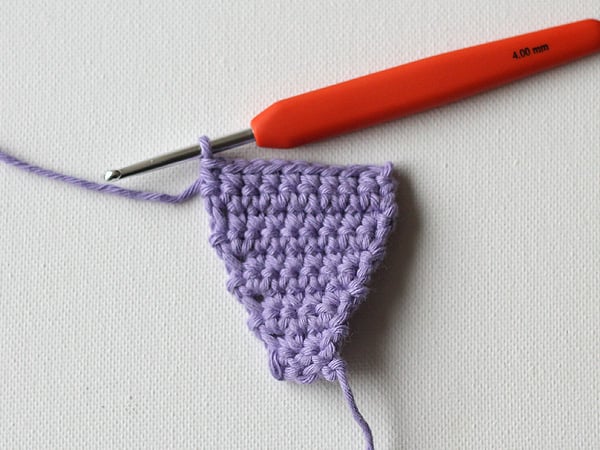
Chain 1, and turn your work. Work a sc2tog into the first 2 stitches, then crochet 3 single crochet stitches, then work another sc2tog into the last 2 stitches. You now have 5 stitches. Cut the yarn.


Step 9
You have now made one side of the crochet bulb. Make another one.


2. Stuff the Bulb
With a length of yarn, sew your bulb together, leaving the top open. Lightly stuff your bulb with polyfill, then continue sewing the two parts together. Sew in your ends.


3. Crochet the Bulb Top
With some grey yarn, start with a slip knot on your hook. Work 3 single crochet stitches on top of the bulb, then turn your work to the back and work another 3 single crochet stitches. Work another row over those 6 stitches, and cut the yarn.


Sew in the ends.


4. Crochet the Other Bulbs
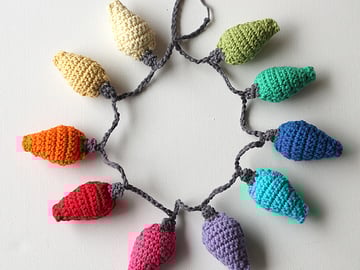
Crochet more lightbulbs in your favorite colours! Try to make a spectrum of colour for a gorgeous rainbow effect.


5. Crochet the Bulb String
With grey yarn, chain 15. Grab the first bulb, and attach it to the string by crocheting one single crochet stitch into the top. Chain 10, and attach another bulb. Keep going like this, ending with 15 chains, until all the bulbs are on the string.

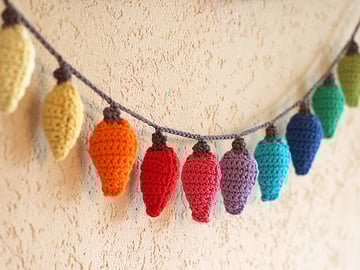
Hang Your Gorgeous Lights
Hang the lights on your wall or in your Christmas tree! You can make a set all in one colour, or try a different colour palette. These lights also make great Christmas gifts!

Do you love this project? Are you going to make some in your own colour scheme? We’d love to see your work! Let us know if you have any questions or other comments in the space below.


