
Bubble Wrap Cowl – a free crochet Pattern from Make My Day Creative
 This cowl was one of my husband’s Christmas gifts so I have been waiting to share it for a while. When I was making the plaid cowl for my brother I fell a bit in love with this yarn. Not a surprise because I am a fan of chainette construction yarns. (Read more about yarn construction types in my post here).
As my husband liked the yarn and the colour options have recently expanded, I asked him to choose what colours he wanted and then made the cowl in secret.

Bubble Wrap Cowl – a free crochet Pattern from Make My Day Creative
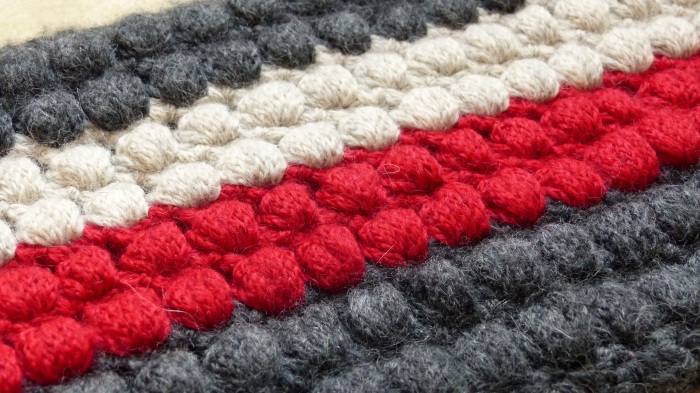
I really love chainette yarn for making puff stitches with because the construction is so lofty. Remember these flower trails fingerless gloves and my pocket full of posies pouch? The petals of the flowers are made using puff stitches too.
This cowl is very easy and quick too thanks to the chunky yarn and 10mm hook. You can easily adjust the size by adding/subtracting and even number of stitches. It works in rows as well as rounds too. So get hold of some chunky yarn and get crocheting!
Scroll down for pdf patterns! (US and UK notation)
Materials:
260m/200g super chunky yarn – I used Debbie Bliss Paloma:
- 130m/100g grey (“Charcoal”)
- 65m/50g red (“Ruby”)
- 65m/50g beige (“Pebble”)
Size 10mm hook
Bubble Wrap Cowl – a free crochet Pattern from Make My Day Creative
Special Stitch: Puff stitch
The puff stitch is essentially the same as a hdc4tog (or htr4tog if you are using UK terminology), all worked in to one stitch. The main thing to remember is to draw each loop up to the height of the row so that each stitch has plenty of puff:
*Yarn over hook, insert hook into ch-sp, draw up a loop to the height of the row, repeat from * 3 more times (9 loops on hook), yarn over and draw through all 9 loops. (You will secure the puff with a ch1, this is written in to the pattern)
You can watch my video on making puff stitches here – but remember this video is for a slightly different project.
Pattern:
Cowl is worked in the round after the first row. The reason for this is that it is easier to make sure your chain isn’t twisted when you join it to make the round.
Ch80 (or an even number of your desired length). This will give 40 puff stitches in each round.
Row 1: Ch1 (counts as sc), ch1, sc in 5th chain from hook, ch1, sk1ch, sc, repeat from * until 1ch remains, ch1, sl-st into the ch-sp at the other end of the work being careful not to twist. This joins the round. (40 ch-sps)
Later you can weave in the tail to attach the loose chain in to the same ch space just joined to. Now work in the round for the remainder of the cowl.
Round 2: Ch2. Puff st in same ch-sp, ch 1, puff st in next ch-sp, repeat from * around, join into the top of the ch2 with a sl-st. (40 puff sts made – and 40 ch sps)
Round 3: Ch 1, sc in ch-sp, repeat from * around, join into first ch1 with a sl-st. (40sc and 40ch-sps)
Repeat rounds 2 and 3 until cowl is desired width. Change colours as desired (example pictured changed every 4 rounds – not including row 1). Finish on a Round 3 to mirror the foundation row on the other side of the cowl.
Weave in all ends. No blocking needed – this cowl is made for puffy structure not drape!

Bubble Wrap Cowl – a free crochet Pattern from Make My Day Creative
I’d love to see how this turns out in a variegated yarn so make sure you share your project pictures on Ravelry!


Reblogged this on adornosmalulu.
I love puff stitch, it was beautiful
Me too! It makes such a fun fabric :)
Ahhh it looks so warm and cozy!
Thanks! It is. And the yarn used is felting a little too making it extra cosy :)