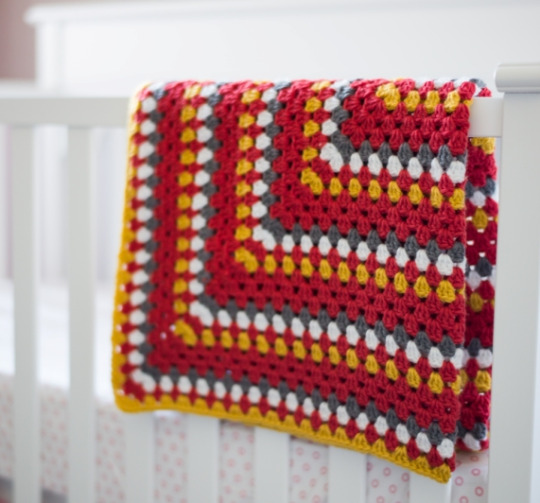
This blog post has been long overdue as it’s been in my Drafts folder for the longest time! When I was pregnant with our older daughter Myla, I crocheted her this Granny Square Blanket HERE (see pic below). Of course, when I was pregnant with our younger daughter Brielle, I knew I wanted to crochet her a baby blanket as well! Baby blankets are such special projects since they are so well-loved and used and can be saved as keepsakes when they grow up. Thus about two years ago, I started designing a chevron baby blanket and trying to figure out a suitable colour scheme!
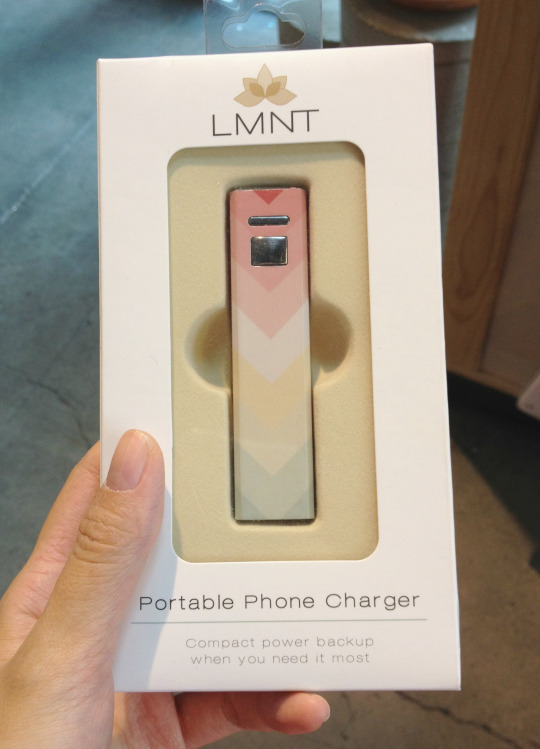
When Ryan and I were shopping on our babymoon in Las Vegas, we came across this phone charger and thought the colours were so pretty! The pinks, creams, yellows, and greens blended so harmoniously together…
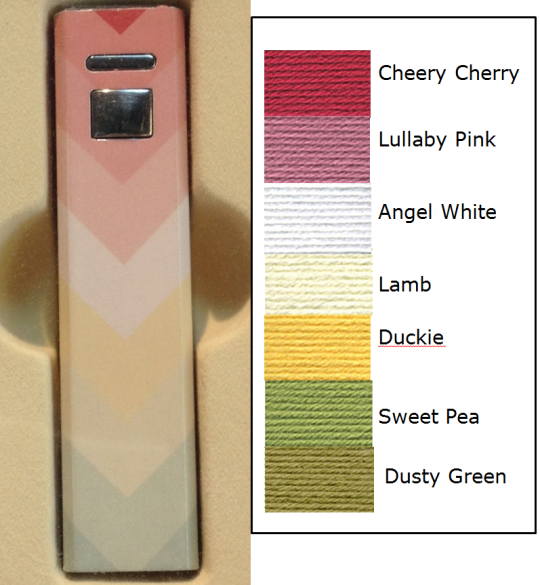
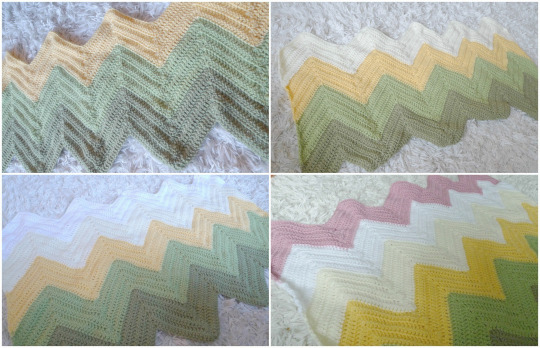
We decided to try and use a similar colour scheme by going with Lion Brand Yarn’s Vanna’s Choice since they have SO MANY colours available in their range! Within the Vanna’s range, you can also find Vanna’s Choice Baby, Vanna’s Complement, Vanna’s Glamour, and Vanna’s Tapestry. I chose Cheery Cherry, Lullaby Pink, Angel White, Lamb, Duckie, Sweet Pea and Dusty Green from the Vanna’s Choice and Baby line to try and match the phone charger colours!
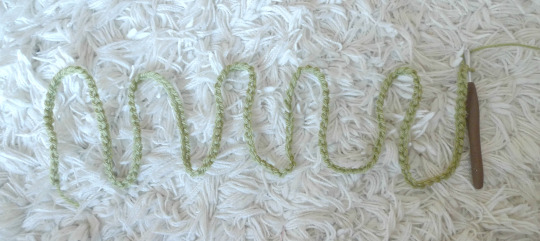
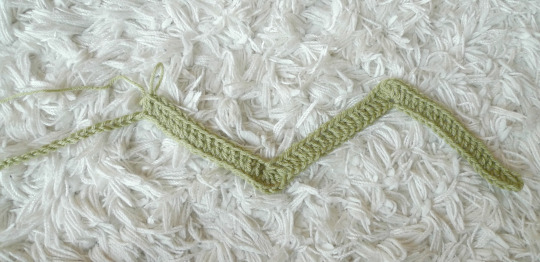
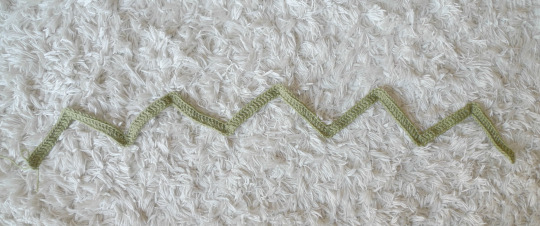
Then, I began figuring out my chevron design. I wanted a very bold and striking zigzag rather than a gentle ripple. I also wanted the blanket to be very dense with minimal gaps or holes. Below you can see how I tested out different numbers to get the look I was going for. Having 5 double crochets between each high point and low point resulted in a gentle wave while 15 double crochets resulted in a very sharp and dramatic zigzag. It’s difficult to see the measuring tape in the photo below, but the first chevron (5 dc’s) is about 2″ wide, the second chevron (10 dc’s) is about 6.5″ wide and the last chevron (15 dc’s) is about 9″ wide!
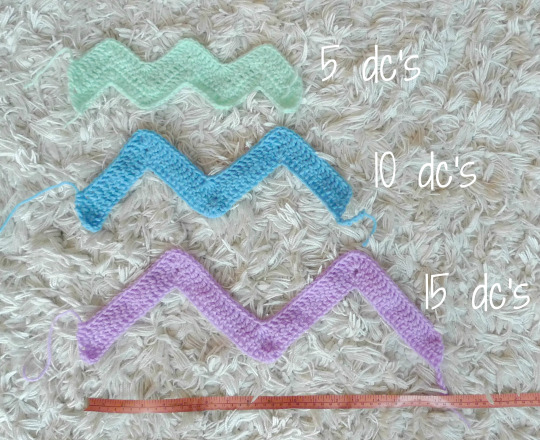
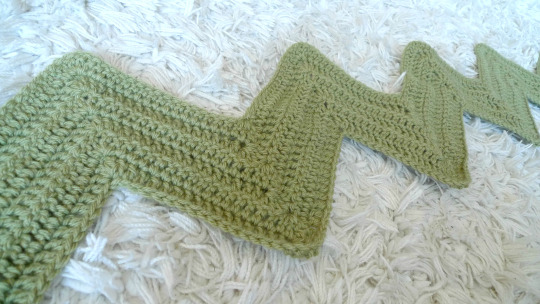
I decided to go with the 15 dc’s between each high and low point for that bold look! Once I figured out how many chevrons I wanted across, I calculated my numbers (see below for calculations in the written pattern). Using the Dusty Green colour, I chained 183 with my 6 mm Clover Amour hook.
Next, I started working the first chevron by doing an initial decrease (detailed in written pattern below) that counts as the first dc.
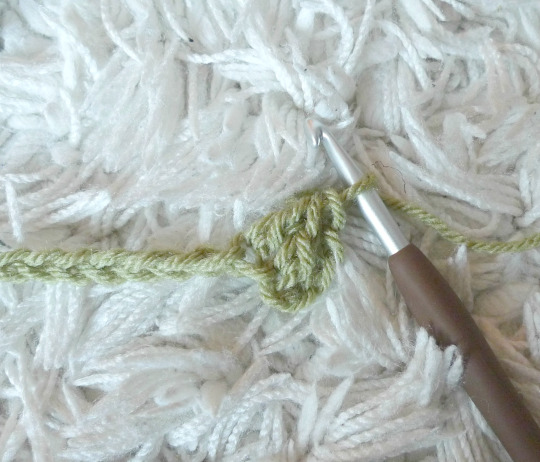
Then I did 15 double crochets and began working the Shell which is composed of (2 Dc, ch 1, 2 dc) in the next stitch to form the high point of the chevron.

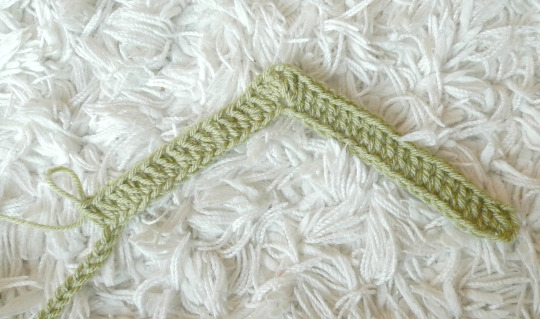
Next I worked 15 double crochets downwards…
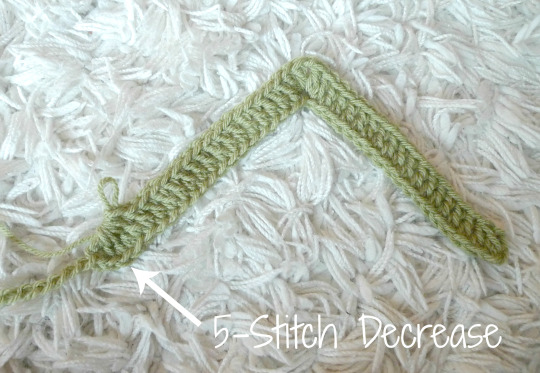
To form the bottom or low point of the chevron, I then worked the 5-Stitch Decrease. One chevron is complete!
Then I continued on with this pattern…
I decided to have 5 chevrons across the row of my baby blanket! It’s generally good to go with an odd number when determining how many chevrons, cables, or repeats to do as it is visually more interesting with a center point.
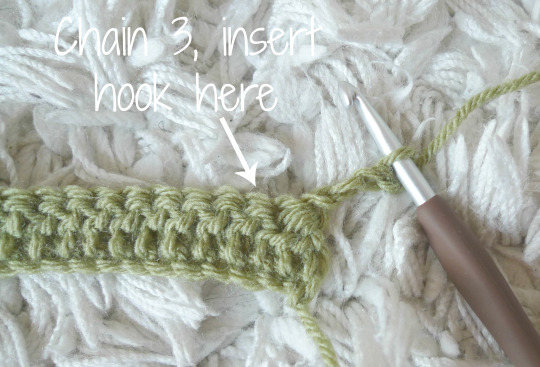
To begin the second row, I chained 3 and then inserted my hook into the 2nd dc below (technically the 5th st from the hook).
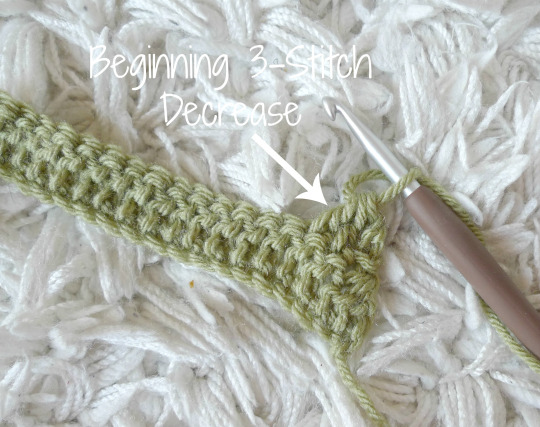
This is where I worked the Beginning 3-Stitch Decrease and then continued the same pattern to build the chevrons! The second and subsequent rows are faster and easier to complete since you’re not working in the chain stitches anymore!
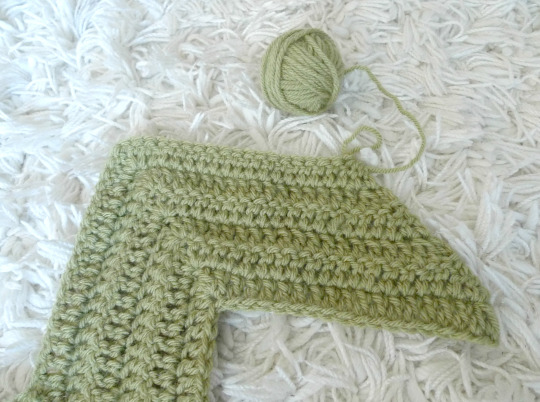
After six rows of my Dusty Green, this colour section was complete! As a pointer, the shell is always worked at the very top point of the previous shell (where the Chain 1 is located). I worked in the Chain 1 stitch rather than the Chain 1 gap to reduce the holes in my blanket.
Only this small ball of yarn was left after six rows! It feels so satisfying using so much of a colour up without too much left-over!
Then I added six rows of the “Sweet Pea” colour!
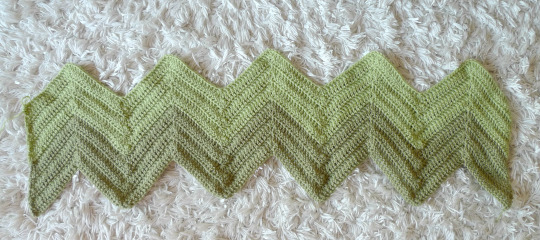
The dense chevron pattern is so striking and very easy to get the hang of once you get going!
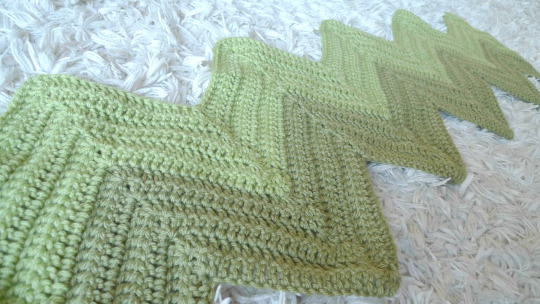
Then I slowly added more and more colours! The beauty of this chevron blanket pattern is that you can use whatever colours you want and have so much fun with it! You can choose to repeat colours, have various shades of the same colour (for an ombré effect, e.g. shades of blue) or the colours of the baby’s nursery. If you’re crocheting a bigger adult blanket, you could go with more sophisticated and muted colours. Since this was a baby blanket, I wanted to use these bright colours, and the combination is fun and unexpected!
***************************************
Here is the pattern for my “Bold & Bright Chevron Baby Blanket”:
Materials:
- Worsted weight yarn (level 4)- I used Lion Brand Yarn’s “Vanna’s Choice” & “Vanna’s Choice Baby” in Cheery Cherry, Lullaby Pink, Angel White, Lamb, Duckie, Sweet Pea and Dusty Green
- 6.00 mm crochet hook
Special stitches:
- Shell: (2 Dc, ch 1, 2 dc) in indicated stitch
- Beginning 3-Stitch Decrease: Chain 3, turn. *YO, insert hook in next dc, YO and pull up a loop, YO and draw through 2 loops on hook. Repeat from * once more, YO and draw through all 3 loops on hook (counts as one dc).
- 5-Stitch Decrease: *YO, insert hook in next dc, YO and pull up a loop, YO and draw through 2 loops on hook; repeat from * 4 times more, YO and draw through all 6 loops on hook (counts as one dc).
- 3-Stitch End Decrease: *YO, insert hook in next dc, YO and pull up a loop, YO and draw through 2 loops on hook; repeat from * 2 times more, YO and draw through all 4 loops on hook (counts as one dc).
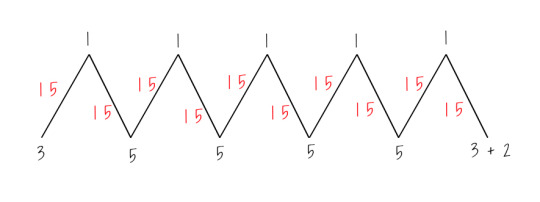
The below diagram shows how I calculated my initial chains! Note that:
- Each high point requires 1 st (shell)
- Each low point requires 5 sts (5-Stitch Decrease)
- The very end/last point requires 3 sts (3-Stitch End Decrease)
- The very beginning point requires 3 sts (Beginning 3-Stitch Decrease) + 2 sts (since you begin by working in the 4th chain from the hook)
- The 15 sts (in red) shows how many stitches are between each high point and low point. You can modify this number if you would like a more gentle and less dramatic chevron/zigzag.
- If you want to stick with the 15 dc’s between each high point and low point but you would like to ADD MORE CHEVRONS, add multiples of 36 (e.g. 1 more chevron = 36 chains, 2 more chevrons = 72 chains, etc).
- All the below numbers add up to 183.
With first colour, Chain 183.
Row 1: Yarn over (YO), insert hook in 4th chain from hook, YO and pull up a loop, YO and draw through 2 loops on hook, YO, insert hook in next ch, YO and pull up a loop, YO and draw through 2 loops on hook, YO and draw through all 3 loops on hook (counts as first dc). Dc in next 15 chains, work Shell in next ch, dc in next 15 chains. *Work 5-stitch decrease, dc in next 15 chains, work Shell in next ch, dc in next 15 chains, rep from * across to last 3 chains. Work 3-Stitch End decrease.
Row 2: Chain 3, turn. In 2nd dc below (or 5th st from the hook), work beginning 3-Stitch Decrease. Dc in next 15 sts, work Shell in next st, dc in next 15 dc. *Work 5-Stitch decrease, dc in next 15 dc, work Shell in next st, dc in next 15 dc, repeat from * across to last 3 dc. Work 3-Stitch End Decrease.
Row 3 and on: Repeat Row 2.
I worked 6 rows for each colour, using 7 colours in total.
Dimensions: 40″/101.6 cm across & 34″/86.4 cm high (from top point to low point)
Potential Modifications:
- If not made for a baby, add fringe/tassels at the ends. See how to do so HERE!
- Crochet in the back or front loops only for greater texture and ridges between each row of chevrons.
- Crochet triangles to fill in the gaps of the high points and low points of the chevrons on the edges of the blanket if you want a square/rectangular shape. Start off with the width of the triangle and decrease stitches on either end to slowly taper it (e.g. see HERE). Elizabeth of Earl Grey Crochet has designed some triangle patterns to specifically work with my Chevron Blanket, so please check out her very helpful blog post and pattern HERE!
- Decrease the number of dc’s between each high and low point (the red number in the diagram above) to make smaller chevrons that are less steep.
- Use the calculations above to increase the number of chevrons and the width of your blanket.
- Crochet around the blanket to give it a more decorative edge.
***************************************
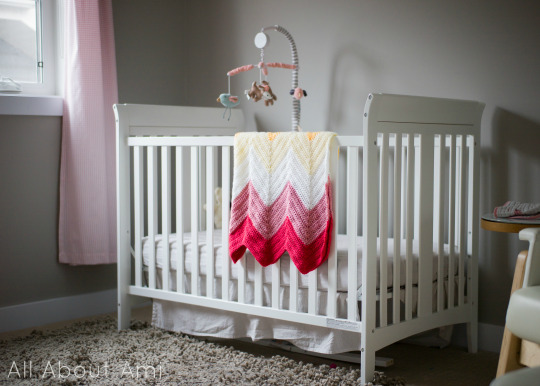
This is what my completed “Bold & Bright Chevron Baby Blanket” looks like! It is a fun and bright addition to Brielle’s nursery! When she uses it, we place the zigzag ends along the sides and tuck them around her.

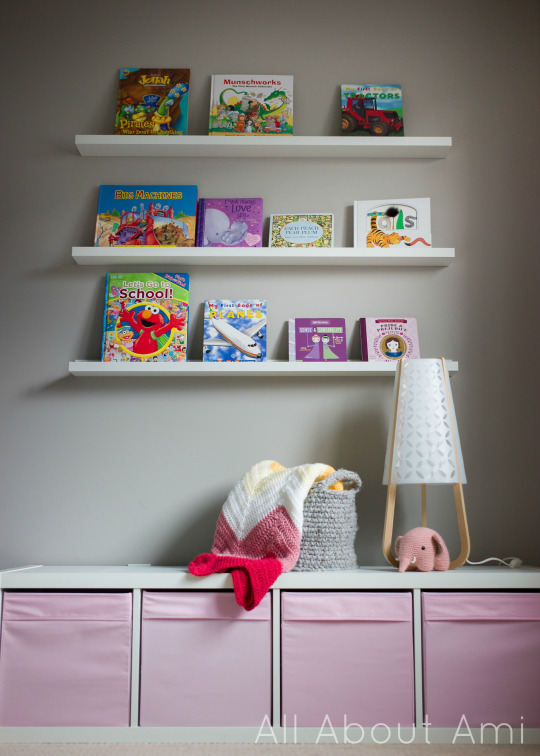
Here it is with some other items in Brie’s nursery, including Rosie the elephant, who was also made using Vanna’s Choice yarn! I’ve seen many people follow my English translation of the elephant amigurumi pattern HERE for baby’s nurseries! Also pictured is my Chunky Basket using Lion Brand Yarn’s Wool-Ease Thick & Quick that I blogged about HERE!
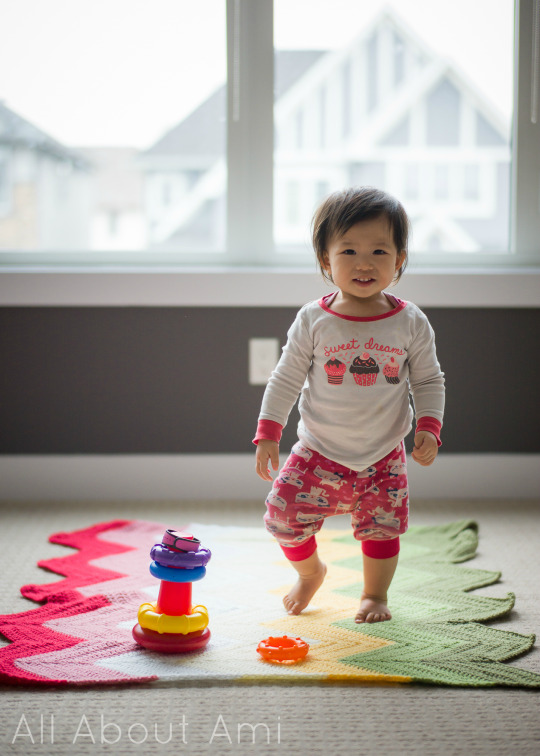
Here is our little sweet pea playing ontop of her colourful baby blanket! The colours remind me of a beautiful Spring garden!
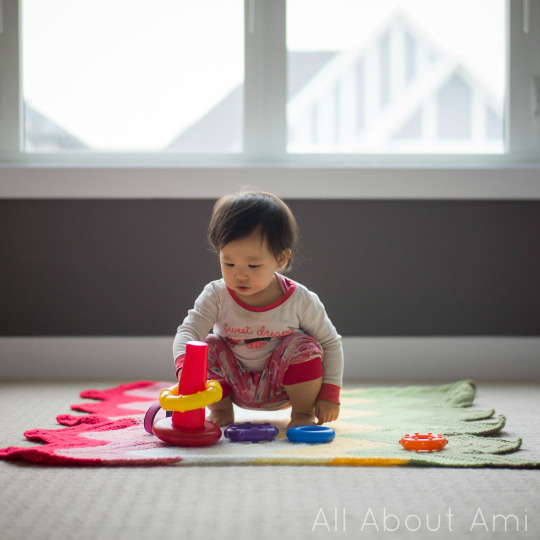
Brielle is so grown up now and does not look like a teeny tiny baby anymore! She is a very precocious, smiley, and jovial little girl who loves learning from her big sister and copying whatever she does!
I thought it was the perfect time to blog about Brielle’s baby blanket since the colours scream Springtime! With so many colours of Vanna’s Choice available, you’re bound to find what you’re looking for, and they’re such an affordable yarn! The chevrons are very bold and striking as each top and low point is very sharp compared to other ripple or wave tutorials out there!
Let us know if you’ll be trying out this chevron pattern and what modifications you make to it!
Don’t forget to follow me on Facebook, Twitter and Instagram to keep up to date with my work!
{This post is sponsored by Lion Brand Yarn! I’ve loved working with their yarn throughout the years and I’m thrilled that I get to collaborate with them every month!}
This pattern is an original pattern by Stephanie Lau of All About Ami. Please do not claim this pattern as your own. If you wish to share this pattern, you may link to this pattern but please do not reprint it on your site. You may keep a copy for your own personal use but please DO NOT sell the pattern or distribute it.
You may sell products made from this pattern but please clearly credit the design to me, Stephanie Lau of All About Ami, and provide a link to my blog www.AllAboutAmi.com. Permission is NOT granted for mass production or factory manufacturing of any kind. Thank you for being respectful and for your understanding!
Amazon Affiliate Link: