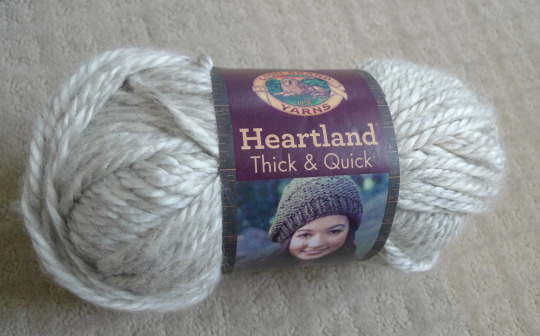
When I first discovered that Lion Brand’s beautiful Heartland yarn came in a super bulky version, I was thrilled! I’ve loved working with the worsted weight version of Heartland in my “Cabled Slouchy Beanie” and my “Granite Cape”. I had one beautiful skein of the colour “Katmai” (the same exact colour I used in my “Granite Cape”) sitting in my stash for a while now, and I had been itching to make something with it. I think it is my new favourite super bulky yarn as it is incredibly soft, drapes well, and has a beautiful “squish” to it without being too stiff or thick.
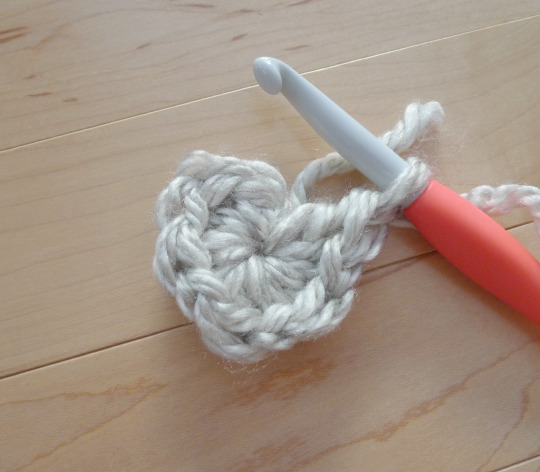
As I was browsing patterns one day, I discovered a stitch called the “Seed Stitch” which is incredibly easy: it is simply alternating single and double crochets! I was impressed that such a simple technique could produce a beautiful texture. You can read full tutorials on how to do the Seed Stitch HERE and HERE. I wanted to work my beanie in joined rounds from the top-down, so I started with a Magic Circle (see how to do this with my full tutorial HERE) using my 9 mm Clover Amour hook. I made 10 stitches, alternating between single and double crochets.
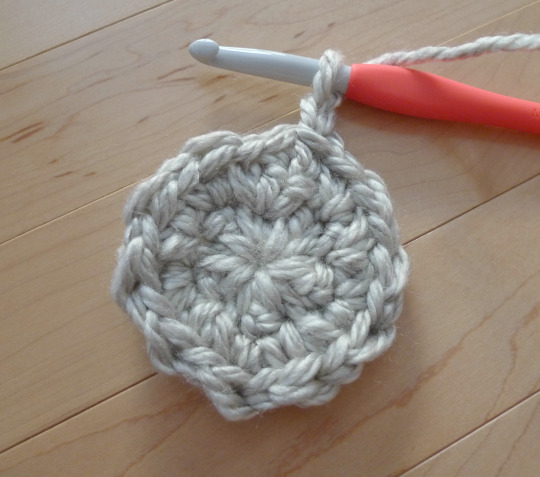
I slip stitched to the first single crochet to close up the round. Since I ended off with a single crochet, I started my next round with a Chain 2 and then a double crochet (I alternated between starting with a single and double crochet for each round).
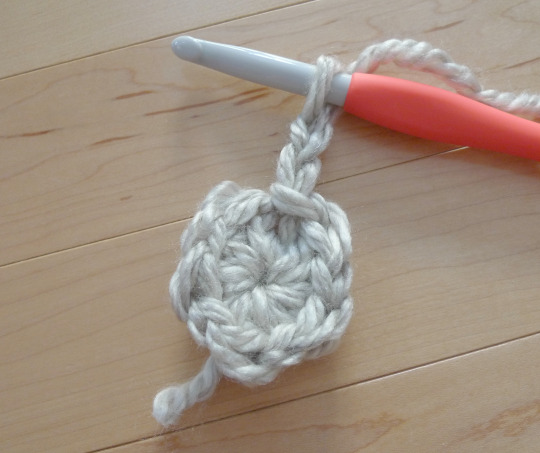
I increased in every stitch for Round 2 (one double crochet and one single crochet in each), so I had 20 stitches in total by the end!
To close off the round, I slip stitched to the first double crochet. Then I chained 1 followed by a single crochet.
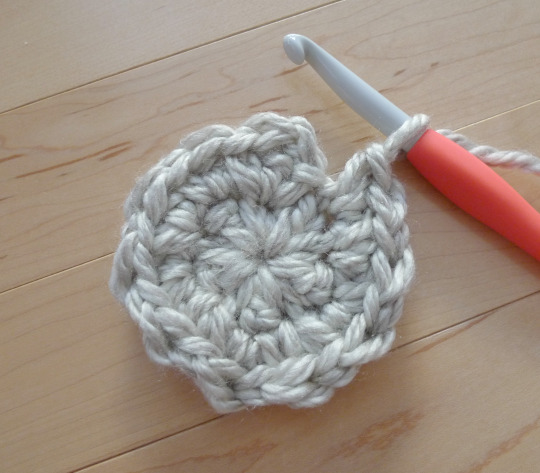
For the third round, I increased every other stitch, bringing the total number of stitches to 30. You can see the interesting texture beginning to develop!
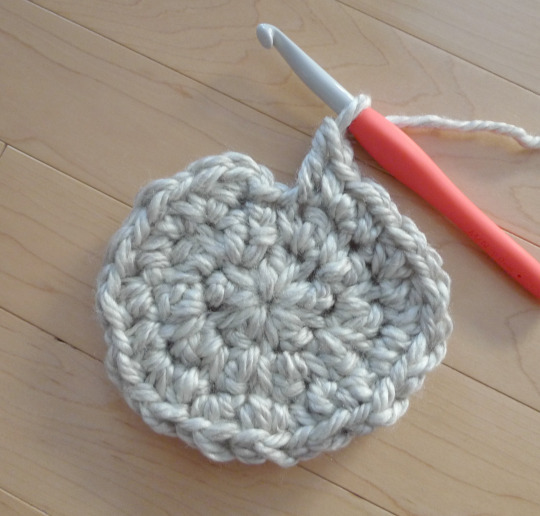
Once again, I closed off the round and this time began with a Chain 2 since I always alternated between chaining 1 and 2 and between starting with a single crochet and a double crochet every other round.
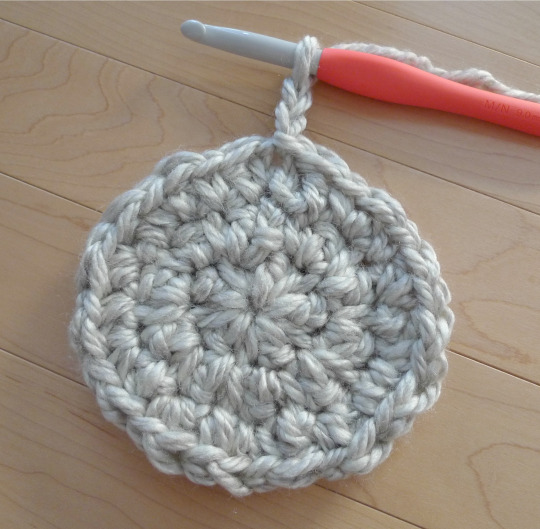
From Round 4 and onwards it is very simple since you simply work one stitch in every stitch (no more increasing). You are always working one single crochet in the double crochet of the previous row (and vice versa), so if you sometimes lose track of your pattern, you can see what your next stitch should be by looking at the stitch below. Another tip is that if you are ending your round with a single crochet, the first stitch of your NEXT round will also be a single crochet (and vice versa).
To add a defined rim to the hat, I did three rounds of LOOSE slip stitches in the back loops only. I find that sometimes crocheting with super bulky yarn can cause garments to stretch quite a bit over time. With this more defined and tight rim, it helps the hat stay on the head and not become too large. With that being said, however, you need to be careful not to slip stitch too tightly or else the hat will be impossible to wear and slip over the head!
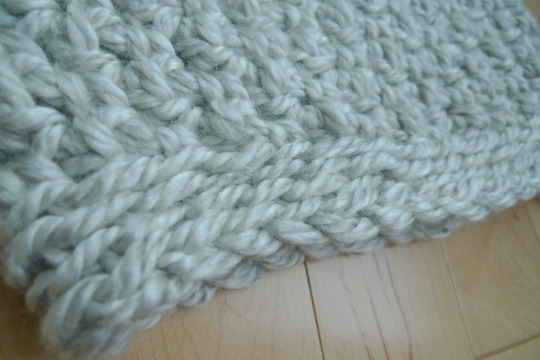
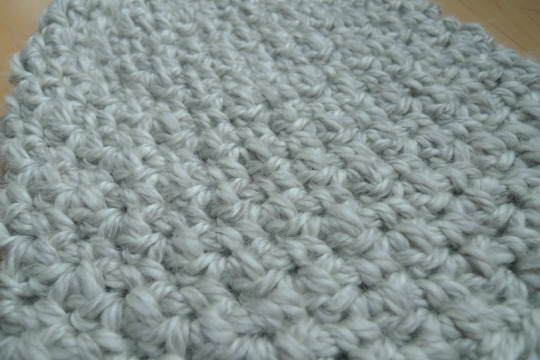
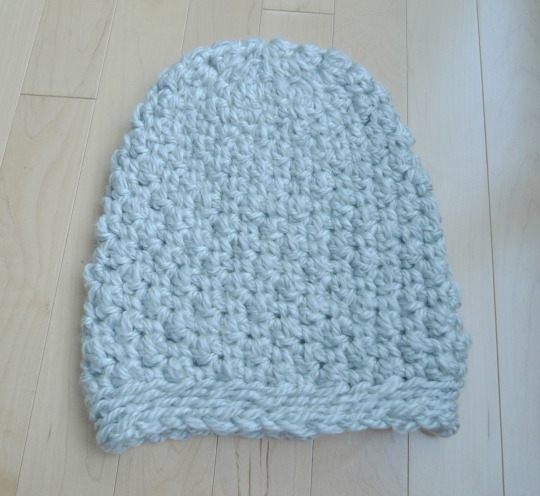
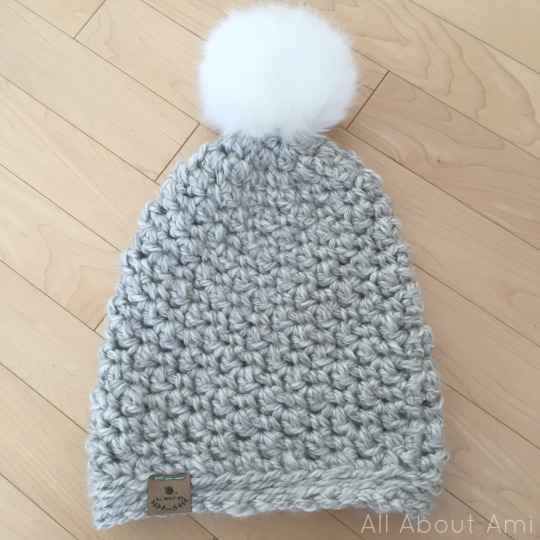
I worked until Round 17 before doing the slip stitches! If you want your beanie to be less slouchy, you can always do fewer rounds. Doesn’t this texture look gorgeous? Who would’ve thought that this look could be achieved by simply alternating single and double crochets!
I wanted to add a fun pom pom to this beanie, so I bought this fluffy white faux fur pom pom (see my post about them HERE)!
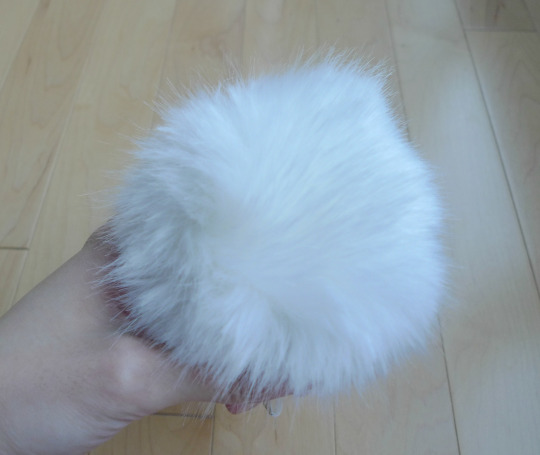
I tried using just the strings that come with the pom pom to attach it to my beanie, but it ended up being pretty flimsy and weak. Thus, I used actual yarn to reinforce the pom pom attachment, sewing the pom pom onto the top of my beanie with a yarn needle.
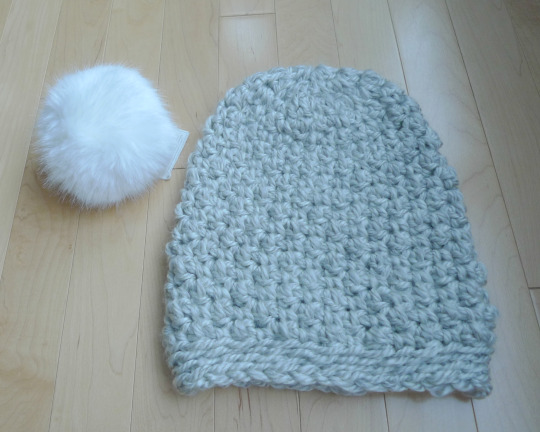
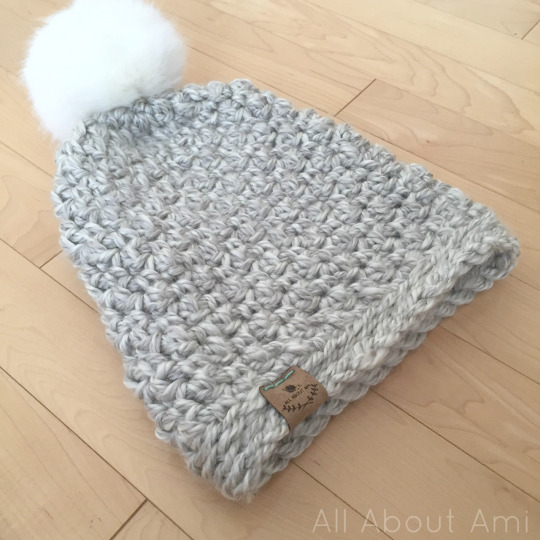
This is what my beanie looks like with the pom pom attached! Such a fun and furry touch!
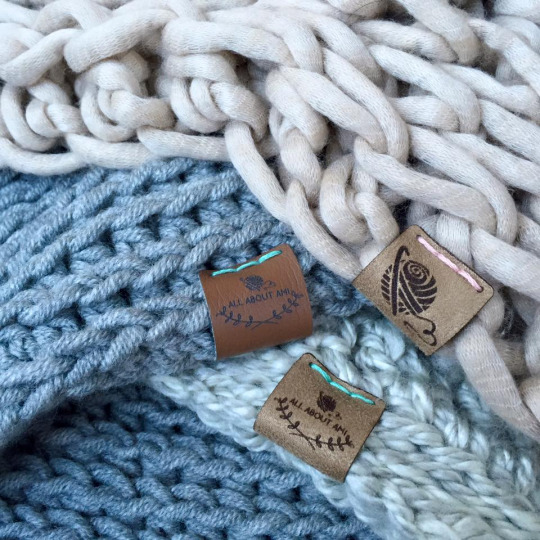
Do you notice the gorgeous ultra suede (fake suede) tag that I sewed onto my beanie? I always wanted some tags for my crocheted pieces even though I don’t sell my work. I think they add such a sophisticated and polished touch, don’t you? I received these samples from Diane of BrickBubble and I will be placing my order soon- you can get ultra suede, ultra leather (fake leather) and wooden tags!
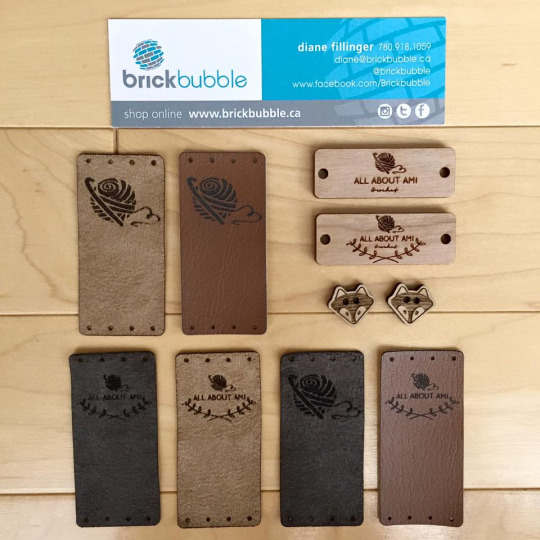
I’ll do a full blog post about them once I receive my tags and a tutorial on how I sew them onto my pieces! Using colourful embroidery floss adds such a fun pop of colour! If you’ve been looking for your own tags, do check out BrickBubble as they come highly recommended (by my followers on social media and myself :D)!
****************
Here is the free pattern for my “Seed Stitch Beanie”:
Materials:
- 9 mm Clover Amour Jumbo Hook
- Super bulky yarn (level 6)- I used 1 skein of Lion Brand Yarn’s “Heartland Thick & Quick” in “Katmai” [Alternatively, you could hold two strands of worsted weight yarn together, e.g. Lion Brand Yarn’s Heartland]
- Optional: Faux fur pom pom
Note:
- Always slip stitch to the first sc or dc of the round, not to the turning chain.
- After you do your turning chain when you are beginning the round, work your first st(s) in the same stitch where you did your slip stitch and turning chain.
- When working the seed stitch (alternating single and double crochets), typically when you end off a round with a single crochet, the first stitch of your next round will be a single crochet (and vice versa with a double crochet).
- You will chain 2 when your round starts with a double crochet, and chain 1 when your round starts with a single crochet.
Round 1: *Sc, Dc*, repeat 5 times in Magic Ring. Sl st to first sc (10 sts).
Round 2: Ch 2. You will be increasing in each stitch around, thus: *Dc, sc* in each st around. Sl st to first dc. (20 sts)
Round 3: Ch 1. Next, we will be doing: *Work one st, then increase in next st* around, alternating between single and double crochets. Written out, this looks like: *Sc in next st, Inc [Dc, sc] in next st*; *Dc in next st, Inc [Sc, dc] in next st* around. You should end off with a dc. Sl st to first sc. (30 sts)
The increases are now complete. Now you will simply be working one stitch in each stitch around.
Round 4: Ch 2. *Dc, sc* around. Sl st to first dc (30 sts).
Round 5: Ch 1. *Sc, dc* around. Sl st to first sc (30 sts).
Repeat Rounds 4 and 5 till desired height/slouchiness is achieved. I went until Round 17.
Now we will work on the rim of the hat.
Round 18: VERY LOOSELY slip stitch around in back loops only (30 sts).
R19-20: Repeat Round 18.
Fasten off and weave in end. Optional: Add faux fur pom pom!
Finished dimensions: 10.5″/27 cm in height, 9″/23 cm at widest part, 18.5″/47 cm circumference
****************
This past weekend we snapped some photos of me wearing my new Seed Stitch Beanie in our snowy surroundings!

This beanie is very soft and has such a lovely texture to it!

This heathered light grey is a gorgeous neutral colour that can match with any outfit- it will be a winter staple for sure!

Below you can see my “All About Ami” tag! It’s so neat to have my own logo on my beanie!

The softness and lightness of the Heartland Thick and Quick enable this beanie to have a lovely slouch to it. Be careful using thicker or stiffer yarns when crocheting slouchy hats as they may end up not draping and simply staying upright! If you do not have any super bulky yarn on hand or it’s difficult to find, you can try holding two strands of worsted weight yarn (level 4) together to achieve the chunkier look (e.g. Lion Brand Yarn’s Heartland)!

My Christmas present this year were these amazing Joan of Arctic Sorel boots! Aren’t they super cute? They are very warm and such a good investment considering how I live in Alberta, Canada where the snow is plentiful and temperatures can dip very low. You can find Joan of Arctic boots on Amazon HERE (I have the Sorel for J.Crew Joan of Arctic boots found HERE).

Take that, snow! You don’t scare me now that I have my warm beanie and Sorel snow boots 🙂 Haha….yay for action shots!

The climate we live in lends itself perfectly to crocheted beanies, cowls, sweaters and mittens…I constantly find myself reaching for the pieces that I crocheted to help keep warm!

Try out this quick beanie that you can whip up in one sitting and with only one skein of yarn! These types of projects are so satisfying since they work up very quickly and have such a beautiful finished look!

{Britannia Parka: Aritzia, Plaid Shirt: Old Navy, Joan of Arctic Boots: Sorel, Seed Stitch Beanie: Me!}
Have fun trying out the simple seed stitch and whipping up these beanies in no time 😉 Share your photos with me on
Facebook, Twitter (@AllAboutAmi) and Instagram (@AllAboutAmi)
, and be on the look out for some fun giveaways coming up soon! Stay warm, everyone!
This pattern is an original pattern by Stephanie Lau of All About Ami. Please do not claim this pattern as your own. If you wish to share this pattern, you may link to this pattern but please do not reprint it on your site. You may keep a copy for your own personal use but please DO NOT sell the pattern or distribute it.
You may sell products made from this pattern but please clearly credit the design to me, Stephanie Lau of All About Ami, and provide a link to my blog www.AllAboutAmi.com. Permission is NOT granted for mass production or factory manufacturing of any kind. Thank you for being respectful and for your understanding!