We will be vacationing in Disney World soon and I wanted to make something special for baby Brielle! Myla has her princess dresses, I have my Minnie Mouse Ears Headband, and I thought a Minnie Mouse bib would be so cute for our baby girl! Bibs are a must for drooly, teething Brie these days and her bibs pretty much cover most of her outfits- thus, I wanted to make her an adorable Disney-themed bib for her to wear in the parks!
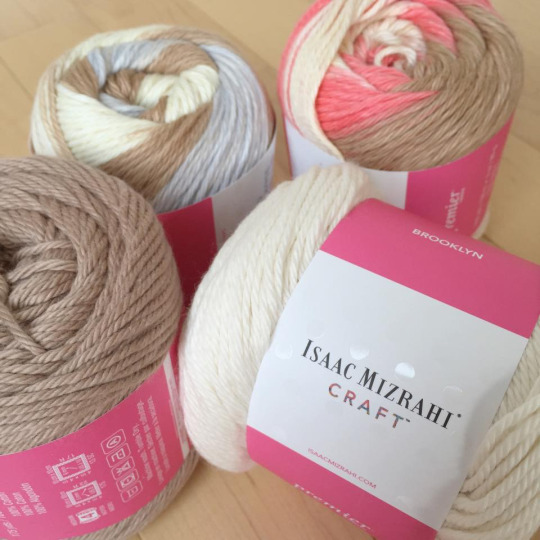
I decided to use the gorgeous 100% cotton Isaac Mizrahi Craft yarn that I had picked up on clearance at Michaels for only $2. This is the same yarn that I used for my little C2C blanket!
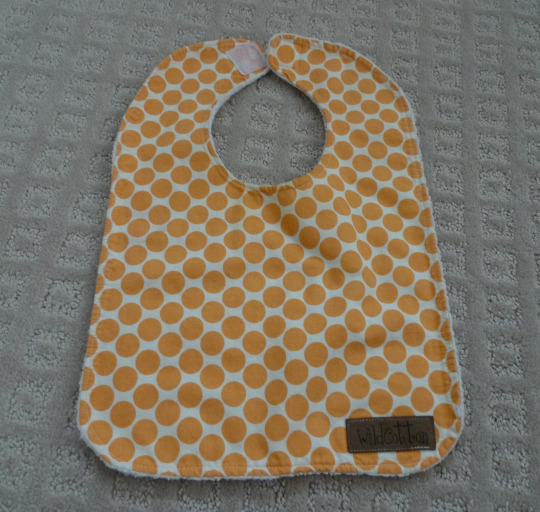
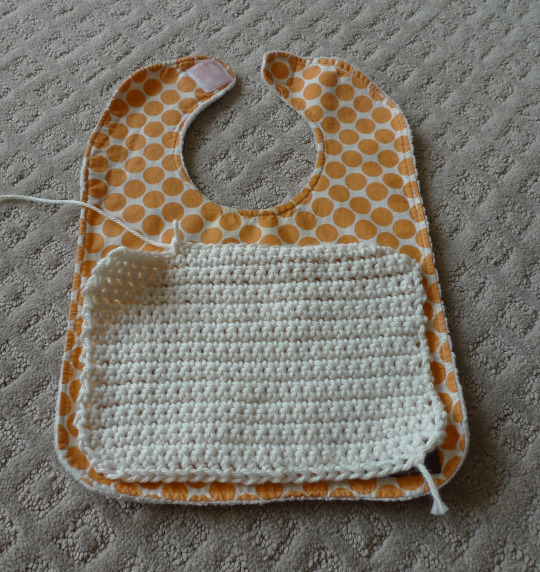
I decided to design my own crochet bib and model it after one of my favourite bibs that Brielle has- this handmade bib lined with minky at the back by WildCotton Gift Co! It is a great size as it provides a lot of coverage for Brielle when she wears it.
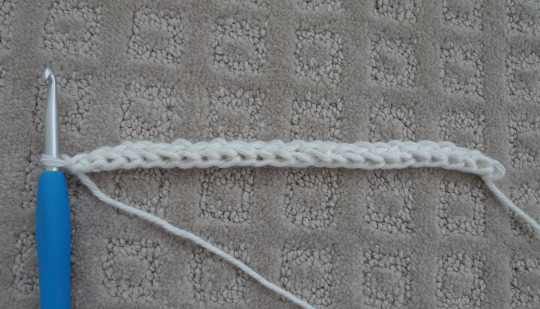
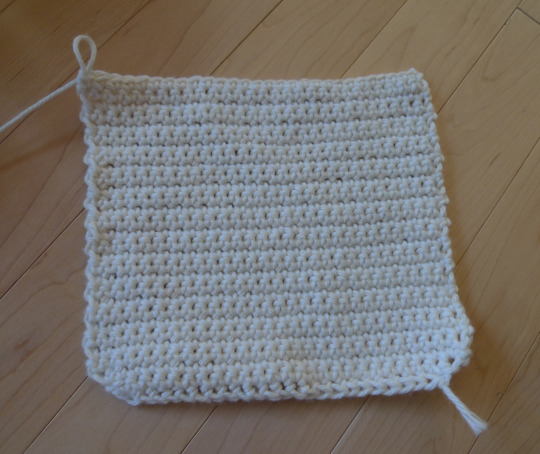
I used my 5 mm hook and started off with some foundation single crochets.
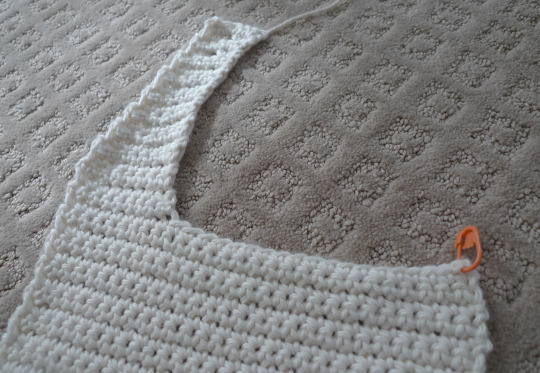
I then increased on the sides to get this slight curved shape.
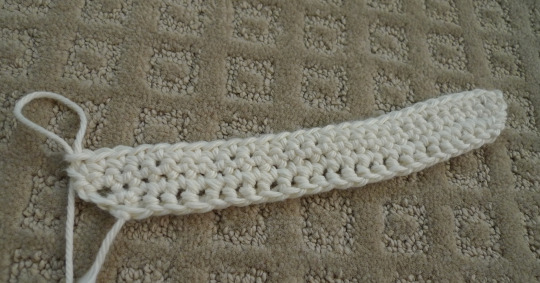
I kept comparing my crocheted piece with the WildCotton bib to ensure I was getting the correct size. I made it slightly smaller as I knew I would add a border along the edge at the end!
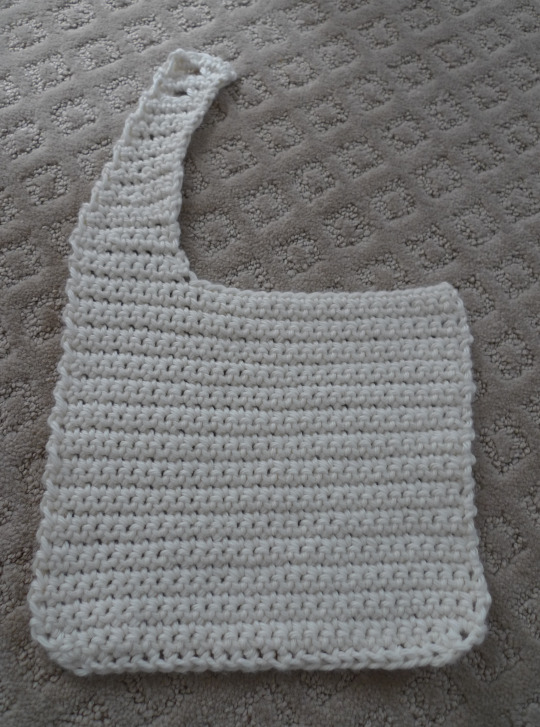
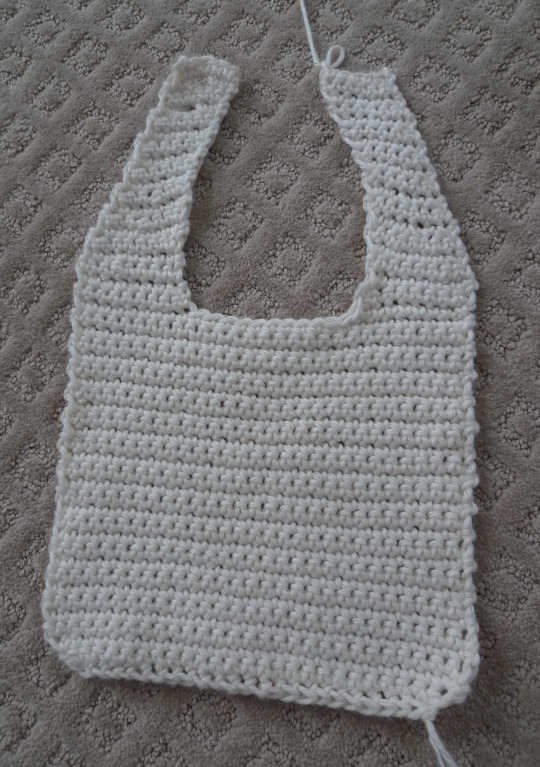
The body is complete!
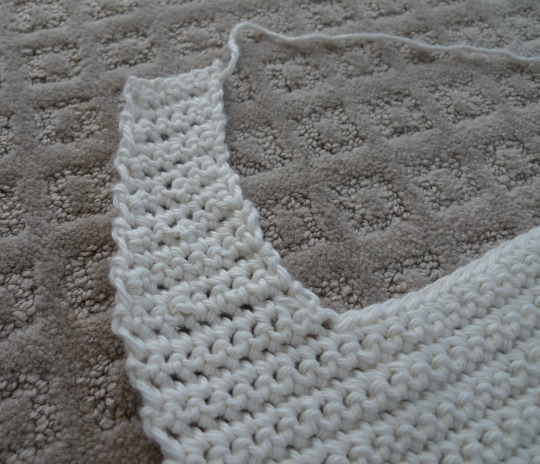
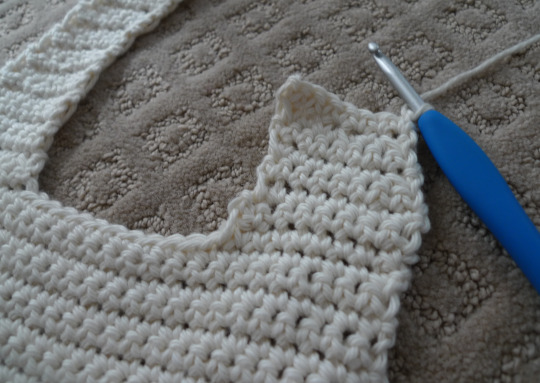
Next I started crocheting the left strap and had it curve towards the center so that it would provide a better fit around the neck rather than going straight upwards.
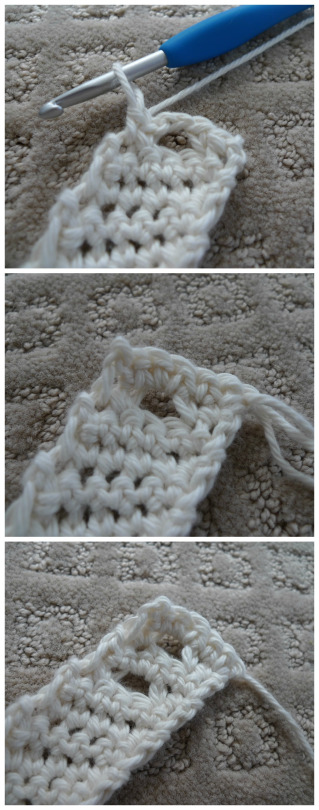
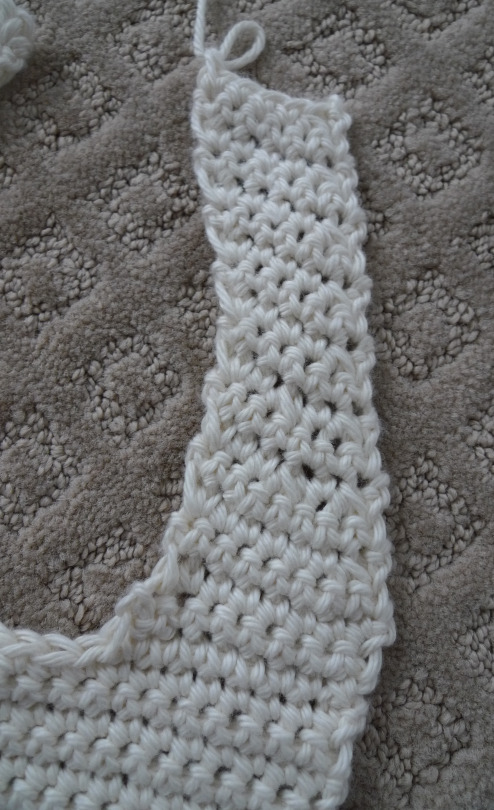
Towards the end of the strap, I skipped some stitches and then crocheted in the chain space on the following row to make a button hole. I made two of these button holes to make the straps a little bit adjustable depending on the size of the baby and in case the bib stretches.
The left strap is now complete!
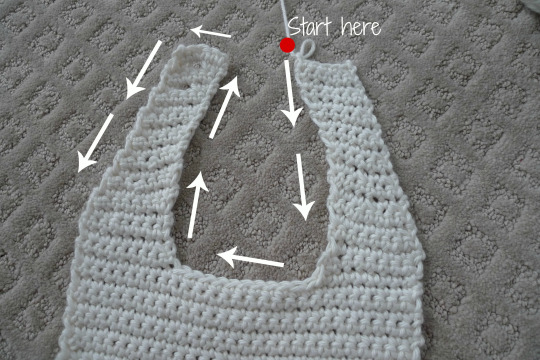
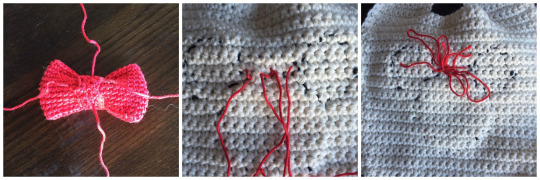
Then I rejoined my yarn on the far right side where the stitch marker is located to begin the right strap.
I followed the exact same pattern to curve the right strap towards the center as well.
This right strap does not need the button holes as this is where we will sew the button!
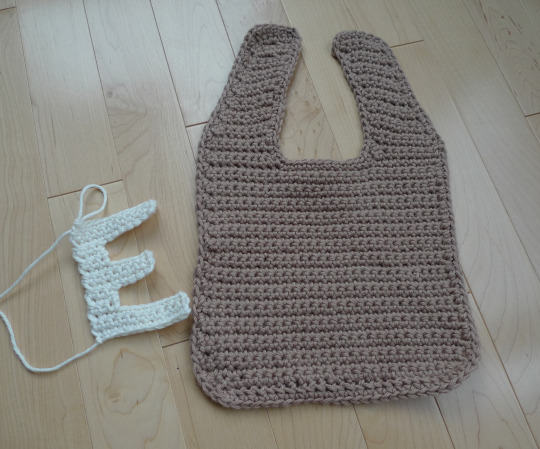
The body and left and right straps are complete!
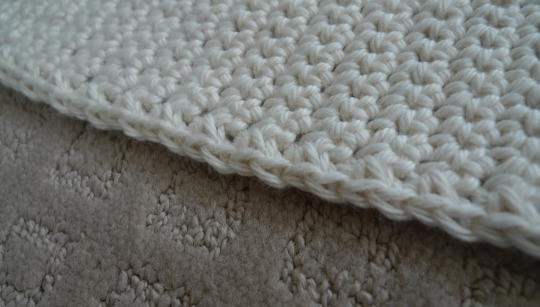
Next I single crocheted around the entire bib to give a more polished edge!
Here is the bib with the finished edging!
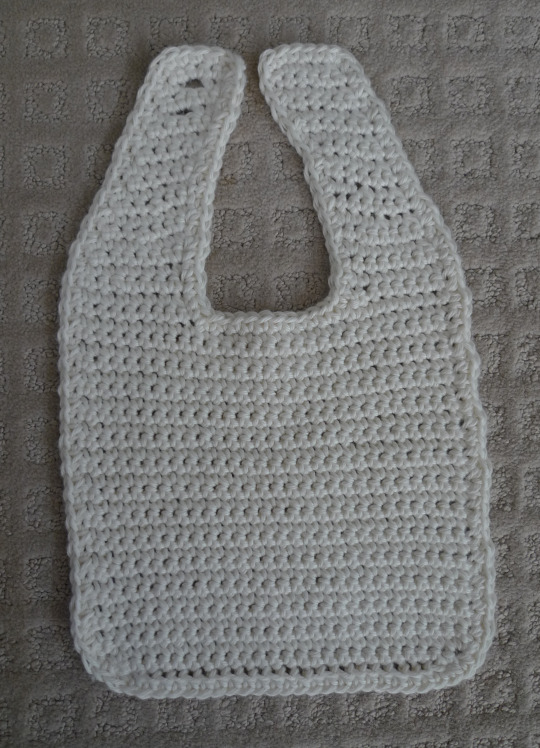
It looks a lot cleaner and polished compared to the jagged edges of crocheting row after row.
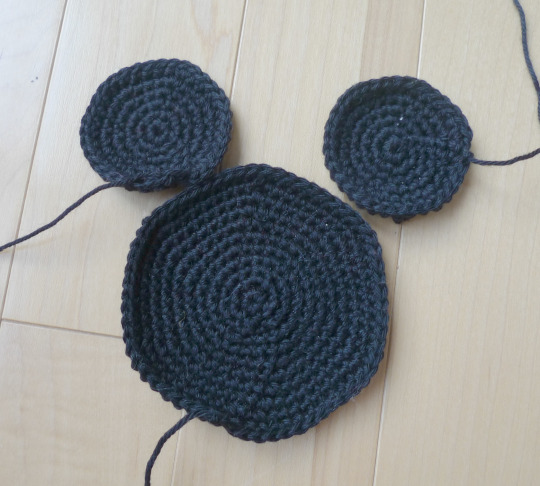
I then crocheted three circles for the Mickey/Minnie applique using lightweight Patons Grace yarn: two small ears and one bigger head.
I used stitch markers to hold the ears in place and then began sewing them to the bib using a yarn needle. I then sewed the head onto the bib so that it slightly overlapped the ears.
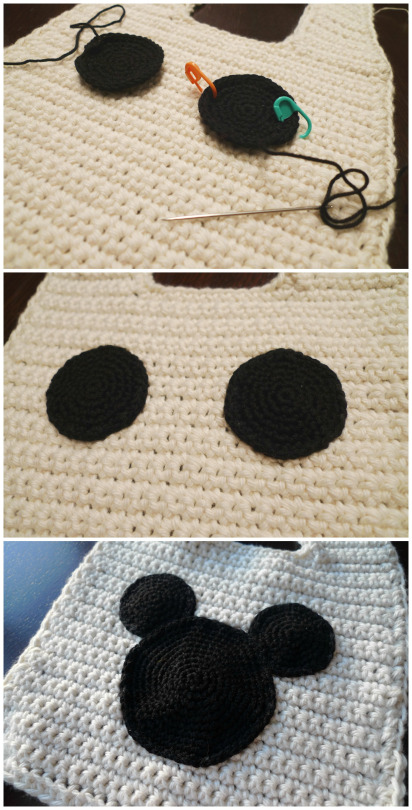
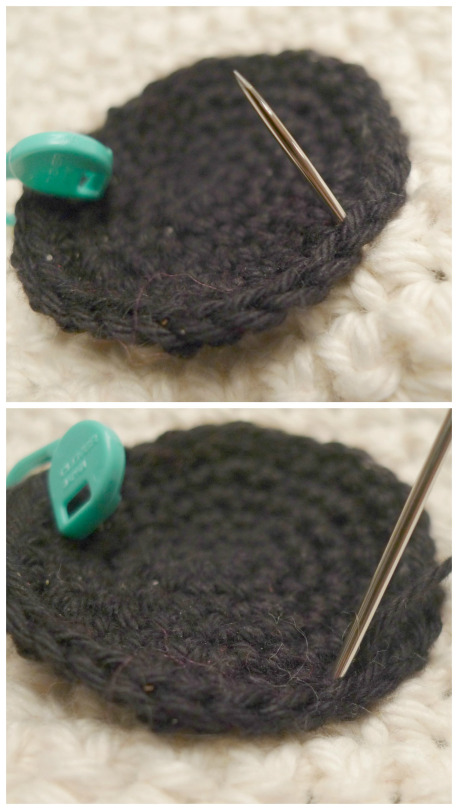
I was careful to sew the black circles onto the bib by weaving my yarn needle under the front and back loops of the last round (rather than whip stitching around the edges). This gives a very clean look as the front and back loops are left untouched.
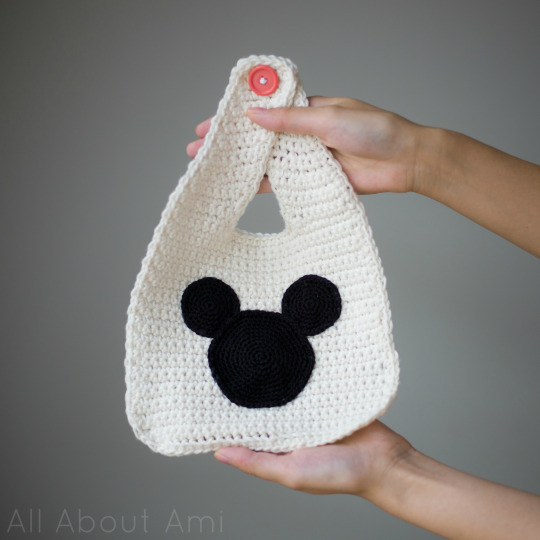
If you want a Mickey bib, you can stop here after sewing on a button!
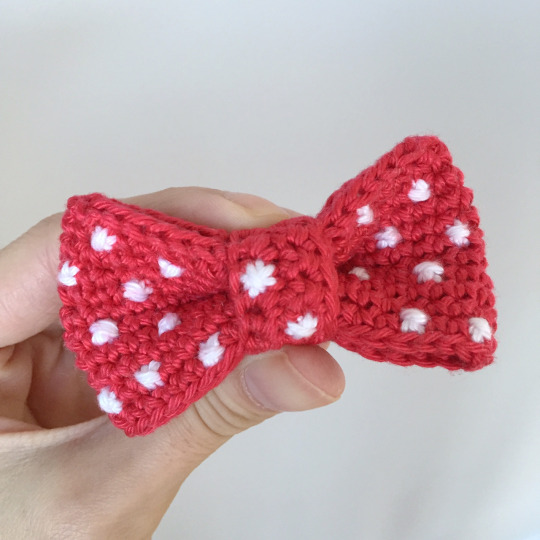
Since I wanted a Minnie bib, however, I started making a bow! I used my red yarn to crochet a tube and then a small strip for the center of the bow.
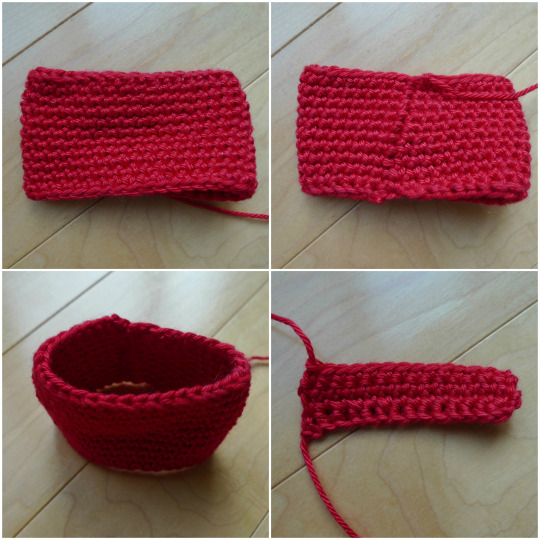
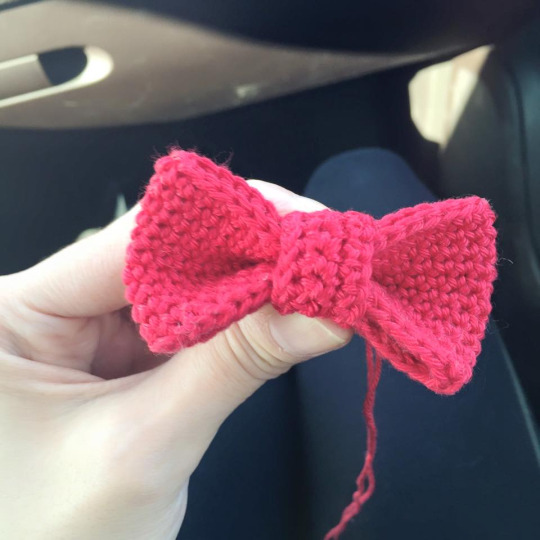
I actually was quickly whipping this up in the car to maximize my crocheting time as Ryan drove! Doesn’t this bow look adorable? You could always leave it like this…
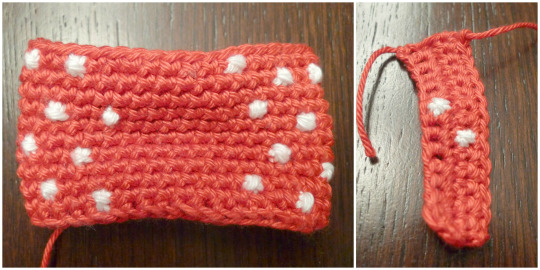
Or you could add polkadots to make it more Minnie-esque! Ryan helped me make polkadots by embroidering little stars onto the body and middle strip of the bow using white yarn (or embroidery floss). Ryan did this by first embroidering a cross (+) and then adding an “X” ontop of the cross! He spaced these polkadots on either side of the body, making sure to leave the middle empty as this is where the strip will go across. Only two polkadots are needed for the middle strip since very little will be visible from the front!
I then pinched the middle of the bow and sewed a couple of rounds together to emphasize the ruching. Next I sewed the strip around the body of the bow to complete it.
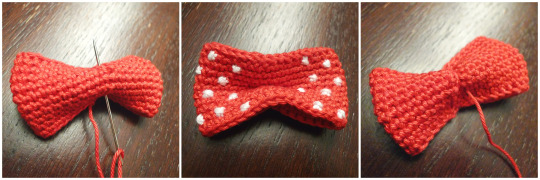
Ta-da! Doesn’t the bow look so adorable? Some people suggested that this could be a really cute bowtie too, which is a wonderful idea!
I decided to make this bow removable in case I don’t want to wash the bow when I wash the whole bib. I used my yarn needle and added two long pieces of yarn to the bow, one going through the length of the bow and the other going through the width. The polkadot bow can then be added to the bib by tying multiple tight bows (rather than tight knots).
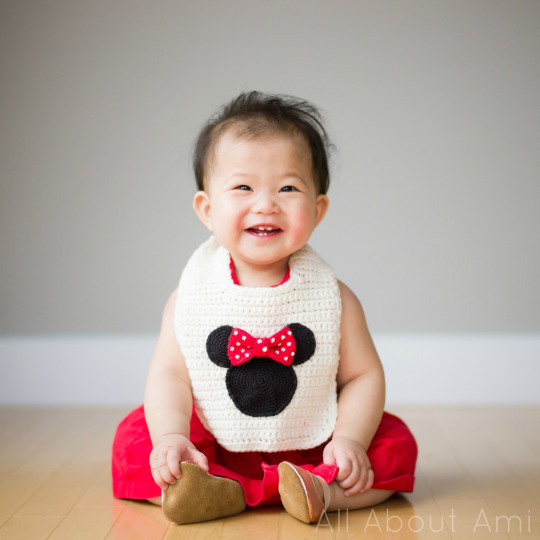
Here is the completed Minnie Mouse Basic Bib! I love how simple and modern it is, and the red bow pops so brightly against the black silhouette!
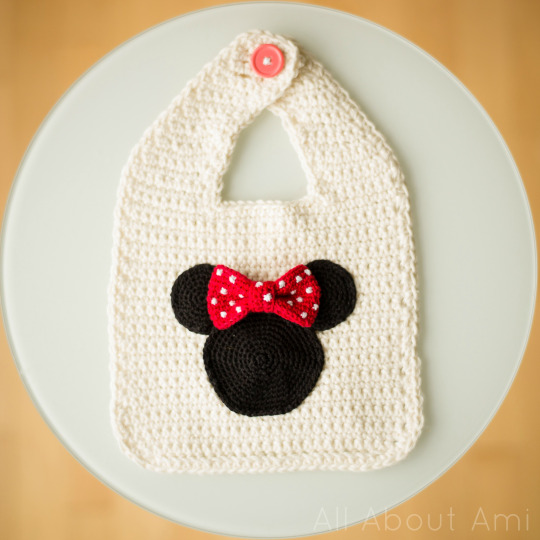
Here is the free pattern for my “Minnie Mouse Basic Bib”!
*********************************
Materials:
- White/beige medium level 4 cotton yarn (I used Premier Yarns “Isaac Mizrahi Craft” yarn in Brooklyn)
- Black, red, white light level 3 yarn (I used Patons Grace)
- 5 mm Clover Amour crochet hook, 2 mm crochet hook
- Button
BIB
Using medium cotton yarn and 5 mm crochet hook,
Row 1: Foundation single crochet 24. Chain 1, turn. (24 sc)
R2: Inc, Sc 22, Inc. Ch 1, turn. (26 sc).
R3: Inc, Sc 24, Inc. Ch 1, turn. (28 sc)
R4-29: Sc 28. Ch 1, turn. (28 sc).
Begin left strap:
R1: Sc 9. Ch 1, turn. (9 sc).
R2: Dec, Sc 7. Ch 1, turn. (8 sc).
R3-4: Sc 8. Ch 1, turn. (8 sc)
R5: Dec, Sc 5, Inc. Ch 1, turn. (8 sts)
R6: Sc 8. Ch 1, turn. (8 sc)
R7: Dec, Sc 1, Dec, Sc 2, Inc. Ch 1, turn. (7 sc)
R8: Sc 7. Ch 1, turn. (7 sc)
R9: Dec, Sc 1, Dec, Sc 1, Inc. Ch 1, turn. (6 sc)
R10: Sc 6. Ch 1, turn. (6 sc).
R11: Dec, Sc 3, Inc. Ch 1, turn. (6 sc)
R12: Sc 6. Ch 1, turn. (6 sc)
R13: Dec, Sc 3, Inc. Ch 1, turn. (6 sc)
R14: Sc 6. Ch 1, turn. (6 sc)
R15: Dec, Sc 3, Inc. Ch 1, turn. (6 sc)
R16: Sc 2, Skip 2, Chain 2, Sc 2. Ch 1, turn. (6 sts)
R17: Dec, Sc 2 in Chain space, Sc 1, Inc. Ch 1, turn. (6 sts)
R18: Repeat R16.
R19: Dec, Sc 2 in Chain space, Sc 1, Inc.
Fasten off.
Begin right strap:
Rejoin yarn at far right side (see picture above where stitch marker is located).
Repeat Rows 1-15 of left strap.
R16: Sc 6. Ch 1, turn. (6 sc)
R17: Dec, Sc 3, Inc. Ch 1, turn. (6 sc)
R18: Repeat R16.
R19: Dec, Sc 3, Inc. (6 sc)
Do not fasten off. Single crochet around entire border of bib.
Sew button onto right strap.
Approximate size: 31 cm (12″) x 20 cm (8″)
MICKEY/MINNIE MOUSE APPLIQUE
When crocheting these circles, I worked in joined rounds and closed up each round by slip stitching to the top of the first sc, not to the ch 1. Then a chain 1 is made to begin the next round. The first stitch/stitches of each round are worked in the same stitch where the chain 1 is located.
Using black yarn and 2 mm crochet hook,
Head:
Round 1: 6 sc in Magic Ring. Slip stitch to top of first sc. Chain 1. (6 sc)
R2: Inc around. Sl st to close, Chain 1. (12 sc)
R3: *Inc, Sc 1*, rep 6 times.
Sl st to close, Chain 1. (18 sc)
R4: *Inc, Sc 2*, rep 6 times. Sl st to close, Chain 1.
(24 sc)
R5: *Inc, Sc 3*, rep 6 times. Sl st to close, Chain 1.
(30 sc)
R6: *Inc, Sc 4*, rep 6 times. Sl st to close, Chain 1.
(36 sc)
R7: *Inc, Sc 5*, rep 6 times.
Sl st to close, Chain 1.
(42 sc)
R8: *Inc, Sc 6*, rep 6 times.
Sl st to close, Chain 1.
(48 sc)
R9: *Inc, Sc 7*, rep 6 times.
Sl st to close, Chain 1.
(54 sc)
R10: *Inc, Sc 8*, rep 6 times.
Sl st to close, Chain 1.
(60 sc).
R11: Sc 60. Sl st to close.
Fasten off and leave long end for sewing.
Ears (make 2)
Round 1: 6 sc in Magic Ring. Slip stitch to top of first sc. Chain 1. (6 sc)
R2: Inc around. Sl st to close, Chain 1. (12 sc)
R3: *Inc, Sc 1*, rep 6 times. Sl st to close, Chain 1. (18 sc)
R4: *Inc, Sc 2*, rep 6 times. Sl st to close, Chain 1. (24 sc)
R5: *Inc, Sc 3*, rep 6 times. Sl st to close, Chain 1. (30 sc)
R6: *Inc, Sc 9*, rep 3 times. Sl st to close. (33 sc)
Fasten off and leave long end for sewing.
Sew two ears onto bib. Sew head onto bib, slightly overlapping the ears.
BOW
Using red yarn and 2 mm crochet hook,
Bow body:
Round 1: Foundation single crochet 36. Join with slip stitch to first sc. (36 sc) .
R2: Chain 1. Sc in same st as ch 1, sc around. (36 sc).
R3-11: Repeat round 2.
Fasten off.
Middle strip:
Row 1: Foundation single crochet 14. Chain 1, turn. (14 sc)
R2-3: Sc 14. Ch 1, turn. (14 sc).
R3: Sc 14. (14 sc)
Fasten off and leave long end for sewing.
Using white yarn/embroidery floss and yarn needle, embroider polkadots onto bow body and middle strip (first embroider a cross (+) and then an “x” ontop of the cross).
Sew middle strip around body of bow.
Attach bow onto bib.
*********************************
This Minnie Mouse bib provides great coverage and is very cute and modern!
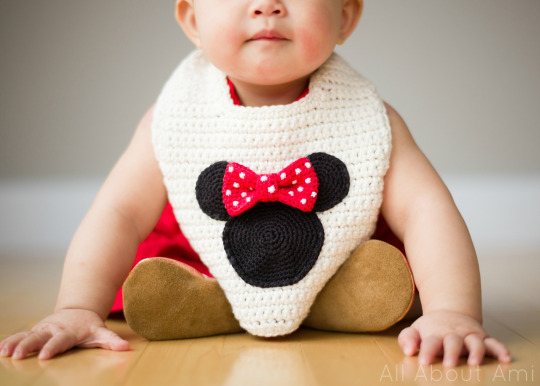
Doesn’t our sweetheart Brielle look so darling in it?
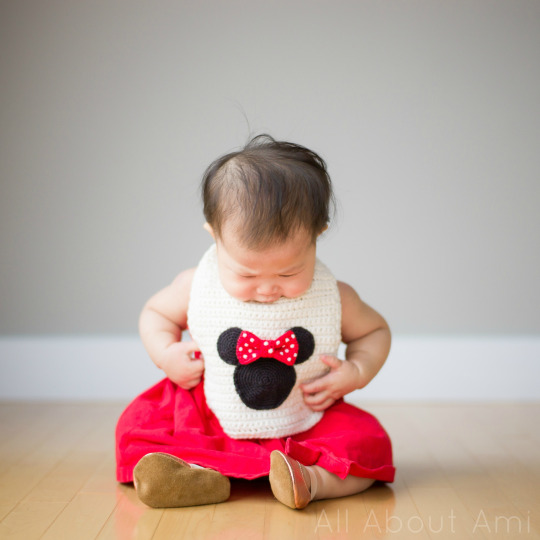
She is examining her own bib too and feeling how soft it is…
If you do not want to add an applique, you could make a plain bib perhaps using variegated yarn for a neat striped effect!

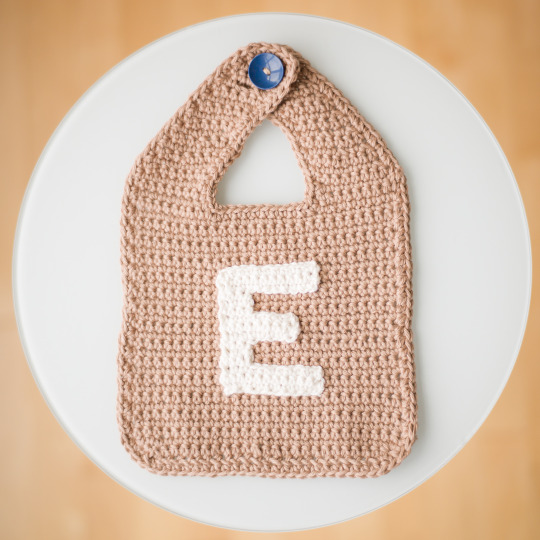
Another idea is to add personalized letters onto your bibs! I used Tamara’s “Moogly Crochet Alphabet” to crochet this E for a pregnant friend!
Doesn’t this make such a special gift? If you use thinner yarn or embroidery floss, you could add the whole baby’s name onto the bib, or possibly a funny phrase!
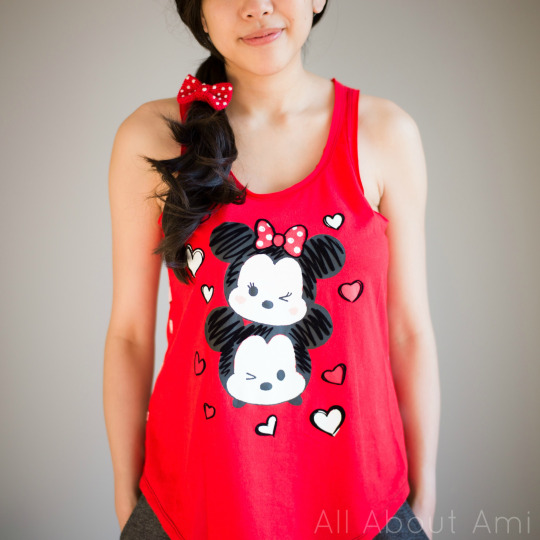
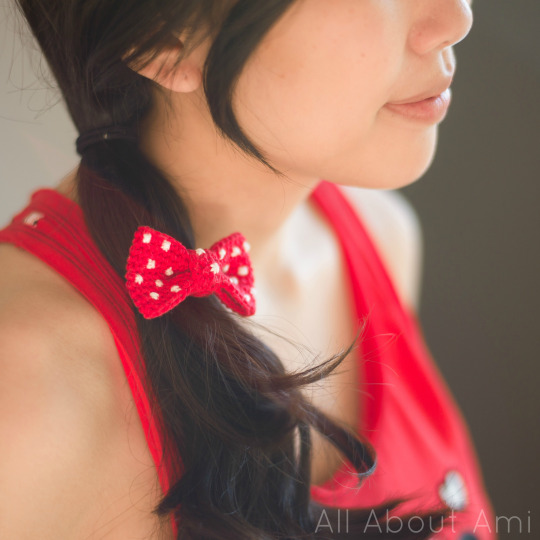
I adore the little polkadot bow that we made! It can also be a very cute hair accessory as it livens up a ponytail and would also look adorable on a bun/topknot! We are getting sooo excited for our trip to Disney World! I picked up this adorable “Mickey and Minnie Mouse “Tsum-Tsum” Tank top” from the Disney Store. Be forewarned, however, that sizes run VERY small as it is Japanese sizing. I read the reviews online and made sure to buy a larger size when I visited the store. I typically wear small/medium, but I like my tank tops to be a bit looser so I purchased this in an XL!
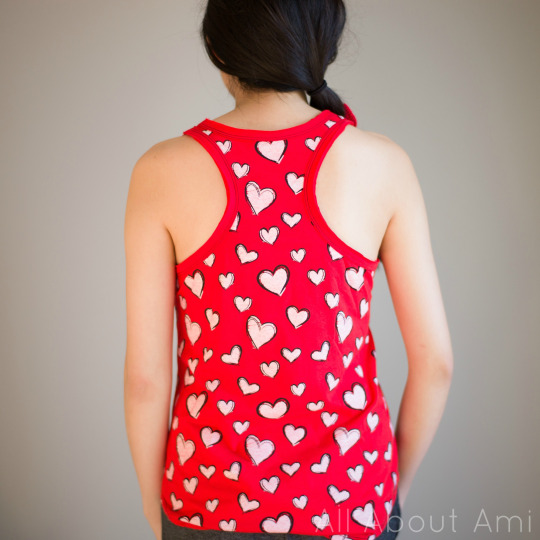
Isn’t the back adorable? Love these graphic hearts that pop!
Bows are just so feminine and pretty!
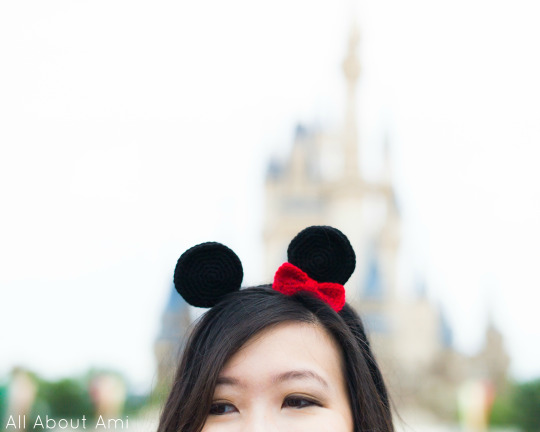
You could also use this new polkadot bow for my “Minnie Mouse Ears Headband” that I designed 3 years ago! I will be wearing it again on this upcoming trip. It’s surreal to think that I was pregnant with Myla in the photo below as we traveled to Tokyo Disney for our babymoon!
Have fun crocheting these bibs and bows and making them your own! You can use my basic bib pattern as a base and add any applique (check out this directory HERE for free patterns), letter or design that you like. You can never have too many bibs with a drooly or teething baby, and you might as well make them cute since they will be wearing them so frequently! The Mickey/Minnie applique can be sewed onto many different items such as dishcloths, scarves, sweaters, beanies and much more. Enjoy these bibs and polkadots bows, my fellow Disney lovers!
This pattern is an original pattern by Stephanie Lau of All About Ami. Please do not claim this pattern as your own. If you wish to share this pattern, you may link to this pattern but please do not reprint it on your site. You may keep a copy for your own personal use but please DO NOT sell the pattern or distribute it.
You may sell products made from this pattern but please clearly credit the design to me, Stephanie Lau of All About Ami, and provide a link to my blog www.AllAboutAmi.com. Permission is NOT granted for mass production or factory manufacturing of any kind. Thank you for being respectful and for your understanding!