Two weeks ago I blogged about the “Cabled Slouchy Beanies” that I designed and crocheted for Myla and I. Thank you so much for all the warm feedback you’ve given me about that pattern, and I’m delighted to hear that you found my step-by-step tutorial easy to follow and understand! Cabling in crochet really isn’t that difficult once you get the hang of it, and I’m glad that you’ve enjoyed learning this new technique and making cabled beanies of your own!
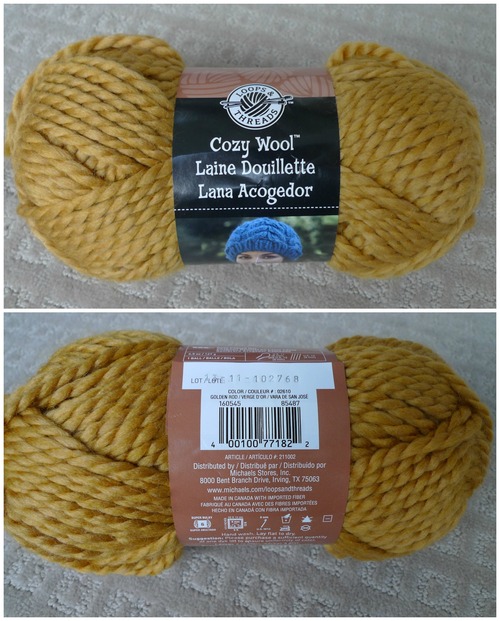
Before crocheting those beanies using worsted weight yarn, I actually started off by crocheting a “Chunky Cabled Slouchy Beanie” using super bulky yarn! I had always wanted to make a super chunky beanie, and I wanted to try the cabling technique I had learned from my “Cabled Wrist Warmers” with this hat. I loved this gorgeous mustard yellow yarn called “Goldenrod” in “Loops & Threads Cozy Wool”. I needed about 2 skeins of this yarn to make this beanie (including the pom pom with some yarn left over).
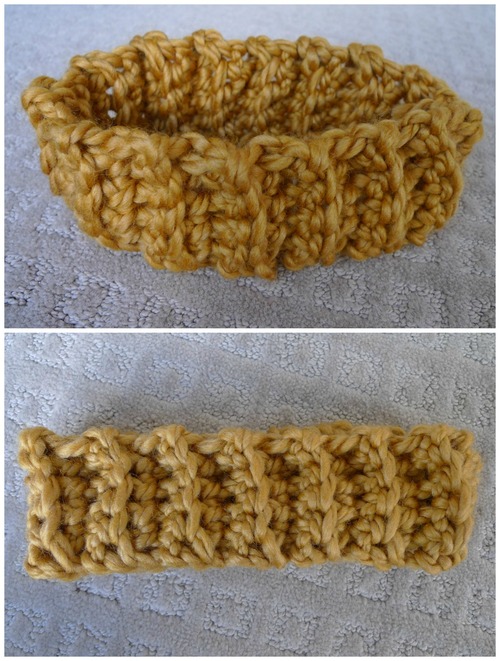
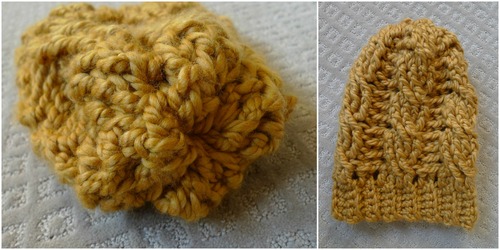
This beanie is constructed the exact same way as the “Cabled Slouchy Beanie”! Of course, the numbers are very different since you are using super bulky yarn (level 6) versus worsted weight yarn (level 4). You start off by crocheting the ribbed band! I used a 10 mm hook with this project, and I must warn you that my beanie ended up stretching A LOT! Thus, I would recommend trying to adjust for this by either making your ribbed band smaller than you think it should be or perhaps using a smaller crochet hook (maybe an 8 or 9 mm).
You then work double crochets around the edge of the band, and then begin your cabling in the subsequent rounds. Please refer to the very detailed step-by-step pictures and instructions I wrote up regarding cabling HERE in my “Cabled Slouchy Beanie” post! The technique is exactly the same!
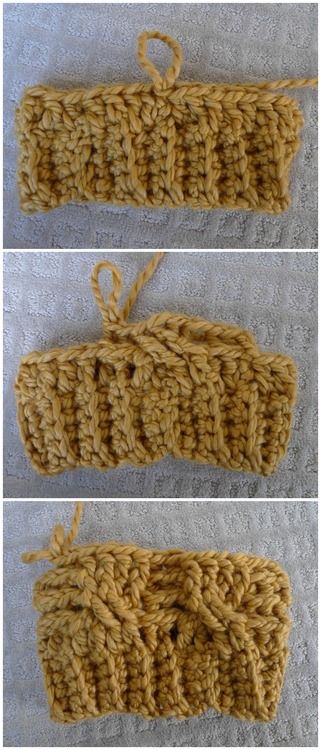
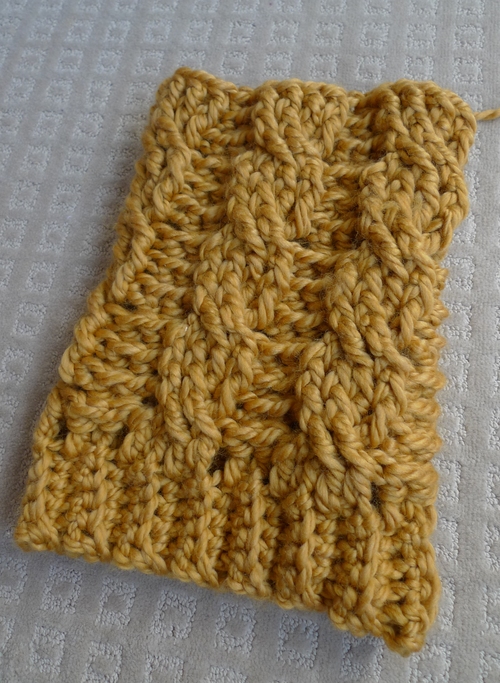
I ended up doing 4 sets of chunky cables! Don’t the cables look so plump and textured? I was curious what more delicate cables would look like after making this beanie, which is why I made the other beanies with worsted weight yarn for Myla and I!
After closing up the top of the beanie…
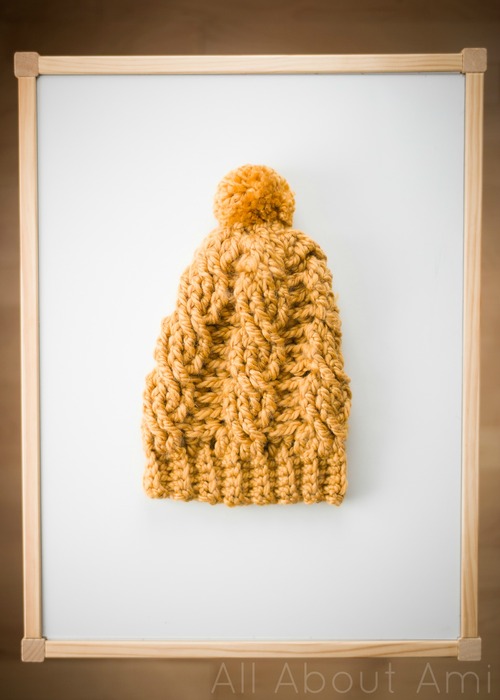
I then used my “Clover Pom Pom Maker” to make a super fluffy yellow pom pom using the super bulky yarn! You can read my review about this awesome pom pom maker tool HERE 🙂

After attaching the pom pom, this was my finished “Chunky Cabled Slouchy Beanie”! Doesn’t it look so warm and soft?
***************************************
Here is the free pattern for my “Chunky Cabled Slouchy Beanie“!
***You can purchase an INEXPENSIVE AD-FREE PDF of this pattern on Etsy HERE! This beautifully formatted PDF is a total of 11 pages including the cover page. It includes the step-by-step picture tutorial and FOUR patterns: the Adult Cabled Slouchy Beanie, Toddler Slouchy Beanie, Chunky Cabled Beanie, and Cabled Beanie version 2!
– This is not a beginner’s project as some previous crochet experience would help! PLEASE refer to the step-by-step pictures found HERE in order to make this technical pattern easier to understand!
Materials:
- 10 mm Clover Amour crochet hook (or 8-9 mm hook- see important note below)
- Super bulky yarn, level 6 (I used Loops & Threads Cozy Wool in “Goldenrod”, 2 skeins)
- Optional: yarn needle to seam up beanie; Clover Pom Pom Maker
Special stitches:
- Front Post Treble Crochet (Fptc): Yarn Over (YO) twice, insert hook from front to back around post of stitch indicated. YO and pull up a loop, [YO and draw through 2 loops on hook] 3 times.
- Back Post Double Crochet (Bpdc): YO, insert hook behind post of stitch (insert hook from back to front of stitch), YO, pull up a loop, YO, (pull through 2 loops) twice.
- Front Post Double Crochet (Fpdc): YO, insert hook behind post of stitch (insert hook from front to back of stitch), YO, pull up a loop, YO, (pull through 2 loops) twice.
Ribbed Band:
Chain 6
R1: In back loops only, Sc 1 in second chain from hook and in each chain across (5 sc).
R2-30: Chain 1, turn. In back loops only, Sc 1 in second chain from hook and in each chain across (5 sc).
My ribbed band measured 18” or 45 cm. Adjust this number based on your own head size. Keep in mind that this band is capable of stretching a lot since we are working with super bulky yarn and a large crochet hook. Fasten off and leave long end for sewing. Sew short ends together to form ribbed band.
Cabled Body:
***In each round, the Ch 2 does not count as a stitch. When joining at the end of each round, join to the stitch indicated (NOT the Ch 2) to make an invisible seam.
Join yarn with sl st at any point around edge of band.
Round 1: Chain 2, work one double crochet in same st as Chain 2. Work 29 dc as evenly as possible around edge of band. Join with sl st to first dc (30 dc). [If adapting the pattern, make sure your final number of dc’s is a multiple of 6.]
R2: Chain 2, Bpdc around first dc from previous round (same dc you joined to from Round 1). Bpdc around next st. Work cabling: {Skip next two dc, 2 Fptc around next 2 dc. Fptc around first skipped dc and next dc}. *2 bpdc in next two st. Work cabling: Sk next 2 st, 2 Fptc around next 2 st. Fptc around first skipped st and next st.*, rep 4 times. Join with sl st to first Bpdc. (5 cables around with 5 sets of Bpdc’s between)
R3: Chain 2, Bpdc around first Bpdc from previous round. Bpdc around next st. Fpdc 4. *Bpdc 2, Fpdc 4*, rep 4 times . Join with sl st to first Bpdc. (5 cables around with 5 sets of Bpdc’s between)
R4: Repeat Round 3.
With rounds 2-4, one set of cables is complete! Keep repeating Rounds 2-4 until desired length.
R5-7: same as Round 2-4
R8-10: same as Round 2-4
R11-13: same as Rounds 2-4
I completed 4 sets of cables with my beanie measuring 11.25” or 29 cm (including ribbed band). Fasten off and leave long end for sewing. Weave yarn through ends of last round, pull tightly and sew hole shut. Alternatively, seam up beanie using this method HERE.
Optional: Add pom pom (I used my “Clover Pom Pom Maker”). Attach pom pom to beanie and you are DONE!
****IMPORTANT NOTES:
- Because of the chunkiness of this yarn and the large 10 mm crochet hook used, my beanie ended up stretching A LOT! Please keep this in mind as you may want to make this beanie smaller so that it has room to stretch later on. You could do this by making your ribbed band shorter or by using a smaller crochet hook (8 or 9 mm)!
- Adding the pom pom to this hat makes it somewhat back heavy as this hat tends to slide off my head (this is probably also due to the fact that it has stretched quite a bit). You could omit the pom pom, make it less slouchy (by doing fewer rounds) or also make the ribbed band wider (i.e. chain more than 6 in the beginning). I have a larger-than-average head, so if this hat ended up being too big for me, it might be too big for you. It actually fits Ryan comfortably now! Please adapt this pattern as you see fit!
***************************************

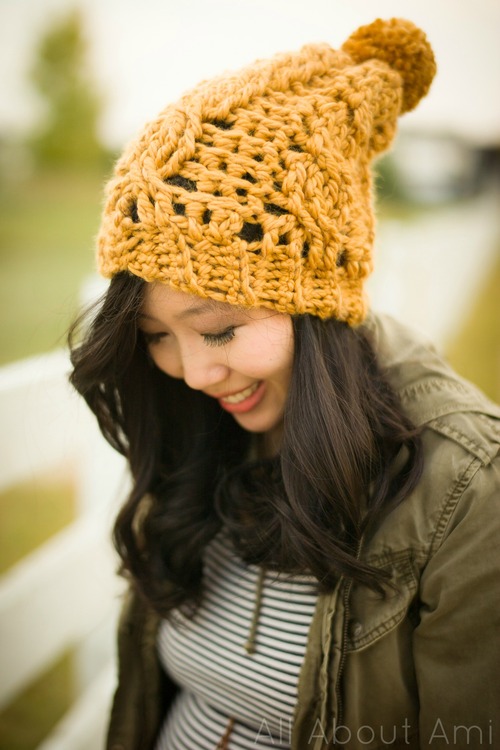
This beanie is very warm, and I love the chunky look of it! As you can see in the picture below, this beanie does stretch quite a bit, particularly in the back double crochet part between the cables….
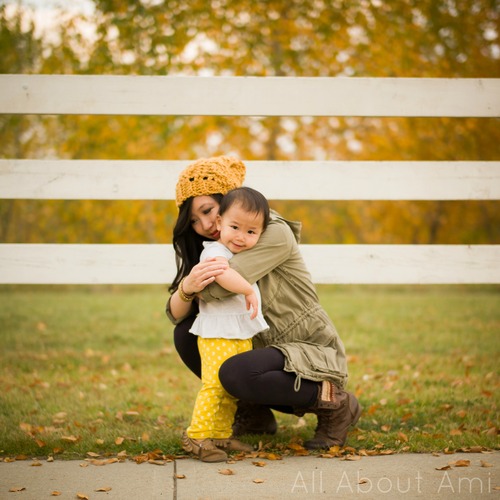
Cuddling with my little cutie! I really adore this golden yellow colour- it’s so perfect for fall and will add a nice pop of colour to my winter wardrobe 🙂
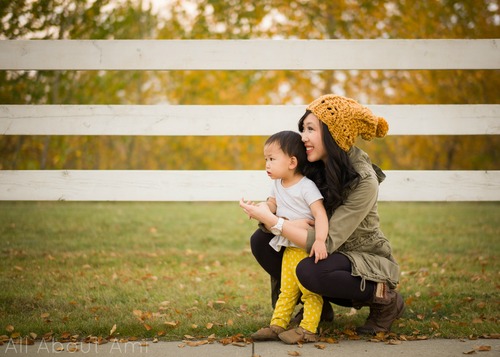
[Striped Tunic: Urban Outfitters, Jacket: Aritzia, Boots: Steve Madden; Chunky Cabled Beanie: Me :D; Belt: Aldo Accessories; Gold Leather Bracelet Cuff: Mahina; Watch: Michael Kors]
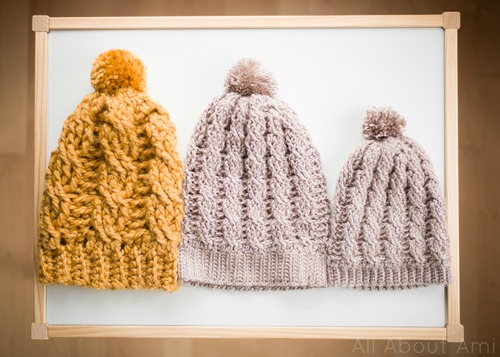
Here are my Cabled Beanies altogether 🙂 Using the worsted weight yarn definitely has a more delicate look as you can see the cables better. The chunky super bulky yarn gives a lot of texture and a puffier look, and it works up extremely quickly since you are working with such a large crochet hook and chunk yarn! I love how this pattern can be easily adapted for different yarns and for different head sizes! Check out this helpful chart HERE to reference hat circumference and hat height measurements for different age groups. Once again, my “Cabled Slouchy Beanie” for adults using worsted weight yarn can be found HERE while the toddler version can be found HERE!
I hope you enjoyed this series of blog posts about cabling! I really enjoyed learning this technique and introducing it to you all, and I hope you have fun making your own beanies using all different types of yarn for yourself, your friends and your family 🙂 Stay tuned for some cowls and scarves coming your way- what better way to keep warm this fall and winter than in your own handmade and crocheted creations?
This pattern is an original pattern by Stephanie Lau of All About Ami. Please do not claim this pattern as your own. If you wish to share this pattern, you may link to this pattern but please do not reprint it on your site. You may keep a copy for your own personal use but please DO NOT sell the pattern or distribute it.
You may sell products made from this pattern but please clearly credit the design to me, Stephanie Lau of All About Ami, and provide a link to my blog www.AllAboutAmi.com. Permission is NOT granted for mass production or factory manufacturing of any kind. Thank you for being respectful and for your understanding!